
 TrueNAS Enterprise
 TrueNAS SCALE
 TrueNAS CORE
 Compare Editions
 TrueCommand
 Software Status
 FreeNAS
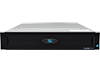 F-Series
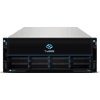 M-Series
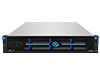 H-Series
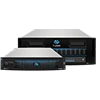 R-Series
 Mini Series
 Contact an Enterprise Specialist
TrueNAS SCALE Documentation Archive
This content follows the TrueNAS SCALE 22.12 (Bluefin) releases. Archival documentation is provided for reference only and not actively maintained.
Use the Product and Version selectors above to view content specific to different TrueNAS software or major versions.
First Time Login
11 minute read.
Last Modified 2024-03-19 08:47 EDTNow that you have installed TrueNAS SCALE or migrated from TrueNAS CORE to SCALE, you can log into the SCALE web user interface (UI) to complete your initial system configuration and then begin managing data!
Important! Use only the web user interface (UI) or the TrueNAS CLI to make configuration changes to the system.
TrueNAS automatically creates several ways to access the UI, but you might need to adjust the default settings for your network environment.
By default, fresh installs of TrueNAS SCALE provide a default address for logging in to the web interface. To view the web interface IP address or reconfigure web interface access, either connect a monitor and keyboard to your TrueNAS system or connect with IPMI for out-of-band system management.
When powering on a TrueNAS system, the system attempts to connect to a DHCP server from all live interfaces to access the web UI. On networks that support Multicast Domain Name Services (mDNS), the system can use a host name and domain to access the TrueNAS web interface. By default, TrueNAS uses the host name and domain truenas.local. To change the host name and domain in the web interface, go to Network and click Settings on the Global Configuration card.
To access the web interface using an IP address, either use the IP address displayed at the top of the Console Setup Menu after installing SCALE or use the IP address you assigned in the Console Setup Menu.
TrueNAS Enterprise
SCALE Enterprise (HA) systems can use the DHCP-assigned IP address for the primary controller to access the SCALE UI or with a static IP address that is configured using the Console Setup Menu.
Using a computer with access to the same network as the TrueNAS system, enter the host name and domain or IP address in a web browser to connect to the SCALE web interface.
The browser you use can impact the quality of your user experience. We generally recommend using Firefox, Edge, or Chrome.
Starting with SCALE Bluefin 22.12.0, root account logins are deprecated for security hardening and to comply with Federal Information Processing Standards (FIPS). All TrueNAS users should create a local administrator account with all required permissions and begin using it to access TrueNAS. When the root user password is disabled, only an administrative user account can log in to the TrueNAS web interface.
A future update of TrueNAS SCALE will permanently disable root account access.
With the implementation of rootless login, root is no longer the default administrator username, rather you use the new admin user created during the installation process. We recommend creating the admin user during the installation process and using it to log into SCALE.
Based on the authentication method selected in step 4 of the SCALE TrueNAS installer Console Setup process, you could see one of three sign-in splash screen options for the web UI.
- Selecting 1. Administrative user (admin) opens the SCALE sign-in screen to log in with the admin username and password created during installation.
- Selecting 2. Root user (not recommended) opens the SCALE sign-in screen to log in with the root username and the root password created during installation.
- Selecting 3. Configure using Web UI opens a SCALE sign-in screen where you select the option for either the admin or root user and create the password.
If you select option 1, the root user still exists but with the password disabled by default, which means only the admin user can log into the system. You can activate the password for the root user for some limited uses, but you should return to a security-hardened operation by disabling the root password immediately after you finish with the limited use.
If you set up the admin user during the installation using the option 1. Administrative user (admin), enter the username admin and password you set up.

To modify user credentials, go to Credentials > Local Users, click anywhere on the user row, then click Edit. For more information see Managing Users.
Starting with SCALE Bluefin 22.12.0, root account logins are deprecated for security hardening and to comply with Federal Information Processing Standards (FIPS). All TrueNAS users should create a local administrator account with all required permissions and begin using it to access TrueNAS. When the root user password is disabled, only an administrative user account can log in to the TrueNAS web interface.
A future update of TrueNAS SCALE will permanently disable root account access.
To create an admin user go to Credentials > Local Users, and click Add to open the Add User screen. Follow the directions in Managing Users to create an admin user with all required settings.
If you select option 3. Configure using Web UI during installation SCALE asks you to create the root or administration user when you first log into the web UI. This option presents a sign-in splash screen with two radio buttons.

Select either the Administrative user or Root user (not recommended) option, then enter the password to use with that user.
If you choose Root user (not recommended) as the TrueNAS authentication method, go to the Credentials > Local Users screen and create the admin account immediately after you enter the UI. Create the admin user account settings, enable the password, and click Save. After setting up the admin user, edit the root user to disable the password and resume rootless login security hardening.
If you cannot remember the administrator password to log in to the web interface, connect a keyboard and mouse to the TrueNAS system and open the Console Setup Menu to reset the admin account password.
After logging in for the first time, you see the main system Dashboard screen. The Dashboard displays basic information about the installed version, systems component usage, and network traffic.The Dashboard for non-Enterprise systems displays the TrueNAS SCALE logo on the System Information widget.SCALE Enterprise users with an iXsystems-provided TrueNAS server also see an image of the system in the System Information widget. Click on the system image to open the System Settings > View Enclosure screen.

You can reorder dashboard widgets by clicking Reorder and then dragging them into your preferred order. You can also choose which widgets appear on the dashboard by clicking Configure.

The top row (toolbar) has links to outside resources and buttons to control the system. The left-hand panel lists the main feature and functional areas and lets users navigate to the various TrueNAS configuration screens.
The icon buttons in the top toolbar menu link to the iXsystems site, display the status of TrueCommand and directory servers, and show system processes and configuration menus. You can also collapse and expand the main function menu on the left side of the screen.

The SCALE top navigation top toolbar provides access to functional areas of the UI that you might want to directly access while on other screens in the UI. Icon buttons provide quick access to dropdown lists of options, dropdown panels with information on system alerts or tasks, and can include access to other information or configuration screens.
The Directory Services Monitor icon button displays the status of Active Directory and LDAP services. Clicking on either takes you to their respective configuration screens.

The Jobs icon button displays all running and failed jobs, tasks, or processes on a dropdown panel.

Click on a running task to display a dialog for that task.
You can abort active jobs (like a disk wipe for example) by clicking the white circled X next to the active job.

The History button opens the Tasks screen that lists all active, complete, and failed jobs. Users can click View next to a task to see the log information and error message for that task.

Users can minimize a job/process dialog by clicking the -.
For more information see the Tasks Screens article.
The Alerts icon displays a list of current alerts for your TrueNAS system and provides access to alert-related settings. Users can dismiss individual alerts or select the option to dismiss all alerts at once.
The icon opens the dropdown list of alert options to view or configure Alert Settings, Alert Services, and Email.

For more information on alert options see Alerts. The Alert Services, Alert Settings, or Email Screens articles provide information on the SCALE UI screens.
See Setting Up Email for help configuring instructions.
The Alert Settings article includes the SCALE Enterprise alert high availability settings.
The Settings icon opens a dropdown list of options for passwords, API keys, and TrueNAS information.
Click on the Change Password icon button to display the change password dialog where you can change the currently logged-in user password.

Click on the icon to display entered passwords. To stop displaying the password, click on the icon.
Click on Guide to open the TrueNAS Documentation Hub in a new tab.
Click on About to display the information window with links to the TrueNAS Documentation Hub, TrueNAS Community Forums, FreeNAS Open Source Storage Appliance GitHub repository, and iXsystems home page.

Now that you can access the TrueNAS SCALE web interface and see all the management options, you can begin configuring your system!