


Replacing a Z-Series Node
3 minute read.
This article demonstrates how to replace one of the TrueNAS Z-Series removable computing modules called a node.
Node Maintenance
Nodes should only be replaced during a maintenance period, as clients using resources on the system could experience interruptions.
A node on the TrueNAS system has failed and needs to be replaced.
Identify the node to be replaced by verifying the serial number. The serial number is on a label on the back of the node, or can be determined from the console with the dmidecode -t1 command. Please contact Support if the serial number cannot be identified.

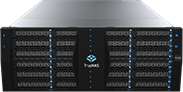
Node A is the upper node, with Node B on the bottom. Some systems only have a single node.
Shutting down the active node on a High Availability system causes the system to failover, where the standby node becomes active and takes over system duties. The node type, Active or Standby is displayed for HA systems under the HA status icon in the upper right corner of the TrueNAS web GUI. Shutting down a standby node does not cause a failover.
Node power buttons are on the front of the system. On a two-node system, the left power button controls node A and the right button controls node B. Only the left power button is used for a single-node system.

Press and release the power button of the node to be replaced. This starts a clean shutdown of that node. Do not hold the power button down. After pressing and releasing the power button, wait two full minutes to give the node sufficient time to shut down cleanly. Move to the rear of the system and note where all cables are connected to the node to be replaced. Make notes, label wires, or take a picture of the cables to facilitate reconnection, then disconnect the cables from that node.
Press the metal latch to unlock the node handle. Rotate the handle down until the node releases from the bay.

Use the handle to pull the node straight out. Set the old node aside. Place the old node where it will not be confused with the new replacement node, or label it to prevent confusion.
Align the new replacement node with the bay and slide it into the chassis until it stops. Lift the handle to latch the node into place.

Reconnect the cables, referring to notes, labels, or photos for correct connection. Turn on the new node with the front power button. Use the console or web GUI to verify successful startup. On an HA system, select System –> Failover –> Sync to Peer. This forces a configuration sync from the active node to the standby node. The standby node will then restart to load the new configuration. Pack the old node into the shipping box from the new node for return to iXsystems.
The node replacement is now complete, and the new node is running. Contact support@iXsystems.com for any further questions about this article or the node replacement process.
If both nodes must be replaced, repeat this process to replace the second node.