TrueNAS CORE is free and Open Source and is the successor to the wildly popular FreeNAS.
It runs on virtually any x86_64 system and provides a broad set of features for many users.
Plugin applications like Plex, NextCloud, and Asigra allow the functionality of a system to be customized for many use cases.
TrueNAS CORE Enterprise is provided as part of an iXsystems hardware purchase or extended iXsystems Support Contract.
Systems can have either single or dual controllers to enable High Availability (HA).
It can also be provided with Enterprise-grade support from iXsystems.
Nightly Development Featured Content
To view documentation for historical or the latest stable TrueNAS CORE major versions, use the Version dropdown at the top of this page.
This configuration guide provides step-by-step tutorials for installing and setting up TrueNAS CORE.
This guide introduces TrueNAS and walks through installing and accessing TrueNAS, storing and backing up data, sharing data over a network, and expanding TrueNAS with different applications solutions.
Table of Contents
⎙ Download or Print: View the CORE Getting Started Guide as a single page suitable for download or print.
13.3 Version Notes: Highlights and change log for each TrueNAS CORE 13.3 release.
Feature Deprecations: Notes about CORE features that are deprecated and either receive no further updates or are scheduled for removal from TrueNAS.
User Agreements: Different User agreement statements related to using TrueNAS.
Sharing Storage: Describes sharing configurations on TrueNAS CORE.
Data Backups: Describes how to configure data backups on TrueNAS CORE.
Applications: Describes how to install applications on TrueNAS CORE.
1.1 - 13.3 Version Notes
Highlights and change log for each TrueNAS CORE 13.3 release.
13.3
This page tracks the latest development roadmap and release notes for the upcoming TrueNAS CORE major version, 13.3.
The latest TrueNAS CORE 13.0 version release notes are available from the TrueNAS CORE 13.0 documentation section.
TrueNAS CORE 13.3, the latest version of the most reliable and highest-quality platform for traditional primary storage use cases, continues to focus on ensuring storage reliability, stability, and security for existing users.
With this release, TrueNAS CORE is now entering a sustaining engineering phase within the TrueNAS project. Users can expect to receive maintenance updates for many years still to come.
TrueNAS CORE 13.3 will include the following updates:
Updates to SMART, Network UPS Tools (NUT), and other services
Various security and bug fixes
TrueNAS CORE 13.3 will continue to receive bug fixes related to stability and security. These updates will ensure that 13.3 is a reliable platform for both homelab and enterprise customers, as well as a staging version for those users who wish to migrate to SCALE at a later date.
Obtaining a Release
Early releases of a major version are intended for testing and feedback purposes only.
Do not use early release software for critical tasks.
To download a .tar file for installing or upgrading to a CORE 13.3 nightly version, go to https://www.truenas.com/download-truenas-core/ and click Download Future Previews.
Select the latest .tar file and click Download.
Log in to the web interface and go to System > Update.
Click INSTALL MANUAL UPDATE FILE.
Select SAVE CONFIGURATION when prompted.
Select an Update File Temporary Storage Location then click Chose File and browse to select the .tar file.
Click APPLY UPDATE.
TrueNAS releases follow a general adoption guideline for their lifetime.
Starting with the NIGHTLY builds, each stage of a major release incorporates more testing cycles and bug fixes that represent a maturation of the release.
With each version release stage, users are encouraged to install, upgrade, or otherwise begin using the major version, depending on the specific TrueNAS deployment and use case:
Release Stage
Completed QA Cycles
Typical Use
Description
NIGHTLY
0
Developers
Incomplete
ALPHA
1
Testers
Not much field testing
BETA
2
Enthusiasts
Major Feature Complete, but expect some bugs
RC
4
Home Users
Suitable for non-critical deployments
RELEASE
6
General Use
Suitable for less complex deployments
U1
7
Business Use
Suitable for more complex deployments
U2+
8
Larger Systems
Suitable for higher uptime deployments
The Software Status page shows the latest recommendations for using the various TrueNAS software releases.
Upgrade Notes
Due to security vulnerabilities and maintainability issues, the S3 service is deprecated in TrueNAS CORE 13.0 and removed in CORE 13.3 (NAS-127694).
Beginning in CORE 13.0-U6, the CORE web interface generates an alert when the deprecated service is either actively running or is enabled to start on boot.
Users should migrate to a separately maintained MinIO plugin or otherwise move any production data away from the S3 service storage location before upgrading to 13.3.
See the CORE 13.0 tutorial for detailed migration instructions.
See also Feature Deprecations.
The web UI Shell is removed in CORE 13.3. Users can continue to access the shell using SSH or a physical system connection with serial cable or other direct method (NAS-124392).
The Plugins, Jails, and Virtual Machines features are untested and provided without support to the TrueNAS Community.
Users with a critical need to use containers or virtualization solutions in production should migrate to the tested and supported virtualization features available in TrueNAS SCALE.
TrueNAS Enterprise customers can contact iXsystems to schedule a TrueNAS SCALE deployment.
See CORE to SCALE Migrations for more information.
Upgrade Paths
      flowchart LR
      A["11.0-U7"] -->|update| B["11.2-U8"]
      B -->|update| C["11.3-U5"]
      C -->|update| D["13.0-U6.1"]
      D -->|"(anticipated)"| E["13.3.0"]
      flowchart LR
      A["11.0-U7"] -->|update| B["11.2-U8"]
      B -->|update| C["11.3-U5"]
      C -->|update| D["13.0-U6.1"]
Component Versions
Click the component version number to see the latest release notes for that component.
Early releases of a major version are intended for testing and feedback purposes only.
Do not use early release software for critical tasks.
May 7, 2024
iXsystems is pleased to release TrueNAS CORE 13.3-BETA1!
This has software component updates and security fixes that are in the polishing phase.
Notable changes:
Due to security vulnerabilities and maintainability issues, the S3 service is deprecated in TrueNAS CORE 13.0 and removed in CORE 13.3 (NAS-127694).
Beginning in CORE 13.0-U6, the CORE web interface generates an alert when the deprecated service is either actively running or is enabled to start on boot.
Users should migrate to a separately maintained MinIO plugin or otherwise move any production data away from the S3 service storage location before upgrading to a 13.3 pre-release version.
See the CORE 13.0 tutorial for detailed migration instructions.
See also Feature Deprecations.
The web UI Shell is removed in CORE 13.3. Users can continue to access the shell using SSH or a physical system connection with serial cable or other direct method (NAS-124392).
The Plugins, Jails, and Virtual Machines features are untested and provided without support to the TrueNAS Community.
Users with a critical need to use containers or virtualization solutions in production should migrate to the tested and supported virtualization features available in TrueNAS SCALE.
TrueNAS Enterprise customers can contact iXsystems to schedule a TrueNAS SCALE deployment.
See CORE to SCALE Migrations for more information.
To switch between detail and list views for the changelog, press t.
Open the changelog in Jira to see the Export menu to print or download the changelog in various file formats.
13.3-BETA1 Ongoing Issues
TrueNAS Enterprise
We are aware of an issue impacting TrueCommand connections for High Availability (HA) systems.
TrueNAS Enterprise HA customers should not upgrade to 13.3-BETA1 at this time.
Click here to see the latest information about public issues discovered in 13.3-BETA1 that are being resolved in a future TrueNAS CORE release.
This list also includes issues that are not to be fixed in CORE and are resolved in TrueNAS SCALE.
1.2 - Feature Deprecations
Notes about CORE features that are deprecated and either receive no further updates or are scheduled for removal from TrueNAS.
As part of security hardening and improving feature maintainability, there are occasions when TrueNAS features must be deprecated.
Features noted in this article are either no longer receiving any maintenance or, typically due to security vulnerabilities, might be scheduled for removal from TrueNAS in a future major version.
Begin planning migrations from these features immediately and note the TrueNAS upgrade paths required when a deprecated feature is in use.
S3 Service
Due to security vulnerabilities and maintainability issues, the S3 service is deprecated in TrueNAS CORE 13.0 and removed in CORE 13.3.
Beginning in CORE 13.0-U6, the CORE web interface generates an alert when the deprecated service is either actively running or is enabled to start on boot.
TrueNAS Enterprise
Beginning in CORE 13.0-U6, Enterprise customers with the S3 service running or enabled are prevented from upgrading to the next major version.
Users should plan to migrate to a separately maintained MinIO plugin or otherwise move any production data away from the S3 service storage location.
Migrating from the built-in S3 service to the plugin could result in an extended data migration window and potential disruption to S3 data access.
See the CORE 13.0 MinIO Plugin tutorial for detailed migration instructions.
SAS Multipath
SAS Multipath is supported as-is and receives no further maintenance updates.
While multipath situations might be detected and be generally functional in TrueNAS CORE, there is a possibility this is not available in a future TrueNAS CORE major version.
Users should avoid creating and managing SAS multipath scenarios with TrueNAS.
Virtualization
The Plugins, Jails, and Virtual Machines features are untested and provided without support to the TrueNAS Community.
Users with a critical need to use containers or virtualization solutions in production should migrate to the tested and supported virtualization features available in TrueNAS SCALE.
TrueNAS Enterprise customers can contact iXsystems to schedule a TrueNAS SCALE deployment.
See CORE to SCALE Migrations for more information.
Web Shell
The web UI Shell is removed in CORE 13.3.
Users can continue to access the shell using SSH or a physical system connection with serial cable or other direct method.
1.3 - User Agreements
Different User agreement statements related to using TrueNAS.
This section contains the various legal agreements and notices pertaining to TrueNAS CORE software.
PLEASE CAREFULLY READ THIS END USER LICENSE AGREEMENT (EULA) BEFORE CLICKING THE AGREE BUTTON. THIS AGREEMENT SERVES AS A LEGALLY BINDING DOCUMENT BETWEEN YOU AND IXSYSTEMS, INC. BY CLICKING THE AGREE BUTTON, DOWNLOADING, INSTALLING, OR OTHERWISE USING TRUENAS CORE SOFTWARE, YOU AGREE TO BE BOUND BY THE TERMS AND CONDITIONS OF THIS AGREEMENT). IF YOU DO NOT AGREE TO THE TERMS AND CONDITIONS IN THIS AGREEMENT, DO NOT USE OR INSTALL TRUENAS CORE SOFTWARE.
This agreement is provided in accordance with the Commercial Arbitration Rules of the American Arbitration Association (the “AAA Rules”) under confidential binding arbitration held in Santa Clara County, California. To the fullest extent permitted by applicable law, no arbitration under this EULA will be joined to an arbitration involving any other party subject to this EULA, whether through class arbitration proceedings or otherwise. Any litigation relating to this EULA shall be subject to the jurisdiction of the Federal Courts of the Northern District of California and the state courts of the State of California, with venue lying in Santa Clara County, California. All matters arising out of or relating to this agreement shall be governed by and construed in accordance with the internal laws of the State of California without giving effect to any choice or conflict of law provision or rule.
1.0 Definitions
1.1 “Company”, “iXsystems” and “iX” means iXsystems, Inc., on behalf of themselves, subsidiaries, and affiliates under common control.
1.2 “TrueNAS CORE Software” means the TrueNAS CORE storage management software.
1.3 “TrueNAS Device” means the TrueNAS storage appliances and peripheral equipment provided by iXsystems or a third party.
1.4 “Product” means, individually and collectively, the TrueNAS CORE Software and the TrueNAS Device provided by iXsystems.
1.5 “Open Source Software” means various open source software components licensed under the terms of applicable open source license agreements, each of which has its own copyright and its own applicable license terms.
1.6 “Licensee”, “You” and “Your” refers to the person, organization, or entity that has agreed to be bound by this EULA including any employees, affiliates, and third party contractors that provide services to You.
1.7 “Agreement” refers to this document, the TrueNAS End User License Agreement.
2.0 License
Subject to the terms set forth in this Agreement, iXsystems grants You a non-exclusive, non-transferable, perpetual, limited license without the option to sublicense, to use TrueNAS CORE Software on Your TrueNAS Device(s). This use includes but is not limited to using or viewing the instructions, specifications, and documentation provided with the Product.
TrueNAS CORE software is made available as Open Source Software, subject to the license conditions contained within that Open Source Software.
3.0 License Restrictions
TrueNAS CORE Software is authorized for use on any TrueNAS Device. TrueNAS Devices can include hardware provided by iXsystems or third parties. TrueNAS Devices may also include virtual machines and cloud instances. TrueNAS CORE software may not be commercially distributed or sold without an addendum license agreement and express written consent from iXsystems.
The TrueNAS CORE Software is protected by copyright laws and international treaties, as well as other intellectual property laws, statutes, and treaties. The TrueNAS CORE Software is licensed, not sold to You, the end user. You do not acquire any ownership interest in the TrueNAS CORE Software, or any other rights to the TrueNAS CORE Software, other than to use the TrueNAS CORE Software in accordance with the license granted under this Agreement, subject to all terms, conditions, and restrictions. iXsystems reserves and shall retain its entire right, title, and interest in and to the TrueNAS CORE Software, and all intellectual property rights arising out of or relating to the TrueNAS CORE Software, subject to the license expressly granted to You in this Agreement.
The TrueNAS CORE Software may contain iXsystems’ proprietary trademarks and collateral. By agreeing to this license agreement for TrueNAS CORE, You agree to use reasonable efforts to safeguard iXsystems’ intellectual property and hereby agree to not use or distribute iXsystems’ proprietary intellectual property and collateral commercially without the express written consent of iXsystems. Official iXsystems Channel Partners are authorized to use and distribute iXsystems’ intellectual property through an addendum to this license agreement.
By accepting this Agreement, You are responsible and liable for all uses of the Product through access thereto provided by You, directly or indirectly.
The TrueNAS CORE software includes Open Source components and some proprietary extensions which are available through additional licences You agree to not alter the source code to take advantage of the proprietary extensions without a license to those proprietary extensions, including the TrueNAS Enterprise features sets.
4.0 General
4.1 Entire Agreement - This Agreement, together with any associated purchase order, service level agreement, and all other documents and policies referenced herein, constitutes the entire and only agreement between You and iXsystems for use of the TrueNAS CORE Software and all other prior negotiations, representations, agreements, and understandings are superseded hereby. No agreements altering or supplementing the terms hereof may be made except by means of a written document signed by Your duly authorized representatives and those of iXsystems.
4.2 Waiver and Modification - No failure of either party to exercise or enforce any of its rights under this EULA will act as a waiver of those rights. This EULA may only be modified, or any rights under it waived, by a written document executed by the party against which it is asserted.
4.3. Severability - If any provision of this EULA is found illegal or unenforceable, it will be enforced to the maximum extent permissible, and the legality and enforceability of the other provisions of this EULA will not be affected.
4.4 United States Government End Users - For any TrueNAS CORE Software licensed directly or indirectly on behalf of a unit or agency of the United States Government, this paragraph applies. Company’s proprietary software embodied in the Product: (a) was developed at private expense and is in all respects Company’s proprietary information; (b) was not developed with government funds; (c) is Company’s trade secret for all purposes of the Freedom of Information Act; (d) is a commercial item and thus, pursuant to Section 12.212 of the Federal Acquisition Regulations (FAR) and DFAR Supplement Section 227.7202, Government’s use, duplication or disclosure of such software is subject to the restrictions set forth by the Company and Licensee shall receive only those rights with respect to the Product as are granted to all other end users.
4.5 Title - iXsystems retains all rights, titles, and interest in TrueNAS CORE Software and all related copyrights, trade secrets, patents, trademarks, and any other intellectual and industrial property and proprietary rights, including registrations, applications, registration keys, renewals, and extensions of such rights.
Contact Information - If You have any questions about this Agreement, or if You want to contact iXsystems for any reason, please email legal@ixsystems.com.
4.8 Termination - iXsystems may cease any and all support, services, or maintenance under this Agreement without prior notice, or liability, and for any reason whatsoever, without limitation, if any of the terms and conditions of this Agreement are breached. Other provisions of this Agreement will survive termination including, without limitation, ownership provisions, warranty disclaimers, indemnity, and limitations of liability.
4.9 Open Source Software Components - iXsystems uses Open Source Software components in the development of the TrueNAS CORE Software. Open Source Software components that are used in the TrueNAS CORE Software are composed of separate components each having their own trademarks, copyrights, and license conditions.
4.10 Assignment - Licensee shall not assign or otherwise transfer any of its rights, or delegate or otherwise transfer any of its obligations or performance, under this Agreement, in each case whether voluntarily, involuntarily, by operation of law, or otherwise, without iXsystems’ prior written consent. No delegation or other transfer will relieve Licensee of any of its obligations or performance under this Agreement. Any purported assignment, delegation, or transfer in violation of this Section is void. iXsystems may freely assign or otherwise transfer all or any of its rights, or delegate or otherwise transfer all or any of its obligations or performance, under this Agreement without Licensee’s consent. This Agreement is binding upon and inures to the benefit of the parties hereto and their respective permitted successors and assigns.
5.0 Export Control Regulations
“The Product may be subject to export control laws. You shall not, directly or indirectly, export, re-export, or release the Product to, or make the Product accessible from, any jurisdiction or country to which export, re-export, or release is prohibited by law, rule, or regulation. You shall comply with all applicable laws, regulations, and rules, and complete all required undertakings (including obtaining any necessary export license or other governmental approval).”
6.0 Data Collection and Privacy
TrueNAS CORE Software may collect non-sensitive system information relating to Your use of the Product, including information that has been provided directly or indirectly through automated means. Usage of TrueNAS CORE Software, device status and system configuration are allowed according to iXsystems’ privacy policy.
TrueNAS CORE Software will not collect sensitive User information including email addresses, names of systems, pools, datasets, folders, files, credentials.
By accepting this Agreement and continuing to use the Product, you agree that iXsystems may use any information provided through direct or indirect means in accordance with our privacy policy and as permitted by applicable law, for purposes relating to management, compliance, marketing, support, security, update delivery, and product improvement.
7.0 Limitation of Liability and Disclaimer of Warranty
THE PRODUCT IS PROVIDED “AS IS” AND WITH ALL FAULTS AND DEFECTS WITHOUT WARRANTY OF ANY KIND. TO THE MAXIMUM EXTENT PERMITTED UNDER APPLICABLE LAW, IXSYSTEMS, ON ITS OWN BEHALF AND ON BEHALF OF ITS AFFILIATES AND ITS AND THEIR RESPECTIVE LICENSORS AND SERVICE PROVIDERS, EXPRESSLY DISCLAIMS ALL WARRANTIES, WHETHER EXPRESS, IMPLIED, STATUTORY, OR OTHERWISE, WITH RESPECT TO THE PRODUCT, INCLUDING ALL IMPLIED WARRANTIES OF MERCHANTABILITY, FITNESS FOR A PARTICULAR PURPOSE, TITLE, AND NON-INFRINGEMENT, AND WARRANTIES THAT MAY ARISE OUT OF COURSE OF DEALING, COURSE OF PERFORMANCE, USAGE, OR TRADE PRACTICE. WITHOUT LIMITATION TO THE FOREGOING, IXSYSTEMS PROVIDES NO WARRANTY OR UNDERTAKING, AND MAKES NO REPRESENTATION OF ANY KIND THAT THE PRODUCT WILL MEET THE LICENSEE’S REQUIREMENTS, ACHIEVE ANY INTENDED RESULTS, BE COMPATIBLE, OR WORK WITH ANY OTHER SOFTWARE, APPLICATIONS, SYSTEMS, OR SERVICES, OPERATE WITHOUT INTERRUPTION, MEET ANY PERFORMANCE OR RELIABILITY STANDARDS OR BE ERROR FREE, OR THAT ANY ERRORS OR DEFECTS CAN OR WILL BE CORRECTED.
TO THE FULLEST EXTENT PERMITTED UNDER APPLICABLE LAW: (A) IN NO EVENT WILL IXSYSTEMS OR ITS AFFILIATES, OR ANY OF ITS OR THEIR RESPECTIVE LICENSORS OR SERVICE PROVIDERS, BE LIABLE TO LICENSEE, LICENSEE’S AFFILIATES, OR ANY THIRD PARTY FOR ANY USE, INTERRUPTION, DELAY, OR INABILITY TO USE THE PRODUCT; LOST REVENUES OR PROFITS; DELAYS, INTERRUPTION, OR LOSS OF SERVICES, BUSINESS, OR GOODWILL; LOSS OR CORRUPTION OF DATA; LOSS RESULTING FROM SYSTEM OR SYSTEM SERVICE FAILURE, MALFUNCTION, OR SHUTDOWN; FAILURE TO ACCURATELY TRANSFER, READ, OR TRANSMIT INFORMATION; FAILURE TO UPDATE OR PROVIDE CORRECT INFORMATION; SYSTEM INCOMPATIBILITY OR PROVISION OF INCORRECT COMPATIBILITY INFORMATION; OR BREACHES IN SYSTEM SECURITY; OR FOR ANY CONSEQUENTIAL, INCIDENTAL, INDIRECT, EXEMPLARY, SPECIAL, OR PUNITIVE DAMAGES, WHETHER ARISING OUT OF OR IN CONNECTION WITH THIS AGREEMENT, BREACH OF CONTRACT, TORT (INCLUDING NEGLIGENCE), OR OTHERWISE, REGARDLESS OF WHETHER SUCH DAMAGES WERE FORESEEABLE AND WHETHER OR NOT IXSYSTEMS WAS ADVISED OF THE POSSIBILITY OF SUCH DAMAGES; (B) IN NO EVENT WILL IXSYSTEMS’ AND ITS AFFILIATES’, INCLUDING ANY OF ITS OR THEIR RESPECTIVE LICENSORS’ AND SERVICE PROVIDERS’, COLLECTIVE AGGREGATE LIABILITY UNDER OR IN CONNECTION WITH THIS AGREEMENT OR ITS SUBJECT MATTER, UNDER ANY LEGAL OR EQUITABLE THEORY, INCLUDING BREACH OF CONTRACT, TORT (INCLUDING NEGLIGENCE), STRICT LIABILITY, AND OTHERWISE, EXCEED THE TOTAL AMOUNT PAID TO IXSYSTEMS PURSUANT TO THIS AGREEMENT FOR THE PRODUCT THAT IS THE SUBJECT OF THE CLAIM; (C) THE LIMITATIONS SET FORTH IN THIS SECTION SHALL APPLY EVEN IF THE LICENSEE’S REMEDIES UNDER THIS AGREEMENT FAIL OF THEIR ESSENTIAL PURPOSE.
You hereby acknowledge that you have read and understand this Agreement and voluntarily accept the duties and obligations set forth herein by clicking accept on this Agreement.
1.3.2 - TrueNAS Enterprise EULA
TrueNAS Enterprise End User License Agreement.
TrueNAS Enterprise End User License Agreement
Important - Please Read This EULA Carefully
PLEASE CAREFULLY READ THIS END USER LICENSE AGREEMENT (EULA) BEFORE CLICKING THE AGREE BUTTON.
THIS AGREEMENT SERVES AS A LEGALLY BINDING DOCUMENT BETWEEN YOU AND IXSYSTEMS, INC.
BY CLICKING THE AGREE BUTTON, DOWNLOADING, INSTALLING, OR OTHERWISE USING TRUENAS SOFTWARE, YOU AGREE TO BE BOUND BY THE TERMS AND CONDITIONS OF THIS AGREEMENT).
IF YOU DO NOT AGREE TO THE TERMS AND CONDITIONS IN THIS AGREEMENT, DO NOT USE OR INSTALL TRUENAS SOFTWARE.
This agreement is provided in accordance with the Commercial Arbitration Rules of the American Arbitration Association (the “AAA Rules”) under confidential binding arbitration held in Santa Clara County, California.
To the fullest extent permitted by applicable law, no arbitration under this EULA will be joined to an arbitration involving any other party subject to this EULA, whether through class arbitration proceedings or otherwise. Any litigation relating to this EULA shall be subject to the jurisdiction of the Federal Courts of the Northern District of California and the state courts of the State of California, with venue lying in Santa Clara County, California.
All matters arising out of or relating to this agreement shall be governed by and construed in accordance with the internal laws of the State of California without giving effect to any choice or conflict of law provision or rule.
1.0 Definitions
1.1 “Company”, “iXsystems” and “iX” means iXsystems, Inc., on behalf of themselves, subsidiaries, and affiliates under common control.
1.2 “TrueNAS Software” means the TrueNAS Enterprise storage management software.
1.3 “TrueNAS Device” means the TrueNAS hardware storage appliances and peripheral equipment.
1.4 “Product” means, individually and collectively, the TrueNAS Software and the TrueNAS Device.
1.5 “Open Source Software” means various open source software components licensed under the terms of applicable open source license agreements, each of which has its own copyright and its own applicable license terms.
1.6 “Licensee”, “You” and “Your” refers to the person, organization, or entity that has agreed to be bound by this EULA including any employees, affiliates, and third party contractors that provide services to You.
1.7 “Agreement” refers to this document, the TrueNAS End User License Agreement.
2.0 License
Subject to the terms set forth in this Agreement, iXsystems grants You a non-exclusive, non-transferable, perpetual, limited license without the option to sublicense, to use TrueNAS Software on Your TrueNAS Device(s) in accordance with Your authorized purchase and use of a TrueNAS Device(s) for Your internal business purposes.
This use includes but is not limited to using or viewing the instructions, specifications, and documentation provided with the Product.
3.0 License Restrictions
TrueNAS Software is only authorized for use with a TrueNAS Device identified by a specific serial number and manufactured by iXsystems.
This license may be extended to a second TrueNAS Device if an additional TrueNAS Device was purchased for high availability data protection.
The license is provided as a digital license key that is installed on the TrueNAS Device.
The TrueNAS Software is protected by copyright laws and international treaties, as well as other intellectual property laws, statutes, and treaties.
The TrueNAS Software is licensed, not sold to You, the end user.
You do not acquire any ownership interest in the TrueNAS Software, or any other rights to the TrueNAS Software, other than to use the TrueNAS Software in accordance with the license granted under this Agreement, subject to all terms, conditions, and restrictions.
iXsystems reserves and shall retain its entire right, title, and interest in and to the TrueNAS Software, and all intellectual property rights arising out of or relating to the TrueNAS Software, subject to the license expressly granted to You in this Agreement.
The TrueNAS Software may contain iXsystems’ trademarks, trade secrets, and proprietary collateral.
iXsystems strictly prohibits the acts of decompiling, reverse engineering, or disassembly of the TrueNAS Software.
You agree to use commercially reasonable efforts to safeguard iXsystems’ intellectual property, trade secrets, or other proprietary information You may have access to, from infringement, misappropriation, theft, misuse, or unauthorized access.
You will promptly notify iXsystems if You become aware of any infringement of the TrueNAS Software and cooperate with iXsystems in any legal action taken by iXsystems to enforce its intellectual property rights.
By accepting this Agreement, You agree You will not disclose, copy, transfer, or publish benchmark results relating to the Product without the express written consent of iXsystems.
You agree not to use, or permit others to use, the TrueNAS Software beyond the scope of the license granted under Section 2, unless otherwise permitted by iXsystems, or in violation of any law, regulation or rule, and you will not modify, adapt, or otherwise create derivative works or improvements of the TrueNAS Software.
You are responsible and liable for all uses of the Product through access thereto provided by You, directly or indirectly.
4.0 General
4.1 Entire Agreement - This Agreement, together with any associated purchase order, service level agreement, and all other documents and policies referenced herein, constitutes the entire and only agreement between You and iXsystems for use of the TrueNAS Software and all other prior negotiations, representations, agreements, and understandings are superseded hereby.
No agreements altering or supplementing the terms hereof may be made except by means of a written document signed by Your duly authorized representatives and those of iXsystems.
4.2 Waiver and Modification - No failure of either party to exercise or enforce any of its rights under this EULA will act as a waiver of those rights.
This EULA may only be modified, or any rights under it waived, by a written document executed by the party against which it is asserted.
4.3 Severability - If any provision of this EULA is found illegal or unenforceable, it will be enforced to the maximum extent permissible, and the legality and enforceability of the other provisions of this EULA will not be affected.
4.4 United States Government End Users - For any TrueNAS Software licensed directly or indirectly on behalf of a unit or agency of the United States Government, this paragraph applies.
Company’s proprietary software embodied in the Product: (a) was developed at private expense and is in all respects Company’s proprietary information; (b) was not developed with government funds; (c) is Company’s trade secret for all purposes of the Freedom of Information Act; (d) is a commercial item and thus, pursuant to Section 12.212 of the Federal Acquisition Regulations (FAR) and DFAR Supplement Section 227.7202, Government’s use, duplication or disclosure of such software is subject to the restrictions set forth by the Company and Licensee shall receive only those rights with respect to the Product as are granted to all other end users.
4.5 Foreign Corrupt Practices Act - You will comply with the requirements of the United States Foreign Corrupt Practices Act (the “FCPA”) and will refrain from making, directly or indirectly, any payments to third parties which constitute a breach of the FCPA.
You will notify Company immediately upon Your becoming aware that such a payment has been made.
You will indemnify and hold harmless Company from any breach of this provision.
4.6 Title - iXsystems retains all rights, titles, and interest in TrueNAS Software and all related copyrights, trade secrets, patents, trademarks, and any other intellectual and industrial property and proprietary rights, including registrations, applications, registration keys, renewals, and extensions of such rights.
4.7 Contact Information - If You have any questions about this Agreement, or if You want to contact iXsystems for any reason, please email legal@ixsystems.com.
4.8 Maintenance and Support - You may be entitled to support services from iXsystems after purchasing a TrueNAS Device or a support contract.
iXsystems will provide these support services based on the length of time of the purchased support contract.
This maintenance and support is only valid for the length of time that You have purchased with Your TrueNAS Device.
iXsystems may from time to time and at their sole discretion vary the terms and conditions of the maintenance and support agreement based on different business environmental and personnel factors.
Any variations will be notified via email and the support portal.
For more information on our Maintenance and Support contract, refer to https://www.ixsystems.com/support/.
4.9 Force Majeure - iXsystems will not be deemed to be in default of any of the provisions of this Agreement or be liable for any delay or failure in performance due to Force Majeure, which shall include without limitation acts of God, earthquake, weather conditions, labor disputes, changes in law, regulation or government policy, riots, war, fire, epidemics, acts or omissions of vendors or suppliers, equipment failures, transportation difficulties, malicious or criminal acts of third parties, or other occurrences which are beyond iXsystems’ reasonable control.
4.10 Termination - iXsystems may terminate or suspend Your license to use the TrueNAS Software and cease any and all support, services, or maintenance under this Agreement without prior notice, or liability, and for any reason whatsoever, without limitation, if any of the terms and conditions of this Agreement are breached.
Upon termination, rights to use the TrueNAS Software will immediately cease.
Other provisions of this Agreement will survive termination including, without limitation, ownership provisions, warranty disclaimers, indemnity, and limitations of liability.
4.11 Open Source Software Components - iXsystems uses Open Source Software components in the development of the TrueNAS Software.
Open Source Software components that are used in the TrueNAS Software are composed of separate components each having their own trademarks, copyrights, and license conditions.
4.12 Assignment - Licensee shall not assign or otherwise transfer any of its rights, or delegate or otherwise transfer any of its obligations or performance, under this Agreement, in each case whether voluntarily, involuntarily, by operation of law, or otherwise, without iXsystems’ prior written consent.
No delegation or other transfer will relieve Licensee of any of its obligations or performance under this Agreement.
Any purported assignment, delegation, or transfer in violation of this Section is void.
iXsystems may freely assign or otherwise transfer all or any of its rights, or delegate or otherwise transfer all or any of its obligations or performance, under this Agreement without Licensee’s consent.
This Agreement is binding upon and inures to the benefit of the parties hereto and their respective permitted successors and assigns.
5.0 Export Control Regulations
The Product may be subject to US export control laws, including the US Export Administration Act and its associated regulations.
You shall not, directly or indirectly, export, re-export, or release the Product to, or make the Product accessible from, any jurisdiction or country to which export, re-export, or release is prohibited by law, rule, or regulation.
You shall comply with all applicable federal laws, regulations, and rules, and complete all required undertakings (including obtaining any necessary export license or other governmental approval), prior to exporting, re-exporting, releasing, or otherwise making the Product available outside the US.
6.0 Data Collection and Privacy
TrueNAS Software may collect non-sensitive system information relating to Your use of the Product, including information that has been provided directly or indirectly through automated means.
Usage of TrueNAS Software, device status and system configuration are allowed according to iXsystems’ privacy policy.
TrueNAS Software will not collect sensitive User information including email addresses, names of systems, pools, datasets, folders, files, credentials.
By accepting this Agreement and continuing to use the Product, you agree that iXsystems may use any information provided through direct or indirect means in accordance with our privacy policy and as permitted by applicable law, for purposes relating to management, compliance, marketing, support, security, update delivery, and product improvement.
7.0 Limitation of Liability and Disclaimer of Warranty
THE PRODUCT IS PROVIDED “AS IS” AND WITH ALL FAULTS AND DEFECTS WITHOUT WARRANTY OF ANY KIND.
TO THE MAXIMUM EXTENT PERMITTED UNDER APPLICABLE LAW, IXSYSTEMS, ON ITS OWN BEHALF AND ON BEHALF OF ITS AFFILIATES AND ITS AND THEIR RESPECTIVE LICENSORS AND SERVICE PROVIDERS, EXPRESSLY DISCLAIMS ALL WARRANTIES, WHETHER EXPRESS, IMPLIED, STATUTORY, OR OTHERWISE, WITH RESPECT TO THE PRODUCT, INCLUDING ALL IMPLIED WARRANTIES OF MERCHANTABILITY, FITNESS FOR A PARTICULAR PURPOSE, TITLE, AND NON-INFRINGEMENT, AND WARRANTIES THAT MAY ARISE OUT OF COURSE OF DEALING, COURSE OF PERFORMANCE, USAGE, OR TRADE PRACTICE.
WITHOUT LIMITATION TO THE FOREGOING, IXSYSTEMS PROVIDES NO WARRANTY OR UNDERTAKING, AND MAKES NO REPRESENTATION OF ANY KIND THAT THE PRODUCT WILL MEET THE LICENSEE’S REQUIREMENTS, ACHIEVE ANY INTENDED RESULTS, BE COMPATIBLE, OR WORK WITH ANY OTHER SOFTWARE, APPLICATIONS, SYSTEMS, OR SERVICES, OPERATE WITHOUT INTERRUPTION, MEET ANY PERFORMANCE OR RELIABILITY STANDARDS OR BE ERROR FREE, OR THAT ANY ERRORS OR DEFECTS CAN OR WILL BE CORRECTED.
TO THE FULLEST EXTENT PERMITTED UNDER APPLICABLE LAW: (A) IN NO EVENT WILL IXSYSTEMS OR ITS AFFILIATES, OR ANY OF ITS OR THEIR RESPECTIVE LICENSORS OR SERVICE PROVIDERS, BE LIABLE TO LICENSEE, LICENSEE’S AFFILIATES, OR ANY THIRD PARTY FOR ANY USE, INTERRUPTION, DELAY, OR INABILITY TO USE THE PRODUCT; LOST REVENUES OR PROFITS; DELAYS, INTERRUPTION, OR LOSS OF SERVICES, BUSINESS, OR GOODWILL; LOSS OR CORRUPTION OF DATA; LOSS RESULTING FROM SYSTEM OR SYSTEM SERVICE FAILURE, MALFUNCTION, OR SHUTDOWN; FAILURE TO ACCURATELY TRANSFER, READ, OR TRANSMIT INFORMATION; FAILURE TO UPDATE OR PROVIDE CORRECT INFORMATION; SYSTEM INCOMPATIBILITY OR PROVISION OF INCORRECT COMPATIBILITY INFORMATION; OR BREACHES IN SYSTEM SECURITY; OR FOR ANY CONSEQUENTIAL, INCIDENTAL, INDIRECT, EXEMPLARY, SPECIAL, OR PUNITIVE DAMAGES, WHETHER ARISING OUT OF OR IN CONNECTION WITH THIS AGREEMENT, BREACH OF CONTRACT, TORT (INCLUDING NEGLIGENCE), OR OTHERWISE, REGARDLESS OF WHETHER SUCH DAMAGES WERE FORESEEABLE AND WHETHER OR NOT IXSYSTEMS WAS ADVISED OF THE POSSIBILITY OF SUCH DAMAGES; (B) IN NO EVENT WILL IXSYSTEMS’ AND ITS AFFILIATES’, INCLUDING ANY OF ITS OR THEIR RESPECTIVE LICENSORS’ AND SERVICE PROVIDERS’, COLLECTIVE AGGREGATE LIABILITY UNDER OR IN CONNECTION WITH THIS AGREEMENT OR ITS SUBJECT MATTER, UNDER ANY LEGAL OR EQUITABLE THEORY, INCLUDING BREACH OF CONTRACT, TORT (INCLUDING NEGLIGENCE), STRICT LIABILITY, AND OTHERWISE, EXCEED THE TOTAL AMOUNT PAID TO IXSYSTEMS PURSUANT TO THIS AGREEMENT FOR THE PRODUCT THAT IS THE SUBJECT OF THE CLAIM; (C) THE LIMITATIONS SET FORTH IN THIS SECTION SHALL APPLY EVEN IF THE LICENSEE’S REMEDIES UNDER THIS AGREEMENT FAIL OF THEIR ESSENTIAL PURPOSE.
You hereby acknowledge that you have read and understand this Agreement and voluntarily accept the duties and obligations set forth herein by clicking accept on this Agreement.
1.3.3 - Software Development Life Cycle
Description of the general process of development, release, and patching of TrueNAS CORE versions.
The TrueNAS Software Development Life Cycle (SDLC) is the process of planning, creating, testing, deploying, and maintaining TrueNAS releases.
Determine the objectives, nature, and scope of future versions of the software.
Requirement Analysis involves gathering feedback and interpreting customer needs and requirements, diagnosing existing problems, and weighing the pros and cons of potential solutions.
The end result is a list of recommended improvements to be integrated into future versions of TrueNAS.
Required and planned changes are investigated in detail and development steps are determined.
Proposed alterations are reviewed by peers for completeness, correctness, and proper coding style.
TrueNAS developers then begin altering the software to include new features, resolve software bugs, or implement security improvements.
Code is integrated into the existing TrueNAS source tree, then built and tested by the Release Engineering (RE) department.
RE verifies that all requirements and objectives are properly met and the updated software is reliable and fault-tolerant according to the determined requirements.
If issues are found, code is reworked to meet the development requirements.
Simultaneously, a security evaluation of the TrueNAS code is completed, with any discovered issues sent to the engineering team for resolution.
The Validation and Documentation Team audits all development changes to the software and resolves any inconsistencies with the current software documentation.
This is to verify that end user documentation is as accurate as possible.
Any security notices, errata, or best practices are also drafted for inclusion on the TrueNAS Security website.
The new release of TrueNAS is evaluated to determine further feature development, bug fixes, or security vulnerability patches.
During this stage, security patches and software erratum are corrected, updated versions of existing branches are pushed, and feedback is solicited for future versions of the software.
SDLC Application
The TrueNAS SDLC applies to the latest two release branches.
As new releases are created for TrueNAS, the oldest TrueNAS release branch is dropped out of the SDLC and labeled as End of Life (EoL).
For example, TrueNAS/FreeNAS 11.3 and TrueNAS 12.0 were in active development under the SDLC in August 2020.
In early 2021, TrueNAS Core/Enterprise 12.0 and 13.0 branches were in active development under the SDLC.
These versions of the software are in active development and maintenance.
We encourage users to actively keep their software updated to an active development version to continue to receive security patches and other software improvements.
The Software Status page shows the latest recommendations for using the various TrueNAS software releases.
TrueNAS Quality Lifecycle
TrueNAS releases follow a general adoption guideline for their lifetime.
Starting with the NIGHTLY builds, each stage of a major release incorporates more testing cycles and bug fixes that represent a maturation of the release.
With each version release stage, users are encouraged to install, upgrade, or otherwise begin using the major version, depending on the specific TrueNAS deployment and use case:
Release Stage
Completed QA Cycles
Typical Use
Description
NIGHTLY
0
Developers
Incomplete
ALPHA
1
Testers
Not much field testing
BETA
2
Enthusiasts
Major Feature Complete, but expect some bugs
RC
4
Home Users
Suitable for non-critical deployments
RELEASE
6
General Use
Suitable for less complex deployments
U1
7
Business Use
Suitable for more complex deployments
U2+
8
Larger Systems
Suitable for higher uptime deployments
1.3.4 - TrueNAS Data Collection Statement
TrueNAS CORE Data Collection Statement.
TrueNAS collects non-sensitive system data and relays the data to a collector managed by iXsystems.
This system data collection is enabled by default and can be disabled in the web interface under System > General > Usage collection.
When disabled, no information about system configuration and usage is collected.
The system capacity and software version is still collected.
The protocol for system data collection uses the same TCP ports as HTTPS (443) and passes through most firewalls as an outgoing web connection.
If a firewall blocks the data collection or the data collection is disabled, there is no adverse impact to the TrueNAS system.
Non-sensitive system data is used to identify the quality and operational trends in the fleet of TrueNAS systems used by the entire community.
The collected data helps iXsystems identify issues, plan for new features, and determine where to invest resources for future software enhancements.
The non-sensitive system data collected is clearly differentiated from sensitive user data that is explicitly not collected by TrueNAS.
This table describes the differences:
Sensitive User Data (NOT COLLECTED)
Non-Sensitive System Data (Optionally Collected)
Description
Any data that includes user identity or business information
Data that only includes information about the TrueNAS system and its operation
Frequency
NEVER
Daily
Examples
Usernames, passwords, email addresses
Anonymous hardware inventory, faults, statistics, Pool configuration
User-created System and dataset names
Software versions, firmware versions
Directory, files names, user data
Services and features enabled, Usage and Performance statistics
1.4 - CORE Hardware Guide
Describes the hardware specifications and system component recommendations for custom TrueNAS CORE deployment.
From repurposed systems to highly custom builds, the fundamental freedom of TrueNAS is the ability to run it on almost any x86 computer.
Minimum Hardware Requirements
Processor
Memory
Boot Device
Storage
2-Core Intel 64-Bit or AMD x86_64 processor
8 GB Memory
16 GB SSD boot device
Two identically-sized devices for a single storage pool
The TrueNAS installer recommends 8 GB of RAM. TrueNAS installs, runs, and operates jails. It also hosts SMB shares and replicates TBs of data with less. iXsystems recommends the above for better performance and fewer issues.
You do not need an SSD boot device, but we discourage using a spinner or a USB stick.
We do not recommend installing TrueNAS on a single disk or striped pool unless you have a good reason to do so. You can install and run TrueNAS without any data devices, but we strongly discourage it.
TrueNAS does not require two cores, as most halfway-modern 64-bit CPUs likely already have at least two.
For help building a system according to your unique performance, storage, and networking requirements, keep reading.
Storage Considerations
The heart of any storage system is the symbiotic pairing of its file system and physical storage devices.
The ZFS file system in TrueNAS provides the best available data protection of any file system at any cost and makes effective use of both spinning-disk and all-flash storage or a mix of the two.
ZFS is prepared for the eventual failure of storage devices, and is highly configurable to achieve the perfect balance of redundancy and performance to meet any storage goal.
A properly-configured TrueNAS system can tolerate multiple storage device failures and recreate its boot media with a copy of the configuration file.
Storage Device Quantities
TrueNAS can manage many storage devices as part of a single storage array. With more Enterprise-level tuning in the mature 13.0 release and similar tuning in the upcoming SCALE Cobia release, TrueNAS can manage as many as 1,250 drives in a single storage array!
Storage Media
Choosing storage media is the first step in designing the storage system to meet immediate objectives and prepare for future capacity expansion.
Spinning Disks
Until the next scientific breakthrough in storage media, spinning hard disks are here to stay thanks to their balance of capacity and cost.
The arrival of double-digit terabyte consumer and enterprise drives provides more choices to TrueNAS users than ever.
TrueNAS Mini systems ship with Western Digital NAS and NL-SAS by default. Understanding the alternatives explains why.SATA NAS Disks
Serial Advanced Technology Attachment (SATA) is still the de facto standard disk interface found in many desktop/laptop computers, servers, and some non-enterprise storage arrays.
The first SATA disks offered double-digit gigabyte capacities. Newer SATA disks meet many size, reliability, and performance goals.
While consumer desktop SATA disks do not have the overall reliability issues they once had, they are still not designed or warrantied for continuous operation or use in RAID groups.
Enterprise SATA disks address the always-on factor, vibration tolerance, and drive error handling required in storage systems. However, the price gap between desktop and enterprise SATA drives is so vast that many users push their consumer drives into 24/7 service pursuing cost savings.
Drive vendors, likely tired of honoring warranties for failed desktop drives used in incorrect applications, responded to this gap in the market by producing NAS drives. NAS drives achieved fame from the original Western Digital (WD) Red™ drives with CMR/PMR technology (now called WD Red Plus).
Western Digital Designed the WD Red™ Plus NAS drives (non-SMR) for systems with up to 8 hard drives, the WD Red™ Pro for systems with up to 16 drives, and the WD UltraStar™ for systems beyond 16 drives.
The iXsystems Community Forum prefers WD drives for TrueNAS builds due to their exceptional quality and reliability.
All TrueNAS Minis ship with WD Red™ Plus drives unless requested otherwise.
Nearline SAS Disks
Nearline SAS (NL-SAS) disks are 7200 RPM enterprise SATA disks with the industry-standard SAS interface in most enterprise storage systems.
SAS stands for Serial Attached SCSI, with the traditional SCSI disk interface in serial form.
SAS systems, designed for data center storage applications, have accurate, verbose error handling, predictable failure behavior, reliable hot swapping, and the added feature of multipath support.
Multipath access means that each drive has two interfaces and can connect to two storage controllers or one controller over two cables.
This redundancy protects against cable, controller card, or complete system failure in the case of the TrueNAS high-availability architecture in which each controller is an independent server that accesses the same set of NL-SAS drives.
NL-SAS drives are also robust enough to handle the rigors of systems with more than 16 disks.
So, capacity-oriented TrueNAS systems ship with Western Digital UltraStar NL-SAS disks thanks to the all-around perfect balance of capacity, reliability, performance, and flexibility that NL-SAS drives offer.SAS Disks
Enterprise SAS disks, built for the maximum performance and reliability that a spinning platter can provide, are the traditional heavy-lifters of the enterprise storage industry.
SAS disk capacities are low compared to NL-SAS or NAS drives due to the speed at which the platters spin, reaching as high as 15,000 RPMs.
While SAS drives may sound like the ultimate answer for high-performance storage, many consumer and enterprise flash-based options have come onto the market and significantly reduced the competitiveness of SAS drives.
For example, we almost completely replaced enterprise SAS drives discontinued from the TrueNAS product lines with flash drives (SSDs or NVMe) in 2016 due to their superior performance/cost ratio.SATA & SAS Flash Storage SSDs
Flash storage technology has progressed significantly in recent years, leading to a revolution in mobile devices and the rise of flash storage in general-purpose PCs and servers.
Unlike hard disks, flash storage is not sensitive to vibration and can be much faster with comparable reliability.
Flash storage remains more expensive per GB, but is becoming more common in TrueNAS systems as the price gap narrows.
The shortest path for introducing flash storage into the mainstream market was for vendors to use standard SATA/SAS hard disk interfaces and form factors that emulate standard hard disks without moving parts.
For this reason, flash storage Solid State Disks (SSDs) have SATA interfaces and are the size of 2.5" laptop hard disks, allowing them to be drop-in replacements for traditional hard disks.
Flash storage SSDs can replace HDDs for primary storage on a TrueNAS system, resulting in a faster, albiet smaller or more expensive storage solution.
If you plan to go all-flash, buy the highest-quality flash storage SSDs your budget allows, focusing on power, safety, and write endurance that matches your expected write workload.
NVMe
While SSDs pretending to be HDDs made sense for rapid adoption, the Non-Volatile Memory Express (NVMe) standard is a native flash protocol that takes full advantage of the flash storage non-linear, parallel nature.
The main advantage of NVMe is its low-latency performance. NVMe is becoming a mainstream option for boot and other tasks. At first, NVMe only came in expansion-card form factors such as PCIe and M.2. The new U.2 interface offers a universal solution that includes the 2.5" drive form factor and an externally accessible (but generally not hot-swappable) NVMe interface.
NVMe devices can run quite hot and may need dedicated heat sinks.
Manual S.M.A.R.T. tests on NVMe devices is currently not supported.
USB Hard Disks
Avoid using USB-connected hard disks for primary storage with TrueNAS. You can use USB Hard Disks for very basic backups in a pinch.
While TrueNAS does not automate this process, you can connect a USB HDD, replicate at the command line, and then take it off-site for safekeeping.
Warning: USB-connected media (including SSDs) may report their serial numbers inaccurately, making them indistinguishable.
These storage device media arrange together to create powerful storage solutions.
Storage Solutions
Hybrid Storage & Flash Cache (SLOG/ZIL/L2ARC)
With hard disks providing double-digit terabyte capacities and flash-based options providing even higher performance, a best-of-both-worlds option is available.
With TrueNAS and OpenZFS, you can merge flash and disk to create hybrid storage that makes the most of both types.
Hybrid setups use high-capacity spinning disks to store data, while DRAM and flash perform hyper-fast read and write caching.
The technologies work together with a flash-based separate write log (SLOG). Think of it as a write cache keeping the ZFS-intent log (ZIL) that speeds up writes.
On the read side, flash is a level two adaptive replacement (read) cache (L2ARC) to keep the hottest data sets on the faster flash media.
Workloads with synchronous writes, such as NFS and databases, benefit from SLOG devices, while workloads with frequently-accessed data might benefit from an L2ARC device.
An L2ARC device is not always the best choice because the level one ARC in RAM always provides a faster cache, and the L2ARC table uses some RAM.
SLOG devices do not need a large capacity since they only need to service five seconds of data writes delivered by the network or a local application.
A high-endurance, low-latency device between 8 GB and 32 GB is adequate for most modern networks, and you can strip or mirror several devices for either performance or redundancy.
Pay attention to the published endurance claims for the device since a SLOG acts as the funnel point for most of the writes made to the system.
SLOG devices also need power protection.
The purpose of the ZFS intent log (ZIL), and thus the SLOG, is to keep sync writes safe during a crash or power failure.
If the SLOG is not power-protected and loses data after a power failure, it defeats the purpose of using a SLOG in the first place.
Check the manufacturer specifications for the device to ensure the SLOG device is power-safe or has power loss/failure protection.
The most important quality to look for in an L2ARC device is random read performance.
The device must support more IOPS than the primary storage media it caches.
For example, using a single SSD as an L2ARC is ineffective in front of a pool of 40 SSDs, as the 40 SSDs can handle far more IOPS than the single L2ARC drive.
As for capacity, 5x to 20x more than the RAM size is a good guideline.
High-end TrueNAS systems can have NVMe-based L2ARC in double-digit terabyte sizes.
Remember that for every data block in the L2ARC, the primary ARC needs an 88-byte entry.
Poorly-designed systems can cause an unexpected fill-up in the ARC and reduce performance.
For example, a 480 GB L2ARC filled with 4KiB blocks needs more than 10GiB of metadata storage in the primary ARC.
Self Encrypting Drives
TrueNAS supports two forms of data encryption at rest to achieve privacy and compliance objectives: Native ZFS encryption and Self Encrypting Drives (SEDs).
SEDs do not experience the performance overhead introduced by software partition encryption but are not as readily available as non-SED drives (and thus can cost a little more).Boot Devices
Booting legacy FreeNAS systems from 8 GB or larger USB flash drives was once very popular.
We recommend looking at other options since USB drive quality varies widely, and modern TrueNAS versions perform increased drive writes to the boot pool.
For this reason, all pre-built TrueNAS Systems ship with either M.2 drives or SATA DOMs.
SATA DOMs, or disk-on-modules, offer reliability close to consumer 2.5" SSDs with a smaller form factor that mounts to an internal SATA port and does not use a drive bay.
Because SATA DOMs and motherboards with M.2 slots are not as common as the other storage devices mentioned here, users often boot TrueNAS systems from 2.5" SSDs and HDDs (often mirrored for added redundancy).
The recommended size for the TrueNAS boot volume is 8 GB, but 16 or 32 GB (or a 120 GB 2.5" SATA SSD) provides room for more boot environments.
Hot Swapability
TrueNAS systems come in all shapes and sizes.
Many users want external access to all storage devices for efficient replacement if issues occur.
Most hot-swap drive bays need a proprietary drive tray into which you install each drive.
These bay and tray combinations often include convenient features like activity and identification lights to visualize activity and illuminate a failed drive with sesutil(8) (https://www.freebsd.org/cgi/man.cgi?query=sesutil&sektion=8 for CORE, https://manpages.debian.org/testing/sg3-utils/sg3_utils.8.en.html for SCALE).
TrueNAS Mini systems ship with four or more hot-swap bays.
TrueNAS R-Series systems can support dozens of drives in their head units and external expansion shelves.
Pre-owned or repurposed hardware is popular among TrueNAS users. Pay attention to the maximum performance offered by the hot-swap backplanes of a given system.
Aim for at least 6 Gbps SATA III support.
Note that hot-swapping PCIe NVMe devices is not currently supported.
Zpool layout (the organization of LUNs and volumes, in TrueNAS/ZFS parlance) is outside of the scope of this guide.
The availability of double-digit terabyte drives raises a question TrueNAS users now have the luxury of asking: How many should I use to achieve my desired capacity?
You can mirror two 16 TB drives to achieve 16 TB of available capacity, but that does not mean you should.
Mirroring two large drives offers the advantage of redundancy and balancing reads between the two devices, which could lower power draw, but little else.
The write performance of two large drives is similar to that of a single drive.
By contrast, an array of eight 4 TB drives offers a wide range of configurations to optimize performance and redundancy at a lower cost.
If configured as striped mirrors, eight drives could yield four times greater write performance with a similar total capacity.
You might also consider adding a hot-spare drive with any zpool configuration, which lets the zpool automatically rebuild itself if one of its primary drives fails.
Storage Device Burn-In
Spinning disk hard drives have moving parts that are highly sensitive to shock and vibration and wear out with use.
Consider pre-flighting every storage device before putting it into production, especially:
Start a long HDD self-test (smartctl -t long /dev/), and after the test completes (could take 12+ hrs)
Check the results (smartctl -a /dev/)
Check pending sector reallocations (smartctl -a /dev/ | grep Current_Pending_Sector)
Check reallocated sector count (smartctl -a /dev/ | grep Reallocated_Sector_Ct)
Check the UDMA CRC errors (smartctl -a /dev/ | grep UDMA_CRC_Error_Count)
Take time to create a pool before deploying the system.
Subject it to as close to a real-world workload as possible to reveal individual drive issues and help determine if an alternative pool layout is better suited to that workload.
Be cautious of used drives, as vendors might not be honest or informed about their age and health.
Verify vendors have not recertified all new drives by checking the hours using smartctl(8).
A drive vendor could also zero the hours of a drive during recertification, masking the drive age.
iXsystems tests all storage devices it sells for at least 48 hours before shipment.
Storage Controllers
The uncontested most popular storage controllers used with TrueNAS are the 6 and 12 Gbps (Gigabits per second, sometimes expressed as Gb/s) Broadcom (formerly Avago, formerly LSI) SAS host bus adapters (HBA).
Controllers ship embedded on some motherboards but are generally PCIe cards with four or more internal or external SATA/SAS ports.
The 6 Gbps LSI 9211 and rebranded siblings with the LSI SAS2008 chip, such as the IBM M1015 and Dell H200, are legendary among TrueNAS users who build systems using parts from the second-hand market.
Flash using the latest IT or Target Mode firmware to disable the optional RAID functionality found in the IR firmware on Broadcom controllers.
For those with the budget, newer models like the Broadcom 9300/9400 series give 12 Gbps SAS capabilities and even NVMe to SAS translation abilities with the 9400 series.
TrueNAS includes the sas2flash, sas3flash, and storcli commands to flash or perform re-flashing operations on 9200, 9300, and 9400 series cards.
Onboard SATA controllers are popular with smaller builds, but motherboard vendors are better at catering to the needs of NAS users by including more than the traditional four SATA interfaces.
Be aware that many motherboards ship with a mix of 3 Gbps and 6 Gbps onboard SATA interfaces and that choosing the wrong one could impact performance.
If a motherboard includes hardware RAID functionality, do not use or configure it, but note that disabling it in the BIOS might remove some SATA functionality, depending on the motherboard.
Most SATA compatibility-related issues are immediately apparent.
There are countless warnings against using hardware RAID cards with TrueNAS.
ZFS and TrueNAS provide a built-in RAID that protects your data better than any hardware RAID card.
You can use a hardware RAID card if it is all you have, but there are limitations.
First and most importantly, do not use their RAID facility if your hardware RAID card supports HBA mode, also known as passthrough or JBOD mode (there is one caveat in the bullets below). When used, it allows it to perform indistinguishably from a standard HBA.
If your RAID card does not have this mode, you can configure a RAID0 for every disk in your system.
While not the ideal setup, it works in a pinch.
If repurposing hardware RAID cards with TrueNAS, be aware that some hardware RAID cards:
Could mask disk serial number and S.M.A.R.T. health information
Could perform slower than their HBA equivalents
Could cause data loss if using a write cache with a dead battery backup unit (BBU)
SAS Expanders
A direct-attached system, where every disk connects to an interface on the controller card, is optimal but not always possible.
A SAS expander (a port multiplier or splitter) enables each SAS port on a controller card to service many disks.
You find SAS expanders only on the drive backplane of servers or JBODs with more than twelve drive bays.
For example, a TrueNAS JBOD that eclipses 90 drives in only four rack units of space is not possible without SAS expanders.
Imagine how many eight-port HBAs you need to access 90 drives without SAS expanders.
While SAS expanders, designed for SAS disks, can often support SATA disks via the SATA Tunneling Protocol or STP, we still prefer SAS disks for reasons mentioned in the NL-SAS section above (SATA disks function on a SAS-based backplane).
Remember that you cannot use a SAS drive in a port designed for SATA drives.
Storage Device Cooling
A much-cited study floating around the Internet asserts that drive temperature has little impact on drive reliability.
The study makes for a great headline or conversation starter, but carefully reading the report indicates that they tested the drives under optimal environmental conditions.
The average temperature that a well-cooled spinning hard disk reaches in production is around 28 °C, and one study found that disks experience twice the number of failures for every 12 °C increase in temperature.
Before adding drive cooling that often comes with added noise (especially on older systems), know that you risk throwing money away by running a server in a data center or closet without noticing that the internal cooling fans are at their lowest setting.
Pay close attention to drive temperature in any chassis that supports 16 or more drives, especially if they are exotic, high-density designs.
Every chassis has certain areas that are warmer for whatever reason. Watch for fan failures and the tendency for some models of 8 TB drives to run hotter than other drive capacities.
In general, try to keep drive temperatures below the drive specification provided by the vendor.
Memory, CPU, and Network Considerations
Memory Sizing
TrueNAS has higher memory requirements than many Network Attached Storage solutions for good reason: it shares dynamic random-access memory (DRAM or simply RAM) between sharing services, add-on plugins, jails, and virtual machines, and sophisticated read caching.
RAM rarely goes unused on a TrueNAS system, and enough RAM is vital to maintaining peak performance.
You should have 8 GB of RAM for basic TrueNAS operations with up to eight drives. Other use cases each have distinct RAM requirements:
Add 1 GB for each drive added after eight to benefit most use cases.
Add extra RAM (in general) if more clients connect to the TrueNAS system. A 20 TB pool backing many high-performance VMs over iSCSI might need more RAM than a 200 TB pool storing archival data. If using iSCSI to back up VMs, plan to use at least 16 GB of RAM for good performance and 32 GB or more for optimal performance.
Add 2 GB of RAM for directory services for the Winbind internal cache.
Add more RAM for plugins and jails, as each has specific application RAM requirements.
Add more RAM for virtual machines with a guest operating system and application RAM requirements.
Add the suggested 5 GB per TB of storage for deduplication that depends on an in-RAM deduplication table.
Add approximately 1 GB of RAM (conservative estimate) for every 50 GB of L2ARC in your pool. Attaching an L2ARC drive to a pool uses some RAM, too. ZFS needs metadata in ARC to know what data is in L2ARC.
Error Correcting Code Memory
Electrical or magnetic interference inside a computer system can cause a spontaneous flip of a single bit of RAM to the opposite state, resulting in a memory error.
Memory errors can cause security vulnerabilities, crashes, transcription errors, lost transactions, and corrupted or lost data.
So RAM, the temporary data storage location, is one of the most vital areas for preventing data loss.
Error-correcting code or ECC RAM detects and corrects in-memory bit errors as they occur.
If errors are severe enough to be uncorrectable, ECC memory causes the system to hang (become unresponsive) rather than continue with errored bits.
For ZFS and TrueNAS, this behavior virtually eliminates any chances that RAM errors pass to the drives to cause corruption of the ZFS pools or file errors.
To summarize the lengthy, Internet-wide debate on whether to use error-correcting code (ECC) system memory with OpenZFS and TrueNAS:
Most users strongly recommend ECC RAM as another data integrity defense.
However:
Some CPUs or motherboards support ECC RAM but not all
Many TrueNAS systems operate every day without ECC RAM
RAM of any type or grade can fail and cause data loss
RAM failures usually occur in the first three months, so test all RAM before deployment.
Central Processing Unit (CPU) Selection
Choosing ECC RAM limits your CPU and motherboard options, but that can be beneficial.
Intel® limits ECC RAM support to workstation and server motherboards.
The 13th generation of their consumer CPUs, such as the Core i5 and i7, support ECC as long as they are paired with a workstation motherboard chipset, such as the W680.
Refer to Intel ARK for a full list of Intel CPUs with ECC support.
Which CPU to choose can come down to a short list of factors:
An underpowered CPU can create a performance bottleneck because of how OpenZFS compresses and encrypts (optional) data and performs checksums.
A higher-frequency CPU with fewer cores usually performs best for SMB-only workloads because of Samba, the lightly-threaded TrueNAS SMB daemon.
A higher-core-count CPU is better suited for parallel encryption and virtualization.
A CPU with AES-NI encryption acceleration support improves the speed of the file system and network encryption.
A server-class CPU is recommended for power and ECC memory support.
A Xeon E5 CPU (or similar) is recommended for software-encrypted pools.
An Intel Ivy Bridge CPU or later is recommended for virtual machine use.
Watch for VT-d/AMD-Vi device virtualization support on the CPU and motherboard to pass PCIe devices to virtual machines.
Be aware if a given CPU contains a GPU or requires an external one. Also note that many server motherboards include a BMC chip with a built-in GPU. See below for more details on BMCs.
AMD CPUs are becoming more popular thanks to the Ryzen and EPYC (Naples/Rome) lines. Support for these platforms is limited on FreeBSD and, by extension, TrueNAS CORE. However, Linux has more support, and TrueNAS SCALE should work with AMD CPUs without issue.
SHA Extensions for x86 instruction set architecture
SHA Extensions in the x86 instruction set architecture support Secure Hash Algorithm family hardware acceleration.
Intel Goldmont (and later), Ice Lake (and later), and Rocket Lake (and later), as well as AMD Zen (and later) processors support the SHA instruction set.
Remote Management: IPMI
As a courtesy to further limit the motherboard choices, consider the Intelligent Platform Management Interface or IPMI (a.k.a. baseboard management controller, BMC, iLo, iDrac, and other names depending on the vendor) if you need:
Remote power control and monitoring of remote systems
Remote console shell access for configuration or data recovery
Remote virtual media for TrueNAS installation or reinstallation
TrueNAS relies on its web-based user interface (UI), but you might occasionally need console access to make network configuration changes.
TrueNAS administration and sharing use a single network interface by default, which can be challenging when you upgrade features like LACP aggregated networking.
The ideal solution is to have a dedicated subnet to access the TrueNAS web UI, but not all users have this luxury. The occasional visit to the hardware console is necessary for global configuration and system recovery.
The latest TrueNAS Mini and R-Series systems ship with full-featured, HTML5-based IPMI support on a dedicated gigabit network interface.
Power Supply Units
The top criteria to consider for a power supply unit (or PSU) on a TrueNAS system are:
Power capacity (in watts) for the motherboard and the number of drives it must support
Reliability
Efficiency rating
Relative noise
Optional redundancy to keep critical systems running if one power supply fails
Select a PSU rated for the initial and a future load placed on it.
Have a PSU with adequate power to migrate from a large-capacity chassis to a fully-populated chassis.
Also, consider a hot-swappable redundant PSU to help guarantee uptime.
Users on a budget can keep a cold spare PSU to limit their potential downtime to hours rather than days.
A good, modern PSU is efficient and integrates into the IPMI management system to provide real-time fan, temperature, and load information.
Most power supplies carry a certified efficiency rating known as an 80 Plus rating.
The 80 plus rating indicates the PSU loses the power drawn from the wall as heat, noise, and vibration instead of powering your components.
If a power supply needs to draw 600 watts from the wall to provide 500 watts of power to your components, it operates at 500/600 = ~83% efficiency.
The other 100 watts get lost as heat, noise, and vibration.
Power supplies with higher ratings are more efficient but also far more expensive.
Do some return-on-investment calculations if you are unsure what efficiency to buy.
For example, if an 80 Plus Platinum PSU costs $50 more than the comparable 80 Plus Gold, it should save you at least $10 per year on your power bill for that investment to pay off over five years.
You can read more about 80 Plus ratings in this post.
Uninterruptible Power Supplies
TrueNAS allows the system to communicate with a battery-backed, uninterruptible power supply (UPS) over a traditional serial or USB connection to coordinate a graceful shutdown in the case of power loss.
TrueNAS works well with APC brand UPS, followed by CyberPower. Consider budgeting for a UPS with pure sine wave output.
Some models of SSD can experience data corruption on power loss.
If several SSDs experience simultaneous power loss, it could cause total pool failure, making a UPS a critical investment.
Ethernet Networking
The network in Network Attached Storage is as important as storage, but the topic reduces to a few key points:
Simplicity - Simplicity is often the secret to reliability with network configurations.
Individual interfaces - Faster individual interfaces such as 10/25/40/100GbE are preferable to aggregating slower interfaces.
Interface support - Intel and Chelsio interfaces are the best-supported options.
Packet fragmentation - Only consider a jumbo framesMTU with dedicated connections, such as between servers or video editors and TrueNAS that are unlikely to experience packet fragmentation.
LRO/LSO offload features - Interfaces with LRO and LSO offload features generally alleviates the need for jumbo frames, and their use can result in lower CPU overhead.
High-Speed Interconnects
Higher-band hardware is becoming more accessible as the hardware development pace increases and enterprises upgrade more quickly.
Home labs can now deploy and use 40 GB and higher networking components. Home users are now discovering the same issues and problems with these higher speeds found by Enterprise customers.
iXsystems recommends using optical fiber over direct attached copper (DAC) cables for the high-speed interconnects listed below:
10Gb NICs: SFP+ connectors
25Gb NICs: SFP28 connectors
40Gb NICs: QSFP+ connectors
100Gb NICs: QSFP28 connectors
200Gb NICs: QSFP56 connectors
400Gb NICs: QSFP-DD connectors
iXsystems also recommends using optical fiber for any transceiver form factors mentioned when using fiber channels.
Direct attached copper (DAC) cables can create interoperability issues between the NIC, cable, and switch.
Virtualized TrueNAS
Finally, the ultimate TrueNAS hardware question is whether to use actual hardware or choose a virtualization solution.
At the heart of the TrueNAS design is OpenZFS. OpenZFS works best with physical storage devices. It is aware of their strengths and compensates for their weaknesses.
TrueNAS developers virtualize TrueNAS every day as part of their work, and it is intended only for use as a development environment.
While possible to deploy TrueNAS in a virtual environment, we do not recommend doing so for regular deployment of TrueNAS when storing production or critical data.
Virtualizing TrueNAS and using virtual disks for your zpool is fine for ad hoc proof-of-concept, but it is not a supported configuration and might result in data corruption.
When the need arises to virtualize TrueNAS (for ad hoc proof-of-concept):
Pass hardware disks or the entire storage controller to the TrueNAS VM if possible (requires VT-d/AMD-Vi support).
Disable automatic scrub pools on virtualized storage such as VMFS, and never scrub a pool while running storage repair tasks on another layer.
Use at least three vdevs to provide adequate metadata redundancy, even with a striped pool.
Provide one or more 8 GB or larger boot devices.
Provide the TrueNAS VM with adequate RAM per its usual requirements.
Consider jumbo frame networking if all devices support it.
Understand that the guest tools in FreeBSD might lack features other guest operating systems have.
Enable MAC address spoofing on virtual interfaces and enable promiscuous mode to use VNET jail and plugins.
1.5 - Install
Provides installation instructions for TrueNAS CORE.
Now that the .iso file is downloaded, you can start installing TrueNAS!
Major Upgrades
The install process can be repeated with newer installation files when the system already has TrueNAS installed.
This is used for major version upgradesISO Verification
The iXsystems Security Team cryptographically signs TrueNAS ISO files so that users can verify the integrity of their downloaded file.
This section demonstrates how to verify an ISO file using the Pretty Good Privacy (PGP) and SHA256 methods.
PGP ISO Verification
You need an OpenPGP encryption application for this method of ISO verification.
There are many different free applications available, but the OpenPGP group provides a list of available software for different operating systems at https://www.openpgp.org/software/.
The examples in this section show verifying the TrueNAS .iso using gnupg2 in a command prompt, but Gpg4win is also a good option for Windows users.
To verify the .iso source, go to https://www.truenas.com/download-tn-core/ , expand the Security option, and click PGP Signature to download the Gnu Privacy Guard (.gpg) signature file. You can download the PGP Public Key from either pgp.mit.edu (search for security-officer@ixsystems.com) or keys.openpgp.org.
Open the PGP Public key link and note the address in your browser and Search results for string.
Use one of the OpenPGP encryption tools mentioned above to import the public key and verify the PGP signature.
Go to the .iso and .iso.gpg download location and import the public key using the keyserver address and search results string:
q5sys@athena /tmp>  gpg --keyserver keys.openpgp.org --recv-keys 0xc8d62def767c1db0dff4e6ec358eaa9112cf7946
gpg: requesting key 12CF7946 from hkp server keys.openpgp.org
gpg: key 358EAA9112CF7946: "IX SecTeam <security-officer@ixsystems.com>" not changed
gpg: Total number processed: 1
gpg:              unchanged: 1
q5sys@athena /tmp>
Use command gpg --verify to compare the .iso and .iso.gpg files:
q5sys@athena /tmp>  gpg --verify TrueNAS-12.0-BETA2.1.iso.gpg TrueNAS-12.0-BETA2.iso
gpg: Signature made Thu Aug 27 10:06:02 2020 EDT using RSA key ID 12CF7946
gpg: Good signature from "IX SecTeam <security-officer@ixsystems.com>"
gpg: WARNING: This key is not certified with a trusted signature!
gpg:          There is no indication that the signature belongs to the owner.
Primary key fingerprint: C8D6 2DEF 767C 1DB0 DFF4  E6EC 358E AA91 12CF 7946
q5sys@athena /tmp>
This response means the signature is correct but still untrusted. Go back to the browser page that has the PGP Public key open and manually confirm that the key was issued for IX SecTeam <security-officer@ixsystems.com> (iX Security Team) on October 15, 2019 and is signed by an iXsystems account.
SHA256 Verification
The command to verify the checksum varies by operating system:
BSD: sha256 isofile
Linux: sha256sum isofile
Mac: shasum -a 256 isofile
Freeware or online checksum utilities are available for Windows users.
The value produced by running the command must match the value shown in the sha256.txt file.
Different checksum values indicate a corrupted installer file that you should not use.
Choose the install type to see specific instructions:
Install Types
Physical Hardware
TrueNAS is very flexible and can run on most x86 computers.
However, there are many different hardware considerations when building a NAS!
If you’re still researching what kind of hardware to use with TrueNAS, read over the very detailed CORE Hardware Guide.
Prepare the Install File
Physical hardware typically requires burning the TrueNAS installer to a physical device. In general a CD or removable USB device is used. This device is temporarily attached to the system to install TrueNAS to the system’s permanent boot device.
Headless, or remote, installation is possible when the system has IPMI available and can create a virtual media CD-ROM using a locally stored .iso.
The method of writing the installer to a device varies between operating systems.
Click Windows or Linux to see instructions for your Operating System, or CD for generic CD burning guidance.
CD
To use the installer with a CD, download your favorite CD burning utility and burn the .iso file to the CD.
Insert the CD into the TrueNAS system and boot from the CD.
Windows
To write the TrueNAS installer to a USB stick on Windows, plug the USB stick into the system and use a program like Rufus to write the .iso file to the memory stick.
When Rufus prompts for which write method to use, make sure dd mode is selected.
The USB stick is not recognized by Windows after the TrueNAS installer writes to it.
To reclaim the USB stick after installing TrueNAS, use Rufus to write a “Non bootable” image, then remove and reinsert the USB stick.
Linux
To write the TrueNAS installer to a USB stick on Linux, plug the USB stick into the system and open a terminal.
Start by making sure the USB stick connection path is correct.
There are many ways to do this in Linux, but a quick option is to enter command lsblk -po +vendor,model and note the path to the USB stick.
This shows in the NAME column of the lsblk output.
Next, use dd to write the installer to the USB stick.
Be very careful when using dd, as choosing the wrong of= device path can result in irretrievable data loss!
Enter dd status=progress if=path/to/.iso of=path/to/USB in the CLI.
If this results in a permission denied error, use command sudo dd with the same parameters and enter the administrator password.
Headless Install
Systems with IPMI connectivity, like the TrueNAS Mini, can use the Virtual Media feature with an .iso to create a virtual boot device for installation.
Mounting the .iso in a virtual CD-ROM, allows installing or updating headless servers remotely through the console.
Here is an example of setting up a virtual CD-ROM with a SUPERMICRO IPMI:
From the Virtual Media menu, select CD-ROM Image.
Fill in the details:
Shared Host: The IP address of the system storing the .iso.
Path to Image: The path to the image file. For example, install/iso/SCALEAngelfish.iso
Click Mount.
Click Refresh Status and confirm a disk is being emulated.
Click Save.
Install Process
With the installer added to a device, you can now install TrueNAS onto the desired system.
Insert the install media, or load the iso using IPMI, and reboot or boot the system.
At the motherboard splash screen, use the hotkey defined by your motherboard manufacturer to boot into the motherboard UEFI/BIOS.
Choose to boot in UEFI mode or legacy CSM/BIOS mode.
When installing TrueNAS, make the matching choice for the installation.
For Intel chipsets manufactured in 2020 or later, UEFI is likely the only option.
If your system supports SecureBoot, you need to either disable it or set it to Other OS to be able to boot the install media.
Select the install device as the boot drive, exit, and reboot the system.
If the USB stick is not shown as a boot option, try a different USB slot.
Which slots are available for boot differs by hardware.
After the system has booted into the installer, follow these steps.
Select Install/Upgrade.
Select the desired install drive.
Select Yes
Select Fresh Install to do a clean install of the downloaded version of TrueNAS.
This erases the contents of the selected drive.!
When the operating system device has enough additional space, you can choose to allocate some space for a swap partition to improve performance.
Next, set a password for the TrueNAS administrative account, named root by default.
This account has full control over TrueNAS and is used to log in to the web interface.
Set a strong password and protect it.
After following the steps to install, reboot the system and remove the install media.
Troubleshooting
If the system does not boot into TrueNAS, there are several things you can check to resolve the situation:
Check the system BIOS and see if there is an option to change the USB emulation from CD/DVD/floppy to hard drive. If it still does not boot, check to see if the card/drive is UDMA compliant.
If the system BIOS does not support EFI with BIOS emulation, see if it has an option to boot using legacy BIOS mode.
If the system starts to boot but hangs with this repeated error message: run_interrupt_driven_hooks: still waiting after 60 seconds for xpt_config, go into the system BIOS and look for an onboard device configuration for a 1394 Controller. If present, disable that device and try booting again.
If the burned image fails to boot and the image was burned using a Windows system, wipe the USB stick before trying a second burn using a utility such as Active@ KillDisk. Otherwise, the second burn attempt fails as Windows does not understand the partition written from the image file. Be very careful to specify the correct USB stick when using a wipe utility!
Virtual Machine
Because TrueNAS is built and provided as an .iso file, it works on all virtual machine solutions (VMware, VirtualBox, Citrix Hypervisor, etc).
This section demonstrates installing with VMware Workstation Player on Windows.
Minimum Virtual Machine Settings
Regardless of virtualization application, use these minimum settings:
RAM: at least 8192MB (8GB)
DISKS: one virtual disk with at least 8GB for the operating system
and boot environments and at least one additional virtual disk with
at least 4GB to be used as data storage.
NETWORK: Use NAT, Bridged, or Host-only depending on your host network configuration.
VMWare products and EFI boot mode:
A third party bug currently affects EFI (UEFI) booting on VMWare products.
Install TrueNAS in BIOS mode until this is resolved.
See VMware article Host Fails to Boot After You Install ESXi in UEFI Mode.
Networking checks for VMware
When installing TrueNAS in a VMware VM, double check the virtual switch and VMware port group.
A misconfigured virtual switch or VMware port group can cause network connection errors for plugins or jails inside the TrueNAS VM.
Enable MAC spoofing and promiscuous mode on the switch first, and then the port group the VM uses.
Jail Networking
If you have installed TrueNAS in VMware, you need functional networking to create a jail.
For the jail to have functional networking, you have to change the VMware settings to allow Promiscuous, MAC address changes, and Forged Transmits.
Setting
Description
Promiscuous Mode
When enabled at the virtual switch level, objects defined within all portgroups can receive all incoming traffic on the vSwitch.
MAC Address Changes
When set to Accept, ESXi accepts requests to change the effective MAC address to a different address than the initial MAC address.
Forged Transmits
When set to Accept, ESXi does not compare source and effective MAC addresses.
Generic VM Creation Process
For most hypervisors, the procedure for creating a TrueNAS VM is the same:
Create a new Virtual Machine as usual, taking note of the following settings.
The virtual hardware has a bootable CD/DVD device pointed to the TrueNAS installer image (this is usually an .iso).
The virtual network card is configured so your network can reach it.
bridged mode is optimal as this treats the network card as if it is plugged into a simple switch on the existing network.
Some products require identifying the OS installed on the VM. The ideal option is FreeBSD 12 64 bit.
If this is not available, try options like FreeBSD 12, FreeBSD 64 bit, 64 bit OS, or Other.
Do not choose a Windows or Linux related OS type.
For VMWare hypervisors, install in BIOS mode.
The VM has sufficient memory and disk space. TrueNAS needs at least 8 GB RAM and 20 GB disk space.
Not all hypervisors allocate enough memory by default.
Boot the VM and install TrueNAS as usual.
After installation completes, shut down the VM instead of rebooting, and disconnect the CD/DVD from the VM before rebooting the VM.
After rebooting into TrueNAS, install VM tools if applicable for your VM, and if they exist for FreeBSD 12, or ensure they are loaded on boot.
Example installation for VMWare Player 15.5
Open VMware Player and click Create a New Virtual Machine to enter the New Virtual Machine Wizard.
1. Installer disk image file
Select the Installer disk image file (iso) option, click Browse, and upload the TrueNAS Core .iso downloaded earlier.
2. Name the Virtual Machine
In this step, you can change the virtual machine name and location.
3. Specify Disk Capacity
Specify the maximum disk size for the initial disk.
The default 20GB is enough for TrueNAS.
Next, select Store virtual disk as a single file.
4. Review Virtual Machine
Review the virtual machine configuration before proceeding.
By default, VMware Player doesn’t set enough RAM for the virtual machine.
Click *Customize Hardware > Memory.
Drag the slider up to 8GB and click Ok.
If you wish to power on the machine after creation, select Power on this virtual machine after creation.
Add Virtual Disks for Storage
After creating the virtual machine, select it from the virtual machine list and click Edit virtual machine settings.
Click Add and select Hard Disk. Select SCSI as the virtual disk type.
Select Create a new virtual disk.
Specify the maximum size of this additional virtual disk.
This disk stores data in TrueNAS.
If desired, allocate the disk space immediately by setting Allocate all disk space now.
Select *Store virtual disk as single file.
Finally, name and chose a location for the new virtual disk.
Repeat this process until enough disks are available for TrueNAS to create ideal storage pools
This depends on your specific TrueNAS use case.
See Pool Creation for descriptions of the various pool (vdev) types and layouts
TrueNAS Installer
Select the virtual machine from the list and click Play virtual machine.
The machine starts and boots into the TrueNAS installer.
Select Install/Upgrade.
Select the desired disk for the boot environments.
Select Yes. This erases all contents on the disk!
Next, set a password for the TrueNAS administrative account, named root by default.
This account has full control over TrueNAS and is used to log in to the web interface.
Set a strong password and protect it.
Select Boot via BIOS.
After the TrueNAS installation is complete, reboot the system.
The Console Setup Menu displays when the system boots successfully.
After installing TrueNAS in a VMware VM, it is recommended to configure and use the vmx(4) drivers on TrueNAS.
To load the VMX driver when TrueNAS boots, log in to the web interface and go to System > Tunables.
Click Add and create a new tunable with the Variableif_vmx_load, Value"YES", and Typeloader, and save the tunable:
Congratulations, TrueNAS is now installed!
The next step is to log in to the web interface using the administrative account credentials and begin configuring the system.
1.6 - Console Setup Menu
Describes the Console Setup menu of TrueNAS CORE.
The Console Setup menu displays at the end of the boot process.
If the TrueNAS system has a keyboard and monitor, this menu can be used to administer the system.
When connecting with SSH, the Console Setup menu is not shown by default.
It can be started by the root user or another user with root permissions by entering /etc/netcli.
To disable the Console Setup menu, go to System > Advanced and select Show Text Console without Password Prompt to clear the checkbox.
On HA systems, some of these menu options are not available unless HA has been administratively disabled.
The menu provides these options:
Configure Network Interfaces provides a configuration wizard to set up the system’s network interfaces. If the system has been licensed for High Availability (HA), the wizard prompts for IP addresses for both “This Controller” and “TrueNAS Controller 2”.
Configure Link Aggregation is for creating or deleting link aggregations.
Configure VLAN Interface is used to create or delete VLAN interfaces.
Configure Default Route is used to set the IPv4 or IPv6 default gateway. When prompted, enter the IP address of the default gateway.
Configure Static Routes prompts for the destination network and gateway IP address. Re-enter this option for each static route needed.
Configure DNS prompts for the name of the DNS domain and the IP address of the first DNS server. When adding multiple DNS servers, press Enter to enter the next one. Press Enter twice to leave this option.
Reset Root Password is used to reset a lost or forgotten root password. Select this option and follow the prompts to set the password.
Reset Configuration to DefaultsCaution! This option deletes all of the configuration settings made in the administrative GUI and is used to reset TrueNAS® back to defaults. Before selecting this option, make a full backup of all data and make sure all encryption keys and passphrases are known! After this option is selected, the configuration is reset to defaults and the system reboots. Storage ➞ Pools ➞ Import Pool can be used to re-import pools.
Reboot restarts the system.
Shut Down shuts down the system.
The numbering and quantity of options on this menu can change due to software updates, service agreements, or other factors.
Please carefully check the menu before selecting an option, and keep this in mind when writing local procedures.
During boot, TrueNAS automatically attempts to connect to a DHCP server from all live interfaces.
If it successfully receives an IP address, the address is displayed so it can be used to access the graphical user interface.
In the example shown above, TrueNAS is accessible at 10.0.0.102.
Some TrueNAS systems are set up without a monitor, making it challenging to determine which IP address has been assigned.
On networks that support Multicast DNS (mDNS), the hostname and domain can be entered into the address bar of a browser.
By default, this value is truenas.local.
If TrueNAS is not connected to a network with a DHCP server, use the console network configuration menu to manually configure the interface as shown here.
In this example, the TrueNAS system has one network interface, em0.
Enter an option from 1-12: 1
1) em0
Select an interface (q to quit): 1
Remove the current settings of this interface? (This causes a momentary disconnec
tion of the network.) (y/n) n
Configure interface for DHCP? (y/n) n
Configure IPv4? (y/n) y
Interface name:     (press enter, the name can be blank)
Several input formats are supported
Example 1 CIDR Notation:
    192.168.1.1/24
Example 2 IP and Netmask separate:
    IP: 192.168.1.1
    Netmask: 255.255.255.0, or /24 or 24
IPv4 Address: 192.168.1.108/24
Saving interface configuration: Ok
Configure IPv6? (y/n) n
Restarting network: ok

...

The web user interface is at
http://192.168.1.108
1.7 - Logging In
Describes how the logging in process works on TrueNAS CORE.
Now that TrueNAS is installed, it’s time to log in to the web interface and begin managing data!
Can I configure TrueNAS using a CLI?
After installing TrueNAS, configuring and using the system is all managed through the web interface.
It is important to only use the web interface to make configuration changes to the system.
By default, using the command-line interface (CLI) to modify the system does not modify the settings database.
Any changes made in the command line are lost and reverted to the original database settings whenever the system restarts.
TrueNAS automatically creates a number of ways to access the web interface, but you might need to adjust the default settings to better fit the system in your network environment.
Web Interface Access
By default, TrueNAS provides a default address for logging in to the web interface.
To view the web interface IP address or reconfigure web interface access, you will need to connect a monitor and keyboard to your TrueNAS system or connect with IPMI for out-of-band system management.
When powering on a TrueNAS system, the system attempts to connect to a DHCP server from all live interfaces and provide access to the web interface.
On networks that support Multicast Domain Name Services (mDNS), a hostname and domain can be used to access the TrueNAS web interface.
By default, TrueNAS is configured to use the hostname and domain truenas.local
You can change this after logging in to the web interface by going to Network > Global Configuration and setting a new Hostname and Domain.
If an IP address is needed, connect a monitor to the TrueNAS system and view the console setup menu that displays at the end of the boot process.
When able to automatically configure a connection, the system shows the web interface IP address at the bottom of the console setup menu.
If needed, you can reset the root password in the TrueNAS console setup menu or by clicking Settings > Change Password in the web interface.
To require logging in to the system before showing the system console menu, go to System > Advanced and unset Show Text Console without Password Prompt.
TrueNAS Enterprise hardware from iXsystems is preconfigured with your provided networking details.
The IP address of the TrueNAS web interface is provided on the system sales order or configuration sheet.
Please contact iX Support if the TrueNAS web interface IP address has not been provided with these documents or cannot be identified from the TrueNAS system console.
Customers who purchase iXsystems hardware or that want additional support must have a support contract to use iXsystems Support Services. The TrueNAS Community forums provides free support for users without an iXsystems Support contract.
Monday - Friday, 6:00AM to 6:00PM Pacific Standard Time:
US-only toll-free: 1-855-473-7449 option 2 Local and international: 1-408-943-4100 option 2
Telephone
After Hours (24x7 Gold Level Support only):
US-only toll-free: 1-855-499-5131 International: 1-408-878-3140 (international calling rates apply)
If the TrueNAS system is not connected to a network with a DHCP server, you can use the console network configuration menu to manually Configure Network Interfaces.
This example shows configuring a single interface, em0:
Enter an option from 1-12: 1
1) em0
Select an interface (q to quit): 1
Remove the current settings of this interface? (This causes a momentary disconnec
tion of the network.) (y/n) n
Configure interface for DHCP? (y/n) n
Configure IPv4? (y/n) y
Interface name:     (press enter, the name can be blank)
Several input formats are supported
Example 1 CIDR Notation:
    192.168.1.1/24
Example 2 IP and Netmask separate:
    IP: 192.168.1.1
    Netmask: 255.255.255.0, or /24 or 24
IPv4 Address: 192.168.1.108/24
Saving interface configuration: Ok
Configure IPv6? (y/n) n
Restarting network: ok

...

The web user interface is at
http://192.168.1.108
Depending on the network environment, review the Configure Default Route option to define your IPv4 or IPv6 default gateway.
Configure Static Routes allows adding destination network and gateway IP addresses, one for each route.
To change the DNS domain and add nameservers, select Configure DNS.
These settings can be adjusted later in the various Network options available in the web interface.
Logging In
On a computer that can access the same network as the TrueNAS system, enter the hostname and domain or IP address in a web browser to connect to the web interface.
The quality of your user experience can be impacted by the browser that you use. We generally recommend using Firefox, Edge, or Chrome.
Enter the administrative account credentials to log in.
By default, the administrative account username is root and the password is set when installing TrueNAS.
Troubleshooting
If the user interface is not accessible by IP address from a browser, check these things:
Are proxy settings enabled in the browser configuration?
If so, disable the settings and try connecting again.
If the page does not load, make sure that a ping reaches the TrueNAS system IP address.
If the address is in a private IP address range, it is only accessible from within that private network.
If the web interface is shown but seems unresponsive or incomplete:
Make sure the browser allows cookies, Javascript, and custom fonts from the TrueNAS system.
Try a different browser. Firefox is recommended.
If the UI becomes unresponsive after an upgrade or other system operation, clear the site data and refresh the browser (Shift+F5).
After logging in, the TrueNAS web interface present options across the top and left side of the screen.
Top Menu
The horizontal menu at the top of the web interface contains status indicators, system alerts, UI theme options, and system power options.
Top Menu Details
Across the top row are links to outside resources and buttons to control the system.
Click the links above to jump to the sections with details on these top toolbar options.
Logos and Side Panel Controls
The logo in the upper-left corner shows the installed TrueNAS software.
Clicking the image takes you to the system Dashboard.
The next two buttons control how the side menu displays.
Click the (menu icon) to hide or show the entire left side panel.
Click the (chevron left icon) to collapse the left side panel to shortcut icons or expand to show icons and text.
Click the iXsystems logo to open the iXsystems corporate website in a new browser tab.
Status Icons
The remaining icons in the top menu show various statuses. They also provide system options.
The icon next to the iXsystems logo shows TrueCommand Cloud connection options.
Clicking the icon shows options for signing up for TrueCommand Cloud. It also displays options for connecting/disconnecting from TrueCommand Cloud.
When the system is not connected to TrueCommand Cloud the options are not available.
The icon appears but is gray in color.
TrueNAS Enterprise compatible hardware has a (cloud with HA text) icon that shows the current status of High Availability (HA) on the system.
A checkmark () cloud icon indicates HA is functional.
An on top of the cloud icon indicates HA disabled or otherwise unavailable.
Task Manager
The (clipboard icon) is the system Task Manager.
Click the icon to show a list of running or completed TrueNAS tasks.
Tasks are sortable by their success or error State, task Method, and Progress.
Typing text in the Filter field shows tasks that match the characters typed into the field.
Clicking an entry shows more details about that task. This includes start and end timestamps.
Alerts
The (bell icon) contains system notification messages.
The icon changes to when TrueNAS creates a new alert.
Clicking the icon slides out a panel from the right side of the screen that lists each alert.
Dismiss or reopen alerts in this panel.
Dismissing an alert does not prevent it from recurring. TrueNAS might create a new alert if the alert conditions continue to exist on the system.
Configure the alert system in System > Alert Settings.
Settings
The (gear icon) contains links to various system specific options.
Change Password is a shortcut for changing the administrator (root) account password.
Password required to log in to the TrueNAS web interface.
Back up or otherwise memorize the updated password when changing it.
Preferences contains theme and other visual options for the web interface:
Preferences Options
Name
Description
Choose Theme
Select a preferred theme from the dropdown list. There are several built-in themes designed for light and dark modes. High contrast viewing options of the web interface are also listed.
Prefer buttons with icons only
Select to preserve screen space using icons and tooltips instead of text labels.
Enable Password Toggle
Select to display an eye icon next to password fields. Clicking the icon reveals the password.
Reset Table Columns to Default
Select to reset all tables to display system default table columns.
Retro Logo
Select to revert branding back to FreeNAS.
Reset All Preferences to Default
Select to reset all user preferences to their default values. Preserves custom themes.
Update Preferences
Click to save changes to the General Preferences.
Click Create New Theme on this screen to create and manage custom themes.
API Keys opens the API Keys screen where you can create or view API keys on the system. Click Add to create a new API key. Click Docs to open the API documentation for the current release.
About opens the TrueNAS CORE looking for help widget. This same widget is available on the system Dashboard, and provides links to the TrueNAS Documentation, community forum, TrueNAS CORE Enterprise web sites.
Power
The (power icon) has the options for changing the system state.
Log Out exits the web interface and shows the login screen.
The system remains powered on.
Restart initiates a power cycle.
The web interface closes. Discontinues power to the system which is then re-enabled.
The login screen appears when the boot cycle completes.
Shut Down exits the web interface. The process to safely discontinue power to the system begins.
The system remains offline until the power situation corrects.
Side Menu
The column on the left side of the screen contains some information about the system and links to the various TrueNAS configuration screens.
The box at the top of the columns shows the current logged in user account and the system host name.
Configuration screens are organized by feature.
For example, to find options related to storing data, click the Storage option and to make data stored in TrueNAS available to client systems, go to the Sharing section.
Dashboard
The system Dashboard is the default screen when logging in to TrueNAS.
Basic information about the installed version, systems component usage and network traffic are all presented on this screen.
For users with compatible TrueNAS Hardware, clicking the system image goes to the System > View Enclosure page.
The Dashboard provides access to all TrueNAS management options.
Now that you can access the TrueNAS web interface and see all the management options, it is time to begin storing data!
1.8 - Storage Configuration
Describes how to configure storage on TrueNAS CORE.
Now that you have logged in to the web interface, it’s time to set up TrueNAS storage.
These instructions demonstrate a simple mirrored pool setup, where you use one disk for storage and the other for data protection.
However, there are many configuration possibilities for your storage environment!
The system needs at least two identically sized disks to create a mirrored storage pool.
While a single-disk pool is technically allowed, we do not recommend it.
The disk you used for the TrueNAS installation does not count toward this limit.
You can configure data backups in several ways and have different requirements.
Backing data up in the Cloud requires a 3rd party Cloud Storage provider account.
Backups with Replication require either additional storage on the TrueNAS system or (ideally) another TrueNAS system in a different location.
Simple Storage Setup
Go to Storage > Pools and click ADD.
Set Create a new pool and click CREATE POOL
For the Name, enter tank or any other preferred name.
In the Available Disks, set two identical disks and click the to move them to the Data VDevs area.
If the disks used have non-unique serial numbers, they do not populate the Available Disks section until you enable the Show disk with non-unique serial numbers checkbox.
TrueNAS automatically suggests Mirror as the ideal layout for maximized data storage and protection.
Review the Estimated total raw data capacity and click CREATE.
TrueNAS wipes the disks and adds tank to the Storage > Pools list.
Adding Datasets or Zvols
New pools have a root dataset that allows further division into new datasets or zvols.
A dataset is a file system that stores data and has specific permissions.
A zvol is a virtual block device with a predefined storage size.
To create either one, go to Storage > Pools, click , and select Add Dataset or Add Zvol.
Users create datasets and zvols as part of configuring specific data-sharing situations:
A dataset with a Share Type set to SMB optimizes that dataset for the Windows sharing protocol.
Block device sharing (iSCSI) requires a zvol.
Organize the pool with additional datasets or zvols according to your access and data-sharing requirements before moving any data into the pool.
When you finish building and organizing your TrueNAS pools, move on to configuring how the system shares data.
1.9 - Sharing Storage
Describes sharing configurations on TrueNAS CORE.
With TrueNAS Storage configured and backed up, it’s time to begin sharing data.
There are several available sharing solutions, but we’ll look at the most common in this article.
Choose a tab to get started with simple sharing examples:
Sharing Data
Requirements
Dataset with Share Type set to SMB.
TrueNAS user accounts with Samba Authentication set.
Set Permissions
Go to Storage > Pools and find the dataset to share.
Click and Edit Permissions.
Click SELECT AN ACL PRESET, open the drop down, and choose OPEN.
Click SAVE.
Create the Share
Go to Sharing > Windows Shares (SMB) and click ADD.
Only the Path and Name are initially required.
The Path is the directory tree on TrueNAS that is shared using the SMB protocol.
The Name forms part of the “full share pathname” when SMB clients connect.
Click SUBMIT to save the configuration to Sharing > Windows Shares (SMB).
Activate the Service
Go to Services and toggle SMB.
Set Start Automatically when you want the share to become accessible immediately after TrueNAS boots.
Connecting to the Share
On a Windows 10 system, open the File Browser.
In the navigation bar, enter \\ and the TrueNAS system name.
When prompted, enter the TrueNAS user account credentials and begin browsing the dataset.
Requirements
TrueNAS dataset to share.
Client systems might require additional packages like nfs-common.
Creating the Share
Go to Sharing > Unix Shares (NFS) and click ADD.
Use the file browser to select the dataset to be shared and click SUBMIT.
When prompted, click ENABLE SERVICE to immediately begin sharing the dataset.
Accessing the Dataset
On a Unix-like system, open a command line.
Enter showmount -eIPADDRESS, replacing IPADDRESS with your TrueNAS system address:
tmoore@ChimaeraPrime:~$ showmount -e 10.238.15.194
Export list for 10.238.15.194:
/mnt/pool1/testds (everyone)
Now make a local directory for the NFS mount:
tmoore@ChimaeraPrime:~$ sudo mkdir nfstemp/
Finally, mount the shared directory:
tmoore@ChimaeraPrime:~$ sudo mount -t nfs 10.238.15.194:/mnt/pool1/testds nfstemp/
From here, cd into the local directory and view or modify the files as needed.
Block sharing is a complicated scenario that requires detailed configuration steps and knowledge of your network environment.
A simple configuration is beyond the scope of this getting started guide, but detailed articles are available in iSCSI Shares.
With simple sharing done, TrueNAS is now installed, accessible, and capable to receive or share data over your network.
Now it is time to protect the TrueNAS storage by setting up data backups.
1.10 - Data Backups
Describes how to configure data backups on TrueNAS CORE.
With storage created and shared, it’s time to ensure TrueNAS data is effectively backed up.
TrueNAS offers several options for backing up data.
This option requires an account with the Cloud Storage provider and a storage location created with the provider, like an Amazon S3 bucket.
Major providers like Amazon S3, Google Cloud, Box and Microsoft Azure are supported, along with a variety of other vendors.
These can charge fees for data transfers and storage, so please review your cloud storage provider policies before transferring any data.
You can configure TrueNAS to send, receive, or synchronize data with a cloud storage provider.
Configuring a cloud sync task allows you to transfer data a single time or set up a recurring schedule to periodically transfer data.
Add the Credential
Go to System > Cloud Credentials > ADD.
Enter a name in Name and choose a provider from the Provider dropdown list.
The authentication options change depending on the selected provider.
Credentials either must be entered manually or a single provider login is required and the credentials add automatically.
After entering the provider credentials, click VERIFY CREDENTIAL.
When verification is confirmed, click SUBMIT.
Add the Data Transfer Task
Go to Tasks > Cloud Sync Tasks and click ADD.
Select the previously saved provider in Credential to populate the Remote section.
Add a value in Description for the task, select PUSH or PULL as the Direction and COPY as the Transfer Mode.
Under Directory/Files, choose the tank dataset previously created.
Now, use the Control options to define how often this task runs.
Open the Schedule dropdown and choose a preset time when running the task is least intrusive to your network.
If the task only needs to run once, clear the Enabled checkbox.
You can trigger the task a single time from the Tasks > Cloud Sync Tasks list to do the initial migration or backup.
To test your task, click DRY RUN.
When the test run is successful, click SUBMIT to save the task and add it to Tasks > Cloud Sync Tasks.
To manually run the task, go to Tasks > Cloud Sync Tasks, click > to expand the new task, and click RUN NOW.
The Status shows success or failure.
Click the status entry to see a detailed log of the action.
Replication is the process of taking a moment in time snapshot of the data and copying that snapshot to another location.
Snapshots typically use less storage than full file backups and have more management options.
This instruction shows using the TrueNAS wizard to create a simple replication.
Go to Tasks > Replication Tasks and click ADD.
Set the source location to the local system and pick which datasets to snapshot.
The wizard takes new snapshots of the sources when no existing source snapshots are found.
Set the destination to the local system and define the path to the storage location for replicated snapshots.
When manually defining the destination, be sure to type the full path to the destination location.
You can define a specific schedule for this replication or choose to run it immediately after saving the new task.
Unscheduled tasks are saved in the replication task list and can be run manually or edited later to add a schedule.
Clicking START REPLICATION saves the new task and immediately attempts to replicate snapshots to the destination.
To confirm that snapshots are replicated, go to Storage > Snapshots and verify the destination dataset has new snapshots with correct timestamps.
TrueNAS is now accessible and configured to store, share, and back up your data!
If you need to expand the system capabilities, see the remaining article about additional Applications.
When you are ready to fine-tune the system configuration or learn more about the advanced features, see the remaining sections in the TrueNAS CORE and Enterprise section.
These sections are organized in order of appearance in the TrueNAS interface, with additional topics for 3rd party solutions, API reference guide, and community recommendations.
1.11 - Applications
Describes how to install applications on TrueNAS CORE.
With the rest of the system configured and data being shared over a network, the final step to consider for first time setup is installing any of the application solutions.
Applications or features added to TrueNAS are created in separate plugins, jails, or virtual machines that are kept separate from the base TrueNAS operating system.
If anything goes wrong or a security vulnerability is exploited in one of these application environments, TrueNAS remains unaffected.
These solutions safely expand TrueNAS capabilities in a restricted, safeguarded way.
The primary method to install applications is to use plugins.
These are pre-packaged applications that quickly install in a tailor-made environment.
Some plugins are supported by iXsystems while others are provided and maintained by the open source community.
A jail is a restricted FreeBSD operating system installed as a separate subset of TrueNAS.
Jails can install a wide variety of applications and be tuned to very specific use cases, but they require more extensive knowledge of FreeBSD and command line operation.
A virtual machine is a fully independent operating system installation.
This reserves or splits the available hardware resources to create a different, full operating system experience.
TrueNAS can install Windows or Unix-like operating systems in a virtual machine (VM), but regular system performance is reduced while virtual machines are running.
Click one of the tabs below to see instructions on installing your preferred application solution.
Network Hardware Offloading
Plugins that use a network interface need to Disable Hardware Offloading in Network -> Interface.
Disabling hardware offloading can reduce general network performance for that interface, so it is recommended to use a secondary interface for application environments.
This instruction demonstrates adding a plugin by walking you through installing the community-favorite Plex application.
You need an account with Plex to complete these instructions.
Installing Plex
Create a dataset called audio and a dataset called video to be used as mount points for Plex.
Next, go to the Plugins page.
Installing a basic PlexMedia plugin:
Select the Plex Media Server plugin and click INSTALL.
Enter a name in Jail Name. For example, plex or whatever name you prefer.
DHCP is set automatically.
Click SAVE.
A dialog window shows the installation progress.
When available, Plugin Installation Notes display when the install completes.
The plugin Status shows as up, with the Boot option selected.
4. Add the Plex mount points. Click > to expand the Plex plugin row.
Click Stop, then click Mount Points.
Click Actions, then Add.
Fill out one mount point for each previously created dataset.
The Source is the created dataset and the Destination is the media directory with /datasetname appended (see example):
Click Submit. Do this for as many mount points as needed. In this example, we have audio and video.
Modify the dataset permissions for each dataset added as a mount point in Plex.
Go to Storage > Pools and click more_vert for your source dataset, then click Edit Permissions.
Click Create a custom ACL and Continue.
Click ADD ACL ITEM and enter the values pictured below:
Set Apply permissions recursively and click Save.
Go to Plugins, find the Plex entry, and click the > to expand the row. Click Start to start the plugin.
Accessing Plex
When the Plex plugin status is up, click the >, then Manage.
Enter your Plex login information.
Installing a Jail
Go to the Jails page and click ADD.
Enter a name for the jail in Name, select the Release version, then click NEXT.
To allow the jail access to the internet, set DHCP Autoconfigure IPv4 and click NEXT.
Additional defaults are set when you select the DHCP option.
Review the Jail Summary and click SUBMIT.
Accessing a Jail
Go to Jails and click the > next to the newly created jail.
Click START.
When the jail State changes to up, click SHELL to see the jail command line.
Installing a Virtual Machine
Virtual machines require uploading an operating system .iso to TrueNAS.
This example shows using an Ubuntu .iso:
Go to Virtual Machines and click ADD.
Select a Guest Operating System and enter a name in Name.
For this example the guest operating system is set to Linux.
Click NEXT.
Enter the physical resources to give the VM.
Larger numbers in Virtual CPUs, Cores, Threads, and Memory allow the VM to perform better, but reduce the performance of the TrueNAS system.
Click NEXT.
Set Create a new disk image and select the VM storage from Zvol Location.
Enter a usable storage number in Size (example shows 50 GiB) and click NEXT.
Network Interface automatically detects the hardware and sets defaults that allow network access.
Make sure these settings are valid, then click NEXT.
Set Upload an installer image file to see additional options.
Select a location on the TrueNAS system in ISO save location.
Click Choose File and browse to the OS installation .iso.
Click UPLOAD and wait for the process to finish (this can take some time).
Click NEXT.
Confirm the VM configuration is correct and click SUBMIT.
Accessing a Virtual Machine
Go to Virtual Machines and click > next to the newly created VM.
Click START.
When the VM State changes to up, click VNC to see the VM display.
Because this example uses an Ubuntu .iso, the Ubuntu installation screen shows.
From here, install the OS as normal.
After the OS install completes, go back to Virtual Machines, toggle the State, and click DEVICES.
Find the CDROM entry and click > Delete to remove the installation .iso from the VM and allow it to boot into the full OS the next time the VM activates.
2 - CORE Tutorials
Standalone tutorials. Tutorials are organized parallel to the CORE interface layout.
Welcome to TrueNAS CORE tutorials!
This guide collects various how-tos for both simple and complex tasks using primarily the TrueNAS web interface.
Tutorials are organized parallel to the TrueNAS web interface structure and grouped by topic.
Tutorials are living articles and continually updated with new content or additional in-depth tutorials that guide in unlocking the full potential of TrueNAS.
To display all tutorials in a linear HTML format, export it to PDF, or physically print it, please select ⎙ Download or Print.
Table of Contents
⎙ Download or Print: View all CORE tutorials as a single html file suitable for download or print.
Task Manager: Use the Task Manager screen to display a list of tasks performed by your TrueNAS and to view logs related to system tasks.
Getting Support: Describes different options for getting support for TrueNAS CORE.
Sharing: Tutorials for configuring different storage sharing protocols in TrueNAS.
Services: Provides information on the Services screen and lists other service tutorial articles.
Jails, Plugins, and VMs: Tutorials about configuring TrueNAS CORE jails, specialized jails called plugins, and virtual machines for full operating system deployments.
Updating CORE: Tutorials for updating or upgrading a TrueNAS CORE system.
Setting UI Preferences: Use the Interface Preferences screen to display a list of general preferences or to change preference settings for your TrueNAS.
2.1 - Task Manager
Use the Task Manager screen to display a list of tasks performed by your TrueNAS and to view logs related to system tasks.
The Task Manager displays a list of tasks performed by the TrueNAS system. It starts with the most recent task.
Click the assignment to open the Task Manager.
Click a task name to display its start time, finish time, and whether the task succeeded.
If a task fails, the error status shows.
Tasks with log file output have a View Logs button to show the log files.
Click CLOSE or anywhere outside the Task Manager dialog to close it, or press Esc.
2.2 - Getting Support
Describes different options for getting support for TrueNAS CORE.
There are several options to get support for your TrueNAS installation.
TrueNAS CORE users can engage with the TrueNAS community to answer questions and resolve issues. TrueNAS Enterprise hardware customers can also access the fast and effective support directly provided by iXsystems.
TrueNAS CORE users are welcome to report bugs and vote for or suggest new TrueNAS features in the project Jira instance.
Have questions? We recommend searching through the software documentation and community resources for answers.
Reporting a Bug
If you encounter a bug or other issue while using TrueNAS, create a bug report in the TrueNAS Jira Project.
The web interface provides a form to report issues without logging out.
We recommend searching the project first to see if another user already reported the issue.
You must have a Jira account to create a bug ticket.
To report an issue using the web interface, go to System > Support.
Enter your Jira Username and Password to verify your account credentials and unlock the SUBMIT button.
The Category dropdown has a large number of options.
Choose the category that best fits where you encountered the issue.
Attaching a debug file and screenshot(s) to your bug ticket is generally recommended to help find the bug and speed up response.
Select Attach Debug to automatically generate a new debug and privately attach it to the issue.
Private debug attachments are only visible to iXsystems engineering staff.
Keep the Subject brief and informative.
Having a short, descriptive subject allows the community to easily find and respond to your issue.
The Description should contain more details about the problem.
We recommend keeping the description less than three paragraphs and including any steps to reproduce the issue.
Creating a Debug File
The TrueNAS web interface lets users save debugging information to a text file.
On TrueNAS CORE systems, go to System > Advanced and click SAVE DEBUG.
Click PROCEED to generate the debug file (might take a few minutes).
After generating the debug file, TrueNAS prompts you to download it to your local system and saves a copy in /var/tmp/fndebug.
The
freenas-debug
command-line utility collects debugging information.
Debug files contain log files which can include personal information such as usernames, networking configuration, device serial numbers, or other identifying information about your system.
Files uploaded to an issue from the System > Support screen using Attach Debug or through the Jira Private File Upload service are only visible to iXsystems engineers.
The iXsystems Privacy Policy contains a detailed statement of our commitment to data privacy.
Always store debug files in a secure location.
Please review debugs and redact any sensitive information before sharing with external entities.
Use a file archiver utility, such as 7-zip, to open compressed debug archives and review log contents.
Suggesting New Features
Want to see a new feature added to TrueNAS?
You can see and vote for community-proposed features in the TrueNAS Jira project and make your feature suggestions here.
If you find a suggestion that you want to see implemented, open that ticket and click Vote for this issue in the People section.
Briefly describe the new feature you would like to see added in the Summary section.
After creating your feature suggestion, it moves to the Gathering Interest stage, where the community can review and vote for the feature.
After gathering enough interest, the TrueNAS Release Council reviews the suggestion for feasibility and determines where to add the feature in the software roadmap.
TrueNAS Community
The TrueNAS Community is an active online resource for asking questions, troubleshooting issues, and sharing information with other TrueNAS users.
You must register to post.
Community Resources are user-contributed articles about every facet of using TrueNAS.
They are organized into broad categories and incorporate a community rating system to better highlight content that the whole community has found helpful.
Social Media
You are always welcome to network with other TrueNAS users using the various social media platforms!
Proactive Support and the Contact Support options below are only available on TrueNAS Enterprise licensed systems.
Contact the iXsystems Sales Team to inquire about purchasing TrueNAS Enterprise licenses.
In addition to all the TrueNAS CORE support options, TrueNAS Enterprise customers who purchase hardware from iXsystems can receive assistance from iXsystems if an issue occurs.
Silver and Gold level Support customers can also enable Proactive Support on their hardware to automatically notify iXsystems if an issue occurs.
To find more details about the different Warranty and Service Level Agreement (SLA) options available, see https://www.ixsystems.com/support/.
Production System Reporting
Once the system is ready to be in production, update the status by checking the This is a production system checkbox and click the Update Status button. This will send an email to iXsystems declaring that the system is in production. TrueNAS has an option to include a debug with the email that could assist support in the future.
Configuring Proactive Support
Proactive Support notifies iXsystems by email whenever hardware conditions on the system require attention.
This feature is available to iXsystems Silver and Gold Support customers.
Be sure to add valid email addresses and phone numbers for the contacts to be quickly notified of any issues.
You can also toggle automatic iXsystems support alerts in the system console menu with /etc/netcli.
Failover must be disabled in TrueNAS High Availability systems before this option can be toggled.
To administratively disable failover in the web interface, go to System > Failover.
Filing a Support Ticket
TrueNAS Enterprise customers can file tickets directly with iXsystems Support by going to System > Support.
Be sure to enter a valid Email and Phone number.
iXsystems Support uses this information to quickly respond to and resolve the issue.
You can also indicate the system’s current use and identify how critical the issue is to system usability.
We recommend always attaching a debug and screenshots to help speed up diagnosing and resolving the issue.
Select Attach Debug to automatically generate a new debug and privately attach it to the issue.
Private debug attachments are only visible to iXsystems engineering staff.
An informative Subject and Description that briefly describes the problem and if there are any steps to reproduce the issue is also helpful.
Clicking SUBMIT generates and sends the support ticket to iXsystems.
This process can take several minutes while information is collected and sent.
TrueNAS sends an email alert if ticket creation fails while Proactive Support is active.
After the creating the new ticket, TrueNAS displays the ticket URL for viewing or updating with more information.
You must have an iXsystems Support account to view the ticket.
Click the URL to log in or register with the support portal.
Use the same email address submitted with the ticket when registering.
Contacting iXsystems Support
Customers who purchase iXsystems hardware or that want additional support must have a support contract to use iXsystems Support Services. The TrueNAS Community forums provides free support for users without an iXsystems Support contract.
Monday - Friday, 6:00AM to 6:00PM Pacific Standard Time:
US-only toll-free: 1-855-473-7449 option 2 Local and international: 1-408-943-4100 option 2
Telephone
After Hours (24x7 Gold Level Support only):
US-only toll-free: 1-855-499-5131 International: 1-408-878-3140 (international calling rates apply)
2.3 - Setting Up Users and Groups
Describes how to set up users and groups in TrueNAS CORE.
Creating users and assigning them to groups allows you to efficiently tune permissions and share data for large numbers of users.
Only the root user account can log in to the TrueNAS web interface.
When the network uses a directory service, import the existing account information using the instructions in Directory Services.
Using Active Directory requires setting Windows user passwords inside Windows.
To see user accounts, go to Accounts > Users.
TrueNAS hides all built-in users by default. To see all built-in users, click settings and SHOW.
Add a User
Go to Accounts > Users and click ADD.
Fields with an * must be configured to submit or change the UI configuration.
TrueNAS subdivides account options into groups of similar options.
Identification
Enter a Full Name.
TrueNAS suggests a simplified Username from the Full Name, but you override it with your own choice.
You can associate an Email address with a user account.
Set and confirm the user password.
User ID and Groups
Next, you must set a user ID.
TrueNAS automatically suggests the user ID starting at 1000, but you can change it.
We recommend using an ID of 1000 or more for non-built-in users.
By default, TrueNAS creates a new primary group with the same name as the user.
To add the user to an existing primary group instead, unset New Primary Group and select a group from the Primary Group drop-down.
You can add the user to more groups using the Auxiliary Groups drop-down.
Directories and Permissions
When creating a user, TrueNAS sets the home directory path to /nonexistent, which does not create a user home directory.
To set a home directory, select a path using the file browser.
If the directory exists and matches the user name, it sets as the user home directory.
When the path does not end with a subdirectory matching the user name, TrueNAS creates a new subdirectory.
The full path to the user home directory displays here when editing a user.
Directly under the file browser, you can set the home directory permissions.
TrueNAS default user accounts cannot change their permissions.
Authentication
You can assign a public SSH key to a user for key-based authentication by pasting the public key into the SSH Public Key field.
If you are using an SSH public key, always keep a backup.
Click DOWNLOAD SSH PUBLIC KEY to download the pasted key as a .txt file.
When Disable Password is Yes, the Password field is unavailable.
The system removes the existing password from the account and disables the Lock User and Permit Sudo options.
The account can’t use password-based logins for services.
For example, disabling the password prevents using account credentials to log in to an SMB share or open an SSH session on the system.
By default, Disable Password is No.
You can set a specific shell for the user from the Shell dropdown:
Shell Options
Setting Lock User disables all password-based functionality for the account until you unset the option.
Permit Sudo allows the account to act as the system administrator using the sudo command.
For better security, leave this option disabled.
If the user account is accessing TrueNAS data using a Windows 8 or newer client, set Microsoft Account to enable additional authentication methods available from those operating systems.
By default, Samba Authentication is enabled.
It allows users to access SMB share data using account credentials.
Groups
Using groups in TrueNAS is an efficient way to manage permissions for many similar user accounts.
The interface lets you manage UNIX-style groups.
If the network uses a directory service, import the existing account information using the instructions in Active Directory.
View Existing Groups
To see saved groups, go to Accounts > Groups
By default, TrueNAS hides built-in groups.
To see built-in groups, click settings and SHOW.
Add a Group
Go to Accounts > Groups and click ADD.
Each group gets a Group ID (GID).
Enter a number above 1000 for a group with user accounts.
You cannot change the GID later.
Groups used by a system service must have an ID that matches the default port number used by the service.
Next, enter a descriptive group Name.
Group names cannot begin with a hyphen (-) or contain a space, tab, or these characters: , : + & # % ^ ( ) ! @ ~ * ? < > =.
By default, the Permit Sudo option is unset.
Setting it allows group members to act as the root account by using sudo.
Leave Permit Sudo unset for better security.
Samba Authentication is set by default.
It allows group members to use SMB permissions and authentication.
Finally, Allow Duplicate GIDs lets you duplicate group IDs but can complicate system configurations.
We recommend leaving it unset.
Group Member Management
Register user accounts to a group to simplify permissions and access to many user accounts.
To manage group membership, go to Accounts > Groups, click the navigate_next for a group, then click groupMEMBERS:
To add user accounts to the group, select them in All users and click .
Select multiple users by holding CTRL while clicking each entry.
2.4 - System Configuration
Tutorials about a wide variety of TrueNAS system management topics.
Adding Certs, CAs, and CSRs: Tutorial articles about adding or importing certificates, certificate signing requests (CSRs), and certificate authorities (CAs) in TrueNAS.
Provides information concerning configuration backups on TrueNAS CORE.
We highly recommend backing up the system configuration regularly.
Doing so preserves settings when migrating, restoring, or fixing the system if it runs into any issues.
Save the configuration file each time the system configuration changes.
Backup configs store information for accounts, network, services, tasks, virtual machines, and system settings.
Backup configs also index ID’s and credentials for account, network, and system services.
Users can view the contents of the backup config using database viewing software like SQLite DB Browser.
Backing Up System Configurations
Manual Backup
Go to System > General and click SAVE CONFIG, then enter your password.
The configuration file contains sensitive data about the TrueNAS system.
Ensure that it is stored somewhere safe.
Automatic Backup
TrueNAS automatically backs up the configuration database to the system dataset every morning at 3:45 (relative to system time settings).
However, this backup does not occur if the system is off at that time.
If the system dataset is on the boot pool and it becomes unavailable, the backup also loses availability.
You must backup SSH keys separately. TrueNAS does not store them in the configuration database.
System host keys are files with names beginning with ssh_host_ in /usr/local/etc/ssh/.
The root user keys are stored in /root/.ssh.
Passwords
The system backup affects two types of passwords: hashed and encrypted.
Hashed: TrueNAS stores user account passwords for the base operating system as hashed values. The system saves them in the system configuration backup, so they do not need to be encrypted to be secure.
Encrypted: The system saves other passwords, like iSCSI CHAP passwords, Active Directory bind credentials, and cloud credentials in an encrypted form to prevent them from being visible as plain text in the saved system configuration. The key or seed for this encryption is usually only on the operating system device.
There are two options after clicking SAVE CONFIG:
Export Password Secret Seed includes encrypted passwords in the configuration file. Encrypted passwords allow you to restore the configuration file to a different operating system device where the decryption seed is not present. Users must physically secure configuration backups containing the seed to prevent unauthorized access or password decryption.
Export Legacy Encryption (GELI) Keys includes encrypted legacy encryption keys in the configuration file. Users can restore the encryption keys by uploading the configuration file to the system using UPLOAD CONFIG.
Resetting and Restoring Configurations
Reset Configuration
To reset the system configuration to factory settings, go to System > General and click RESET CONFIG.
Save the system’s current configuration before resetting.
If you do not save the system config before resetting it, you may lose any data that you did not back up. You cannot revert to the previous settings.
After resetting the system configuration, the system restarts, and you must set a new login password.
Restore Configuration
Users can restore configurations by going to System > General and clicking UPLOAD CONFIG.
When uploading a config, you can select any previously saved config files for their system.
2.4.2 - Managing Boot Environments
Provides information about managing boot environments on TrueNAS CORE.
TrueNAS supports a ZFS feature known as boot environments.
These are snapshot clones that TrueNAS can boot into.
You can only use one boot environment for booting.
How does this help me?
A boot environment allows rebooting into a specific point in time and greatly simplifies recovering from system misconfigurations or other potential system failures.
With multiple boot environments, the process of updating the operating system becomes a low-risk operation.
The updater automatically creates a snapshot of the current boot environment and adds it to the boot menu before applying the update.
If anything goes wrong during the update, the system administrator can boot TrueNAS into the previous environment to restore system functionality.
Changing Boot Environments
Sometimes, rolling back to an older boot environment can be useful.
For example, if an update process doesn’t go as planned, it is easy to roll back to a previous boot environment.
TrueNAS automatically creates a boot environment when the system updates.
There are two different methods for changing the active boot environment: using the web interface and through a Command Line Interface (CLI)
Web Interface
Go to System > Boot and click more_vert for the desired boot environment, then click Activate.
Reboot the system to activate the new boot environment.
Command Line Interface
Reboot the system.
When the welcome screen appears, press the key that corresponds with the option Boot Environments (usually 7).
The Boot Environments options does not appear when no additional boot environments are present.
Choose the new boot environment to activate byt pressing the key for the Active: option.
Press the key to cycle through existing boot environments.
When you select the desired boot environment, press Backspace to return to the welcome menu, then press 4 to reboot the system.
Boot Actions
Go to System > Boot and click ACTIONS.
Add a New Boot Environment
Click Add to make a new boot environment from the active environment.
Name the new boot environment and click SUBMIT.
You may only use alphanumeric characters, dashes (-), and underscores (_) in the Name.
View Stats/Settings
Click Stats/Settings to display statistics for the operating system device.
By default, TrueNAS scrubs the operating system device every 7 days.
To change the default, input a different number in the Scrub interval (in days) field and click UPDATE INTERVAL.
View Boot Pool Status
Click Boot Pool Status to see the status of each boot-pool device, including any read, write, or checksum errors.
Scrub the Boot Pool
Click Scrub Boot Pool to perform a manual (data integrity check) of the operating system device.
2.4.3 - Mirroring the Boot Pool
Provides information on how to mirror the boot pool on TrueNAS CORE.
Adding a second storage device to the boot pool changes the configuration to a Mirror.
This allows one of the devices to fail and the system still boots.
If one of the two devices were to fail, that device is easily detached and replaced.
When adding a second device to create a mirrored boot pool, consider these caveats:
Capacity: The new device must have at least the same capacity as the existing device.
Larger capacity devices can be added, but the mirror will only have the capacity of the smallest device.
Different models of devices which advertise the same nominal size are not necessarily the same actual size.
For this reason, adding another device of the same model of is recommended.
Device Type: We strongly recommend using SSDs rather than USB devices when creating a mirrored boot pool.
Removing devices from storage pools can result in data loss!
Go to System > Boot > ACTIONS > Boot Pool Status.
Click on the boot device, then click attach.
Select a new Member Disk from the drop-down and click SUBMIT.
Use all disk space?
By default, TrueNAS partitions the new device to the same size as the existing device.
When you select Use all disk space, TrueNAS uses the entire capacity of the new device.
If the original operating system device fails and is detached, the boot mirror changes to consist of just the newer device and grows to whatever capacity it provides.
However, new devices added to this mirror must now be as large as the new capacity.
2.4.4 - Managing Enclosures
Provides information about hardware and expansion shelves on TrueNAS CORE.
Only compatible TrueNAS hardware and expansion shelves available from iXsystems allow seeing the View Enclosure option.
To learn more about available iXsystems products, see the TrueNAS Systems Overview or browse the Hardware documentation.
Go to System > View Enclosure to display the status of connected disks and hardware.
Checking Enclosure Components
The screen shows the primary system.
Other detected TrueNAS hardware is available from a column on the right side of the screen.
Click an enclosure to show details about that hardware.
The screen is divided into different tabs which reflect the active sensors in the chosen hardware.
You can rename a system by clicking EDIT LABEL.
Identifying Disks
In the Disks tab, select a disk on the enclosure image and click IDENTIFY DRIVE. The drive LED on the physical system flashes so you can find it.
The TrueNAS Mini Series models do not support drive light identification.
2.4.5 - Configuring the System Email
Provides information on how to set up system email on TrueNAS CORE.
An automatic script sends a nightly email to the administrator (root) account containing important information such as issues with the health of the disks, or other system functions.
Alerts sent are based on the default options set on the Alerts Settings screen.
TrueNAS emails alert events to the email set up for the root user account.
Configure the Root Email Address
Go to Accounts > Users, click more_vert next to the root user, then click Edit.
Enter a remote email address for the system administrator that regularly monitors the system in Email, then click SAVE.
Configuring user email addresses follows the same process.
Configure the System Email
Go to System > Email and enter a From Name for system emails.
Next, select a Send Mail Method and fill out the remaining fields (SMTP) or log in (GMail OAuth).
Click SEND TEST MAIL to verify the configured email settings are working.
If the test email fails, double-check that the root user Email field is correctly configured.
2.4.6 - Setting the System Dataset
Describes how to configure the system dataset on TrueNAS CORE.
The system dataset stores debugging core files, encryption keys for encrypted pools, and Samba4 metadata such as the user and group cache and share level permissions.
To view the current location of the system dataset, go to System > System Dataset.
Store the System Log
Users can store the system log on the system dataset.
We recommend users store the log information on the system dataset when the system generates large amounts of data and has limited memory or a limited-capacity operating system device.
Set Syslog to store the system log on the system dataset.
Leave unset to store the system log in /var on the operating system device.
Change System Dataset
Select an existing pool from the System Dataset Pool dropdown.
You can move the system dataset to unencrypted pools or encrypted pools that do not have passphrases.
Moving the system dataset to an encrypted pool disables that volume’s passphrase capability.
You cannot move the system dataset to a passphrase-encrypted or read-only pool.
Reboots Required
The SMB service must restart, which causes a brief outage for any active SMB connections.
Highly Available TrueNAS systems must reboot the standby controller when the system dataset moves.
If a user changes the pool storing the system dataset later, TrueNAS migrates the existing data in the system dataset to the new location.
2.4.7 - Setting Up a Remote Syslog Server
Describes setting up a remote syslog server in TrueNAS CORE.
TrueNAS CORE allows users to configure a remote system logging server using any of the three transport protocols supported in CORE.
Options are UDP, TCP, or TLS.
The steps for all three protocols are the same except UDP and TCP do not require a certificate and certificate authority and TLS does.
Configuring a Syslog Server
(TLS only) Go to System > CAs and configure a certificate authority for the remote logging server.
You can use a self-signed CA. Enter the IP address for the remote server in Subject Alternate Names.
(TLS only) Go to System > Certificates and configure a certificate for the remote logging server.
Use the CA created for the remote syslog server. Enter the IP address for the remote server in Subject Alternate Names.
Go to System > Advanced and configure the syslog server settings.
a. Select the level of logging in Syslog Level.
b. Enter the IP address for the remote sever in Syslog Server.
c. Select TLS in Syslog Transport or one of the other transport protocols.
The system shows the certificate and certificate authority settings after selecting TLS.
If selecting UDP or TCL, go to step four.
d. Select the certificate created for the remote syslog server from the Syslog TLS Certificate dropdown list.
e. Select the certificate authority created for the remote syslog server from the Syslog TLS Certificate Authority dropdown list.
Click SAVE.
2.4.8 - Creating Alerts
Describes how to create an alert on TrueNAS CORE.
The alert system integrates with various third-party services.
Tuning alerts helps personalize TrueNAS to any highly-sensitive issues.
Add an Alert Service
Go to System > Alert Services and click ADD.
Choose a Type and fill out the options specific to that alert service, then test the service configuration by clicking SEND TEST ALERT.
Customize Alert Settings
Go to System > Alert Settings.
The UI groups alerts based on type.
For example, alerts related to pools appear in the Storage alert section.
Customize each alert Warning Level and Frequency using the drop-down menus.
Changing any of these options affects every configured alert service.
Click SAVE before leaving the page.
2.4.9 - Configuring SSH Connections
Provides information on how to configure Secure Socket Shell (SSH) connections on your TrueNAS.
Secure Socket Shell (SSH) is a cryptographic network protocol. It provides a secure method to access and transfer files between two hosts. This is possible even if the two hosts use an unsecured network.
SSH establishes secure connections by means of user account credentials. It also uses key pairs shared between host systems for authentication.
Create SSH Keypairs
TrueNAS generates and stores RSA-encrypted SSH public and private keypairs in System > SSH Keypairs.
The system typically uses keypairs when configuring SSH Connections or SFTP Cloud Credentials.
Encrypted keypairs or keypairs with passphrases are not supported.
Creating a new SSH Connection or Replication task generates new keypairs.
To manually generate a new keypair, go to System > SSH Keypairs, click ADD, and give the keypair a unique name.
Click GENERATE KEYPAIR to add values to the public and private key fields.
Copy these strings or download them into text files for later use.
Create SSH Connections
Semi-Automatic
TrueNAS offers a semi-automatic setup mode for setting up an SSH connection. This simplifies setting up an SSH connection with another FreeNAS or TrueNAS system. In semi-automatic setup mode it is not necessary to log in to the remote system to transfer SSH keys.
Semi-automatic setup requires an SSH keypair on the local system. You must have administrator account credentials for the remote TrueNAS. You must also configure the remote system to allow root access with SSH.
The semi-automatic configuration can generate the needed keypair. You can manually create the keypair by going to System > SSH Keypairs.
Go to System > SSH Connections and click ADD.
Use a valid URL scheme for the remote TrueNAS URL.
Leave the username as root and enter the account password for the remote TrueNAS system.
You can import the existing private key created from an SSH keypair, or create a new private key with a new SSH keypair.
Save the new configuration. TrueNAS opens a connection to the remote TrueNAS and exchanges SSH keys.
Manual Configuration
You can configure a secure SSH connection that does not generate a password prompt. This involves copying a public encryption key from the local system to the remote system.
Adding a SSH Public Key to the TrueNAS Root Account
Log in to the TrueNAS system that generated the SSH keypair and go to System > SSH Keypairs.
Open the keypair you want to use for the SSH connection. Copy the text of the SSH public key or download the public key as a text file.
Log in to the TrueNAS system that needs to register the public key. Go to Accounts > Users and edit the root account.
Paste the SSH public key text into the SSH Public Key field.
Generate a new SSH keypair in System > SSH Keypairs. Copy or download the value for the public key and add it to the remote NAS.
If the remote NAS is not a TrueNAS system, please see the system documentation on adding a SSH public key.
Manually Configuring the SSH Connection on the Local TrueNAS
Log back into the local TrueNAS system and go to System > SSH Connections. Add a new connection and change the setup method to Manual.
Select the private key from the SSH keypair you used when you transferred the public key on the remote NAS.
2.4.10 - Configuring Tunables
Describes how to add or edit tunables on TrueNAS CORE.
Be careful when adding or editing the default tunables.
Changing the default tunables can make the system unusable.
TrueNAS allows you to add system tunables from the web interface.
You can manually define tunables, or TrueNAS can run an autotuning script to attempt to optimize the system.
Tunables are used to manage TrueNAS sysctls, loaders, and rc.conf options.
loader specifies parameters to pass to the kernel or load additional modules at boot time.
rc.conf enables system services and daemons and only takes effect after a reboot.
sysctl configures kernel parameters while the system is running and generally takes effect immediately.
Adding a sysctl, loader, or rc.conf option is an advanced feature.
A sysctl immediately affects the kernel running the TrueNAS system, and a loader can adversely affect the TrueNAS boot process.
Do not create a tunable on a production system before testing the ramifications of that change.
Configure Tunables
To configure a tunable, go to System > Tunables and click ADD.
Select the Type of tunable to add or modify.
Enter the name of the loader, sysctl, or rc.conf variable to configure.
If you wish to create the system tunable but not immediately enable it, unset the Enabled checkbox.
Configured tunables remain in effect until deleted or Enabled is unset.
We recommend restarting the system after making sysctl changes.
Some sysctls only take effect at system startup, and restarting the system guarantees that the setting values correspond with what the running system uses.
Autotuning
TrueNAS provides an autotune script that optimizes the system depending on the installed hardware.
Is this script available somewhere?
To see which checks are performed, find the autotune script in /usr/local/bin/autotune.
For example, if a pool exists on a system with limited RAM, the autotune script automatically adjusts some ZFS sysctl values to minimize memory starvation issues.
Autotuning can introduce system performance issues. You must only use it as a temporary measure until you address the underlying hardware issue.
Autotune always slows a RAM-starved system as it caps the ARC.
We do not recommend TrueNAS Enterprise customers use the autotuning script, as it can override any specific tunings made by iXsystems Support.
Enabling autotune runs the autotuner script at boot.
To run the script immediately, reboot the system.
Any tuned settings appear in System > Tunables.
Can I manually tune a setting controlled by the autotuner?
Deleting tunables created by the autotune only affects the current session.
Autotune-set tunables regenerate every time the system boots.
You cannot manually tune any setting the autotuner controlls.
To permanently change a value set by autotune, change the description of the tunable.
For example, changing the description to “manual override” prevents autotune from reverting the tunable back to the autotune default value.
2.4.11 - Adding Certs, CAs, and CSRs
Tutorial articles about adding or importing certificates, certificate signing requests (CSRs), and certificate authorities (CAs) in TrueNAS.
TrueNAS lets users create or import certificates, certificate signing requests (CSRs), and certificate authorities (CAs) that enable encrypted connections to the web interface.
Adding Certificates or CSRs: Provides instructions on adding or importing certificates and certificate signing requests (CSRs) in TrueNAS CORE.
2.4.11.1 - Creating Certificate Authorities (CAs)
Describes how to create or import certificates using TrueNAS CORE.
TrueNAS can act as a certificate authority (CA).
When encrypting SSL or TLS connections to the TrueNAS system, you can import an existing CA or create a CA and certificate on the TrueNAS system.
The certificate appears on the dropdown menus for services that support SSL or TLS.
Go to System > CAs and click ADD. Enter a name for the CA, then choose the type from the Type dropdown list of three, Internal CA, Intermediate CA, or Import CA. The process to add a CA for each type is slightly different.
Creating CA
A CA must exist in CORE to add an Intermediate CA. This can be an internal or imported CA.
To create a CA:
Enter or select the Identifier and Type setting options.
a. Enter a name for this CA.
b. Select Internal CA from the Type dropdown list to create an internal certificate.
Select Intermediate CA to create an intermediate certificate. This displays the Signing Certificate Authority field in Certificate Options.
Select an option from the Profiles dropdown list.
A profile for the CA auto-fills options like Key Type, Key Length, and Digest Algorithm. Otherwise, you must set options manually.
To add an OpenVPN Root CA, select OpenVPN Root CA.
The configuration form populates with default settings, enables Basic Constraints, Authority Key Identifier, Extended Key Usage, and Key Usage, and sets the options for each extension.
To add CA certificate, select CA.
The configuration form populates with default settings, enables Basic Constraints, Authority Key Identifier, Extended Key Usage, and Key Usage, and sets the options for each extension.
Select the Certificate Options.
a. Select a Key Type from the dropdown list. We recommend the RSA key type. Use EC for elliptic curve certificates.
b. Select the Key Length. We recommend a minimum of 2048 for security reasons.
c. Select a Digest Algorithm. We recommend SHA256.
d. Enter the Lifetime of the CA in days to set how long the CA remains valid.
Enter or select the Certificate Subject settings.
a. Enter the geographic information in Country, Locality, Organizational Unit (optional), Common Name, State, Organization, Email, and Subject Alternate Names.
Select enable and select extensions to use if you did not select an option in Profiles. If manually selecting and entering extension:
a. Select Enable, then enter the extensions for Basic Constraints.
Enter a value in Path Length that determines how many non-self-issued intermediate certificates can follow the certificate in a valid certification path.
Entering 0 allows a single additional certificate to follow in the certificate path. Then select the extension(s) to use.
Select an option from the Basic Constraints Config dropdown list. Select CA to use a certificate authority.
Selecting Critical Extension can result in rejection of the certificate by the system that is using the certificate if that system does not recognize the extension.
b. Select Enable, then enter the extensions for Authority Key Identifier.
Enabling Authority Key Config adds the authority key identifier extension which provides a means of identifying the public key corresponding to the private key used to sign the certificate. Used when an issue has multiple signing keys, possibly due to multiple concurrent key pairs or due to changeover. Options are Authority Cert Issuer or Critical Extension.
c. Select Enable, then enter the extensions for Extended Key Usage. Select one or more usages for the public key from the Usages dropdown list.
TrueNAS uses Extended Key Usage for end-entity certificates.
Enable Critical Extension to identify this extension as critical for the certificate.
Do not enable Critical Extension if Usages contains ANY_EXTENDED_KEY_USAGE.
Using Extended Key Usage and Key Usage extensions requires that the certificate purpose is consistent with both extensions. See RFC 3280, section 4.2.1.13 for more details.
Click Submit to create the CA.
Importing a CA
Use this procedure to import a CA.
Enter a name for this certificate.
Select Import CA from the Type dropdown list.
Copy the certificate for the CA you want to import and paste it into the Certificate field.
Paste the certificate private key of at least 1024 bits in length into Private Key when available.
Enter and confirm the passphrase for the private key into Passphrase and Confirm Passphrase.
Click Submit.
Deleting a CA
Before deleting a CA, verify it is not used by another service such as S3, FTP, etc. You cannot delete a CA when in use by other services.
Also, before you can delete a CA, you need to delete certificates issued by the CA or those relying on the CA.
If you receive an error that mentions foreign keys reference, ensure the certificates on your system do not use the CA you want to delete.
2.4.11.2 - Adding Certificates or CSRs
Provides instructions on adding or importing certificates and certificate signing requests (CSRs) in TrueNAS CORE.
By default, TrueNAS comes equipped with an internal, self-signed certificate that enables encrypted access to the web interface.
You can either import or create a new certificate or signing request by navigating to System > Certificates and clicking ADD.
Adding Internal Certificates
To add an internal certificate:
Enter the name for the certificate, then select Internal Certificate from the Type dropdown list.
Select an option from the Profiles dropdown list.
A profile for the certificate auto-fills options like Key Type, Key Length, Digest Algorithm. Otherwise, you must set options manually.
To add an HTTPS RSA certificate, the default certificate type, select HTTPS RSA Certificate.
The configuration form populates with default settings, enables Basic Constraints, Authority Key Identifier, Extended Key Usage, and Key Usage, and set the options for each extension.
To add an elliptical curve certificate select HTTPS ECC Certificate.
The configuration form populates with default settings, enables Basic Constraints, Authority Key Identifier, Extended Key Usage, and Key Usage, and set the options for each extension.
To add an OpenVPN certificate, select the client or server option that fits the certificate type you want to create.
The configuration form populates with default settings, enables Basic Constraints, Authority Key Identifier, Extended Key Usage, and Key Usage, and set the options for each extension.
Enter or select the Certificate Options settings if you did not select a Profile option.
a. Select a Signing Certificate Authority from the dropdown list.
b. Select a Key Type from the dropdown list. We recommend selecting RSA.
c. Select the Key Length. We recommend a minimum of 2048 for security reasons.
d. Select a Digest Algorithm. We recommend SHA256.
e. Enter the Lifetime of the certificate CA in days to set how long the CA remains valid.
Enter or select the Certificate Subject setting options.
Enter the geographic and other information in Country, Locality, Organizational Unit (optional), Common Name, State, Organization, Email, and Subject Alternate Names.
Select enable and select extensions to use if you did not select an option in Profiles. If manually selecting and entering extension:
a. Select Enable, then enter the extensions for Basic Constraints.
Enter a value in Path Length that determines how many non-self-issued intermediate certificates can follow the certificate in a valid certification path.
Entering 0 allows a single additional certificate to follow in the certificate path. Then select the extension(s) to use.
b. Select Enable, then enter the extensions for Authority Key Identifier.
c. Select Enable, then enter the extensions for Extended Key Usage. Select one or more usages for the public key from the Usages dropdown list.
TrueNAS uses Extended Key Usage for end-entity certificates.
Enable Critical Extension if you want to identify this extension as critical for the certificate.
Do not enable Critical Extension if Usages contains ANY_EXTENDED_KEY_USAGE.
Using Extended Key Usage and Key Usage extensions requires that the certificate purpose is consistent with both extensions. See RFC 3280, section 4.2.1.13 for more details.
d. Select Enable, then enter the extensions for Key Usage. Select any extensions from the Key Usage Config dropdown list.
Click Submit.
Creating a Certificate Signing Request
To add a certificate singing request (CSR) certificate:
Enter the name for the certificate, then select Certificate Signing Request from the Type dropdown list.
Select Certificate Signing Request from the Profiles dropdown list.
A profile for the certificate auto-fills options like Key Type, Key Length, Digest Algorithm. Otherwise, you must set options manually.
To use an HTTPS RSA certificate, the default certificate type, select HTTPS RSA Certificate.
The configuration form populates with default settings, enables Basic Constraints, Authority Key Identifier, Extended Key Usage, and Key Usage, and set the options for each extension.
To use an elliptical curve certificate, select HTTPS ECC Certificate.
The configuration form populates with default settings, enables Basic Constraints, Authority Key Identifier, Extended Key Usage, and Key Usage, and set the options for each extension.
To use an OpenVPN certificate, select the client or server option that fits the certificate type.
The configuration form populates with default settings, enables Basic Constraints, Authority Key Identifier, Extended Key Usage, and Key Usage, and set the options for each extension.
Enter or select the Certificate Options settings if you did not select a Profile option.
a. Select a Key Type from the dropdown list. We recommend selecting RSA.
b. Select a Digest Algorithm. We recommend SHA256.
Enter or select the Certificate Subject setting options.
Enter the geographic and other information in Country, Locality, Organizational Unit (optional), Common Name, State, Organization, Email, and Subject Alternate Names.
Select enable and select extensions to use if you did not select an option in Profiles. If manually selecting and entering extension:
a. Select Enable, then enter the extensions for Basic Constraints.
Enter a value in Path Length that determines how many non-self-issued intermediate certificates can follow the certificate in a valid certification path.
Entering 0 allows a single additional certificate to follow in the certificate path. Then select the extension(s) to use.
b. Select Enable, then enter the extensions for Authority Key Identifier.
c. Select Enable, then enter the extensions for Extended Key Usage. Select one or more usages for the public key from the Usages dropdown list.
TrueNAS uses Extended Key Usage for end-entity certificates.
Enable Critical Extension if you want to identify this extension as critical for the certificate.
Do not enable Critical Extension if Usages contains ANY_EXTENDED_KEY_USAGE.
Using Extended Key Usage and Key Usage extensions requires that the certificate purpose is consistent with both extensions. See RFC 3280, section 4.2.1.13 for more details.
d. Select Enable, then enter the extensions for Key Usage. Select any extensions from the Key Usage Config dropdown list.
Click Submit.
Importing a Certificate
To import a certificate:
Select Import Certificate as the Type.
Select the Certificate Options.
To import a previously-added certificate for a CSR, select CSR exists on this system, then select one from the Signing Certificate Authority dropdown list.
Copy the certificate for the CA you want to import and paste it into the Certificate field.
Paste the certificate key that is least 1024 bits long into Private Key when available.
Enter and confirm the Private Key Passphrase.
Click Submit.
Importing a Certificate Signing Request
To import a certificate signing request (CSR):
Select Import Certificate Signing Request as the Type.
Copy the certificate for the CA you want to import and paste it into the Certificate field.
Paste the certificate key that is least 1024 bits long into Private Key when available.
Enter and confirm the Private Key Passphrase.
Click Submit.
2.4.12 - Configuring Failover (HA)
Describes how to configure failover on TrueNAS CORE Enterprise.
TrueNAS Enterprise
This article only applies to licensed TrueNAS Enterprise High availability (HA) systems.
Contact the iXsystems Sales Team to inquire about purchasing TrueNAS Enterprise licenses.
Warning:
To avoid the potential for data loss, contact iXsystems before replacing a controller or upgrading to High Availability.
Configure High Availability (HA)
Power on both system controllers and log in to the web interface for one of them.
For first-time logins, TrueNAS prompts you to upload the TrueNAS Enterprise License.
Otherwise, go to System > Support and update the license.
Paste the HA license received from iXsystems and save it.
The license contains the serial numbers for both units in the chassis.
Activating an HA license adds the System > Failover screen and modifies fields throughout the UI so that you can configure hostnames and IP addresses for both controllers.
After configuring HA, an icon displays when HA is active or unavailable.
When the system administrator disables HA, the status icon changes to show HA is unavailable.
If the standby TrueNAS controller is not available because it is powered off, still starting up, disconnected from the network, or does not have failover configured, the status icon changes to show HA is unavailable.
HA also becomes unavailable if the controllers have different numbers of disks.
If both TrueNAS controllers reboot simultaneously, you must enter the passphrase for an encrypted pool at the web interface login screen.
Networking
To ensure system networking is configured for HA, go to Network > Global Configuration.
You can set the host names for both controllers and a virtual host name that reaches whichever controller is currently active.
Next, go to Network > Interfaces and edit the primary interface.
Editing interfaces is disabled when HA is active.
To disable HA, go to System > Failover and disable failover.
Edit the interface, then reactivate failover immediately.
TrueNAS automatically synchronizes the configuration changes to the standby controller
You can designate the interface as critical for failover and combine multiple interfaces into a failover group.
There are also options to configure IP addresses for each controller and a virtual IP address with virtual host ID for administrative access.
After the network configuration is complete, log out and log back in using the virtual IP address.
You can now configure pools and shares as usual, and configuration automatically synchronizes between the active and standby TrueNAS controllers.
All subsequent logins should use the virtual IP address.
Connecting directly to the standby TrueNAS controller with a browser does not allow web interface logins.
When troubleshooting HA networking, the ifconfig command adds two additional fields to the output to help with failover troubleshooting: CriticalGroup and Interlink.
Enable Failover
To make general changes to the Failover settings, go to System > Failover
You can manually disable failover on this screen.
Make sure to set one of the controllers as the default so that it becomes active when both boot simultaneously.
Booting an HA pair with failover disabled causes both TrueNAS controllers to come up in standby mode.
In this situation, the web interface shows an option to force a TrueNAS controller to activate.
To have the system wait to failover during a network timeout, replace 0 with a new number of seconds.
Do not sync the TrueNAS configuration unless directed by an iXsystems Support Engineer!
TrueNAS automatically synchronizes the system configuration. The manual sync options are only for dangerous or high-risk troubleshooting situations.
2.4.13 - Configuring ACME DNS
Describes how to configure ACME on the open-source supported TrueNAS CORE.
This feature is only available in the open-source supported TrueNAS CORE.
Name the authenticator.
Leave Authenticator set to Route53.
Enter the Access ID Key and Secret Access Key from Amazon.
Amazon Route 53 is the only supported DNS provider in TrueNAS CORE.
See the AWS documentation for more details about generating the Access ID Key and Secret Access Key.
Click SUBMIT to register the DNS Authenticator and add it to the authenticator options for ACME Certificates.
Creating ACME Certificates
You can create ACME certificates for existing certificate signing requests.
The certificates use an ACME DNS authenticator to confirm domain ownership. Then, they are automatically issued and renewed.
To create a new ACME certificate, go to System > Certificates, click (Options) for an existing certificate signing request, and select Create ACME Certificate.
Give the ACME certificate an identifier (name), and accept the TOS by setting Terms of Service.
For the Authenticator, select the ACME DNS authenticator you created, then click SUBMIT.
2.4.14 - Configuring KMIP
Describes how to configure KMIP on TrueNAS CORE Enterprise.
TrueNAS Enterprise
KMIP is only available for TrueNAS Enterprise licensed systems.
Contact the iXsystems Sales Team to inquire about purchasing TrueNAS Enterprise licenses.
The Key Management Interoperability Protocol (KMIP) is an extensible client/server communication protocol for storing and maintaining keys, certificates, and secret objects.
KMIP on TrueNAS Enterprise integrates the system within an existing centralized key management infrastructure and uses a single trusted source for creating, using, and destroying SED passwords and ZFS encryption keys.
Keys can be created on a single server and then retrieved by TrueNAS.
Keys wrapped within keys, symmetric, and asymmetric keys are supported.
Alternately, KMIP can be used for clients to ask a server to encrypt or decrypt data without the client ever having direct access to a key.
KMIP also can be used to sign certificates.
Requirements
You need to have a KMIP server available with certificate authorities and certificates you can import into TrueNAS.
Have the KMIP server configuration open in a separate browser tab or copy the KMIP server certificate string and private key string to later paste into the TrueNAS web interface.
This helps simplify the TrueNAS connection process.
Log in to the TrueNAS web interface and go to System > CAs and click ADD.
In the Type drop down menu, select Import CA.
Enter a memorable Name for the CA, then paste the KMIP server Certificate and Private Key strings into the related fields.
Leave the Passphrase empty and click Submit.
Next, go to System > Certificates and click ADD.
In the Type drop down menu, select Import Certificate.
Enter a memorable Name for the certificate and paste the KMIP server Certificate and Private Key strings into the related TrueNAS fields.
Leave the Passphrase empty and click SUBMIT.
For security reasons, we strongly recommend protecting the CA and Certificate values.
Configuring KMIP in TrueNAS
Go to System > KMIP.
Enter the central key server Server host name or IP address and the number of an open connection Port on the key server.
Select the Certificate and Certificate Authority that you imported from the central key server.
To ensure the Certificate and CA chain is correct, set Validate Connection and click SAVE.
When the certificate chain verifies, choose the encryption values, SED passwords, or ZFS data pool encryption keys to move to the central key server.
Set Enabled to begin moving the passwords and keys immediately after clicking SAVE.
Refresh the KMIP screen to show the current KMIP Key Status.
If you want to cancel a pending key synchronization, set Force Clear and click SAVE.
2.4.15 - Using Two-Factor Authentication
Describes how to use two-factor authentication on TrueNAS CORE.
We recommend two-factor authentication (2FA) for increased security.
TrueNAS offers 2FA to ensure that a compromised administrator (root) password alone cannot grant access to the administrator interface.
To utilize 2FA, you need a mobile device with Google Authenticator installed.
Other authenticator applications can be used, but you will need to confirm the settings and QR codes generated in TrueNAS are compatible with your particular app before permanently activating 2FA.
What is 2FA, and why would I want to enable it?
Two-factor authentication (2FA) is an extra layer of security that prevents someone from logging in, even if they have your password. This extra security measure requires you to verify your identity using a randomized 6-digit code that regenerates every 30 seconds (unless modified).
Setting Up Two-Factor Authentication
Set up a second 2FA device as a backup before proceeding.
Go to System > 2FA and click ENABLE TWO-FACTOR AUTHENTICATION. Then, click CONFIRM.
Click SHOW QR, then scan it using Google Authenticator on the mobile device.
Using 2FA to Log In to TrueNAS
Enabling 2FA changes the login process for both the TrueNAS web interface and SSH logins:
Web UI Login
The login screen has another field for the randomized authenticator code. If this field isn’t immediately visible, refresh the browser.
Enter the code from the mobile device (complete without the space) in the login window with the root username and password.
SSH Login
Set Enable Two-Factor Auth for SSH in System > 2FA, then go to Services > SSH and click .
Set Log in as Root with Password and click SAVE. Toggle the SSH service and wait for the status to show that it is RUNNING.
Open a Command Prompt or Terminal and SSH into TrueNAS using the system hostname or IP address, root account username and password, and the 2FA code from the mobile device.
2.5 - Changing the Default Shell
Describes how to change the default shell on TrueNAS CORE.
The default shell for an account is the environment that user accesses in a local or SSH session.
The default shell for a new installation is zsh.
You can change the default shell in Accounts > Users.
Click for the root user and click Edit.
Choose the desired shell from the Shell dropdown list and click SAVE.
Shell options are:
2.6 - Community Guides
Additional tutorials written by the TrueNAS Community about TrueNAS CORE configuration and use cases.
Because TrueNAS is both Open Source and complicated, the massive user community often creates recommendations for specific hardware or environments.
User-created recommendations can be added in this location, but be aware these are provided “as-is” and are not officially supported by iXsystems, Inc.
Describes the process of mapping host or domain names on TrueNAS CORE.
Description
Domain Name resolution is the process of mapping host or domain names, such as mytruenas or truenas1.mycompany.com, to their associated IP addresses.
This is done by a variety of methods.
The quickest method is to read entries in the hosts file, which is a local text file containing a list of IP addresses mapped to domain/host names.
Every operating system (OS) that communicates through the TCP/IP protocol has a hosts file.
The hosts file can speed up name resolution when a DNS server is not available on the local network.
A DNS server runs networking software that allows it to join the Domain Name System.
This is the standard service used on the Internet for name resolution.
When adding entries to a TrueNAS system hosts file, use the TrueNAS web interface to save the entries directly to the configuration database.
Do not edit the hosts file directly, as any changes are overwritten by the configuration database during reboot.
Errors
I’m trying to use NFS, SSH, and FTP, but I keep receiving reverse DNS or timeout errors.
The fastest domain name resolution method is for the operating system to read the hosts file, but if there are no matching entries in the hosts file, a DNS server is queried instead.
This is a slower process as the OS has to find the DNS server, send it a query, and wait for an answer.
Timeout errors are common for some network protocols, such as SSH, FTP and NFS, as their connection requests can time out before a DNS server replies.
To speed up name resolution, add entries for commonly used hosts to the hosts file.
Fix
To add an entry to the hosts file, use a browser to log in to your TrueNAS web interface and follow these steps:
Go to Network > Global Configuration.
Scroll down to the Host name database field and add an entry for the TrueNAS system in the format IP_address space hostname.
Click Save.
2.6.2 - Legacy Engine (11.3) Replication
Describes legacy replication on FreeNAS or TrueNAS 11.3.
This article only applies to FreeNAS or TrueNAS version 11.3.
The Legacy replication option in this version provides compatibility with the replication engine used in FreeNAS/TrueNAS 11.2 and earlier.
Creating a legacy replication requires creating an SSH connection to the remote system and snapshots generated by a periodic snapshot task.
Process Summary
Create SSH connection to remote system in System > SSH Connections
Create a periodic snapshot task of the source datasets in Tasks > Periodic Snapshot Tasks
Go to Tasks > Replication Tasks and open the advanced creation screen.
Set Transport to LEGACY
Select SSH connection to remote system
Choose source datasets related to the periodic snapshot task
Set a target location on the remote system
Creating a Legacy Engine Replication
Go to Tasks > Replication Tasks and click ADD.
Select Advanced Replication.
Select LEGACY for the replication Transport method to reorganize the screen for the relevant options.
Choose the SSH connection to a remote system that stores replicated snapshots.
Select the source datasets on the local system using the file browser or manually enter the dataset paths into the field.
To also replicate snapshots of child datasets, set Recursive.
To choose the replication target, open the file browser and select the dataset to store snapshots.
Entering a path to a new dataset creates that target dataset in the defined file path.
The remaining options allow defining how long to keep replicated snapshots, compressing data before replication, and setting a bandwidth limit on the transfer.
2.6.3 - Configuring a 3rd Party VPN service on TrueNAS
Describes how to configure OpenVPN client on TrueNAS 12.0.
TrueNAS includes the ability to run OpenVPN.
This is a short tutorial to configure the OpenVPN client on TrueNAS 12.0.
Many VPN services are provided by 3rd parties that are unaffiliated with iXsystems.
Please verify compatibility and pricing with your provider before integrating with TrueNAS.
Prerequisite: An OpenVPN server running with a similar configuration to these configuration file settings:
Give it a name (example: VPN_CA) and select Import CA as the Type.
Copy and paste the certificate from the configuration file.
The certificate is found between the tags and of the OpenVPN config file.
Installing the Certificate
Open System > Certificate.
Add a certificate.
Give it a name (example: VPN) and select Import Certificate as the Type.
Copy and paste the certificate found in the OpenVPN config file between the tags and .
Copy and paste the key between the tags and from the configuration file.
Configure OpenVPN Service
With a CA and Certificate created, we can configure the VPN connection next.
Go to the Services page and find the OpenVPN Client entry.
Click the to configure the service.
Choose the certificate and Root CA previously installed.
Port the remaining parameters found in the OpenVPN configuration file.
Additional parameters stores options from the configuration files, like the TLS key for authentication or user login/password.
Start the Service
Go to the Services page and find the OpenVPN service.
Toggle the service to start it. If desired, select the Start Automatically checkbox to have the service start each time the system boots.
Test if the connection is working using curl ifconfig.me in a terminal.
It returns the IP from the VPN connection and not from the local connection.
Turn the OpenVPN client service on and off to see the difference.
Logs of the OpenVPN client are in /var/log/messages and /var/log/daemon.
2.6.4 - Setting ACL Permissions for Jailed Applications
Describes how to configure ACL permissions for jailed applications on TrueNAS CORE.
Various Plugin jails require permissions to access datasets.
Unless otherwise modified, a dataset is owned by the user root and group wheel.
Jailed processes like Plex run as their own user.
As a result, a default installation of the Plex plugin cannot read or write any datasets and thus cannot access media files stored in those datasets.
The TrueNAS user must explicitly configure dataset permissions to allow the plugin to use the dataset.
Creating a Dataset Access Control List
To create a dataset Access Control List (ACL) for an application, you need to obtain the Application user ID.
For example, the Plex ID is 972.
Other popular Plugin user IDs include:
Radarr = 352
Sonarr = 351
Transmission = 921
Sabnzbd = 350
To create an ACL for a dataset, log in to the UI and go to Storage > Pools.
Click the three dot icon more_vert and select Edit Permissions.
Click the Add ACL Item button to create a new entry.
New entries appear at the bottom of the list of existing ACL items.
Continuing with Plex as our example, we would enter the following:
Who: User
User: 972 (Don't worry if it says "Could not find a username for this ID")
ACL Type: Allow
Permissions Type:
Basic Permissions: Read
Flags Type: Basic
Flags: Inherit
If files already exist in the dataset, click the Apply permissions recursively checkbox and click Save.
2.6.5 - Setting SMB ACLs on Legacy FreeNAS systems
Describes how to configure SMB ACLs on legacy FreeNAS or TrueNAS released before 12.0.
This article only applies to versions of FreeNAS or TrueNAS released before 12.0
TrueNAS uses Samba to share pools using the Microsoft SMB protocol.
SMB is built into the Windows and macOS operating systems and most Linux and BSD systems pre-install an SMB client to provide support for the SMB protocol.
The SMB protocol supports many different types of configuration scenarios, ranging from simple to complex.
The complexity of the scenario depends on several factors:
Client operating system types and versions connecting to the share.
When the network has an active Windows server.
Active Directory is in use.
Depending on the specific authentication requirements, it can be necessary to create or import user and group accounts into FreeNAS/TrueNAS.
2.7 - Managing TLS Ciphers
Describes how to manage TLS ciphers on TrueNAS CORE.
TrueNAS accepts different Transport Layer Security (TLS) cipher suites for secure web interface connections.
Only use TLS 1.2 or newer for best security.
By default, all options are available if you need to adjust this setting to match your particular network environment or security concerns.
Allow or Restrict TLS Ciphers
Go to System > General and click on HTTPS Protocols to open a drop-down menu with the various cipher suites.
Unsetting a cipher restricts its use in TrueNAS.
After enabling or disabling a cipher, you must reboot the TrueNAS system.
TLSv1
TLSv1 provides Internet communication security using encryption and other secure messaging techniques.
While not officially deprecated, TLSv1 was considered obsolete in 2008.
For security, we discourage enabling TLSv1 unless your network environment requires it.
TLSv1.1
TLSv1.1 is a revision of v1.0 with additional protections against CBC attacks.
While not officially deprecated, TLSv1.1 was considered obsolete in 2008.
For security reasons, users are encouraged to avoid enabling this suite unless required by the network environment.
TLSv1.2
TLSv1.2 increases the protocol’s ability to handle cryptographic algorithms.
TLSv1.2 represented a major step forward in security effectiveness and resulted in the “soft” deprecation of TLS versions 1.0 and 1.1.
TLSv1.3
TLSv1.3 represents another major improvement to the protocol.
TLSv1.3 removes legacy or insecure encryption algorithms, adds encryption for handshake messages, and separates authentication and key exchange concepts.
2.8 - Tasks
Tutorial articles about a wide variety of TrueNAS system tasks.
TrueNAS includes an easy to use interface for common tasks a sysadmin needs to preform on a NAS on a regular basis. These can roughly be broken down into three groups.
Describes how to create a cron job on TrueNAS CORE.
TrueNAS allows users to run specific commands or scripts on a regular schedule using cron(8).
Creating a Cron Job
Go to Tasks > Cron Jobs and click ADD.
The Description helps identify the purpose of the cron job and is optional.
Enter the Command to run on the Schedule.
Alternately, enter the path to a script file to run instead of a specific command.
Don’t forget to define the shell type when using a path to a script file.
For example, a script written for sh must be specified as sh /mnt/pool1/helloWorld.sh.
Select a TrueNAS user account with the necessary permissions to run the Command or script.
Next, define the CommandSchedule.
Additional Options:
When Hide Standard Output (stdout) is unset, TrueNAS mails any standard output to the user account that runs the Command.
When Hide Standard Error (stderr) is unset, TrueNAS mails any error output to the user account that runs the Command. Unsetting Hide Standard Error helps debug the Command or script if an error occurs.
Unsetting Enabled only keeps the task from automatically running. You can still save the cron job and run it manually.
Managing a Cron Job
Go to Tasks > Cron Jobs and click the next to an entry to see details and options.
Clicking RUN NOW immediately starts the job Command, separately from any Schedule.
EDIT changes any setting available during task creation.
DELETE removes the cron job from TrueNAS. Once you delete a cron job, you cannot restore the job configuration.
2.8.2 - Creating Init/Shutdown Scripts
Explains how to create scheduled scripts on TrueNAS CORE.
Create an Init/Shutdown Script
TrueNAS can schedule commands or scripts to run at system startup or shutdown.
Go to Tasks > Init/Shutdown Scripts and click ADD.
Enter a Description, then select a Type.
Command Type
Enter a command with any options you want. You can find commands here or on our Community Forums.
Can I use a path for the Command?
You can also include the full path to a command in the entry.
Scheduled commands must be in the default path.
You can find the path to a command by entering which COMMAND in the shell, where COMMAND is the command you want to locate.
When available, the path to the command displays:
[root@freenas ~]# which ls
/bin/ls
Select when you want the Command to run and fill out the rest of the fields to your needs, then click SUBMIT.
Script Type
Select the path to the Script. The Script runs using sh(1). You can find some helpful scripts on our Community Forums.
Select when you want the Script to run and fill out the rest of the fields to your needs, then click SUBMIT.
Managing an Init/Shutdown Script
Always test the script to verify it executes and achieves the desired results.
All init/shutdown scripts are run with sh.
All saved Init/Shutdown tasks are in Tasks > Init/Shutdown Scripts.
Click (Options) next to a task to EDIT or DELETE that task.
2.8.3 - Creating Rsync Tasks
Provides information on how to create a remote sync (rsync) task on your TrueNAS.
Rsync is a fast and secure way to copy data to another system, either for backup or data migration purposes.
An rsync task requires configuration of both a Host and Remote system. These instructions assume a TrueNAS system for both the Host and Remote configurations.
Basic Requirements
Rsync requires a dataset with the needed data on the Host or Remote system.
Rsync provides the ability to either push or pull data.
When using rsync to push, data copies from a Host system to a Remote system.
When using rsync to pull, data pulls from a Remote system. It is then put on the Host system.
TrueNAS has extra requirements depending on if you choose the Module or SSH rsync mode.
Rsync Services Requirements
Before you create an rsync task on the Host system, you must create a module on the Remote system. The Remote system must have rsync service activated.
When TrueNAS is the Remote system, create a module by going to Services and clicking edit for the rsync service. Click the Rsync Module tab, then click ADD. See ConfiguringRsync for more information.
Creating a Module Mode Rsync Task
Log in to the Host system interface, go to Tasks > Rsync Tasks, and click ADD.
Select the Source dataset to use with the rsync task and a User account to run the rsync task.
Select a Direction for the rsync task.
Select a Schedule for the rsync task.
Enter the Remote Host IP address or host name.
Use the format username@remote_host when the user name differs on the Remote host.
Select Module in the Rsync Mode dropdown list.
Enter the Remote Module Name as it appears on the Remote system.
Configure the remaining options according to your specific needs.
Clearing Enabled disables the task schedule.
You can still save the rsync task and run it as a manual task.
Creating an SSH Mode Rsync Task
SSH Requirements
The Remote system must have SSH enabled.
To enable SSH in TrueNAS, go to Services and click the SSH toggle button. The toggle button turns blue when the service is on.
The Host system needs an established SSH connection to the Remote for the rsync task.
To create the connection, go to System > SSH Connections and click ADD.
Configure a Semi-automatic connection and from the Private Key dropdown list select Generate New.
Can this be set up in a command line instead?
Go to the shell on the system entered in the Host field.
When a TrueNAS account other than root manages the rsync task, enter su - USERNAME, where USERNAME is the TrueNAS user account that runs the rsync task.
Enter ssh-keygen -t rsa to create the key pair.
When prompted for a password, press Enter without setting a password (a password breaks the automated task).
Here is an example of running the command:
truenas# ssh-keygen -t rsa
Generating public/private rsa key pair.
Enter file in which to save the key (/root/.ssh/id_rsa):
Created directory '/root/.ssh'.
Enter passphrase (empty for no passphrase):
Enter the same passphrase again:
Your identification has been saved in /root/.ssh/id_rsa.
Your public key has been saved in /root/.ssh/id_rsa.pub.
The key fingerprint is:
SHA256:NZMgbuPvTHeEqi3SA/U5wW8un6AWrx8ZsRQdbJJHmR4 tester@truenas.local
The key randomart image is:
+---[RSA 2048]----+
| . o=o+ || . .ooE. || +.o==. || o.oo+.+ || ...S+. . || . ..++o. || o oB+. . || . =Bo+.o ||o+==oo |+----[SHA256]-----+
The default public key location is ~/.ssh/id_rsa.pub.
Enter cat ~/.ssh/id_rsa.pub to see the key and copy the file contents.
Copy it to the corresponding user account on the Remote system in Accounts > Users.
Click EDIT and paste the key into SSH Public Key.
Next, copy the host key from the Remote system to the Host system user .ssh/known_hosts directory, using ssh-keyscan.
On the host system, open the shell and enter ssh-keyscan -t rsa remoteIPaddress » userknown_hostsDir where remoteIPaddress is the Remote system IP address and userknown_hostsDir is the known_hosts directory on the host system.
Example: ssh-keyscan -t rsa 192.168.2.6 >> /root/.ssh/known_hosts.
SSH Mode Process
Go to Tasks > Rsync Tasks and click ADD.
Configure the SSH settings first by selecting SSH in the Rsync Mode dropdown list. Enter the Port number and Remote Path.
Define the Source dataset for the rsync task and select an account in User.
The name in User must be identical to the SSH ConnectionUsername.
Select a direction for the rsync task, either Push or Pull, and define the task Schedule.
Enter the Remote host IP address or host name.
Use the format username@remote_host if the user name differs on the Remote host.
Configure the remaining options according to your specific needs.
Clearing the Enabled checkbox disables the task schedule without deleting the configuration.
You can still run the rsync task by going to Tasks > Rsync Tasks and clicking , then RUN NOW.
Rsync Service and Modules
The rsync task does not work when the related system service is off.
To turn the rsync service on, go to Services and click the rsync toggle button. The toggle button turns blue when the service is on.
See Configuring Rsync for more information on rsync configuration and module creation.
2.8.4 - Running S.M.A.R.T. Tests
Provides information on how to run Self-Monitoring, Analysis and Reporting Technology (S.M.A.R.T.) tests on your TrueNAS.
S.M.A.R.T. (Self-Monitoring, Analysis and Reporting Technology) is an industry standard for disk monitoring and testing.
Disks are monitored for problems using several different kinds of self-tests.
TrueNAS can adjust when and how alerts for S.M.A.R.T. are issued.
When S.M.A.R.T. monitoring reports an issue, we recommend you replace that disk.
Most modern ATA, IDE, and SCSI-3 hard drives support S.M.A.R.T.
Refer to your respective drive documentation for confirmation.
S.M.A.R.T. tests run on a disk.
Running tests can reduce drive performance, so we recommend scheduling tests when the system is in a low-usage state.
Avoid scheduling disk-intensive tests at the same time!
For example, do not schedule S.M.A.R.T. tests on the same day as a disk scrub or resilver.
How do I check or change S.M.A.R.T. testing for a disk?
Go to Storage > Disks and click chevron_right to expand an entry.
Enable S.M.A.R.T. shows as true or false.
To enable or disable testing, click EDIT DISK(S) and find the Enable S.M.A.R.T. option.
Manual S.M.A.R.T. Tests
To quickly test a disk for errors, go to Storage > Disks and select the disks to be tested.
After selecting the desired disks, click MANUAL TEST.
Next, select the test Type.
Each test type can differ based on the drive connection, ATA or SCSI:
ATA Connection
Long - runs S.M.A.R.T. Extended Self-Test. This scans the entire disk surface and can take many hours on large-volume disks.
Short - runs S.M.A.R.T. Short Self-Test (usually under ten minutes). These are basic disk tests that vary by manufacturer.
Conveyance - runs S.M.A.R.T. Conveyance Self-Test.
This self-test routine identifies damage incurred during transporting of the device.
This self-test routine requires only minutes to complete.
Offline - runs S.M.A.R.T. Immediate Offline Test.
Updates the S.M.A.R.T. attribute values. If the test finds errors, the errors only appear in the SMART error log.
SCSI Connection
Long - runs the Background long self-test.
Short - runs the Background short self-test.
Offline - runs the default self-test in foreground.
No entry is placed in the self-test log.
Click START to begin the test.
Depending on the test type you choose, the test can take some time to complete.
TrueNAS generates alerts when tests discover issues.
Where can I view the test results?
Go to Storage > Disks, expand an entry, and click S.M.A.R.T. TEST RESULTS.
From the shell, use smartctl and the name of the drive: smartctl -l selftest /dev/ada0.
Automatic S.M.A.R.T. Tests
Go to Tasks > S.M.A.R.T. Tests and click ADD.
Select the Disks to test, Type of test to run, and Schedule for the task.
S.M.A.R.T. tests can offline disks! Avoid scheduling S.M.A.R.T. tests simultaneously with scrub or resilver operations.
Saved schedules appear in the Tasks > S.M.A.R.T. Tests list.
CLI
To verify the schedule is saved, you can open the shell and enter smartd -q showtests.
RAID controllers?
Disable the S.M.A.R.T. service when using a RAID disk controller.
The controller monitors S.M.A.R.T. separately and marks disks as a Predictive Failure on a test failure.
2.8.5 - Periodic Snapshot Tasks
Describes how to create periodic snapshot tasks on TrueNAS CORE.
A periodic snapshot task allows scheduling the creation of read-only versions of pools and datasets at a given point in time.
How should I use snapshots?
Snapshots do not make copies of the data, so creating one is quick. It is common to take frequent snapshots every 15 minutes, even for large and active pools.
A snapshot with no file changes takes no storage space, but as file changes happen, the snapshot size changes to reflect the size of the changes.
In the same way as all pool data, you recover the space after deleting the last reference to the data.
Snapshots keep a history of files, providing a way to recover an older copy or even a deleted file.
For this reason, many administrators take snapshots often, store them for a while, and store them on another system, typically using the Replication Tasks function.
Such a strategy allows the administrator to roll the system back to a specific point in time.
If there is a catastrophic loss, an off-site snapshot can restore data to when the last snapshot occured.
Creating a Periodic Snapshot Task
Go to Tasks > Periodic Snapshot Tasks and click ADD.
Choose the dataset (or zvol) to schedule as a regular backup with snapshots and determine how long to store them.
Define the task Schedule and configure the remaining options for your use case.
Snapshot Lifetimes
TrueNAS deletes snapshots when they reach the end of their life and preserves snapshots when at least one periodic task requires it.
For example, you have two schedules created where one schedule takes a snapshot every hour and keeps them for a week, and the other takes a snapshot every day and keeps them for three years.
Each has an hourly snapshot taken.
After a week, snapshots created at 01.00 through 23.00 get deleted, but you keep snapshots timed at 00.00 because they are necessary for the second periodic task.
These snapshots get destroyed at the end of 3 years.
Naming Schemas
The Naming Schema determines how automated snapshot names generate.
A valid schema requires the %Y (year), %m (month), %d (day), %H (hour), and %M (minute) time strings, but you can add more identifiers to the schema too, using any identifiers from the Python strptime function.
For Periodic Snapshot Tasks used to set up a replication task with the Replication Task function:
You can use custom naming schemas for full backup replication tasks. If you are using the snapshot for incremental replication tasks, use the default naming schema. Go to Using a Custom Schema for additional information.
This uses some letters differently from POSIX (Unix) time functions.
For example, including %z (time zone) ensures that snapshots do not have naming conflicts when daylight time starts and ends, and %S (second) adds finer time granularity.
When referencing snapshots from a Windows computer, avoid using characters like : that are invalid in a Windows file path.
Some applications limit filename or path length, and there might be limitations related to spaces and other characters.
Always consider future uses and ensure the name given to a periodic snapshot is acceptable.
Managing Periodic Snapshot Tasks
Click SUBMIT to save the task in Tasks > Periodic Snapshot Tasks.
You can find any snapshots from this task in Storage > Snapshots.
To check the log for a saved snapshot schedule, go to Tasks > Periodic Snapshot Tasks and click the task State.
2.8.6 - Creating Replication Tasks
TrueNAS CORE replication tutorials.
Local Replication: Describes how to create local replication tasks on TrueNAS CORE.
Remote Replication: Describes how to create a remote replication task on TrueNAS CORE.
Advanced Replication: Describes how to configure advanced replication tasks on TrueNAS CORE.
Troubleshooting Tips: Provides troubleshooting tips for replication tasks on TrueNAS CORE.
2.8.6.1 - Local Replication
Describes how to create local replication tasks on TrueNAS CORE.
Process Summary
Process Summary
Requirements: Storage pools and datasets created in Storage > Pools.
Go to Tasks > Replication Tasks and click ADD
Choose Sources.
Set the source location to the local system.
Use the file browser or type paths to the sources.
Define a Destination path.
Set the destination location to the local system.
Select or manually define a path to the single destination location for the snapshot copies.
Set the Replication schedule to run once.
Define how long the snapshots is stored in the Destination.
Clicking START REPLICATION immediately snapshots the chosen. Sources and copies those snapshots to the Destination.
Dialog might ask to delete existing snapshots from the Destination. Be sure to protect that all-important data before deleting anything.
Clicking the task State shows the logs for that replication task.
Quick Backups with the Replication Wizard
TrueNAS provides a wizard for quickly configuring different simple replication scenarios.
While we recommend regularly scheduled replications to a remote location as the optimal backup scenario, the wizard can quickly create and copy ZFS snapshots to another location on the same system.
This is useful when you have no remote backup locations or when a disk is in danger of failure.
All you need to create a local replication are datasets or zvols in a storage pool to use as the replication source and (preferably) a second storage pool to store replicated snapshots.
You can set up the local replication entirely in the Replication Wizard.
To open the Replication Wizard, go to Tasks > Replication Tasks and click ADD.
Set the source location to the local system and pick which datasets to snapshot.
The wizard takes new snapshots of the sources when it can’t find existing source snapshots. Enabling Recursive replicates all snapshots contained within the selected source dataset snapshots.
Local sources can also use a naming schema to identify and include custom snapshots in the replication.
A naming schema is a collection of strftime time and date strings and any identifiers that a user might have added to the snapshot name.
Set the Destination to the local system and define the path to the storage location for replicated snapshots.
When manually defining the Destination, type the full path to the destination location.
TrueNAS suggests a default name for the task based on the selected source and destination locations, but you can type your name for the replication.
You can load any saved replication task into the wizard to make creating new replication schedules even easier.
You can define a specific schedule for this replication or choose to run it immediately after saving the new task.
Unscheduled tasks are still saved in the replication task list and can be run manually or edited later to add a schedule.
The destination lifetime is how long copied snapshots store in the Destination before the system deletes them.
We usually recommend defining a snapshot lifetime to prevent storage issues.
Choosing to keep snapshots indefinitely can require you to manually clean old ones from the system if or when the Destination fills to capacity.
Clicking START REPLICATION saves the new task and immediately attempts to replicate snapshots to the Destination.
When TrueNAS detects that the Destination already has unrelated snapshots, it asks to delete the unrelated ones and do a full copy of the new ones.
START REPLICATION can delete data, so be sure you are okay with deleting any existing snapshots. Alternatively, back them up in another location.
The simple replication is added to the replication task list and shows that it is currently running.
Clicking the task state shows the replication log with an option to download it to your local system.
To confirm that snapshots replicated, go to Storage > Snapshots and verify the destination dataset has new snapshots with correct timestamps.
2.8.6.2 - Remote Replication
Describes how to create a remote replication task on TrueNAS CORE.
Configure SSH and automatic dataset snapshots in TrueNAS before creating a remote replication task.
This ensures that both systems can connect and new snapshots are regularly available for replication.
To streamline creating simple replication configurations, the replication wizard assists with creating a new SSH connection and automatically creates a periodic snapshot task for sources with no existing snapshots.
Process Summary
Process Summary
Tasks > Replication Tasks
Choose sources for snapshot replication.
Remote sources require an SSH connection.
TrueNAS shows how many snapshots will replicate.
Define the snapshot destination.
A remote destination requires an SSH connection.
Choose a destination or define it manually by typing a path.
Adding a new name at the end of the path creates a new dataset.
Choose replication security.
We always recommend replication with encryption.
Disabling encryption is only meant for absolutely secure networks.
Schedule the replication.
Schedule can be standardized presets or a custom-defined schedule.
Running once runs the replication immediately after creation.
Task is still saved and can be rerun or edited.
Choose how long to keep the replicated snapshots.
Creating a Remote Replication Task
Go to Tasks > Replication Tasks and click ADD.
You can load any saved replication to prepopulate the wizard with that configuration.
Saving changes to the configuration creates a new replication task without altering the one you loaded into the wizard.
This saves time when creating multiple replication tasks between the same two systems.
Sources
Start by configuring the replication sources.
Sources are the datasets or zvols with snapshots to use for replication.
Choosing a remote source requires selecting an SSH connection to that system.
Expanding the directory browser shows the current datasets or zvols available for replication.
You can select multiple sources or manually type the names into the field.
TrueNAS shows how many snapshots are available for replication.
We recommend you manually snapshot the sources or create a periodic snapshot task before creating the replication task.
However, when the sources are on the local system and don’t have any existing snapshots, TrueNAS can create a basic periodic snapshot task and snapshot the sources immediately before starting the replication. Enabling Recursive replicates all snapshots contained within the selected source dataset snapshots.
Remote sources require entering a Snapshot Naming Schema to identify the snapshots to replicate.
A naming schema is a collection of strftime time and date strings and any identifiers that a user might have added to the snapshot name.
Local sources can also use a naming schema to identify and include custom snapshots in the replication.
Destination
The destination is where replicated snapshots are stored.
Choosing a remote destination requires an SSH connection to that system.
Expanding the directory browser shows the current datasets that are available for replication.
You can select a destination dataset or manually type a path in the field.
You cannot use Zvols as a remote replication destination.
Adding a name to the end of the path creates a new dataset in that location.
Encryption: To use encryption when replicating data, check the Encryption box.
Encryption Key Format allows the user to choose between a Hex (base 16 numeral) or Passphrase (alphanumeric) style encryption key.
Store Encryption key in Sending TrueNAS database allows the user to either store the Encryption key in the sending TrueNAS database (box checked) or choose a temporary location for the encryption key to decrypt replicated data (box unchecked).
Security and Task Name
Using encryption for SSH transfer security is always recommended.
If you are using two systems within a secure network for replication, disabling encryption speeds up the transfer.
However, the data is not protected from malicious sources.
Choosing no encryption for the task is the same as choosing the SSH+NETCAT transport method from the advanced options screen.
NETCAT uses common port settings, but these can be overridden by switching to the advanced options screen or editing the task after creation.
TrueNAS suggests a name based on the selected sources and destination, but you can overwrite it with a custom name.
Adding a schedule automates the task to run according to your chosen times.
You can choose between several preset schedules or create a custom schedule for when the replication runs.
Choosing to run the replication once runs the replication immediately after saving the task, but you must manually trigger any additional replications.
Finally, define how long you want to keep snapshots on the destination system.
We recommend defining snapshot lifetime to prevent cluttering the system with obsolete snapshots.
Starting the Replication
Start Replication saves the new replication task.
TrueNAS enables new tasks by default and activates them according to their schedule (or immediately if you didn’t choose a schedule).
The first time a replication task runs, it takes longer because the snapshots must copy entirely fresh to the destination.
Later replications run faster, as only the subsequent changes to snapshots replicate.
Clicking the task state opens the log for that task.
2.8.6.3 - Advanced Replication
Describes how to configure advanced replication tasks on TrueNAS CORE.
Requirements:
Storage pools with datasets and data to snapshot.
SSH configured with a connection to the remote system saved in System > SSH Connections.
Dataset snapshot task saved in Tasks > Periodic Snapshot Tasks.
Process Summary
Go to Tasks > Replication Tasks and click ADD, then select ADVANCED REPLICATION CREATION.
General Options:
Name the task.
Select Push or Pull for the local system.
Select a replication transport method.
SSH is recommended.
SSH+Netcat is used for secured networks.
Local is for in-system replication.
Configure the replication transport method:
Remote options require an SSH connection.
SSH+Netcat requires defining Netcat ports and addresses.
Sources:
Select sources for replication.
Choose a periodic snapshot task as the source of snapshots to replicate.
Remote sources require defining a snapshot naming schema.
Destination:
Remote destination requires an SSH connection.
Select a destination or type a path in the field.
Define how long to keep snapshots in the destination.
Scheduling:
Run automatically starts the replication after a related periodic snapshot task completes.
To automate the task according to its schedule, set that option and define a schedule for the replication task.
Creating an Advanced Replication Task
To use the advanced editor to create a replication task, go to Tasks > Replication Tasks, click ADD to open the Wizard, then click ADVANCED REPLICATION CREATION.
Options group by category.
Options can appear, disappear, or be disabled depending on the configuration choices you make.
Start by configuring the General options first, then the Transport options before configuring replication Sources and Destination.
Name the task.
Each task name must be unique, and we recommend you name it in a way that makes it easy to remember what the task is doing.
Choose whether the local system is sending (Push) or receiving data (Pull) and decide what Transport method to use for the replication before configuring the other sections.
Transport Options
The Transport selector determines the method to use for the replication:
SSH is the standard option for sending or receiving data from a remote system, but SSH+NETCAT is faster for replications within completely secure networks.
Local is only used for replicating data to another location on the same system.
With SSH-based replications, configure the transport method by selecting the SSH Connection to the remote system that sends or receives snapshots.
Options for compressing data, adding a bandwidth limit, or other data stream customizations are available. Stream Compression options are only available when using SSH. Before enabling Compressed WRITE Records, verify that the destination system supports compressed WRITE records.
For SSH+NETCAT replications, you also need to define the addresses and ports to use for the Netcat connection.
Allow Blocks Larger than 128KB is a one-way toggle.
Replication tasks using large block replication only continue to work as long as this option remains enabled.
Source
The replication Source is the datasets or zvols to replicate.
Select the sources for the replication task by opening the file browser or entering dataset names in the field.
Pulling snapshots from a remote source requires a valid SSH Connection before the file browser can show any directories.
If the file browser shows a connection error after selecting the correct SSH Connection, you might need to log in to the remote system and ensure it allows SSH connections.
Go to the Services screen and check the SSH service configuration. Start the service.
By default, replication tasks use snapshots to quickly transfer data to the receiving system.
When Full Filesystem Replication is set, the chosen Source completely replicates, including all dataset properties, snapshots, child datasets, and clones.
When choosing this option, we recommend allocating additional time for the replication task to run.
Leaving Full Filesystem Replication unset but setting Include Dataset Properties includes just the dataset properties in the snapshots to be replicated.
Additional options allow you to recursively replicate child dataset snapshots or exclude specific child datasets or properties from the replication.
Local sources replicate by snapshots you generated from a periodic snapshot task or from a defined naming schema that matches manually created snapshots.
Remote sources require entering a snapshot naming schema to identify the snapshots to replicate.
A naming schema is a collection of strftime time and date strings and any identifiers that a user might have added to the snapshot name.
For example, entering the naming schema custom-%Y-%m-%d_%H-%M finds and replicates snapshots like custom-2020-03-25_09-15.
Multiple schemas can be entered by pressing Enter to separate each schema.
To define specific snapshots from the periodic task to replicate, set Replicate Specific Snapshots and enter a schedule.
The only periodically generated snapshots in the replication task are those that match your defined schedule.
Alternately, you can use your Replication Schedule to determine which snapshots replicate by setting Run Automatically, Only Replicate Snapshots Matching Schedule, and defining when the replication task runs.
When a replication task has difficulty completing, set Save Pending Snapshots.
Save Pending Snapshots prevents the source TrueNAS from automatically deleting any snapshots that fail to replicate to the destination system.
Destination
The destination is where replicated data is stored.
Choosing a remote destination requires an SSH Connection to that system.
Expanding the file browser shows the current available datasets on the destination system.
You can click a destination or manually type a path in the field.
Adding a name to the end of the path creates a new dataset in that location.
DO NOT use zvols for a remote destination
By default, the destination dataset is SET to be read-only after the replication is complete.
You can change the Destination Dataset Read-only Policy to only start replication when the destination is read-only (REQUIRE) or to disable checking the dataset’s read-only state (IGNORE).
Encryption adds another layer of security to replicated data by encrypting the data before transfer and decrypting it on the destination system.
Setting the checkbox allows using a HEX key or defining your own encryption PASSPHRASE.
The encryption key can be stored in the TrueNAS system database or in a custom-defined location.
Synchronizing Destination Snapshots With Source destroys any snapshots in the destination that do not match the source snapshots.
TrueNAS also fully replicates the source snapshots as if the replication task had never run before, which leads to excessive bandwidth consumption.
This can be a destructive option, so be sure that any snapshots that the task deletes from the destination are obsolete or otherwise backed up in a different location.
Defining the Snapshot Retention Policy is generally recommended to prevent cluttering the system with obsolete snapshots.
Choosing Same as Source keeps the snapshots on the destination system for the same duration as the defined snapshot lifetime from the source system periodic snapshot task.
You can also define your own Custom lifetime for snapshots on the destination system.
Schedule
By default, setting the task to Run Automatically starts the replication immediately after the related periodic snapshot task is complete.
Setting the Schedule checkbox allows scheduling the replication to run at a separate time.
Setting Only Replicate Snapshots Matching Schedule restricts the replication to only replicate those snapshots created at the same time as the replication schedule.
2.8.6.4 - Troubleshooting Tips
Provides troubleshooting tips for replication tasks on TrueNAS CORE.
Using a Custom Schema
You can use Snapshot Tasks set up or imported with a custom schema name for “full backup” replication tasks. Incremental replication tasks will not work.
There are several ways to create a custom schema:
Importing a ZFS dataset with snapshots into TrueNAS with a schema that doesn’t match the TrueNAS schema.
Creating a custom schema name in the Snapshot Task occurs when the Naming Schema field in a Periodic Snapshot Task is not the default.
Replication Task Log
To view and download the replication task log, go to Tasks > Replication Tasks.
Click on the state of the replication task.
Click the DOWNLOAD LOGS button to download the log file.
Editing a Replication Task
To edit the replication task, go to Tasks > Replication Tasks.
Click the > to expand the replication task information, then click EDIT.
To customize the importance and frequency of a Replication task alert (success or failure), go to System > Alert Settings and scroll down to the Tasks area.
Set the Warning Level and how often the alert notification sends.
See Alert Settings for more information about this UI screen.
FAQ
Question: If the internet connection goes down for a while, does the replication restart where it left off - including any intermediate snapshots?
Answer: Yes.
Question: If a site changes a lot of data at once and the internet bandwidth is not enough to finish sending the snapshot before the next one begins, do the replication jobs run one after the other and not stomp on each other?
Answer: Yes.
2.8.7 - Using Resilver Priority
Describes how to configure resilver priority tasks on TrueNAS CORE.
Resilvering is a process that copies data to a replacement disk. Complete it as quickly as possible.
Resilvering is a high priority task.
It can run in the background while performing other system functions, however, this can put a higher demand on system resources.
Increasing the priority of resilvers helps them finish faster as the system runs tasks with higher priority ranking.
Use the Resilver Priority screen to schedule a time where a resilver task can become a higher priority for the system and when the additional I/O or CPU use does not affect normal usage.
Go to Tasks > Resilver Priority to configure the priority to the best time for your environment.
Select Enabled, then use the dropdown lists to select a start time in Begin and time to finish in End to define a priority period for the resilver.
To select the day(s) to run the resliver, use the Days of the Week dropdown to select when the task can run with the priority given.
A resilver process running during the time frame defined between the beginning and end times likely runs faster than during times when demand on system resources is higher.
We advise you to avoid putting the system under any intensive activity or heavy loads (replications, SMB transfers, NFS transfers, Rsync transfers, S.M.A.R.T. tests, pool scrubs, etc) during a resilver process.
2.8.8 - Creating Scrub Tasks
Describes how to create scrub tasks on TrueNAS CORE.
A “scrub” is when ZFS scans the data on a pool.
Scrubs identify data integrity problems, detect silent data corruptions caused by transient hardware issues, and provide early disk failure alerts.
Edit Default Scrub Tasks
By default, TrueNAS creates a scrub task when you create a new pool.
The default schedule for a scrub is to run every Sunday at 12:00 AM.
To edit the default scrub, go to Tasks > Scrub Tasks, click , and EDIT.
Create New Scrub Tasks
To create a scrub task for a pool, go to Tasks > Scrub Tasks and click ADD.
Select a Pool, enter the Threshold (in days), and give the scrub a description. Assign a Schedule and click SUBMIT.
2.8.9 - Creating Cloud Sync Tasks
Describes how to configure cloud storage backup tasks in TrueNAS CORE.
Cloud sync tasks let TrueNAS integrate with a Cloud Storage provider for additional backup storage.
Cloud Sync tasks allow for single time transfers or recurring transfers on a schedule, and are an effective method to back up data to a remote location.
These providers are supported for Cloud Sync tasks in TrueNAS CORE:
Using the Cloud means that data can go to a third party commercial vendor not directly affiliated with iXsystems.
Please investigate and fully understand vendor pricing policies and services before creating any Cloud Sync task.
iXsystems is not responsible for any charges incurred from the use of third party vendors with the Cloud Sync feature.
Create a Cloud Storage Credential
Transferring data from TrueNAS to the Cloud requires saving Cloud Storage Provider credentials on the system.
To maximize security, TrueNAS encrypts credentials after saving.
However, this means that to restore any cloud credentials from a TrueNAS configuration file, you must enable Export Password Secret Seed when generating that configuration backup.
Remember to protect any downloaded TrueNAS configuration files.
Go to System > Cloud Credentials and click ADD.
Enter a credential Name and choose a Provider.
The rest of the options vary by Provider.
Enter the required Authentication strings to enable saving the credential.
Some providers can automatically populate the required Authentication strings by logging in to the account.
To automatically configure the credential, click Login to Provider and entering your account username and password.
We recommend verifying the credential before saving it.
Create a Cloud Sync Task
Requirements
All system Storage configured and ready to receive or send data.
A Cloud Storage provider account and a cloud storage location (like an Amazon S3 bucket).
Cloud Storage account credentials must be saved in System > Cloud Credentials.
Go to Tasks > Cloud Sync Tasks and click ADD.
Give the task a Description and select a cloud credential.
TrueNAS connects to the chosen Cloud Storage Provider and shows the available storage locations.
Decide if data is transferring to (PUSH) or from (PULL) the Cloud Storage location (Remote).
Choose a Transfer Mode:
SYNC keeps all the files identical between the two storage locations. If a sync encounters an error, the destination does not delete the files.
Syncing to a Backblaze B2 bucket does not delete files from the bucket, even when you delete those files locally.
Instead, Backblaze tags files with a version number or moves them to a hidden state.
To automatically delete old or unwanted files from the bucket, adjust the Backblaze B2 Lifecycle Rules.
COPY duplicates each source file into the destination, overwriting any destination files with the same name as the source.
Copying is the least potentially destructive option.
MOVE transfers the files from the source to the destination and deletes the original source files.
It also overwrites files with the same names on the destination.
Next, select a Schedule from the drop-down, or unset Enable to make the task available without running on a schedule.
Advanced Scheduler
Choosing a Presets option populates the rest of the fields.
To customize a schedule, enter crontab values for the Minutes/Hours/Days.
These fields accept standard cron values.
The simplest option is to enter a single number in the field.
The task runs when the time value matches that number.
For example, entering 10 means that the job runs when the time is ten minutes past the hour.
An asterisk (*) means match all values.
Specific time ranges are set by entering hyphenated number values.
For example, entering 30-35 in the Minutes field sets the task to run at minutes 30, 31, 32, 33, 34, and 35.
You can also enter lists of values.
Enter individual values separated by a comma (,).
For example, entering 1,14 in the Hours field means the task runs at 1:00 AM (0100) and 2:00 PM (1400).
A slash (/) designates a step value.
For example, while entering * in Days means the task runs every day of the month, */2 means the task runs every other day.
Combining all the above examples together creates a schedule running a task each minute from 1:30-1:35 AM and 2:30-2:35 PM every other day.
There is an option to select which Months the task runs.
Leaving each month unset is the same as selecting every month.
The Days of Week schedules the task to run on specific days.
This is in addition to any listed days.
For example, entering 1 in Days and setting Wed for Days of Week creates a schedule that starts a task on the first day of the month and every Wednesday of the month.
The Schedule Preview displays when the current settings mean the task runs.
Examples of CRON syntax
Syntax
Meaning
Examples
*
Every item.
* (minutes) = every minute of the hour. * (days) = every day.
*/N
Every Nth item.
*/15 (minutes) = every 15th minute of the hour (every quarter hour). */3 (days) = every 3rd day. */3 (months) = every 3rd month.
Comma and hyphen/dash
Each stated item (comma) Each item in a range (hyphen/dash).
1,31 (minutes) = on the 1st and 31st minute of the hour. 1-3,31 (minutes) = on the 1st to 3rd minutes inclusive, and the 31st minute, of the hour. mon-fri (days) = every Monday to Friday inclusive (every weekday). mar,jun,sep,dec (months) = every March, June, September, December.
Days can be specified as days of month, or days of week.
With these options, you can create flexible schedules similar to these examples:
Desired schedule
Values to enter
3 times a day (at midnight, 08:00 and 16:00)
months=*; days=*; hours=0/8 or 0,8,16; minutes=0 (Meaning: every day of every month, when hours=0/8/16 and minutes=0)
Every Monday, Wednesday and Friday, at 8.30 pm
months=*; days=mon,wed,fri; hours=20; minutes=30
1st and 15th day of the month, during October to June, at 00:01 am
Every 15 minutes during the working week, which is 8am - 7pm (08:00 - 19:00) Monday to Friday
Note that this requires two tasks to achieve: (1) months=*; days=mon-fri; hours=8-18; minutes=*/15 (2) months=*; days=mon-fri; hours=19; minutes=0 We need the second scheduled item, to execute at 19:00, otherwise we would stop at 18:45. Another workaround would be to stop at 18:45 or 19:45 rather than 19:00.
Advanced Options
Scripting and Environment Variables
Advanced users can write scripts that run immediately before or after the Cloud Sync task.
The Post-script field runs when the Cloud Sync task successfully completes.
You can pass a variety of task environment variables into the Pre-script and Post-script fields:
CLOUD_SYNC_ID
CLOUD_SYNC_DESCRIPTION
CLOUD_SYNC_DIRECTION
CLOUD_SYNC_TRANSFER_MODE
CLOUD_SYNC_ENCRYPTION
CLOUD_SYNC_FILENAME_ENCRYPTION
CLOUD_SYNC_ENCRYPTION_PASSWORD
CLOUD_SYNC_ENCRYPTION_SALT
CLOUD_SYNC_SNAPSHOT
There also are provider-specific variables like CLOUD_SYNC_CLIENT_ID or CLOUD_SYNC_TOKEN or CLOUD_SYNC_CHUNK_SIZE.
Remote storage settings:
CLOUD_SYNC_BUCKET
CLOUD_SYNC_FOLDER
Local storage settings:
CLOUD_SYNC_PATH
Testing Settings
Test the settings before saving by clicking DRY RUN.
TrueNAS connects to the Cloud Storage Provider and simulates a file transfer without sending or receiving data.
Cloud Sync Behavior
Saved tasks activate based on their schedule, or when you click RUN NOW.
An in-progress cloud sync must finish before another can begin.
Stopping an in-progress task cancels the file transfer and requires starting the file transfer over.
To view logs about a running task or a task most recent run, click the task status.
Cloud Sync Restore
To quickly create a new cloud sync task that uses the same options but reverses the data transfer, expand () on an existing task and click RESTORE.
Give the new task a Description and define the path to a storage location for the transferred data.
TrueNAS saves the restored cloud sync task as another entry in Tasks > Cloud Sync Tasks.
If the restore destination dataset is the same as the original source dataset, the restored files might have their ownership altered to root. If root did not create the original files and they need a different owner, you can recursively reset ACL Permissions of the restored dataset through the GUI or by running chown from the CLI.
2.8.10 - Using the Advanced Scheduler
Describes how to use the Advanced Scheduler on TrueNAS CORE.
Choosing a Presets option automatically populates all fields.
To customize a schedule, enter crontab values for the Minutes/Hours/Days.
The simplest option is to enter a single number in the field.
The task runs when the time value matches that number.
Entering 10 runs the task when the time is ten minutes past the hour.
An asterisk (*) matches all values.
Set specific time ranges by entering hyphenated number values.
Entering 30-35 in the Minutes field runs the task at minutes 30, 31, 32, 33, 34, and 35.
You can list individual values separated by a comma (,).
Entering 1,14 in the Hours field runs the task at 1:00 AM (0100) and 2:00 PM (1400).
A slash (/) designates a step value.
Entering * in Days runs the task every day of the month, while */2 runs it every other day.
Combining all the above examples creates a schedule running a task each minute from 1:30-1:35 AM and 2:30-2:35 PM every other day.
There is an option to select which Months the task runs.
Leaving each month unset is the same as selecting every month.
The Days of Week schedules the task to run on specific days plus any listed days.
Entering 1 in Days and setting Wed for Days of Week creates a schedule that starts a task on the first day of the month and every Wednesday of the month.
The Schedule Preview displays when the current settings mean the task runs.
Examples of CRON syntax
Syntax
Meaning
Examples
*
Every item.
* (minutes) = every minute of the hour. * (days) = every day.
*/N
Every Nth item.
*/15 (minutes) = every 15th minute of the hour (every quarter hour). */3 (days) = every 3rd day. */3 (months) = every 3rd month.
Comma and hyphen/dash
Each stated item (comma) Each item in a range (hyphen/dash).
1,31 (minutes) = on the 1st and 31st minute of the hour. 1-3,31 (minutes) = on the 1st to 3rd minutes inclusive, and the 31st minute, of the hour. mon-fri (days) = every Monday to Friday inclusive (every weekday). mar,jun,sep,dec (months) = every March, June, September, December.
You can specify days as days of the month or days of the week.
With these options, you can create flexible schedules similar to these examples:
Desired schedule
Values to enter
3 times a day (at midnight, 08:00 and 16:00)
months=*; days=*; hours=0/8 or 0,8,16; minutes=0 (Meaning: every day of every month, when hours=0/8/16 and minutes=0)
Every Monday, Wednesday and Friday, at 8.30 pm
months=*; days=mon,wed,fri; hours=20; minutes=30
1st and 15th day of the month, during October to June, at 00:01 am
Every 15 minutes during the working week, which is 8am - 7pm (08:00 - 19:00) Monday to Friday
Note that this requires two tasks to achieve: (1) months=*; days=mon-fri; hours=8-18; minutes=*/15 (2) months=*; days=mon-fri; hours=19; minutes=0 We need the second scheduled item, to execute at 19:00, otherwise we would stop at 18:45. Another workaround is to stop at 18:45 or 19:45 rather than 19:00.
2.8.11 - Backing Up Google Drive to TrueNAS
Describes how to back up Google Drive to TrueNAS CORE.
Google Drive and G Suite are widely used to create and share documents, spreadsheets, and presentations with team members.
Although cloud-based tools have inherent backups and replications included by the cloud provider, certain users may require additional backup or archive capabilities.
For example, companies using G Suite for important work may need to keep records for years, potentially beyond the scope of the G Suite subscription.
TrueNAS can easily back up Google Drive using its built-in cloud sync.
Set up Google Drive Credentials
Go to System > Cloud Credentials and click ADD.
Name the Credential and select Google Drive as the Provider.
Click LOGIN TO PROVIDER and log in with the appropriate Google user account.
Google requests permission to access all the Google Drive files for the FreeNAS device.
Allow access. The appropriate access key generates in the FreeNAS access token. You may assign a Team ID if necessary.
Click VERIFY CREDENTIAL and wait for it to verify, then click SUBMIT
Create the Cloud Sync Task
Go to Tasks > Cloud Sync Tasks and set the backup time frame, frequency, and folders (cloud-based folder and TrueNAS dataset).
Set whether the synchronization should sync all changes, copy new files, or move files.
Add a description for the task and select the cloud credentials.
Choose the appropriate cloud folder target and TrueNAS storage location.
Select the file transfer mode:
Sync: Keep files newly created or deleted the same.
Copy: Copy new files to the appropriate target (i.e., TrueNAS pulls files from Google Drive or pushes files to Google Drive).
Move: Copy files to the target and delete them from the source. With Move, users can set a folder in Google Drive for archival and move older documents to that folder from their Drive account. The task would automatically back up the files to the TrueNAS storage.
Once you create the task, attempt a Dry Run.
If the Dry Run succeeds, click SAVE..
Expand the section down to see the task options.
Clicking RUN NOW prompts the task to start immediately.
The web interface shows the status as RUNNING and SUCCESS upon completion. You can see details in the Task Manager. While the task runs, clicking on the RUNNING button reveals a popup log.
Once the sync reports SUCCESS, you can verify it by opening the folder on another computer if it is a share, through SSH access, or by checking the destination directory through the TrueNAS CLI.
Working with Google-Created Content
One caveat is that Google Docs and other files created with Google tools have their own proprietary set of permissions and their read/write characteristics unknown to the system over a standard file share. Files are unreadable as a result.
To allow Google-created files to become readable, allow link sharing to access the files before the backup. Doing so ensures that other users can open the files with read access, make changes, and then save them as another file if further edits are needed. Note that this is only necessary if the file was created using Google Docs, Google Sheets, or Google Slides; other files should not require modification of their share settings.
TrueNAS is perfect for storing content, including cloud-based content, for the long term. Not only is it simple to sync and backup from the cloud, but users can rest assured that their data is safe, with snapshots, copy-on-write, and built-in replication functionality.
2.9 - Network
Provides information on using the Network Summary screen and lists other tutorials related to configuring CORE networking.
Network Summary
The Network Summary screen gives a concise overview of the current network setup.
It provides information about the currently active interfaces, default routes, and name servers configured on the system.
These areas are not editable.
Interfaces shows configured physical, bridge, link aggregation LAGG, and virtual LAN vlan interfaces.
All detected physical interfaces are listed, even when unconfigured.
The IPv4 or IPv6 address displays when a static IP is saved for an interface.
Default Routes lists all saved TrueNAS default routes.
Go to Network > Global Configuration to configure default routes.
Nameservers lists any configured DNS name servers that TrueNAS uses.
To change this list, go to Network > Global Configuration.
Network > Global Configuration contains the TrueNAS host name and domain, and default gateway. It also contains other options.
To edit an interface, click > next to it to expand the view. This provides a general description about the chosen interface. Click EDIT.
TrueNAS Enterprise customers: you cannot edit an interface with High Availability (HA) enabled. Go to System > Failover and check the Disable Failover box, then click SAVE.
The Type of interface determines the interface editing options available.
After completing interface editing, click SAVE.
You have the option to TEST CHANGES or REVERT CHANGES.
The default time for testing changes is 60 seconds, but you can change it to your desired setting.
After clicking TEST CHANGES, confirm your choice and click TEST CHANGES again.
Either click SAVE CHANGES or REVERT CHANGES.
You have the time specified to make this choice.
Clicking SAVE CHANGES opens a dialog with the option to CANCEL or SAVE network interface changes. Click SAVE.
The system displays a dialog that shows the network interface changes are now permanent.
Interface Articles
Setting Up a Network Bridge: Provides instructions on setting up a network bridge interface on TrueNAS CORE.
Setting Up Link Aggregations: Provides instructions on setting up a network link aggregation (LAGG) interface on TrueNAS CORE.
Setting Up a Network VLAN: Provides instructions on setting up a network VLAN interface on TrueNAS CORE.
Provides instructions on setting up a network bridge interface on TrueNAS CORE.
A bridge generally refers to various methods of combining (aggregating) many network connections. These form a single total network. TrueNAS uses bridge(4) to manage bridges.
To set up a bridge interface, go to Network > Interface > Add.
Select Bridge as the Type and enter a name for the interface. The name must use the format bridgeX*, where X is a number representing a non-parent interface.
It is also recommended to add any notes or reminders. Enter details about this particular bridge in Description.
The next section is Bridge Settings. Use the dropdown list next to Bridge Members to select the correct interfaces. Configure the remaining interface options to match your networking needs.
Every kind of network interface has common settings:
Disabling Hardware Offloading can reduce network performance. It is not recommended.
Disabling this option is sometimes necessary. For example, when the interface is managing jails, plugins, or virtual machines.
MTU stands for maximum transmission unit. It is the largest protocol unit for transferring data.
MTU size varies. Physical hardware and available network interfaces determine the largest workable MTU size.
1500 and 9000 are standard Ethernet MTU sizes. The recommendation is to use the default 1500.
The permissible range of MTU values is 1492-9216.
Leaving this field blank sets the default value of 1500.
You can enter more tuning ifconfig settings in the Options.
IP Addresses
Additional aliases for the interface can also be defined:
It is possible to define either IPv4 or IPv6 addresses and subnets from 1-32.
Clicking Add provides another field for defining an IP address.
2.9.1.2 - Setting Up Link Aggregations
Provides instructions on setting up a network link aggregation (LAGG) interface on TrueNAS CORE.
A Link Aggregation (LAGG) is a general method of combining (aggregating) many network connections. The connections are either parallel or in series. This provides extra bandwidth or redundancy for critical networking situations. TrueNAS uses lagg(4) to manage LAGGs.
To set up a LAGG interface, go to Network > Interface > Add.
Set the Type to Link Aggregation.
Enter a name for the interface. The name must use the format laggX, where X is a number representing a non-parent interface.
Enter any notes or reminders about this particular LAGG in the Description field.
Go to LAGG Settings and then Lagg Protocol to configure the interface ports to match your networking needs:
Lagg Protocols
LACP
The most commonly used LAGG protocol.
It is one part of IEEE specification802.3ad. LACP mode performs negotiation with the network switch to form a group of ports.
These are all active at the same time.
The network switch must support LACP for this option to function.
Failover
Failover sends traffic through the primary interface of the group.
Traffic diverts to the next available interface in the LAGG if the primary is not accessible.
Load Balance
Load Balance accepts inbound traffic on any port of the LAGG group.
It then balances the outgoing traffic on the active ports in the LAGG group.
It is a static setup that does not watch the link state nor does it negotiate with the switch.
Round Robin
Round robin accepts inbound traffic on any port of the LAGG group.
It sends outbound traffic using a round robin scheduling algorithm.
The outbound traffic sends in sequence, using each LAGG interface in turn.
None
This mode disables traffic on the LAGG interface without disabling the LAGG interface.
Lagg Interfaces
Now define the Lagg Interfaces and review the remaining interface options.
Every kind of network interface has common settings:
Disabling Hardware Offloading can reduce network performance. It is not recommended.
Disabling this option is sometimes necessary. For example, when the interface is managing jails, plugins, or virtual machines.
MTU stands for maximum transmission unit. It is the largest protocol unit for transferring data.
MTU size varies. Physical hardware and available network interfaces determine the largest workable MTU size.
1500 and 9000 are standard Ethernet MTU sizes. The recommendation is to use the default 1500.
The permissible range of MTU values is 1492-9216.
Leaving this field blank sets the default value of 1500.
You can enter more tuning ifconfig settings in the Options.
IP Addresses
Additional aliases for the interface can also be defined:
It is possible to define either IPv4 or IPv6 addresses and subnets from 1-32.
Clicking Add provides another field for defining an IP address.
2.9.1.3 - Setting Up a Network VLAN
Provides instructions on setting up a network VLAN interface on TrueNAS CORE.
A virtual LAN (VLAN) is a specialized domain in a computer network. It is a domain partitioned and isolated at the data link layer (OSI layer 2). See here for more information on VLANs. TrueNAS uses vlan(4) to manage VLANS.
To set up a VLAN interface, go to Network > Interface > Add.
Set the Type to VLAN and enter a name for the interface in Name. The name must use the format vlanX, where X is a number representing a non-parent interface.
Enter any notes or reminders about this VLAN in the Description field.
Determine the requirements of your network environment before enabling DHCP or AutoconfigureIPv6.
It is important to understand how this new interface functions in your situation. By default, TrueNAS allows only one network interface to have DHCP enabled.
Give careful attention to the remaining VLAN Settings. These need proper configuration in order for the network interface to function.
Parent Interface where you select the VLAN parent interface. This is usually an Ethernet card connected to a switch port already configured for the VLAN.
Vlan Tag where you enter a numeric tag for this interface. This is usually preconfigured in the switched network.
There are a few extra interface options to review after the VLAN options are set. See Interfaces Screen for more information on settings.
Other Settings
Every kind of network interface has common settings:
Disabling Hardware Offloading can reduce network performance. It is not recommended.
Disabling this option is sometimes necessary. For example, when the interface is managing jails, plugins, or virtual machines.
MTU stands for maximum transmission unit. It is the largest protocol unit for transferring data.
MTU size varies. Physical hardware and available network interfaces determine the largest workable MTU size.
1500 and 9000 are standard Ethernet MTU sizes. The recommendation is to use the default 1500.
The permissible range of MTU values is 1492-9216.
Leaving this field blank sets the default value of 1500.
You can enter more tuning ifconfig settings in the Options.
IP Addresses
Additional aliases for the interface can also be defined:
It is possible to define either IPv4 or IPv6 addresses and subnets from 1-32.
Clicking Add provides another field for defining an IP address.
2.9.1.4 - Setting a Static IP Address for the TrueNAS UI
Provides instructions on configuring a network interface for static routes on TrueNAS CORE.
Disruptive Change
It is possible to make changes to the network interface that the web interface uses. But this can result in losing connection to the TrueNAS system!
Very often fixing misconfigured network settings requires command line knowledge. Physical access to the system is often required as well.
Multiple interfaces connected to a single TrueNAS system cannot be members of the same subnet.
You can combine multiple interfaces with link aggregation (LAGG) or a network bridge.
Alternatively, you can assign multiple static IP addresses to a single interface by configuring aliases.
Click for more information
When multiple network interface cards (NICs) connect to the same subnet, users might incorrectly assume that the interfaces automatically load balance.
However, ethernet network topology allows only one interface to communicate at a time.
Additionally, both interfaces must handle broadcast messages since they are listening on the same network.
This configuration adds complexity and significantly reduces network throughput.
If you require multiple NICs on a single network for performance optimization, you can use a link aggregation (LAGG) configured with Link Aggregation Control Protocol (LACP).
A single LAGG interface with multiple NICs appears as a single connection to the network.
While LACP is beneficial for larger deployments with many active clients, it might not be practical for smaller setups.
It provides additional bandwidth or redundancy for critical networking situations.
However LACP has limitations as it does not load balance packets.
On the other hand, if you need multiple IP addresses on a single subnet, you can configure one or more static IP aliases for a single NIC.
In summary, we recommend using LACP if you need multiple interfaces on a network.
If you need multiple IP addresses, define aliases. Deviation from these practices might result in unexpected behavior.
For a detailed explanation of ethernet networking concepts and best practices for networking multiple NICs, refer to this discussion from National Instruments.
Process Summary
Configuring a static IP address involves both the TrueNAS web UI and the Console Setup menu.
Web UI
Network > Interfaces > Add or Edit
Type address into IP Address and select a subnet mask.
Add or Delete additional addresses as needed.
Test saved changes before permanently applying them.
Dialog asks to temporarily apply changes.
After you apply the network settings changes, they don’t immediately become permanent. You can choose the amount of time the new settings will work as temporary settings. After this designated amount of time, the new network settings become permanent if you save them. Saving the new network changes overwrites the previous configuration.
Network > Network Summary summarizes addressing information of every configured interface.
Console menu
Physical Interfaces: select Configure Network Interfaces (options are similar for other interface types)
Delete interface? enter or select n
Remove interface settings? enter or select n
Configure IPv4? enter or select y
Enter IP address and subnet mask
Configure IPv6 enter or select y
Enter IP address
Configure failover? enter or select n
Saving changes interrupts the web interface and could require a system reboot.
Setting Static IP Addresses
TrueNAS can configure physical network interfaces with static IP addresses. Use either the web interface or the system console menu.
The recommendation is to use the web interface for this process. There are extra safety features to prevent saving misconfigured interface settings.
Adding Static IP Addresses Using the Web Interface
Log in to the web interface and go to Network > Interfaces.
This contains creation and configuration options for physical and virtual network interfaces.
Type the desired address in the IP Address field and select a subnet mask.
Multiple interfaces cannot be members of the same subnet.
If an error displays when setting the IP addresses on multiple interfaces, check the subnet.
Use the buttons to Add and Delete more IP addresses as needed.
To avoid saving invalid or unusable settings, network changes are at first temporary.
Applying any interface changes adds a dialog to the Network > Interfaces list.
You can adjust how long to test the network changes before they revert back to the previous settings.
If the test is successful, another dialog allows making the network changes permanent.
To view system networking settings, go to Network > Network Summary.
Using the System Console Menu to Assign Static IP Addresses to a Physical Interface
You need to have a monitor and keyboard attached to the system to use the console. If the system hardware allows it, you can connect with IPMI.
The console menu displays after the system completes booting.
To add static IP addresses to a physical interface, go to Configure Network Interfaces.
Other interface types have a similar process to add static IP addresses.
Interfaces that are already configured for DHCP have that option disabled.
There are many prompts to answer before you can add a static address.
This example shows adding static IPv4 addresses to interface igb0:
Example
  Enter an option from 1-11: 1
  1) igb0
  2) igb1
  Select an interface (q to quit): 1
  Delete interface? (y/n) n
  Remove the current settings of this interface? (This causes a momentary disconne
  ction of the network.) (y/n) n
  Configure IPv4? (y/n) y
  Interface name:
  Several input formats are supported
  Example 1 CIDR Notation:
      192.168.1.1/24
  Example 2 IP and Netmask separate:
      IP: 192.168.1.1
      Netmask: 255.255.255.0, /24 or 24
  IPv4 Address:10.238.15.194/22
  Saving interface configuration: Ok
  Configure IPv6? (y/n) n
  Configure failover settings? (y/n) n
  Restarting network: ok
  Restarting routing: ok
Saving interface configuration changes disrupts the web interface while system networking restarts.
The new settings might need a system reboot to take effect. If the web interface is unavailable, this could also require a reboot. Check if the network interface you changed is the one utilized by the web interface.
2.9.2 - Define Static Routes
Provides instructions on setting up static routes on TrueNAS CORE.
Static routes are fixed, or non-adaptive routes. They are manually configured routes in the routing table.
It is recommended to use the web UI for all configuration tasks. TrueNAS does not have static routes defined by default.
When required, add a static route by going to Network > Static Routes and clicking ADD.
Enter a Destination IP address. Use the format A.B.C.D/E where E is the CIDR mask.
Enter the IP address of the Gateway.
Enter any notes or identifiers describing the route in Description.
2.9.3 - Enabling WireGuard
Provides instructions on setting up WireGuard on TrueNAS CORE.
WireGuard is a popular option in the VPN marketplace. It is fast, simple, and uses modern cryptography standards. It is possible to connect your NAS to a WireGuard network in a few easy steps. Systems running FreeNAS version 11.3-RC1 through TrueNAS 13.0 have WireGuard capability.
Configure System Tunables for WireGuard
Go to System > Tunables > Add and use these settings to enable the service:
Variable = wireguard_enable
Value = YES
Type = rc.conf
Next, create another tunable to define the networking interface:
Variable = wireguard_interfaces
Value = wg0
Type = rc.conf
When finished, TrueNAS sets and enables the two variables.
Configure a Init/Shutdown Script
Next, create a post-init script. This places the WireGuard config in the correct location at startup.
Go to Tasks > Init/Shutdown Scripts and click Add.
Configure the script to load the WireGuard .conf file each time the system boots:
You can configure the /root/wg0.conf file. This applies a WireGuard configuration to attach to whatever WireGuard network you define.
It can be a single point-to-point to anything running WireGuard. It can even use full routing.
Example use cases are:
Access data on a NAS from your Remote Laptop
Linking NAS to NAS for replication
Attaching a managed NAS to a remote network
Access to your NAS from your smartphone
Create the File with WireGuard Configuration to Apply at Boot
Now create the /root/wg0.conf. This is the specific WireGuard configuration to apply at boot.
These file settings depend on your specific networking environment and requirements. Their configuration is beyond the scope of this article.
Determine that you have a valid /root/wg0.conf. If so, rebooting the system brings up the WireGuard interface with a wg0 device in the output of ifconfig.
2.9.4 - IPMI
Provides instructions on setting up Intelligent Platform Management Interface (IPMI) on TrueNAS CORE.
IPMI requires compatible hardware! Refer to your hardware documentation. Hardware compatibility determines if the IPMI option displays in the TrueNAS web interface.
Many TrueNAS Storage Arrays provide a built-in out-of-band management port. If the system becomes unavailable through the web interface, you can use this port to provide side-band management. Use IPMI to perform several vital functions. These include checking the log, accessing the BIOS setup, and powering on the system. IPMI does not need physical access to the system. You can use it to allow another person remote access to the system. This is useful when investigating a configuration or troubleshooting issue.
Configure IPMI by going to Network > IPMI. The IPMI configuration screen provides a shortcut to the most basic IPMI configuration.
IPMI Configuration
Use the Network > IPMI screen to configure IPMI settings. See IPMI Screen for more information on IPMI settings.
Click SAVE to save the IPMI settings.
Connecting to the IPMI
Save the configuration. Access the IPMI interface using a web browser and the IP address specified in Network > IPMI. The management interface prompts for login credentials. Refer to your IPMI device documentation to learn the default administrator account credentials.
Log in to the management interface. Here you can change the default administrative user name and create extra IPMI users. The appearance of the IPMI utility and the functions that are available vary by hardware.
2.10 - Storage
Tutorials about different TrueNAS storage management topics.
Pools: Provides instructions on creating and pool, and lists other pool and storage articles in TrueNAS CORE.
Importing Pools: Describes how to import storage pools on TrueNAS CORE.
Managing Pools: Describes how to manage storage pools on TrueNAS CORE.
Creating Datasets: Describes how to create and configure a dataset on TrueNAS CORE.
Adding Zvols: Describes how to create a Zvol on TrueNAS CORE.
Permissions: This articled describes permissions configuration on TrueNAS CORE.
Storage Encryption: Describes how to encrypt a storage pool in TrueNAS CORE.
Fusion Pools: Describes how to create a Fusion Pool on TrueNAS CORE.
SLOG Overprovisioning: Describes how to configure SLOG over-provisioning on TrueNAS CORE.
Import Disk: Describes how to import a disk on TrueNAS CORE.
2.10.1 - Pools
Provides instructions on creating and pool, and lists other pool and storage articles in TrueNAS CORE.
TrueNAS uses ZFS data storage pools to efficiently store and protect data.
What is a pool?
Storage pools are attached drives organized into virtual devices (vdevs).
Drives are arranged inside vdevs to provide varying amounts of redundancy and performance.
This allows for high performance pools, pools that maximize data lifetime, and all situations in between.
ZFS and TrueNAS periodically reviews and heals whenever a bad block is discovered in a pool.
Review Storage Needs
We strongly recommend that you review the available system resources and plan the storage use case before creating a storage pool.
Review when:
Storing critical information. More drives allocated to the pool increases redundancy.
Maximizing total available storage at the expense of redundancy or performance means allocating large volume disks and configuring the pool for minimal redundancy.
Maximizing pool performance means installing and allocating high-speed SSD drives to the pool.
Determining your specific storage requirements is a critical step before creating a pool.
To create a new pool, go to Storage > Pools and click ADD.
The Create or Import Pool screen of the pool creation screens opens.
Select Create new pool and click CREATE POOL to open the Pool Manager.
To begin, enter a name for the pool in Name.
Do not include spaces in the pool name as this could cause problems with other functions.
Encryption?
Encryption algorithms are available as an option for maximizing data security, however, this also complicates how data is retrieved and risks permanent data loss!
Refer to the Encryption article for more details and decide if encryption is necessary for your use case before setting any encryption options.
Next, configure the virtual devices (vdevs) that make up the pool.
Using Suggest Layout
Clicking SUGGEST LAYOUT allows TrueNAS to review all available disks and populate the primary data vdevs with identically sized drives in a balanced configuration between storage capacity and data redundancy.
To clear the suggestion, click RESET LAYOUT.
To manually configure the pool, add vdevs according to your use case.
Select the Disk checkboxes and click the to move the disks into the Data VDevs list.
USB-connected disks might report their serial numbers inaccurately, making them indistinguishable from each other.
Using Vdev Types
Pools have many different kinds of vdevs available.
These store data or enable unique features for the pool:
Data
Standard vdev for primary storage operations.
Each storage pool requires at least one data vdev.
Data vdev configuration typically affects how the other kinds of vdevs are configured.
Duplicating a Data VDev
A Data VDev with disks is duplicated by clicking REPEAT.
When more disks are available and equal in size, the REPEAT button creates another vdev with an identical configuration called a mirror of vdevs.
When even more same-size disks are available, you can create multiple copies of the original vdev.
Do not have multiple data vdevs with different numbers of disks in each vdev as this complicates and limits the pool capabilities.
Cache
ZFS L2ARC read-cache is used with fast devices to accelerate read operations.
You can add or remove this after creating the pool.Log
ZFS LOG is a device that improves synchronous write speeds.
You can add or remove this after creating the pool.Hot Spare
Hot Spare sets up drives as reserved to insert into Data vdevs when an active drive fails.
Hot spares are temporarily used as replacements for failed drives to prevent larger pool and data loss scenarios.
When a failed drive is replaced with a new drive, the hot spare reverts to an inactive state and is available again as a hot spare.
When the failed drive is only detached from the pool, the temporary hot spare is promoted to a full data vdev member and is no longer available as a hot spare.
Metadata
Metadata vdevs are a special allocation class used to create Fusion Pools for increased metadata and small block I/O performance.Dedup
Dedup vdevs store ZFS de-duplication.
Requires allocating X GiB for every X TiB of general storage.
For example, 1 GiB of dedup vdev capacity for every 1 TiB of data vdev availability.
To add a different vdev type during pool creation, click ADD VDEV and select the type.
Select disks from Available Disks and use the (right arrow) next to the new VDev to add it to that section.
Vdev Layout
Disks added to a vdev arrange in different layouts, according to the specific pool use case.
Can I create vdevs with different layouts in one pool?
Adding multiple vdevs with different layouts to a pool is not supported.
Create a new pool when a different vdev layout is required.
For example, pool1 has a data vdev in a mirror layout, so create pool2 for any raid-z vdevs.Stripe
Each disk is used to store data.
Requires at least one disk and has no data redundancy.
Never use a stripe type vdev to store critical data!
A single disk failure results in losing all data in the vdev.
Mirror
Data is identical in each disk.
Requires at least two disks, has the most redundancy, and the least capacity.RAIDZ1
Uses one disk for parity while all other disks store data.
Requires at least three disks.RAIDZ2
Uses two disks for parity while all other disks store data.
Requires at least four disks.RAIDZ3
Uses three disks for parity while all other disks store data.
Requires at least five disks.
The Pool Manager suggests a vdev layout from the number of disks added to the vdev.
For example, if adding two disks, TrueNAS automatically configures the vdev as a mirror, where the total available storage is the size of one added disk while the other disk provides redundancy.
To change the vdev layout, open the Data VDevs list and select the desired layout.
Pool Articles
Importing Pools: Describes how to import storage pools on TrueNAS CORE.
Managing Pools: Describes how to manage storage pools on TrueNAS CORE.
Creating Datasets: Describes how to create and configure a dataset on TrueNAS CORE.
Adding Zvols: Describes how to create a Zvol on TrueNAS CORE.
Permissions: This articled describes permissions configuration on TrueNAS CORE.
Storage Encryption: Describes how to encrypt a storage pool in TrueNAS CORE.
Fusion Pools: Describes how to create a Fusion Pool on TrueNAS CORE.
SLOG Overprovisioning: Describes how to configure SLOG over-provisioning on TrueNAS CORE.
2.10.1.1 - Importing Pools
Describes how to import storage pools on TrueNAS CORE.
This procedure only applies to disks with a ZFS storage pool.
To import disks with different file systems, see Import Disk.
ZFS pool importing works for pools that were exported or disconnected from the current system, created on another system, and pools to reconnect after reinstalling or upgrading the TrueNAS system.
To import a pool, go to Storage > Pools > ADD.
Do I need to do anything different with disks installed on a different system?
When physically installing ZFS pool disks from another system, use the command zpool export poolname in the command line or a web interface equivalent to export the pool on that system.
Shut that system down and move the drives to the TrueNAS system.
Shutting down the original system prevents an in use by another machine error during the TrueNAS import.
There are two kinds of pool imports, standard ZFS pool imports and ZFS pools with legacy GELI encryption.
Pool Import Options
Standard ZFS Pool
Standard ZFS Pools
Select Import Existing Pool and click NEXT.
The wizard asks if the pool has legacy GELI encryption.
Select No, continue with import and click NEXT.
TrueNAS detects any pools that are present but unconnected.
Choose the ZFS pool to import and click NEXT.
Review the Pool Import Summary and click IMPORT.
ZFS Pool with GELI
Encrypted GELI Pools
Importing a GELI-encrypted pool requires using the encryption key file and passphrase to decrypt the pool before importing.
When a pool cannot be decrypted, it cannot be re-imported after a failed upgrade or lost configuration, and the data is irretrievable!
Always have a copy of the pool GELI key file and passphrase available.
Select Import Existing Pool and click NEXT.
The wizard asks if the pool has legacy GELI encryption.
Select Yes, decrypt the disks and review the decryption options.
Make sure the Disks selection shows the encrypted disks and partitions that are part of the incoming pool.
Apply the GELI encryption key file by clicking Choose File and uploading the file from your local system.
When a passphrase is also present, enter it in Passphrase.
Click Next and wait for the disks to decrypt.
When the disks are decrypted, select the GELI pool to import.
Review the Pool Import Summary and click IMPORT.
GELI encrypted pools show in Storage > Pools as (Legacy Encryption).
Back Up the Pool Key
For security reasons, encrypted pool keys do not save to a configuration backup file.
When TrueNAS is installed to a new device and restored with a saved configuration file, keys for encrypted disks are not present and the system does not request them.
To correct this, export the encrypted pool in Storage > Pools with settings > Export/Disconnect.
Do not select Destroy data on this pool?.
Now import the pool again.
During the import, add the encryption keys as described previously.
2.10.1.2 - Managing Pools
Describes how to manage storage pools on TrueNAS CORE.
After creating a data storage pool, there are a variety of options to change the initial configuration of that pool.
Changing a pool can be disruptive, so make sure you are aware of existing resources on the system and consider backing up any stored data before changing the pool.
To find an existing pool, log in to the web interface and go to Storage > Pools.
The current status and storage usage of each pool is shown.
To see more details about a pool, click the expand_more expand symbol on the right side of the pool entry.
Click the for all pool management options.
Pool Actions
Pool Options
Contains any additional high-level settings for the pool.
Auto TRIM allows TrueNAS to periodically check the pool disks for storage blocks that can be reclaimed.
This can have a performance impact on the pool, so the option is disabled by default.
For more details about TRIM in ZFS, see the autotrim property description in zpool.8.
Export/Disconnect
Removes the pool from the system.
Use to prepare drives for transfer to a new system and import the pool or completely delete the pool and any data stored on it.
A dialog warns about the risks of disconnecting the pool and shows any system services that are affected by removing the pool.
Because this is a destructive action, you must select additional checkboxes and enter the name of the pool when also deleting stored data.
You can also remove existing shares to this data when the pool is disconnected.
Add Vdevs
Opens the Pool Manager to add more vdevs to the pool.
Changing the original encryption and data vdev configuration is not allowed.
A new data vdev is chosen by default.
To add different kinds of vdevs to the pool, click ADD VDEV and select the type from the dropdown list.
When adding disks to increase the capacity of a pool, ZFS supports the addition of virtual devices, or vdevs, to an existing ZFS pool.
After a vdev is created, more drives cannot be added to that vdev, but a new vdev can be striped with another of the same type to increase the overall size of the pool.
To extend a pool, the vdev added must be the same type as existing vdevs.
Some vdev extending examples:
Extend a ZFS mirror: Add the same number of drives. The result is a striped mirror.
For example, if ten new drives are available, a mirror of two drives can be created initially, then extended by adding another mirror of two drives, and repeating three more times until all ten drives are added.
Extend a three-drive RAIDZ1: Add another three drives. The resulting pool is a stripe of two RAIDZ1 vdevs, similar to RAID 50 on a hardware controller.
Extend a four-drive RAIDZ2: Add another four drives. The result is a stripe of RAIDZ2 vdevs, similar to RAID 60 on a hardware controller.
Add a disk as a hot spare to the pool.
Scrub Pool
Initiate a data integrity check of the pool.
Any problems detected during the scrub are either automatically corrected or generate an alert in the web interface.
By default, every pool is automatically checked on a reoccurring scrub schedule.
Status
Opens the Pool Status screen to show the state of the last scrub and disks in the pool.
Expand Pool
Increases the size of the pool to match all available disk space.
This option is typically used when virtual disks are resized apart from TrueNAS.Upgrade Pool
This option only displays when the pool can be upgraded to use new ZFS feature flags.
Before upgrading an existing pool, be aware of these caveats:
Upgrading a pool is one-way. This means that if you change your mind.
You cannot go back to an earlier ZFS version or downgrade to an earlier version of the software that does not support those ZFS features.
Upgrading can affect data. Before performing any operation that can affect the data on a storage disk, always back up all data first and verify the integrity of the backup.
While it is unlikely that the pool upgrade affects the data, it is always better to be safe than sorry.
Upgrading a ZFS pool is optional. Do not upgrade the pool if the possibility of reverting to an earlier version of TrueNAS or repurposing the disks in another operating system that supports ZFS is desired.
It is not necessary to upgrade the pool unless the end user has a specific need for the newer ZFS Feature Flags.
If you upgrade a pool to the latest feature flags, you cannot import that pool into another operating system that does not yet support those feature flags.
The upgrade itself only takes a few seconds and is non-disruptive.
It is not necessary to stop any sharing services to upgrade the pool.
However, it is best to upgrade when the pool is not in heavy use.
The upgrade process suspends I/O for a short period, but is nearly instantaneous on a quiet pool.
2.10.1.3 - Creating Datasets
Describes how to create and configure a dataset on TrueNAS CORE.
A TrueNAS dataset is a file system that is created within a data storage pool.
Datasets can contain files, directories (child datasets), and have individual permissions or flags.
Datasets can also be encrypted, either using the encryption created with the pool or with a separate encryption configuration.
It is recommended to organize your pool with datasets before configuring data sharing, as this allows for more fine-tuning of access permissions and using different sharing protocols.
Creating a Dataset
To create a dataset in the desired pool, go to Storage > Pools.
The Name and Options fields is required to create the dataset.
Datasets typically inherit most of these settings from the root or parent dataset, only a dataset name is required before clicking SUBMIT.
See Dataset Screens for more information on basic and advanced settings.
For the Sync option, we recommend production systems with critical data use the default Standard choice or increase to Always.
Choosing Disabled is only suitable in situations where data loss from system crash or power loss is acceptable.
By default, datasets inherit the Encryption Options from the root or parent dataset.
To configure the dataset with different encryption settings, clear the checkmark from Inherit and choose the new in Encryption Options.
For detailed descriptions of the encryption options, see the Encryption article.
Clicking ADVANCED OPTIONS adds dataset quota management tools and a few additional fields to the Other Options:
Managing Datasets
After a dataset is created, additional management options are available by going to Storage > Pools and clicking for a dataset:
Add Dataset: create a new dataset that is a child of this dataset.
Datasets can be continuously layered in this manner.
Add Zvol: create a new ZFS block device as a child of this dataset.
Edit Options: opens the dataset options to make adjustments to the dataset configuration.
The dataset Name, Case Sensitivity, and Share Type cannot be changed.
Edit Permissions: opens the editor to set access permissions for this dataset.
Depending on the dataset creation options, this can be a simple permissions editor or the full ACL editor. For more information about editing permissions, read the permissions article.
User Quotas: shows options to set data or object quotas for user accounts cached on the system or user accounts that are connected to this system.
Group Quotas: shows options to set data or object quotas for user groups cached on the system or user groups that are connected to this system.
Delete Dataset: removes the dataset, all stored data, and any snapshots of the dataset from TrueNAS.
Deleting datasets can result in unrecoverable data loss!
Be sure that any critical data is moved off the dataset or is otherwise obsolete.
Create Snapshot: take a single ZFS snapshot of the dataset to provide additional data protection and mobility.
Created snapshots are listed in Storage > Snapshots.
Quotas
TrueNAS allows setting data or object quotas for user accounts and groups cached on or connected to the system.
Setting a quota defines the maximum allowed space for the dataset.
You can also reserve a defined amount of pool space for the dataset to help prevent situations where automatically generated data like system logs consume all space on the dataset.
Quotas can be configured for either the new dataset or to include all child datasets in the quota.
The Edit User window allows editing the User Data Quota, which is the amount of disk space that can be used by the selected users, and the User Object Quota, which is the number of objects that can be owned by each of the selected users.
To edit user quotas in bulk, click Actions and select Set Quotas (Bulk).
The same options for single groups are presented, along with choosing groups for these new quota rules.
2.10.1.4 - Adding Zvols
Describes how to create a Zvol on TrueNAS CORE.
A ZFS Volume (Zvol) is a dataset that represents a block device.
These are needed when configuring an iSCSI Share.
To create a zvol in a pool, go to Storage > Pools then click and Add Zvol.
Options
To quickly create a Zvol with the default options, enter a name for the Zvol, a size, and click SAVE.
See Zvols Screen for more information on zvol settings.
Setting Zvol Block Sizes
To set the zvol block size, click ADVANCED OPTIONS on the ADD ZVOL screen. This adds the Block Size setting near the bottom of the screen.
Select that option that suits the use case or uses the information below to help determine the correct setting to use.
Optimal Zvol Block Sizes
TrueNAS automatically recommends a space-efficient block size for new zvols. This table shows the minimum recommended volume block size values. To manually change this value, use the Block size dropdown list.
Configuration
Number of Drives
Optimal Block Size
Mirror
N/A
16k
Raidz-1
3
16k
Raidz-1
4/5
32k
Raidz-1
6/7/8/9
64k
Raidz-1
10+
128k
Raidz-2
4
16k
Raidz-2
5/6
32k
Raidz-2
7/8/9/10
64k
Raidz-2
11+
128k
Raidz-3
5
16k
Raidz-3
6/7
32k
Raidz-3
8/9/10/11
64k
Raidz-3
12+
128k
Additional tuning might be required for optimal performance, depending on the workload. iXsystems engineers are available to assist Enterprise customers with tuning their TrueNAS hardware. The workload tuning chapter of the OpenZFS handbook is also a good resource.
Managing Zvols
To see options for an existing zvol, click more_vert next to the desired zvol in Storage > Pools:
Use Delete zvol to remove the zvol from TrueNAS.
Deleting zvols can result in unrecoverable data loss!
Be sure that any critical data is moved off the zvol or is otherwise obsolete.
Deleting a zvol also deletes all snapshots of that zvol.
Use Edit Zvol to open the zvol creation form to change the previously saved settings.
Similar to datasets, a zvol name cannot be changed.
Use Create Snapshot to take a single current-point-in-time image of the zvol and save it to Storage > Snapshots.
A snapshot name is suggested in Name along with an extra option to make the snapshot Recursive is available.
When the selected zvol is cloned from an existing snapshot, Promote Dataset is available.
When a clone is promoted, the original volume becomes a clone of the clone, making it possible to delete the volume that the clone was created from.
Otherwise, a clone cannot be deleted while the original volume exists.
When the zvol is created with encryption enabled, additional Encryption Actions are displayed.
2.10.1.5 - Permissions
This articled describes permissions configuration on TrueNAS CORE.
Permissions control the actions users can perform on dataset contents.
TrueNAS allows using both a simple permissions manager and editing a full Access Control List (ACL) for defining dataset permissions.
To change dataset permissions, go to Storage > Pools >more_vertEdit Permissions for a dataset.
Basic Permissions Editor
The Edit Permissions option allows basic adjustments to a datasets ACL.
Options
The Owner section controls which TrueNAS user and group has full control of this dataset.
Access Mode defines the basic read, write, and execute permissions for the user, group, and other accounts that might access this dataset.
Advanced has several tuning options to set how permissions apply to directories and files within the current dataset.
To switch from the basic editor to the advanced ACL editor, click USE ACL MANAGER.
Access Control Lists
An Access Control List (ACL) is a set of account permissions associated with a dataset and applied to directories or files within that dataset.
ACLs are typically used to manage user interactions with shared datasets and are created when a dataset is added to a pool.
When creating a dataset, you can choose how the ACL can be modified by selecting an ACL Mode:
Passthrough only updates ACL entries (ACEs) that are related to the file or directory mode.
Restricted does not allow chmod to make changes to files or directories with a non-trivial ACL.
An ACL is trivial if it can be fully expressed as a file mode without losing any access rules.
Setting the ACL Mode to Restricted is typically used to optimize a dataset for SMB sharing, but can require further optimizations.
For example, configuring an rsync task with this dataset could require adding --no-perms as an extra option for the task.
To view an ACL, go to Storage > Pools >more_vertEdit Permissions for a nested dataset within a pool.
The ACL for a new file or directory is typically inherited from the parent directory and is preserved when it is moved or renamed within the same dataset.
An exception is when there are no File Inherit or Directory Inherit flags in the parent ACL owner@, group@, or everyone@ entries.
These non-inheriting entries are added to the ACL of the newly created file or directory based on the Samba create and directory masks or the umask value.
Editing an ACL
Click ACL Manager to adjust file ownership or account permissions to the dataset.
The first time viewing the ACL Manager a dialog suggests using basic presets.
The ACL can be edited at any time after choosing to either apply a preset or create a custom ACL.
Choose Select a preset ACL and choose a preset.
The preset options are OPEN, RESTRICTED, or HOME.
Choose Create a custom ACL to create a new list of customized permissions.
File Information
The selected User controls the dataset and always has permission to modify the ACL and other attributes.
The selected Group also controls the dataset, but permissions change by adding or modifying a group@ ACE.
Any user accounts or groups imported from a directory service can be selected as the primary in User or Group.
Access Control List (ACEs)
To add a new item to the ACL, define Who the Access Control Entry (ACE) applies to, and configure permissions and inheritance flags for the ACE.
ACL Details from Shell
To view an ACL information from the console, connect to a shell session and enter:
getfacl /mnt/path/to/dataset
Permissions
Permissions are divided between Basic and Advanced options.
The basic options are commonly used groups of the advanced options.
Basic Permissions
Read (r-x---a-R-c---): view file or directory contents, attributes, named attributes, and ACL.
Includes the Traverse permission.
Modify (rwxpDdaARWc--s): adjust file or directory contents, attributes, and named attributes.
Create new files or subdirectories.
Includes the Traverse permission.
Changing the ACL contents or owner is not allowed.
Traverse (--x---a-R-c---): Execute a file or move through a directory.
Directory contents are restricted from view unless the Read permission is also applied.
To traverse and view files in a directory, but not be able to open individual files, set the Traverse and Read permissions, then add the advanced Directory Inherit flag.
Full Control (rwxpDdaARWcCos): Apply all permissions.
Advanced Permissions
Read Data (r): View file contents or list directory contents.
Write Data (w): Create new files or modify any part of a file.
Append Data (p): Add new data to the end of a file.
Read Named Attributes (R): view the named attributes directory.
Write Named Attributes (W): create a named attribute directory. Must be paired with the Read Named Attributes permission.
Execute (x): Execute a file, move through, or search a directory.
Delete Children (D): delete files or subdirectories from inside a directory.
Read Attributes (a): view file or directory non-ACL attributes.
Write Attributes (A): change file or directory non-ACL attributes.
Delete (d): remove the file or directory.
Read ACL (c): view the ACL.
Write ACL* (C): change the ACL and the ACL mode.
Write Owner (o): change the user and group owners of the file or directory.
Synchronize (s): synchronous file read/write with the server. This permission does not apply to FreeBSD clients.
Inheritance Flags
Basic inheritance flags only enable or disable ACE inheritance.
Advanced flags offer finer control for applying an ACE to new files or directories.
Basic Flags
Inherit (fd-----): enable ACE inheritance.
No Inherit (-------): disable ACE inheritance.
Advanced Flags
File Inherit (f): The ACE is inherited with subdirectories and files. It applies to new files.
Directory Inherit (d): new subdirectories inherit the full ACE.
No Propagate Inherit (n): The ACE can only be inherited once.
Inherit Only (i): Remove the ACE from permission checks but allow it to be inherited by new files or subdirectories. Inherit Only is removed from these new objects.
Inherited (I): set when the ACE has been inherited from another dataset.
2.10.1.6 - Storage Encryption
Describes how to encrypt a storage pool in TrueNAS CORE.
TrueNAS supports different encryption options for critical data.
Users are responsible for backing up and securing encryption keys and passphrases!
Losing the ability to decrypt data is similar to a catastrophic data loss.
Encryption of specific datasets (AES-256-GCM in TrueNAS 12.0)
The local TrueNAS system manages keys for data-at-rest.
The user is responsible for storing and securing their keys.
The Key Management Interface Protocol (KMIP) is included in TrueNAS 12.0.
Encryption Drawbacks and Considerations
Always consider the following drawbacks/considerations when encrypting data:
All datasets contained within an encrypted pool inherit encryption.
If there is only one pool and it is encrypted, all datasets are also encrypted.
If the encryption keys and passwords are lost, encrypted data is unrecoverable.
We do not recommend using GELI or ZFS encryption with deduplication because of the sizable performance impact.
Be cautious when using many encryption and deduplication features at once since they all compete for the same CPU cycles.
Encrypting a Storage Pool
Encrypting the root dataset of a new storage pool further increases data security.
All datasets added to a pool with encryption applied inherit encryption. This means all datasets added to a pool with encryption are also encrypted.
Create a new pool and set Encryption in the Pool Manager.
TrueNAS shows a warning.
TrueNAS can encrypt new datasets within an existing unencrypted storage pool without having to encrypt the entire pool.
To encrypt a single dataset, go to Storage > Pools, open the more_vert for an existing dataset, and click Add Dataset.
Now select the authentication to use from the two options in Type: either a Key or Passphrase.
The remaining options are the same as a new pool.
Datasets with encryption enabled show additional icons on the Storage > Pools list.
Locking and Unlocking Datasets
The dataset locked/unlocked status is determined from an icon:
The dataset unlocked icon: lock_open.
The dataset locked icon: lock.
A Dataset on an encrypted pool with encryption properties that don’t match the root dataset shows this icon:
NOTE: An unencrypted pool with an encrypted dataset also shows this icon:
You can only lock or unlock encrypted datasets when they are secured with a passphrase instead of a key file.
Before locking a dataset, verify that it is not currently in use, then click (Options) and Lock.
Use the Force unmount option only if you are certain no one is currently accessing the dataset.
After locking a dataset, the unlock icon changes to a locked icon.
While the dataset is locked, it is not available for use.
Enter the passphrase and click Submit.
To unlock child datasets, select Unlock Children.
Child datasets that inherited encryption settings from the parent dataset unlock when the parent unlocks.
Users can simultaneously unlock child datasets with different passphrases from the parent by entering their passphrases.
Confirm unlocking the datasets and wait for a dialog to show the unlock is successful.
The parent dataset is media. It has three child datasets.
The documents child dataset inherits the parent encryption settings and password.
The other two child datasets (audio and video) have their own passphrases. When you lock the parent dataset all child datasets are also locked.
Open the more_vert for the parent dataset and select unlock.
To unlock all the datasets, select Unlock Children and enter the passphrase for each dataset to unlock.
Manually download a copy of the inherited and non-inherited encrypted dataset key files for the pool by opening the pool settings menu and selecting Export Dataset Keys. Enter the root password and click CONTINUE.
To manually download a back up of a single key file for the dataset, click the dataset more_vert and select Export Key.
Enter the root password and click CONTINUE. Click DOWNLOAD KEY.
To change the key, click the dataset more_vert and Encryption Options.
The passphrase is the only means to decrypt the information stored in a dataset using passphrase encryption keys. Be sure to create a memorable passphrase or physically secure the passphrase.
To use a passphrase instead of a key file, click the dataset more_vert and Encryption Options.
Change the Encryption Type from Key to Passphrase.
Passphrase is a user-defined string of eight to 512 characters in length, to use instead of an encryption key to decrypt the dataset.
pbkdf2iters is the number of password-based key derivation function 2 (PBKDF2) iterations to use for reducing vulnerability to brute-force attacks.
Entering a number greater than 100000 is required.
Unlocking a Replicated Encrypted Dataset or Zvol Without a Passphrase
TrueNAS Enterprise users can connect a Key Management Interoperability Protocol (KMIP) server to centralize keys when they are not using passphrases to unlock a dataset or zvol.
Users with TrueNAS CORE or Enterprise installations without KMIP should either replicate the dataset or zvol without properties to disable encryption at the remote end or construct a special json manifest to unlock each child dataset/zvol with a unique key.
Unlocking Methods
Method 1: Construct JSON Manifest
Replicate every encrypted dataset you want to replicate with properties.
Export key for every child dataset which has a unique key.
Construct a proper json for each child dataset with poolname/datasetname of the destination system and key from the source system. For example:
{"tank/share01": "57112db4be777d93fa7b76138a68b790d46d6858569bf9d13e32eb9fda72146b"}
Save this file with the extension .json.
Unlock the dataset(s) on the remote system using properly constructed json files.
Method 2: Replicate Encrypted Dataset/zvol Without Properties
To not encrypt the dataset on the remote side so it does not require a key to unlock, clear properties when replicating.
Go to Tasks > Replication Tasks and click ADD.
Click ADVANCED REPLICATION CREATION.
Fill out the form as needed and do not select Include Dataset Properties.
Click SUBMIT.
This does not affect TrueNAS Enterprise installs with KMIP.
Legacy GELI Encryption
TrueNAS no longer supports GELI encryption (deprecated).
Can I directly convert a GELI-encrypted pool to native ZFS encryption?
No.
You must migrate data out of the GELI pool and into a ZFS encrypted pool.
GELI Pool Migrations
Data can be migrated from the GELI-encrypted pool to a new ZFS-encrypted pool.
Unlock the GELI-encrypted pool before attempting any data migrations.
The new ZFS-encrypted pool must be at least the same size as the previous GELI-encrypted pool.
Do not delete the GELI dataset until you verify the data migration.
There are a few options to migrate data from a GELI-encrypted pool to a new ZFS-encrypted pool:
GELI encrypted pools continue to be detected and supported in the TrueNAS web interface as Legacy Encrypted pools.
As of TrueNAS version 12.0-U1, a decrypted GELI pool can migrate data to a new ZFS encrypted pool using the Replication Wizard.
Replication Wizard Method
Start the Replication Wizard, go to Tasks > Replication Task and click ADD.
In Source Location, select On this System, then set the dataset to transfer.
In Destination Location, select On a Different System, then:
a. Create or select an existing SSH Connection.
Either click Create New or select the destination system SSH connection from the list of available connections.
b. In Destination, select the dataset to replicate files to.
c. (Optional) Select Encryption to apply encryption to the SSH transfer.
Select either PASSPHRASE or HEX as the Encryption Key Format.
If you selected PASSPHRASE, enter the passphrase. If you selected HEX, set Generate Encryption Key.
Select Store Encryption key in Sending TrueNAS database.
Click Next
Select Run Once as the replication schedule.
Clear the Make Destination Dataset Read-Only checkbox.
Click START REPLICATION
File Transfer Method
This method does not preserve file ACLs.
The web interface supports using Tasks > Rsync Tasks to transfer files out of the GELI pool.
File Transfer Method
In the shell, rsync and other file transfer mechanisms (scp, cp, sftp, ftp, rdiff-backup) are available for copying data between pools.
ZFS Send and Receive
These instructions are an example walk-through, and not an exact step-by-step guide for all situations.
Research ZFS send/receive before attempting this.
A simple example cannot cover every edge case.
ZFS Send and Receive Method
Legend:
GELI pool = pool_a
Origin dataset = dataset_1
Latest snapshot of GELI pool = snapshot_name
ZFS native-encrypted pool = pool_b
Receiving dataset = dataset_2
Create a new encrypted pool in Storage > Pools.
Open the shell.
Make a new snapshot of the GELI pool and dataset with the data to migrate. Enter command:
zfs snapshot -r pool_a/dataset_1@snapshot_name.
Create a passphrase: echo passphrase > /tmp/pass.
Use ZFS send/receive to transfer the data between pools. Enter command:
zfs send -Rv pool_a/dataset_1@snapshot_name | zfs recv -o encryption=on -o keyformat=passphrase -o keylocation=file:///tmp/pass pool_b/dataset_2.
After the transfer completes, go to Storage > Pools and lock the new dataset.
After locking the dataset, immediately unlock it.
TrueNAS prompts for the passphrase.
After entering the passphrase and unlocking the pool, you can delete the /tmp/pass file used for the transfer.
If desired, you can convert the dataset to use a key file instead of a passphrase.
To use a key file, click the dataset (Options) and click Encryption Options.
Change the Encryption Type from Passphrase to Key and save.
Back up your key file immediately!
Repeat this process for every dataset in the pool that you need to migrate.
2.10.1.7 - Fusion Pools
Describes how to create a Fusion Pool on TrueNAS CORE.
Fusion Pools are also known as ZFS allocation classes, ZFS special vdevs, and metadata vdevs (Metadata vdev type on the Pool Manager screen.).
What's a special VDEV?
A special VDEV can store metadata such as file locations and allocation tables.
The allocations in the special class are dedicated to specific block types.
By default, this includes all metadata, the indirect blocks of user data, and any deduplication tables.
The class can also be provisioned to accept small file blocks.
This is a great use case for high performance but smaller sized solid-state storage.
Using a special vdev drastically speeds up random I/O and cuts the average spinning-disk I/Os needed to find and access a file by up to half.
Creating a Fusion Pool
Go to Storage > Pools, click ADD, and select Create new pool.
A pool must always have one normal (non-dedup/special) VDEV before other devices can be assigned to the special class.
Configure the Data VDevs, then click ADD VDEV and select Metadata.
Add SSDs to the new Metadata VDev and select the same layout as the Data VDevs.
The metadata special VDEV is critical for pool operation and data integrity, so you must protect it with hot spare(s).
UPS Recommendation
When using SSDs with an internal cache, add uninterruptible power supply (UPS) to the system to help minimize the risk from power loss.
Using special VDEVs identical to the data VDEVs (so they can use the same hot spares) is recommended, but for performance reasons you can make a different type of VDEV (like a mirror of SSDs).
In that case you must provide hot spare(s) for that drive type as well. Otherwise, if the special VDEV fails and there is no redundancy, the pool becomes corrupted and prevents access to stored data.
Drives added to a metadata VDEV cannot be removed from the pool.
When more than one metadata VDEV is created, then allocations are load-balanced between all these devices.
If the special class becomes full, then allocations spill back into the normal class.
After the fusion pool is created, the Status shows a Special section with the metadata SSDs.
Describes how to configure SLOG over-provisioning on TrueNAS CORE.
Over-provisioning SLOG SSDs is useful for different scenarios.
The most useful benefit of over-provisioning is greatly extending SSD life.
Over-provisioning an SSD distributes the total number of writes and erases across more flash blocks on the drive.
Some SATA devices are limited to one resize per power cycle.
Some BIOS can block resize during boot and require a live power cycle.
Overprovision Options
Web Interface
To over provision a SLOG device, log in to TrueNAS and go to System > Advanced.
Enter an over-provision value corresponding to the new size in GB in the Log (Write Cache) Overprovision Size in GiB field.
When this value is applied, the over-provision value is applied whenever a pool is created with a SLOG device.
It is impossible to restore an over-provisioned SLOG device back to original capacity without running the disk_resize command after first destroying the pool it was part of and issuing a full power cycle.
Only one over-provision/under-provision operation occurs per power cycle.
Erasing the over-provision setting in System > AdvancedLog (Write Cache) Overprovision Size in GiB field and setting to none prevents future SLOG devices from being over-provisioned.
Shell
Use disk_resize in the shell to over-provision.
The command to over-provision an SSD is disk_resize {DEVICE} {SIZE}, where {DEVICE} is the SSD device name and {SIZE} is the new provision size in GiB or TiB.
Example: disk_resize ada5 16GB.
When no size is specified, it reverts the provision back the full size of the device.
2.10.2 - Creating Snapshots
Describes how to create snapshots on TrueNAS CORE.
Snapshots are one of the most powerful features of ZFS.
A snapshot provides a read only point-in-time copy of a file system or volume.
This copy does not consume extra space in the ZFS pool.
The snapshot only records the differences between storage block references whenever the data is modified.
Why do I want to keep snapshots?
Snapshots keep a history of files and provide a way to recover an older or even deleted files.
For this reason, many administrators take regular snapshots, store them for some time, and copy them to a different system.
This strategy allows an administrator to roll the system data back to a specific point in time.
In the event of catastrophic system or disk failure, off-site snapshots can restore data up to the most recent snapshot.
Taking snapshots requires the system have all pools, datasets, and zvols already configured.
Creating a Single Snapshot
Consider making a Periodic Snapshot Task to save time and create regular, fresh snapshots.
To perform a quick snapshot of existing storage, go to Storage > Snapshots and click ADD.
Use the Dataset dropdown list to select an existing ZFS pool, dataset, or zvol to snapshot.
The TrueNAS software displays a suggested name that you can override with any custom string.
To include the snapshot in local or remote replication tasks choose a proper naming schema. The Naming Schema drop-down list populates with schemas already created from periodic snapshot tasks.
To include child datasets with the snapshot, select Recursive.
Managing Snapshots
Go to Storage > Snapshots to manage created snapshots.
Each entry in the list includes the dataset and snapshot names.
Click chevron_right to view options for a snapshot.
DATE CREATED shows the exact time and date of the snapshot creation.
USED shows the amount of space consumed by this dataset and all of its descendants.
This value, checked against the dataset quota and reservation, shows the space used but does not include the dataset reservation. It takes into account the reservations of any descendant datasets.
The amount of space that a dataset consumes from its parent, and the amount of space freed if this dataset is recursively deleted, is the greater of its space used and its reservation.
At creation, a snapshot shares space between the snapshot, file system, and even with previous snapshots.
File system changes reduce the shared space and count toward space used by a snapshot.
Deleting a snapshot often increases the space that is unique and used in other snapshots.
REFERENCED shows the amount of data accessible by this dataset. This could be shared with other datasets in the pool. New snapshots or clones reference the same amount of space as the file system it was created from, as the contents are identical.
Viewing Used Space with Shell
Another method to view the space used by an individual snapshot is to go to the shell and enter command zfs list -t snapshot.
The space used, available, or referenced does not account for pending changes.
In general, pending changes update within a few seconds, but larger disk changes slow usage updates.
Deleting a Snapshot
The Delete option destroys the snapshot.
You must delete child clones before you can delete their parent snapshot.
While creating a snapshot is instantaneous, deleting one is I/O intensive and can take a long time, especially when deduplication is enabled.
Why?
ZFS has to review all allocated blocks before deletion to see if another process is using that block. If not used, the ZFS can free that block.
Cloning a Snapshot
Use CLONE TO NEW DATASET to create a new snapshot clone (dataset) from the snapshot contents.
What is a clone?
A clone is a writable copy of the snapshot.
Because a clone is actually a mountable dataset, it appears in the Pools screen rather than the Snapshots screen.
Creating a new snapshot adds -clone to the name by default.A dialog prompts for the new dataset name.
The suggested name derives from the snapshot name.
Rolling Back
Reverts the dataset back to the point in time saved by the snapshot.
Rollback is a dangerous operation that causes any configured replication tasks to fail.
Replications use the existing snapshot when doing an incremental backup, and rolling back can put the snapshots out of order.
To restore the data within a snapshot, the recommended steps are:
Clone the desired snapshot.
Share the clone with the share type or service running on the TrueNAS system.
Allow users to recover their needed data.
Delete the clone from Storage > Pools.
This approach does not destroy any on-disk data and has no impact on replication.
TrueNAS asks for confirmation before rolling back to the chosen snapshot state.
Clicking Yes reverts all dataset files to the state they were in at the time of snapshot creation.
Bulk Operations
To delete multiple snapshots, select the left column box for each snapshot to include. Click the deleteDelete button that displays.
To search through the snapshots list by name, type a matching criteria into the searchFilter Snapshots text field.
The list now displays only the snapshot names that match the filter text.
Browsing a Snapshot Collection
All dataset snapshots are accessible as an ordinary hierarchical file system, accessed from a hidden .zfs located at the root of every dataset.
A snapshot and any files it contains are not accessible or searchable if the snapshot mount path is longer than 88 characters.
The data within the snapshot is safe but to make the snapshot accessible again shorten the mount path.
A user with permission to access the dataset contents can view the list of snapshots by going to the dataset .zfs directory from a share, like SMB, NFS, and iSCSI, or in the TrueNAS SCALE CLI.
Users can browse and search any files they have permission to access throughout the entire dataset snapshot collection.
When creating a snapshot, permissions or ACLs set on files within that snapshot might limit access to the files.
Snapshots are read-only, so users do not have permission to modify a snapshot or its files, even if they had write permissions when creating the snapshot.
From the Datasets screen, select the dataset and click Edit on the Dataset Details widget.
Click Advanced Options and set Snapshot Directory to Visible.
To access snapshots:
Using a share, configure the client system to view hidden files.
For example, in a Windows SMB share, enable Show hidden files, folders, and drives in Folder Options.
From to the dataset root folder, open the .zfs directory and navigate to the snapshot.
Using the TrueNAS SCALE CLI, enter storage filesystem listdir path="/PATH/TO/DATASET/.zfs/PATH/TO/SNAPSHOT" to view snapshot contents.
See also storage filesystem.
A user with permission to access the hidden file can view and explore all snapshots for a dataset from the shell or the Sharing screen using services like SMB, NFS, and SFTP.
2.10.3 - Creating VMware-Snapshots
Describes how to create a VMWare snapshot on TrueNAS CORE.
Storage > VMware-Snapshots coordinates ZFS snapshots when using TrueNAS as a VMware datastore.
When a ZFS snapshot is created, TrueNAS automatically snapshots any running VMware virtual machines before taking a scheduled or manual ZFS snapshot of the dataset or zvol backing that VMware datastore.
To copy TrueNAS snapshots to VMWare, virtual machines must be powered-on.
The temporary VMware snapshots are then deleted on the VMware side but still exist in the ZFS snapshot and are available as stable restore points.
These coordinated snapshots go on the Storage > Snapshots list.
You need a paid-edition for VMware ESXi to use VMware-Snapshots.
If you try to use them with ESXi free edition you see the following error message: Error: Can’t create snapshot, current license or ESXi version prohibits execution of the requested operation.
ESXi free has a locked (read-only) API that prevents using TrueNAS VMware-Snapshots.
The cheapest ESXi edition that is compatible with TrueNAS VMware-Snapshots is VMware vSphere Essentials Kit.
Create a VMware Snapshot
Go to Storage > VMware Snapshots and click ADD.
After entering the Hostname, Username, and Password, click FETCH DATASTORES to populate the menu and then select the datastore to synchronize.
TrueNAS connects to the VMware host after clicking FETCH DATASTORES.
The ZFS Filesystem and Datastore drop-down menus populate from the VMware host response.
Choosing a datastore also selects any previously mapped dataset.
2.10.4 - Disks
Tutorials about managing disks in TrueNAS CORE.
Wiping a Disk: Describes how to wipe a disk in TrueNAS CORE.
Disk Replacement: Describes how to replace a disk and restore the hot spare in TrueNAS CORE.
2.10.4.1 - Wiping a Disk
Describes how to wipe a disk in TrueNAS CORE.
The wipe function deletes obsolete data off an unused disk.
This is a destructive action and results in permanent data loss!
Back up any critical data off the disk to be wiped.
To wipe a disk, go to Storage > Disks.
Click the chevron_right for a disk to see all the options.
The wipe option is only available when the disk is not in use.
Click WIPE to open a dialog with additional options:
The disk Name (da1, da2, ada4) helps confirm that you have selected the right disk to wipe.
The Method dropdown list shows the different available wipe options available. Select Quick to erase only the partitioning information on a disk, making it easy to reuse but without clearing other old data. Quick wipes take only a few seconds. Select Full with zeros to overwrite the entire disk with zeros. This can take several hours to complete. Select Full with random to overwrite the entire disk with random binary code and takes even longer than Full with zeros to complete.
Ensure all data is backed up and the disk is no longer in use.
Triple check that the correct disk is selected for the wipe.
Recovering data from a wiped disk is usually impossible.
After selecting the appropriate method, click WIPE.
A dialog asks for confirmation of the action.
Verify the name to ensure you have the correct disk chosen.
When satisfied the disk can be wiped, select Confirm and click CONTINUE.
A dialog shows the disk wipe progress.
See Disks Screens for more information on Disks screen settings.
2.10.4.2 - Disk Replacement
Describes how to replace a disk and restore the hot spare in TrueNAS CORE.
Hard drives or solid-state drives (SSDs) have a finite lifetime and can fail unexpectedly.
When a disk fails in a Stripe (RAID0) pool, the entire pool has to be recreated and all data restored from backups.
Creating non-stripe storage pools that have disk redundancy is always recommended.
To prevent further loss of redundancy or eventual data loss, always replace a failed disk as soon as possible!
TrueNAS integrates new disks into a pool to restore the pool to full functionality.
Replacing a Disk
Another disk of the same or greater capacity is required to replace a failed disk.
This disk must be installed in the TrueNAS system, not part of an existing storage pool, and available to use as a replacement.
The replacement process wipes any data on the replacement disk.
Can I replace a disk in a GELI-encrypted (Legacy) pool?
Although GELI encryption is deprecated, TrueNAS implements GELI encryption during a “GELI-Encrypted (Legacy) pool” disk replacement. TrueNAS uses GELI encryption for the lifetime of that pool, even after replacement.
The TrueNAS Pool widget on the main Dashboard shows when a disk failure degrades a pool.
We recommend you take the disk offline before starting the replacement.
This removes the device from the pool and can prevent swap issues.
To offline a disk:
Go to Storage > Pools screen, click on the settings settings icon, and then select Status to Open the Pool Status screen and display the disks in the pools.
Click the more_vert icon for the disk you plan to remove, and then click Offline.
Select Confirm, then click OFFLINE. The disk should now be offline.
Can I use a disk that is failing but still active?
There are some situations where a disk that has not completely failed can be left online to provide additional redundancy during the replacement procedure.
We don’t recommend leaving failed disks online unless you know the exact condition of the failing disk!
Attempting to replace a heavily degraded disk without off-lining it first results in a significantly slower replacement process.The offline failed?
If the offline operation fails with a Disk offline failed - no valid replicas message, go to Storage > Pools, click the settings for the degraded pool, and select Scrub Pool.
When the scrub operation finishes, reopen the pool Status and try to offline the disk again.
When the disk status shows as Offline, physically remove the disk from the system.
Select a new member disk and click Replace Disk.
The new disk must have the same or greater capacity as the disk you are replacing.
The replacement fails when the chosen disk has partitions or data present.
To destroy any data on the replacement disk and allow the replacement to continue, set the Force option.
When the disk wipe completes and TrueNAS starts replacing the failed disk, the Pool Status changes to show the in-progress replacement.
TCG Pyrite Version 1 and
Version 2 are similar to Opalite, but with hardware encryption removed
Pyrite provides a logical equivalent of the legacy ATA security for non-ATA devices. Only the drive firmware protects the device.
Pyrite Version 1 SEDs do not have PSID support and can become unusable if the password is lost.
TCG Enterprise designed for systems with many data disks
These SEDs cannot unlock before the operating system boots.
See this Trusted Computing Group and NVM Express® joint white paper for more details about these specifications.
TrueNAS Implementation
TrueNAS implements the security capabilities of camcontrol for legacy devices and sedutil-cli for TCG devices.
When managing a SED from the command line, it is recommended to use the sedhelper wrapper script for sedutil-cli to ease SED administration and unlock the full capabilities of the device. Examples of using these commands to identify and deploy SEDs are provided below.
A SED can be configured before or after assigning the device to a pool.
By default, SEDs are not locked until the administrator takes ownership of them. Ownership is taken by explicitly configuring a global or per-device password in the web interface and adding the password to the SEDs. Adding SED passwords in the web interface also allows TrueNAS to automatically unlock SEDs.
A password-protected SED protects the data stored on the device when the device is physically removed from the system. This allows secure disposal of the device without having to first wipe the contents. Repurposing a SED on another system requires the SED password.
For TrueNAS High Availability (HA) systems, SED drives only unlock on the active controller!
Deploying SEDs
Enter command sedutil-cli --scan in the shell to detect and list devices. The second column of the results identifies the drive type:
Character
Standard
no
non-SED device
1
Opal V1
2
Opal V2
E
Enterprise
L
Opalite
p
Pyrite V1
P
Pyrite V2
r
Ruby
Example:
root@truenas1:~ # sedutil-cli --scan
Scanning for Opal compliant disks
/dev/ada0  No  32GB SATA Flash Drive SFDK003L
/dev/ada1  No  32GB SATA Flash Drive SFDK003L
/dev/da0   No  HGST    HUS726020AL4210  A7J0
/dev/da1   No  HGST    HUS726020AL4210  A7J0
/dev/da10    E WDC     WUSTR1519ASS201  B925
/dev/da11    E WDC     WUSTR1519ASS201  B925
TrueNAS supports setting a global password for all detected SEDs or setting individual passwords for each SED. Using a global password for all SEDs is strongly recommended to simplify deployment and avoid maintaining separate passwords for each SED.
Setting a Global Password for SEDs
Go to System > Advanced > SED Password and enter the password.
Record this password and store it in a safe place!
Now configure the SEDs with this password. Go to the shell and enter command sedhelper setup <password>, where <password> is the global password entered in System > Advanced > SED Password.
sedhelper ensures that all detected SEDs are properly configured to use the provided password:
Rerun command sedhelper setup <password> every time a new SED is placed in the system to apply the global password to the new SED.
Creating Separate Passwords for Each SED
Go to Storage > Disks. Click the > next to an SED, then select Edit. Enter and confirm the password in the SED Password field.
You must configure the SED to use the new password. Go to the shell and enter command sedhelper setup --disk <da1> <password>, where <da1> is the SED to configure and <password> is the created password from Storage > Disks > Edit Disks > SED Password.
Repeate this process for each SED and any SEDs added to the system in the future.
Remember SED passwords! If you lose the SED password, you cannot unlock SEDs or access their data.
Always record SED passwords whenever they are configured or modified and store them in a secure place!
Check SED Functionality
When SED devices are detected during system boot, TrueNAS checks for configured global and device-specific passwords.
Unlocking SEDs allows a pool to contain a mix of SED and non-SED devices. Devices with individual passwords are unlocked with their password. Devices without a device-specific password are unlocked using the global password.
To verify SED locking is working correctly, go to the shell. Enter command sedutil-cli --listLockingRange 0 <password> </dev/da1>, where <dev/da1> is the SED and <password> is the global or individual password for that SED. The command returns ReadLockEnabled: 1, WriteLockEnabled: 1, and LockOnReset: 1 for drives with locking enabled:
This section contains command line instructions to manage SED passwords and data. The command used is sedutil-cli(8). Most SEDs are TCG-E (Enterprise) or TCG-Opal (Opal v2.0). Commands are different for the different drive types, so the first step is identifying which type is used.
These commands can be destructive to data and passwords. Keep backups and use the commands with caution.
Check SED version on a single drive, /dev/da0 in this example:
root@truenas:~ # sedutil-cli --isValidSED /dev/da0
/dev/da0 SED --E--- Micron_5N/A U402
All connected disks can be checked at once:
root@truenas:~ # sedutil-cli --scan
Scanning for Opal compliant disks
/dev/ada0 No 32GB SATA Flash Drive SFDK003L
/dev/ada1 No 32GB SATA Flash Drive SFDK003L
/dev/da0 E Micron_5N/A U402
/dev/da1 E Micron_5N/A U402
/dev/da12 E SEAGATE XS3840TE70014 0103
/dev/da13 E SEAGATE XS3840TE70014 0103
/dev/da14 E SEAGATE XS3840TE70014 0103
/dev/da2 E Micron_5N/A U402
/dev/da3 E Micron_5N/A U402
/dev/da4 E Micron_5N/A U402
/dev/da5 E Micron_5N/A U402
/dev/da6 E Micron_5N/A U402
/dev/da9 E Micron_5N/A U402
No more disks present ending scan
root@truenas:~ #
Instructions for Specific Drives
TCG-Opal
Reset the password without losing data with command:
Wipe data and reset password using the PSID with this command:
sedutil-cli --yesIreallywanttoERASEALLmydatausingthePSID <PSINODASHED> </dev/device> where is the PSID located on the pysical drive with no dashes (-).
TCG-E
Change or Reset the Password without Destroying Data
Run these commands for every LockingRange or band on the drive.
To determine the number of bands on a drive, use command sedutil-cli -v --listLockingRanges </dev/device>.
Increment the BandMaster number and rerun the command with --setPassword for every band that exists.
Use all of these commands to reset the password without losing data:
Use Storage > Import Disk to integrate UFS (BSD Unix), NTFS (Windows), MSDOS (FAT), or EXT2 (Linux) formatted disks into TrueNAS.
This is a one-time import, copying the data from that disk into a TrueNAS dataset.
Only one disk can be imported at a time, and the disk must be installed or physically connected to the TrueNAS system.
What about EXT3 or EXT4 filesystems?
Importing an EXT3 or EXT4 filesystem is possible in some cases, although neither is fully supported.
EXT3 journaling is not supported, so those file systems must have an external fsck utility, like the one provided by E2fsprogs utilities, run on them before import.
EXT4 file systems with extended attributes or inodes greater than 128 bytes are not supported.
EXT4 file systems with EXT3 journaling must have an fsck run on them before import, as described above.
Use the dropdown list to select the Disk to import.
TrueNAS attempts to detect and select the the Filesystem type.
Selecting the MSDOSFS file system shows an additional MSDOSFS locale dropdown menu.
Use this option to select the locale when non-ASCII characters are present on the disk.
Finally, browse to the ZFS dataset to hold the copied data and define the Destination Path.
After clicking SAVE, the chosen disk mounts and its contents copied to the specified dataset at the end of the entry in Destination Path.
To monitor an in-progress import, open the Task Manager by clicking the assignment in the top menu bar.
The disk unmounts after the copy operation completes.
A dialog allows viewing or downloading the disk import log.
The import was interrupted!
Use the same import procedure to restart the task.
Choose the same entry in Destination Path as the interrupted import for TrueNAS to scan the destination for previously imported files and resume importing any remaining files.
2.11 - Directory Services
Accessing Directory Services on your TrueNAS
Setting Up Active Directory: Provides information on how to configure Active Directory (AD) on your TrueNAS.
Setting Up LDAP: Use the LDAP screen to configure Lightweight Directory Access Protocol (LDAP) server settings on your TrueNAS.
Setting up NIS: Use the NIS screen to configure Network Information System (NIS) on your TrueNAS.
Setting Up Kerberos: Use the Kerberos screen to configure Kerberos realms and keytabs on your TrueNAS.
2.11.1 - Setting Up Active Directory
Provides information on how to configure Active Directory (AD) on your TrueNAS.
The Active Directory (AD) service shares resources in a Windows network. AD provides authentication and authorization services for the users in a network. This eliminates the need to recreate the user accounts on TrueNAS.
Domain users and groups in local ACLs are accessible after joining AD. Setting up shares acts as a file server. Joining an AD domain configures the Privileged Access Manager (PAM). This allows domain users to log on via SSH or authenticate to local services.
It is possible to configure AD services on Windows. Or on Unix-like operating systems running Samba version 4.
To configure a connection, you need to know the following items:
Determine the Active Directory domain controller domain.
Make sure you have the account credentials for that system.
Preparation
Preparing the following before configuring Active Directory helps ensure the connection process.
Verify Name Resolution
Confirm that name resolution is functioning. Connect to shell and use ping to check the connection to the AD domain controller.
truenas# ping ad01.lab. ixsystems.com
PING ad01. lab. ixsystems.com (10.215.5.200) : 56 data bytes
64 bytes from 10.215.5.200: icmp_seq=0 ttl=126 time=0.800 ms
64 bytes from 10.215.5.200: icmp_seq=1 ttl=126 time=0.933 ms
64 bytes from 10.215.5.200: icmp_seq=2 ttl=126 time=0.810 ms
64 bytes from 10.215.5.200: icmp_seq=3 ttl=126 time=0.876 ms
^C
ad01. lab. ixsystems.com ping statistics
4 packets transmitted, 4 packets received, 0.0% packet loss
round-trip min/avg/max/stddev = 0.800/0.855/0.933/0.054 ms
The ability to send and receive packets without loss verifies the connection.
Press Ctrl + C to cancel the ping.
Another option is to use the command host -t srv _ldap._tcp.domainname.com. This checks the network SRV records and verifies DNS resolution.
The ping failed!
If the ping fails, go to Network > Global Configuration.
Update the DNS Servers and Default Gateway settings.
Enter more than one value in Nameserver for the AD domain controllers.
This helps DNS queries for the required SRV records succeed.
Domain controllers are not always available.
Using more than one name server helps maintain the AD connection in these instances.
Time Synchronization
Active Directory relies on Kerberos, a time-sensitive protocol.
During the domain join process, the AD domain controller with the PDC Emulator FSMO Role is added as the preferred NTP server.
You can change NTP server settings in System > NTP Servers if necessary.
In a default AD environment, the local system time must be in sync with the AD domain controller time. Their times cannot differ from each other by more than 5 minutes. Use an external time source when configuring a virtualized domain controller. TrueNAS creates an Alert if the system time gets out of sync with the AD domain controller time.
The following options apply to time synchronization in TrueNAS:
Go to System > General and make sure the value in Timezone matches the AD Domain Controller.
Select either local time or universal time in the system BIOS.
Connect to the Active Directory Domain
To connect to Active Directory, go to Directory Services > Active Directory. Enter the AD Domain Name and account credentials.
Select Enable to attempt to join the AD domain immediately after saving the configuration.
The preconfigured defaults are generally suitable. Advanced options are available for fine-tuning the AD configuration. Click ADVANCED OPTIONS to access extra options.
Click REBUILD DIRECTORY SERVICE CACHE to resync the cache if it becomes out of sync. Or if fewer users than expected are available in the permissions editors.
I don't see any AD information!
After configuring the Active Directory service, there can be a delay. TrueNAS can take a few minutes to populate the AD information.
To check the AD join progress, open the assignmentTask Manager in the upper-right corner.
TrueNAS displays any errors during the join process in the Task Manager.
When the import completes, AD users and groups become available. These have basic dataset permissions or an Access Control List (ACL). Enabled is the default status for the TrueNAS cache.
Joining AD adds default Kerberos realms and generates a default AD_MACHINE_ACCOUNT keytab.
TrueNAS automatically begins using this default keytab. TrueNAS removes any administrator credentials stored in the TrueNAS configuration file.
Related Services: FTP Access
The recommendation is to use SFTP over FTP. But joined systems do allow FTP access. Keep these caveats in mind:
Authentication uses DOMAIN\username as the user name by default.
A user home directory needs to exist before joining.
You cannot add an AD user to the FTP group. Enable local user auth for FTP instead.
An existing samba homes share created in the GUI is set as the template homedir for AD users. This means that AD user home directories are set inside that path.
Proper permissions are vital.
There are no guarantees about how proftpd handles ACLs.
AD users can have populated homedir information in their LDAP schema. The admin (or pam_mkhomedir) must ensure that these paths exist.
When the admin is pulling home directories from their LDAP schema, take an extra step of caution. Ensure that users aren’t writing files to the boot device.
Troubleshooting
Resync the cache if it becomes out of sync. Or if fewer users than expected are available in the permissions editors. Go to Directory Services > Active Directory > REBUILD DIRECTORY SERVICE CACHE.
If you are using Windows Server with 2008 R2 or older, try the following options:
Create a Computer entry on the Windows server Organizational Unit (OU). When creating this entry, enter the TrueNAS host name in the name field. Make sure it is the same name as the one set in the Hostname field in Network > Global Configuration. Must match the NetBIOS alias from Directory Services > Active Directory > Advanced Options.
Shell Commands
You can enter various shell commands to get more details about the AD connection and users:
AD current state: midclt call activedirectory.get_state.
Details about the currently connected Lightweight Directory Access Protocol (LDAP) server: midclt call activedirectory.domain_info | jq.
Example:
View AD users: wbinfo -u.
To see more details about a user, enter getent passwd DOMAIN\\<user>. Replace <user> with the desired user name.
With the TrueNAS cache enabled wbinfo -u can show more users than appear to be available when configuring permissions. Go to Directory Services > Active Directory and increase the AD Timeout value.
View AD groups: wbinfo -g.
To see more details, enter getent group DOMAIN\\domain\ users.
View domains: wbinfo -m.
Test AD connection: wbinfo -t. A successful test shows a message similar to checking the trust secret for domain YOURDOMAIN via RPC calls succeeded.
User connection test to an SMB share: smbclient '//127.0.0.1/smbshare -U AD01.LAB.IXSYSTEMS.COM\ixuser, replacing 127.0.0.1 with your server address, smbshare with the SMB share name, AD01.LAB.IXSYSTEMS.COM with your trusted domain, and ixuser with the user account name for authentication testing.
2.11.2 - Setting Up LDAP
Use the LDAP screen to configure Lightweight Directory Access Protocol (LDAP) server settings on your TrueNAS.
Lightweight Directory Access Protocol (LDAP) is an open and cross-platform protocol. It is often used to centralize authentication. TrueNAS includes an Open LDAP client for accessing information from an LDAP server. An LDAP server provides directory services for finding network resources. This includes finding users and their associated permissions.
Does LDAP work with SMB?
LDAP authentication for SMB shares is not enabled. To enable, first determine if LDAP authentication for SMB shares is a requirement. If so, configure the LDAP directory and populate it with Samba attributes. The most popular script for performing this task is smbldap-tools. The LDAP server must support SSL/TLS. Import the certificate for the LDAP server CA. Non-CA certificates are not currently supported.
Integrating an LDAP Server with TrueNAS
To integrate an LDAP server with TrueNAS, go to Directory Services > LDAP.
Enter any LDAP server host names or IP addresses.
Separate entries with an empty space.
Entering more than one host name or IP address creates an LDAP failover priority list.
What does this do?
If a host does not respond, the system tries the next host in the list until it establishes a new connection.
Enter the Base DN.
This is the top level of the LDAP directory tree used when searching for resources.
For example, dc=test,dc=org.
Enter the Bind DN.
This is the administrative account name on the LDAP server.
For example, cn=Manager,dc=test,dc=org.
Enter the Bind Password.
This is the password associated with the account in Bind DN.
The final basic option is Enable.
Clearing the Enable checkbox disables the LDAP configuration without deleting it. Enable it at a later time without reconfiguring the options.
To make further changes to the LDAP configuration, click ADVANCED OPTIONS.
See LDAP Screen for information on basic and advanced option settings.
See Kerberos for more information on using Kerberos.
To configure LDAP certificate-based authentication for the LDAP provider to sign, see Certificate Signing Requests.
Samba 4.13.0 deprecated Samba Schema. Select if SMB shares need LDAP authentication and the LDAP server is already configured with Samba attributes. If selected, specify the type of schema from the Schema dropdown list.
2.11.3 - Setting up NIS
Use the NIS screen to configure Network Information System (NIS) on your TrueNAS.
NIS (Network Information Service) is a client–server directory service protocol. It assists in distributing system configuration data between computers on a network. This data can include user and host names.
What exactly does this do?
A NIS system maintains and distributes a central directory. This central directory contains user and group information. It also contains other text-based tables of information. These tables can include host names and e-mail aliases.
In FreeBSD, the file /etc/passwd contains the list of users. The file /etc/shadow contains the authentication hashes. NIS adds another global user list to identify users on any NIS domain client.
NIS is limited in scalability and security.
For modern networks, LDAP has replaced NIS.
To configure NIS, go to Directory Services > NIS.
Enter the NIS Domain name and list any NIS Servers (host names or IP addresses).
Press Enter to separate server entries.
Configure the remaining options as needed:
Secure Mode : Select to have ypbind(8) refuse to bind to any NIS server not running as root on a TCP port over 1024.
Manycast : Select for ypbind to bind to the fastest responding server.
Enable : Leave the checkbox clear to disable the configuration without deleting it.
Click SAVE to save configuration settings.
Click REBUILD DIRECTORY SERVICE CACHE to resync the cache if it becomes out of sync. Or if fewer users than expected are available in the permissions editors.
2.11.4 - Setting Up Kerberos
Use the Kerberos screen to configure Kerberos realms and keytabs on your TrueNAS.
Kerberos is a web authentication protocol that uses strong cryptography. It proves the identity of both client and server over an insecure network connection.
Kerberos uses realms and keytabs to authenticate clients and servers.
A Kerberos realm is an authorized domain that a Kerberos server can use to authenticate a client.
Kerberos keytabs allow systems and clients to join an Active Directory or LDAP. Keytabs make it possible to join without entering a password.
TrueNAS allows configuring both Kerberos realms and keytabs.
Kerberos Realms
Your network must contain a Key Distribution Center (KDC) to add a realm.
Users can configure Kerberos realms. Go to Directory Services > Kerberos Realms** and click ADD.
By default, TrueNAS creates a Kerberos realm for the local system.
Enter the Realm name and click SUBMIT.
See Kerberos Screens for more information on Kerberos screens and settings.
Kerberos Keytabs
Kerberos keytabs allow systems and clients to join an Active Directory or LDAP. Keytabs make it possible to join without entering a password.
A keytab (key table) is a file that stores encryption keys for various authentication scenarios.
With keytabs, the TrueNAS system database benefits from this security feature. It does not store the Active Directory or LDAP administrator account password. This could be a security risk in some environments.
When using a keytab, create and use a less privileged account to perform any required queries.
The TrueNAS system database stores the password for that account.
Create Keytab on Windows Server for Active Directory
To create the keytab on a Windows Server system, open a command prompt and use the ktpass command:
ktpass -princ USERNAME@REALM.COM -pass PASSWORD -crypto ENCRYPTION TYPE -ptype KRB5_NT_PRINCIPAL -kvno 0 -out c:\PATH\KEYTABNAME.KEYTAB where USERNAME@REALM.COM is the Windows Server user and principal name written in the format username@KERBEROS.REALM.
The Kerberos realm is typically in all caps, but the Kerberos realm case should match the realm name.
Refer to this note about using /princ for more details.
PASSWORD is the Windows Server user password.
ENCRYPTION TYPE is the cryptographic type you want to use. Setting ENCRYPTION TYPE to ALL allows using all supported cryptographic types.
Users can specify each key instead of ALL:
DES-CBC-CRC is used for compatibility.
DES-CBC-MD5 is used for compatibility and adheres more closely to the MIT implementation.
Specifying cryptographic types creates a keytab with enough privileges to grant tickets.
PATH\KEYTABNAME.KEYTAB is the path where you want to save the keytab and the name you want it to have.
Example ktpass Command
ktpass -princ admin@WINDOWSSERVER.NET -pass Abcd1234! -crypto ALL -ptype KRB5_NT_PRINCIPAL -kvno 0 -out c:\kerberos\freenas.keytab
Add Windows Keytab to TrueNAS
After generating the keytab, add it to the TrueNAS system in Directory Services > Kerberos Keytabs > Add Kerberos Keytab.
To instruct the Active Directory service to use the keytab, go to Directory Services > Active Directory and click Advanced Options. Select the installed keytab using the Kerberos Principal dropdown list.
When using a keytab with Active Directory, username and userpass in the keytab should match the Domain Account Name and Domain Account Password fields in Directory Services > Active Directory.
To instruct LDAP to use a principal from the keytab, go to Directory Services > Active Directory. Click Advanced Options, then select the installed keytab using the Kerberos Principal dropdown list.
2.12 - Sharing
Tutorials for configuring different storage sharing protocols in TrueNAS.
File sharing is a core benefit of a NAS. TrueNAS helps foster collaboration between users through network shares. TrueNAS can use AFP, iSCSI shares, Unix NFS shares, Windows SMB shares, and WebDAV shares.
Contents
AFP Share Creation: Provides information on how to create Apple Filing Protocol (AFP) shares on your TrueNAS.
To create a new share, make sure a dataset is available with all the data for sharing.
AFP Share Configuration
To configure the new share, go to Sharing > Apple Shares (AFP) and click ADD.
Because AFP sharing is deprecated, confirm that you intend to create an AFP share.
Next, use the file browser to select a dataset to share and enter a descriptive name for the share in Name.
Select Time Machine if the share is to have Apple Time Machine backups.
This advertises the share to other Mac systems as a disk that stores Time Machine backups.
Having multiple AFP shares configured for Time Machine backups is not recommended.
Select Use as Home Share to create home directories for users that connect to the share.
Only one AFP share can be a home share.
The AFP share is enabled by default.
To create the share but not immediately enable it, clear Enabled.
Clicking SUBMIT creates the share.
To edit an existing AFP share, go to Sharing > Apple Shares (AFP) and click .
Start or Stop AFP Service
To begin advertising the AFP shared location, go to Services. To determine the current state of the AFP service, hover the mouse over the toggle. The toggle turns blue when it is running. Click the AFP toggle to start the service if it is not running, or to stop the service if it is already running.
To automatically start the service after TrueNAS boots, select Start Automatically.
Changing AFP Service settings
If the AFP service is running, stop it before attempting to edit settings.
It is recommended to use the default settings for the AFP service.
To adjust the service settings, click the edit icon.
Use an Apple operating system to connect to the share.
Open the Finder app on the Mac and click Go > Connect to Server… in the top menu bar on the Mac.
Enter afp://{IPofTrueNASsystem} and click Connect.
For example, entering afp://192.168.2.2 connects to the TrueNAS AFP share at 192.168.2.2.
2.12.2 - Block Shares (iSCSI)
Describes how to configure iSCSI shares on TrueNAS CORE.
Internet Small Computer Systems Interface (iSCSI) represents standards for using Internet-based protocols for linking binary data storage device aggregations.
IBM and Cisco submitted the draft standards in March 2000. Since then, iSCSI has seen widespread adoption into enterprise IT environments.
iSCSI functions through encapsulation. The Open Systems Interconnection Model (OSI) encapsulates SCSI commands and storage data within the session stack. The OSI further encapsulates the session stack within the transport stack, the transport stack within the network stack, and the network stack within the data stack.
Transmitting data this way permits block-level access to storage devices over LANs, WANs, and even the Internet itself (although performance may suffer if your data traffic is traversing the Internet).
The table below shows where iSCSI sits in the OSI network stack:
OSI Layer Number
OSI Layer Name
Activity as it relates to iSCSI
7
Application
An application tells the CPU that it needs to write data to non-volatile storage.
6
Presentation
OSI creates a SCSI command, SCSI response, or SCSI data payload to hold the application data and communicate it to non-volatile storage.
5
Session
Communication between the source and the destination devices begins. This communication establishes when the conversation starts, what it talks about, and when the conversion ends. This entire dialogue represents the session. OSI encapsulates the SCSI command, SCSI response, or SCSI data payload containing the application data within an iSCSI Protocol Data Unit (PDU).
4
Transport
OSI encapsulates the iSCSI PDU within a TCP segment.
3
Network
OSI encapsulates the TCP segment within an IP packet.
2
Data
OSI encapsulates the IP packet within the Ethernet frame.
1
Physical
The Ethernet frame transmits as bits (zeros and ones).
Unlike other sharing protocols on TrueNAS, an iSCSI share allows block sharing and file sharing.
Block sharing provides the benefit of block-level access to data on the TrueNAS.
iSCSI exports disk devices (zvols on TrueNAS) over a network that other iSCSI clients (initiators) can attach and mount.
iSCSI Terminology
Challenge-Handshake Authentication Protocol (CHAP): an authentication method that uses a shared secret and three-way authentication to determine if a system is authorized to access the storage device. It also periodically confirms that the session has not been hijacked by another system. In iSCSI, the client (initiator) performs the CHAP authentication.
Mutual CHAP: a CHAP type in which both ends of the communication authenticate to each other.
Internet Storage Name Service (iSNS): protocol for the automated discovery of iSCSI devices on a TCP/IP network.
Extent: the storage unit to be shared. It can either be a file or a device.
Portal: indicates which IP addresses and ports to listen on for connection requests.
Initiators and Targets: iSCSI introduces the concept of initiators and targets which act as sources and destinations respectively. iSCSI initiators and targets follow a client/server model. Below is a diagram of a typical iSCSI network. The TrueNAS storage array acts as the iSCSI target and can be accessed by many of the different iSCSI initiator types, including software and hardware-accelerated initiators.
The iSCSI protocol standards require that iSCSI initiators and targets is represented as iSCSI nodes. It also requires that each node is given a unique iSCSI name. To represent these unique nodes via their names, iSCSI requires the use of one of two naming conventions and formats, IQN or EUI. iSCSI also allows the use of iSCSI aliases which are not required to be unique and can help manage nodes.
Logical Unit Number (LUN): LUN represents a logical SCSI device. An initiator negotiates with a target to establish connectivity to a LUN. The result is an iSCSI connection that emulates a connection to a SCSI hard disk. Initiators treat iSCSI LUNs as if they were a raw SCSI or SATA hard drive. Rather than mounting remote directories, initiators format and directly manage filesystems on iSCSI LUNs. When configuring multiple iSCSI LUNs, create a new target for each LUN. Since iSCSI multiplexes a target with multiple LUNs over the same TCP connection, there can be TCP contention when more than one target accesses the same LUN. TrueNAS supports up to 1024 LUNs.
Jumbo Frames: Jumbo frames are the name given to Ethernet frames that exceed the default 1500 byte size. This parameter is typically referenced by the nomenclature as a maximum transmission unit (MTU). A MTU that exceeds the default 1500 bytes necessitates that all devices transmitting Ethernet frames between the source and destination support the specific jumbo frame MTU setting, which means that NICs, dependent hardware iSCSI, independent hardware iSCSI cards, ingress and egress Ethernet switch ports, and the NICs of the storage array must all support the same jumbo frame MTU value. So, how does one decide if they should use jumbo frames?
Administrative time is consumed configuring jumbo frames and troubleshooting if/when things go sideways. Some network switches might also have ASICs optimized for processing MTU 1500 frames while others might be optimized for larger frames. Systems administrators should also account for the impact on host CPU utilization. Although jumbo frames are designed to increase data throughput, it may measurably increase latency (as is the case with some un-optimized switch ASICs); latency is typically more important than throughput in a VMware environment. Some iSCSI applications might see a net benefit running jumbo frames despite possible increased latency. Systems administrators should test jumbo frames on their workload with lab infrastructure as much as possible before updating the MTU on their production network.
TrueNAS Enterprise
Asymmetric Logical Unit Access (ALUA): ALUA allows a client computer to discover the best path to the storage on a TrueNAS system.
HA storage clusters can provide multiple paths to the same storage.
For example, the disks are directly connected to the primary computer and provide high speed and bandwidth when accessed through that primary computer.
The same disks are also available through the secondary computer, but speed and bandwidth are restricted.
With ALUA, clients automatically ask for and use the best path to the storage.
If one of the TrueNAS HA computers becomes inaccessible, the clients automatically switch to the next best alternate path to the storage.
When a better path becomes available, as when the primary host becomes available again, the clients automatically switch back to that better path to the storage.
Do not enable ALUA on TrueNAS unless it is also supported by and enabled on the client computers. ALUA only works when enabled on both the client and server.
iSCSI Configuration Methods
There are a few different approaches for configuring and managing iSCSI-shared data:
TrueNAS Enterprise
TrueNAS Enterprise customers that use vCenter to manage their systems can use the TrueNAS vCenter Plugin to connect their TrueNAS systems to vCenter and create and share iSCSI datastores.
This is all managed through the vCenter web interface.
TrueNAS CORE web interface: the TrueNAS web interface is fully capable of configuring iSCSI shares. This requires creating and populating zvol block devices with data, then setting up the iSCSI Share. TrueNAS Enterprise licensed customers also have additional options to configure the share with Fibre Channel.
TrueNAS SCALE web interface: TrueNAS SCALE offers a similar experience to TrueNAS CORE for managing data with iSCSI; create and populate the block storage, then configure the iSCSI share.
Fibre Channel: Describes how to set up Fibre Channel on TrueNAS CORE.
2.12.2.1 - Adding an iSCSI Share
Describes how to add an iSCSI share on TrueNAS CORE.
To get started, make sure you have created a zvol or a dataset with at least one file to share.
Go to Sharing > Block Shares (iSCSI). You can either set one up manually or use WIZARD to guide you through creation.
Wizard Setup Process
On Create or Choose Block Device:
Enter a name for the iSCSI share. It can only contain lowercase alphanumeric characters plus a dot (.), dash (-), or colon (:). We recommend keeping the name short or at most 63 characters.
Choose the Extent Type.
If the Extent Type is Device, select the Zvol to share from the Device menu.
If the Extent Type is File, select the path to the extent and indicate the file size.
Select the type of platform to use for the share. For example, if using the share from an updated Linux OS, choose Modern OS.
Click Next. The Portals screen displays.
Select an existing portal or click Create New to add a portal.
If you create a new portal, you must select a discovery authentication method.
a. Select either CHAP or MUTUAL CHAP in the Discovery Authentication Method field.
b. Select either None or Create New in the Discovery Authentication Group field. Create New displays additional configuration fields.
If you select None you can leave Discovery Authentication Group empty.
c. Enter a number in the Group ID field to identify the group.
d. Enter the user name in the User field. This can be the same as the initiator.
e. Enter a password of 12 to 16 characters in the Secret field and again in Secret (Confirm).
f. Select the IP address(es) to use. If adding more than one IP address, click ADD and then select the IP address.
Use 0.0.0.0. to listen on all IPv4 or :: to listen on all IPv6 IP addresses.
G. Select the TCP port number to use if different from the default.
H. Click Next to display the Initiator screen.
Enter the initiator information to use. Decide which initiators or networks can use the iSCSI share. Leave the list empty to allow all initiators or networks, or add entries to the list to limit access to those systems. Use the keyboard Enter between each entry. Click Next to display the Confirm Options screen.
Confirm the settings you entered. To change any setting click BACK until you see the screen where you want to make changes.
Click SUBMIT to save the iSCSI block share.
Manual Setup Process
To add or edit an existing iSCSI share, use the seven tab to access the various iSCSI configuration screens.
Configure the share global configuration settings. Click the Target Global Configuration tab.
Configure the portal settings. Click on the Portals tab.
To add a new portal, click ADD and enter the basic and IP address information.
To edit an existing portal, click more_vert next to the portal and select Edit.
Configure the initiator settings (not required). Click on the Initiators Groups tab. Both the Add and Edit forms have the same settings fields.
Use ADD to display the Initiators Add configuration screen.
Either leave Allow All Initiators checked or configure your own allowed initiators and authorized networks.
Click the more_vert icon for the initiator group and select Edit to display the Initiator Group Edit configuration screen.
Configure authorized access networks. Click the Authorized Access tab.
Click ADD to add a new authorized access network. Fill out the group, user and peer user information.
Click more_vert next to the authorized access network and select Edit.
Configure targets. Click the Targets tab.
To add a new target, click ADD and enter the basic and iSCSI group information.
To edit an existing target, click more_vert next to it and select Edit.
Configure extents. Click the Extents tab.
To add a new extent, click ADD and enter the basic, type, and compatibility information.
To edit an existing extent, click more_vert next to it and select Edit.
Configure any associated targets. Click on the Associated Targets tab.
To add a new associated target, click ADD and fill out the information.
To edit an existing associated target, click more_vert next to it and select Edit.
Starting the iSCSI Service
To turn on the iSCSI service, go to Services locate iSCSI and click on the toggle. It should display the status Running.
To set it to start automatically when TrueNAS boots up, select the Start Automatically checkbox.
Click on the edit returns to the options in Sharing > iSCSI.
2.12.2.2 - Increasing iSCSI Share Available Storage
Describes how to increase iSCSI share available storage on TrueNAS CORE.
Expanding LUNs
TrueNAS lets users expand Zvol and file-based LUNs to increase the available storage that the iSCSI shares.
Expanding Zvol LUNs
To expand a Zvol LUN, go to Storage > Pools and click the more_vert next to the Zvol LUN, then select Edit Zvol.
Enter a new size in the Size for this zvol field, then click SAVE.
To prevent data loss, the web interface does not allow users to reduce the Zvol size.
TrueNAS also does not allow users to increase the Zvol size past 80% of the pool size.
Expanding a File-Based LUN
To expand a file-based LUN, you need to know the path to the file. To find the path, go to Sharing > Block Shares (iSCSI) and click the Extents tab.
Click the more_vert next to the file-based LUN and select Edit.
Highlight and copy the path, then click CANCEL
Go to the shell and enter truncate -s +sizepath/to/file where size is how much space you want to grow the file by, and path/to/file is the file path you copied earlier, then press Enter.
An example of the command could look like this: truncate -s +2g /mnt/Shares/Dataset1/FileLun/FileLUN
Lastly, go back to the extent in Sharing > Block Shares (iSCSI) and make sure the Filesize is set to 0 so that the share uses the actual file size.
2.12.2.3 - Using the iSCSI Share
Describes how to use the iSCSI share in TrueNAS CORE.
Using the iSCSI Share
Connecting to and using an iSCSI share can differ between operating systems. This article provides instructions for Linux and Windows.
Configuring Linux to Use the iSCSI Share
iSCSI Utilities and Service
First, open the command line and ensure that the open-iscsi utility is installed.
To install the utility on an Ubuntu/Debian distribution, enter command sudo apt update && sudo apt install open-iscsi.
After the installation completes, ensure the iscsid service is running with command sudo service iscsid start.
With the iscsid service started, run the command iscsiadm with the discovery arguments and get the necessary information to connect to the share.
Discover and Log In to the iSCSI Share
Run the command sudo iscsiadm \--mode discovery \--type sendtargets \--portal {IPADDRESS} where {IPADDRESS} is IP address (without curly brackets) you configured in the UI on the iSCSI > Portals > Add screen.
The output provides the base name and target name that TrueNAS configured.
Alternatively, to get the same output enter command sudo iscsiadm -m discovery -t st -p {IPADDRESS} where {IPADDRESS} is IP address (without curly brackets) you configured for the iSCSI share.
Note the base name and target name given in the output, since you need them to log in to the iSCSI share.
When a portal discovery authentication method** set to CHAP (on the UI Sharing > iSCSI> Portals screen), add the three following command lines to /etc/iscsi/iscsid.conf.
discovery.sendtargets.auth.authmethod = CHAP
discovery.sendtargets.auth.username = user
discovery.sendtargets.auth.password = secret
The user for command discovery.sendtargets.auth.username is set in the authorized access used by the portal of the iSCSI share (UI iSCSI > Portals). Likewise, the password to use for command discovery.sendtargets.auth.password is the in the iSCSI > Authorized Access screen Secret field. Without those lines, the iscsiadm does not discover the portal configured to use the CHAP authentication method.
Next, enter command sudo iscsiadm \--mode node \--targetname {BASENAME}:{TARGETNAME} \--portal {IPADDRESS} \--login, where {BASENAME} and {TARGETNAME} (without curly brackets) is the information from the discovery command.
Partition iSCSI Disk
When the iSCSI share login succeeds, the device shared through iSCSI shows on the Linux system as an iSCSI Disk.
To view a list of connected disks in Linux, enter command sudo fdisk -l.
Because the connected iSCSI disk is raw, you must partition it.
Identify the iSCSI device in the list and enter command sudo fdisk {/PATH/TO/iSCSIDEVICE} where {/path/to/iSCSIDEVICE} (without curly brackets) is the path for your iSCSI device.
View the iSCSI device path in shell with the sudo fdisk -l command.
Use the fdisk command defaults when partitioning the disk.
Remember to type w when finished partitioning the disk.
The w command tells fdisk to save any changes before quitting.
After creating the partition on the iSCSI disk, a partition slice displays on the device name.
For example, /dev/sdb1.
Enter fdisk -l to see the new partition slice.
Make a File System on the iSCSI Disk
Finally, use mkfs to make a file system on the new partition slice on the device.
To create the default filesystem (ext2), enter the sudo mkfs {/PATH/TO/iSCSIDEVICEPARTITIONSLICE} command where {/PATH/TO/iSCSIDEVICEPARTITIONSLICE} (without curly brackets) is the path to your partition slice on your device.
Mount the iSCSI Device
Now the iSCSI device can mount and share data.
Enter command sudo mount {/PATH/TO/iSCSIDEVICEPARTITIONSLICE} where {/PATH/TO/iSCSIDEVICEPARTITIONSLICE} (without curly brackets) is the path to your partition slice on your device.
For example, sudo mount /dev/sdb1 /mnt mounts the iSCSI device sdb1 to /mnt.
Configuring Windows to Use the iSCSI Share
To access the data on the iSCSI share, clients need to use iSCSI Initiator software. An iSCSI Initiator client is pre-installed in Windows 7 to 10 Pro, and Windows Server 2008, 2012, and 2019. Windows Professional Edition is usually required.
First, click the Start Menu and search for the iSCSI Initiator application.
Next, go to the Configuration tab and click Change to change the iSCSI initiator to the same name created earlier. Click OK.
Next, switch to the Discovery Tab, click Discover Portal, and type in the TrueNAS IP address.
If TrueNAS changed the port number from the default 3260, enter the new port number.
If you set up CHAP when creating the iSCSI share, click Advanced…, set Enable CHAP log on, and enter the initiator name and the same target/secret set earlier in TrueNAS.
Click OK.
Go to the Targets tab, highlight the iSCSI target, and click Connect.
After Windows connects to the iSCSI target, you can partition the drive.
Search for and open the Disk Management app.
Your drive should currently be unallocated. Right-click the drive and click New Simple Volume….
Complete the Wizard to format the drive and assign a drive letter and name.
Finally, go to This PC or My Computer in File Explorer. The new iSCSI volume should show up under the list of drives. You should now be able to add, delete, and modify files and folders on your iSCSI drive.
2.12.2.4 - Fibre Channel
Describes how to set up Fibre Channel on TrueNAS CORE.
Fibre Channel is a TrueNAS Enterprise feature. Only TrueNAS systems licensed for Fibre Channel have the Fibre Channel Ports added to Sharing > Block Shares (iSCSI) screens.
Setting up a Fibre Channel ISCSI Share
This procedure uses an example to illustrate each step.
Add a zvol to use for the share.
a. Go to Storage > Pools.
b. Find an existing pool, click and Add zvol to create a new zvol.
Configure these iSCSI tabs in Sharing > Block Shares (iSCSI):
Initiators and Authorized Access screens only apply to iSCSI and can be ignored when configuring Fibre Channel.
a. Portals. Check for the 0.0.0.0:3260 IP and port number. If it doesn’t exist, click Add and add this portal.
b. Targets. Click Add to set up a new target. Enter the values for your uses case in the Target Name, Target Alias, and Portal Group.
Select the Target Mode option from iSCSI, Fibre Channel or Both.
The Initiator Group ID selects which existing initiator group has access to the target.
Options for the Authentication Method are None, CHAP, or Mutual CHAP.
Set Authentication Group Number to either none or an integer. This value represents the number of existing authorized accesses.
The TargetReporting tab provides Fibre Channel port bandwidth graphs.
c. Extents. Click Add to create a new extent.
d. Associated Targets. Click Add to add a new associated target.
Select values for Target and Extent.
The LUN ID is a value between 0 and 1023. Some initiators expect a value below 256. Leave this field blank to automatically assign the next available ID.
Set Fibre Channel Ports.
a. Click chevron_right to expand the option for the port you want to select.
b. Select the Mode as either Initiators or Targets. The Targets dropdown field displays on the right side of the screen.
c. Select the target from the list. A list of **Connected Initiators displays below the Targets dropdown list field.
d. Select the initiator you want to use and then click Save.
Start the iSCSI service. Go to Services and click the iSCSI toggle until the Running status message displays.
2.12.3 - NFS Share Creation
Provides information on how to create a Network File Share (NFS) on your TrueNAS.
Creating a Network File System (NFS) share on TrueNAS makes a lot of data available for anyone with share access.
Depending on the share configuration, it can restrict users to read or write privileges.
NFS treats each dataset as its own file system.
When creating the NFS share on the server, the specified dataset is the location that client accesses.
If you choose a parent dataset as the NFS file share location, the client cannot access any nested or child datasets beneath the parent.
If you need to create shares that include child datasets, SMB sharing is an option.
Note that Windows NFS Client versions currently support only NFSv2 and NFSv3.
Adding an NFS Share Dataset
Before creating an NFS share, create the dataset you want the share to use for data storage.
It is best practice to use a dataset instead of a full pool for SMB and/or NFS shares.
Sharing an entire pool makes it more difficult to later restrict access if needed.
We recommend creating a new dataset with the Share Type set to Generic for the new NFS share.
Use the file browser to select the dataset to share.
Enter an optional Description to help identify the share.
Clicking SUBMIT creates the share.
There is the option to select ENABLE SERVICE while creating the share to start the service.
With this option selected, the service starts automatically after any reboots.
To edit an existing NFS share, go to Sharing > Unix Shares (NFS) and click more_vert> Edit.
The options available are identical to the share creation options.
Configure the NFS Service
To begin sharing the data, go to Services and click the NFS toggle.
If you want NFS sharing to activate immediately after TrueNAS boots, set Start Automatically.
NFS service settings can be configured by clicking (Configure).
See NFS Screen for details.
Unless a specific setting is needed, we recommend using the default settings for the NFS service.
When TrueNAS is already connected to Active Directory, setting NFSv4 and Require Kerberos for NFSv4 also requires a kerberos keytab.
Connecting to the NFS Share with a Linux/Unix OS
The NFS share connects with various operating systems.
The recommendation is to use a Linux/Unix operating system.
Using a Linux/Unix operating system, download the nfs-common kernel module.
Do this using the package manager of the installed distribution.
For example, on Ubuntu/Debian, enter sudo apt-get install nfs-common in the terminal.
After installing the module, connect to an NFS share by entering sudo mount -t nfs {IPaddressOfTrueNASsystem}:{path/to/nfsShare} {localMountPoint}, where {IPaddressOfTrueNASsystem} is the IP address of the remote TrueNAS system that contains the NFS share, {path/to/nfsShare} is the path to the NFS share on the TrueNAS system, and {localMountPoint} is a local directory on the host system configured for the mounted NFS share.
For example, sudo mount -t nfs 10.239.15.110:/mnt/pool1/photoDataset /mnt mounts the NFS share photoDataset to the local directory /mnt.
By default, anyone that connects to the NFS share only has the read permission.
To change the default permissions, edit the share.
Go to Advanced Options and change the Access settings.
ESXI 6.7 or later is required for read/write functionality with NFSv4 shares.
2.12.4 - WebDav Share Creation
Contains information on how to create a Web-based Distributed Authoring and Versioning (WebDAV) share on your TrueNAS.
TrueNAS supports (WebDAV), or Web-based Distributed Authoring and Versioning. WebDAV makes it easy to share a TrueNAS dataset and its contents over the web.
To create a new share, make sure a dataset is available with all the data for sharing.
Share Configuration
Go to Sharing > WebDAV Shares and click ADD.
Enter a name for the share in Name and use the file browser to select the dataset to share.
Enter an optional description for the share in Description to help identify it.
To prevent user accounts from modifying the shared data, select Read Only.
The default selection is Change User & Group Ownership.
This changes existing ownership of all files in the share to the webdav user and group accounts.
The default selection simplifies WebDAV share permission. This unexpected change causes the web interface to display a warning:
Clearing the checkbox labeled Change User & Group Ownership prevents the warning from displaying. You must manually set shared file ownership to the webdav or www user and group accounts in that case.
By default, the new WebDAV share is immediately active.
To create the share but not immediately activate it, clear the checkmark in Enable.
Click SUBMIT to create the share.
Service Activation
Creating a share immediately opens a dialog to activate the WebDAV service:
It is possible to enable or disable the WebDAV system service at a later time. Go to Services and click the WebDAV toggle to stop the service. To automatically start the service when TrueNAS boots, select Start Automatically.
Click the edit to change the service settings.
For better data security, select HTTPS as the Protocol.
This requires choosing an SSL certificate. The freenas_default certificate is available as an option.
All Protocol options require defining a Port number.
Verify that the WebDAV service port is not already in use on the network before defining a Port number.
Select either Basic or Digest as the method of HTTP Authentication. Create a new Webdav Password. This prevents unauthorized access to the shared data.
Click SAVE after making any changes.
Connecting to the WebDAV Share
WebDAV shared data is accessible from a web browser.
To see the shared data, open a new browser tab and enter the following in the URL field {PROTOCOL}://{TRUENASIP}:{PORT}/{SHAREPATH} where the elements in curly brackets {} are your chosen settings from the WebDAV share and service.
Example: https://10.2.1.1:8081/newdataset
When the Authentication WebDAV service option is configured to either Basic or Digest, a user name and password is required.
Enter the user name webdav and the password defined in the WebDAV service.
2.12.5 - Windows Shares (SMB)
Tutorials for SMB sharing scenarios.
SMB Background
SMB (also known as CIFS) is the native file sharing system in Windows.
SMB shares can connect to any major operating system. This includes Windows, MacOS, and Linux.
TrueNAS can use SMB to share files among one or many users or devices.
SMB supports a wide range of permissions and security settings.
SMB can support advanced permissions (ACLs) on Windows and other systems.
SMB also supports Windows Alternate Streams and Extended Metadata.
SMB is suitable for the management and administration of large or small pools of data.
TrueNAS uses Samba to provide SMB services.
There are many versions of the SMB protocol.
During SMB session negotiation, an SMB client attempts to negotiate the highest SMB protocol.
Industry-wide, the usage of the SMB1 protocol (sometimes referred to as NT1) is being deprecated for security reasons.
However, most SMB clients support SMB 2 or 3 protocols, even when they are not the default protocols.
Legacy SMB clients rely on NetBIOS name resolution to discover SMB servers on a network.
The NetBIOS name server (nmbd) is disabled by default in TrueNAS.
You can enable it in Network > Global Configuration if this functionality is required.
MacOS clients use mDNS to discover the presence of SMB servers on the network.
The mDNS server (avahi) is enabled by default on TrueNAS.
Windows clients use WS-Discovery to discover the presence of SMB servers.
Check the version of the Windows client.
In some versions of the Windows client, the default settings disable network discovery.
Discoverability through broadcast protocols is a convenience feature.
It is not required to access an SMB server.
First Steps
Create a dataset.
It is best practice to use a dataset instead of a full pool for SMB and/or NFS shares.
Sharing an entire pool makes it more difficult to later restrict access if needed.
For the new SMB share, the recommendation is to create a new dataset and set the Share Type to SMB.
Create the ZFS dataset with these settings:
aclmode = restricted
case sensitivity = insensitive
A default Access Control List is also applied to the dataset.
This default ACL is restrictive and only allows access to the dataset owner and group.
You can change this ACL later according to your use case.
Create local user accounts.
By default, all new local users are members of a built-in SMB group called builtin users.
You can use this group to grant access to all local users on the server.
You can use additional groups to fine-tune permissions to large numbers of users.
User accounts built-in to TrueNAS cannot access SMB.
User accounts that do not have the smb flag set cannot access SMB.
As of 13.3, SMB user passwords can include the question mark (?).
Why not just allow anonymous access to the share?
Anonymous or guest access to the share is possible, but this is a security vulnerability.
Anonymous or guest access is being deprecated by the major SMB client vendors.
This partly because signing and encryption are not possible for guest sessions.What about LDAP users?
With LDAP configured, users from the LDAP server can have access the SMB share.
Go to Directory Services > LDAP > ADVANCED MODE and set Samba Schema.
Caution: local TrueNAS user accounts no longer have access to the share.
Tune the dataset ACL.
After creating a dataset and the needed accounts, determine the access requirements and adjust the dataset ACL to match.
To edit the ACL, go to Storage > Pools, open the options for the new dataset, and click Edit Permissions.
Many home users often add a new entry that grants this access: FULL_CONTROL to the builtin_users group with the flags set to INHERIT.
See the Permissions article for more details.
Creating an SMB Share
To create a Windows SMB share, go to Sharing > Windows Shares (SMB) and click ADD.
The Path and Name of the SMB share define the smallest amount of information required to create a new SMB share.
The Path is the directory tree on the local file system exported over the SMB protocol.
Name is the name of the SMB share.
This forms a part of the full share path name when SMB clients perform an SMB tree connect.
Enter a name that is less than or equal to 80 characters in length.
The name shoud not contain any invalid characters.
Microsoft documentation MS-FSCC section 2.1.6 lists these invalid characters.
The last component of the value in Path becomes the share name if Name is blank or empty.
You can set a share Purpose to apply and lock pre-defined advanced options for the share.
To keep full control over all the share Advanced Options, choose No presets.
You can specify an optional value in Description to help explain the purpose of the share.
Enabled shares this path when the SMB service is activated.
Clearing Enabled disables the share without deleting the configuration.
See SMB Share Screen for more information on SMB Share settings.
Activating the SMB Service
Connecting to an SMB share does not work when the related system service is not activated.
To make an SMB share available on the network, go to Services and click the SMB toggle to start the service.
If you want the service to activate whenever TrueNAS boots, select Start Automatically.
Verify that the required CIFS packages are installed for your distribution of Linux.
Create a mount point. Enter sudo mkdir /mnt/smb_share.
Mount the volume. Enter sudo mount -t cifs //computer_name/share_name /mnt/smb_share.
If your share requires user credentials, add the switch -o username= with your username after cifs and before the share address.
Windows
To mount the SMB share to a drive letter on Windows, open the command line and enter the following command with the appropriate drive letter, computer name, and share name.
net use Z: \\computer_name\share_name /PERSISTENT:YES
In case of Windows reporting an incorrect password, you might have to change your Windows security settings using Local Security Policy > Local Policies > Security Options > Network security: LAN Manager authentication level > Send NTLMv2 response only.
Apple
Open Finder > Go > Connect To Server
Enter the SMB address: smb://192.168.1.111.
Input the username and password for the user assigned to that pool or guest if gGuest access is enabled on the share.
FreeBSD
Create a mount point. Enter sudo mkdir /mnt/smb_share.
Mount the volume. Enter sudo mount_smbfs -I computer_name\share_name /mnt/smb_share.
SMB Articles
Managing SMB Shares: Provides information on how to manage Server Message Block (SMB) shares on your TrueNAS.
Home Shares: Describes how to configure a Home Share on TrueNAS CORE.
Shadow Copies: Describes how to configure shadow copies on TrueNAS CORE.
2.12.5.1 - Managing SMB Shares
Provides information on how to manage Server Message Block (SMB) shares on your TrueNAS.
Share Management
After creating the SMB share, additional management options are available by going to Sharing > Windows Shares (SMB) and clicking for a share entry:
Opens a screen to configure an Access Control List (ACL) for the share. The default is open.
Edit Share ACL
This is separate from file system permissions, and applies at the level of the entire SMB share.
Permissions defined here are not interpreted by clients of other file sharing protocols.
Permissions defined here are not interpreted by other SMB shares. Even if the other SMB shares export the same share Path value.
Enabling Access Based Share Enumeration uses this ACL to determine the browse list.
Name
Description
Edit Filesystem ACL
Opens a screen to configure an Access Control List (ACL) for the path defined in the share Path.
Delete
Remove the share configuration from TrueNAS. Shared data is unaffected.
Configure Share ACL
To see the share ACL options, click more_vert > Edit Share ACL.
>
The Share Name is shown, but cannot be changed.
ACL Entries are listed as a block of settings.
Click ADD to register a new entry.
Name
Description
SID
Who this ACL entry (ACE) applies to, shown as a Windows Security Identifier. Either a SID or a Domain with Name is required for the ACL.
Domain
Enter a domain for the user Name. Required when a SID is not entered. Local users have the SMB server NetBIOS name: truenas\smbusers.
Permission
Dropdown list of predefined permission combinations: Select Read for read access and execute permission on the object (RX). Select Change for read access, execute permission, write access, and delete object (RXWD). Select Full for read access, execute permission, write access, delete object, change Permissions, and take ownership (RXWDPO).
Enter the name of who this ACL entry applies to, shown as a user name. Requires adding the user Domain.
Type
Select from the dropdown list how permissions are applied to the share. Select Allowed to deny all permissions by default except those that are manually defined. Select Denied to allow all permissions by default except those that are manually defined.
Click SAVE to store the share ACL and apply it to the share immediately.
Configure File System ACL
Click more_vert> Edit Filesystem ACL to quickly return to Storage > Pools and edit the dataset ACL.
This ACL defines the user accounts or groups that own or have specific permissions to the shared dataset.
The User and Group values show which accounts own, or have full permissions to the dataset.
Change the default settings to your preferred primary account and group. Select the Apply checkboxes before saving any changes.
ACL Presets
To rewrite the current ACL with a standardized preset, click SELECT AN ACL PRESET and choose an option:
Open
Has three entries:
owner@ has full dataset control.
group@ has full dataset control.
All other accounts can modify the dataset contents.
Restricted
Has two entries:
owner@ has full dataset control.
group@ can modify the dataset contents.
Home
Has three entries:
owner@ has full dataset control.
group@ can modify the dataset contents.
All other accounts can traverse through the dataset.
Adding ACL Entries (ACEs)
To define permissions for a specific user account or group, click ADD ACL ITEM.
Open the Who dropdown list, select User or Group, and select a specific user or group account.
Define the settings for the account. Define the permissions to apply to that account.
For example, to allow the tmoore user permission to view dataset contents but not make changes, define the ACL Type as Allow. Define Permissions for this user as Read.
2.12.5.2 - Home Shares
Describes how to configure a Home Share on TrueNAS CORE.
TrueNAS offers the Use as Home Share option for organizations or SMEs that want to use a single SMB share to provide a personal directory to every user account.
The Use as Home Share feature is available for a single TrueNAS SMB share. You can create additional SMB shares as described in the SMB sharing article but without the Use as Home Share option enabled.
Go to Storage > Pools and open the more_vert next to the root dataset in the pool you just created, then click Add Dataset.
Name the dataset (this article uses Home_Share_Dataset as an example) and set the Share Type to SMB.
After creating the dataset, go to Storage > Pools and open more_vert next to the new dataset. Select Edit Permissions.
Click the Group dropdown menu and change the owning group to your Active Directory domain admins and check Apply Group.
Click Select an ACL Preset and choose HOME. Then, click SAVE.
Create the Share
Go to Sharing > Windows Shares (SMB) and click ADD.
Set the Path to the prepared dataset (Home_Share_Dataset for example).
The Name automatically changes to be identical to the dataset. Leave this at the default.
Set the Purpose to No presets, then click ADVANCED OPTIONS and check Use as Home Share. Click SUBMIT.
The ACL editor opens, displaying the home ACL preset values.
Click SAVE. Enable the SMB service in Services to make the share available on your network.
Add Users
Go to Accounts > Users and click ADD. Create a new user name and password. By default, the user Home Directory is titled from the user account name and added as a new subdirectory of Home_Share_Dataset.
If existing users require access to the home share, go to Accounts > Users and edit an existing account.
Adjust the user home directory to the appropriate dataset and give it a name to create their own directory.
After the user accounts have been added and permissions configured, users can log in to the share and see a folder matching their user name.
2.12.5.3 - Shadow Copies
Describes how to configure shadow copies on TrueNAS CORE.
Shadow Copies, also known as the Volume Shadow Copy Service (VSS) or Previous Versions, is a Microsoft service for creating volume snapshots.
Shadow copies can be used to restore previous versions of files from within Windows Explorer.
By default, all ZFS snapshots for a dataset underlying an SMB share path are presented to SMB clients through the volume shadow copy service or are accessible directly with SMB when the hidden ZFS snapshot directory is located within the path of the SMB share.
There are a few caveats about shadow copies to be aware of before activating the feature in TrueNAS:
When the Windows system is not fully patched to the latest service pack, Shadow Copies might not work.
If no previous versions of files to restore are visible, use Windows Update to ensure the system is fully up-to-date.
Shadow copy support only works for ZFS pools or datasets.
Appropriate permissions must be configured on the pool or dataset shared by SMB.
Users cannot use an SMB client to delete shadow copies. Instead, the administrator uses the TrueNAS web interface to remove snapshots.
Shadow copies can be disabled for an SMB share by clearing the checkmark from Enable shadow copies for the SMB share.
This does not prevent access to the hidden .zfs/snapshot directory for a ZFS dataset when the directory is located within the path for an SMB share.
To enable Shadow Copies, go to Sharing > Windows Shares (SMB) and Edit an existing share.
Open the Advanced Options, find the Other Options and select Enable Shadow Copies.
Windows 10 v2004 Issue
Some users have experienced issues in the Windows 10 v2004 release where network shares can’t be accessed. The problem appears to come from a bug in gpedit.msc, the Local Group Policy Editor. Unfortunately, setting the Allow insecure guest logon flag value to Enabled in Computer Configuration > Administrative Templates > Network > Lanman Workstation appears to have no effect on the configuration.
To work around this issue, edit the Windows registry. Use Regedit and go to HKLM\SYSTEM\CurrentControlSet\Services\LanmanWorkstation\Parameters.
The DWORD AllowInsecureGuestAuth is an incorrect value: 0x00000000. Change this value to 0x00000001 (Hexadecimal 1) to allow adjusting the settings in gpedit.msc.
You can apply this to a fleet of Windows machines with a Group Policy Update.
2.13 - Services
Provides information on the Services screen and lists other service tutorial articles.
The Services screen lists all services available on the TrueNAS.
Activate or configure a service on the Services page.
Use the right slider to scroll down to the bottom of the list of services or click on page 2, or the or arrows.
To locate a service, type in the Filter Search field to narrow down the list of services.
Select Start Automatically for configured services that need to start after the system boots.
Click the toggle to start or stop the service, depending on the current state. Hover the mouse over the toggle to see the current state of that service. The toggle turns blue when it is running.
Click the edit icon to display the settings screen for a service.
Services related to data sharing or automated tasks are documented in their respective Sharing or Tasks.
Services Articles
Configuring Dynamic DNS: Provides instructions on how to configure Dynamic Domain Name Service (DDNS) on your TrueNAS system.
Configuring FTP: Provides information on how to configure File Transfer Protocol (FTP) on your TrueNAS.
Configuring LLDP: Provides information on how to configure Link Layer Discovery Protocol (LLDP) on your TrueNAS.
Configuring OpenVPN: Provices information on how to configure Open Virtual Private Network (OpenVPN) services on your TrueNAS.
Configuring Rsync: Provides information on how to configure remote sync (rsync) on your TrueNAS.
Configuring S.M.A.R.T.: Configurinng Self-Monitoring, Analysis and Reporting Technology (S.M.A.R.T.) on your TrueNAS.
Configuring S3: Provides information on how to start a local S3 service on your TrueNAS.
Configuring SFTP: Configuring SSH File Transfer Protocol (SFTP) service on your TrueNAS.
Configuring SNMP: Provides information on how to configure Simple Network Management Protocol (SNMP) on your TrueNAS.
Configuring SSH: Provides instructions on configuring Secure Shell (SSH) on your TrueNAS.
Configuring TFTP: Configuring Trivial File Transfer Protocol (TFTP) on your TrueNAS.
Configuring UPS: Provides information on configuring UPS service on your TrueNAS.
S3 for MinIO: Provides information on how to configure S3 for MinIO on your TrueNAS.
2.13.1 - Configuring Dynamic DNS
Provides instructions on how to configure Dynamic Domain Name Service (DDNS) on your TrueNAS system.
ISPs often change the IP address of the system. With Dynamic Domain Name Service (DDNS) the current IP address continues to point to a domain name to provide access to TrueNAS.
DDNS requires registration with a DDNS service such as DynDNS before configuring TrueNAS.
Open your specific DDNS service settings in another browser tab for reference while configuring TrueNAS.
Log in to the TrueNAS web interface and go to Services > Dynamic DNS.
Your DDNS solution provides the required values for these fields.
Start the DDNS service after choosing your Provider options and saving the settings.
2.13.2 - Configuring SFTP
Configuring SSH File Transfer Protocol (SFTP) service on your TrueNAS.
Configuring SFTP Service
SSH File Transfer Protocol (SFTP), is available by enabling SSH remote access to the TrueNAS system.
SFTP is more secure than standard FTP as it applies SSL encryption on all transfers by default.
Go to Services, find the SSH entry, and click the edit.
Select Allow Password Authentication.
Evaluate Log in as Root with Password for your security environment:
SSH with root is a security vulnerability. It allows more than SFTP transfer access. SSH with root also allows full remote control over the NAS with a terminal.
Review the remaining options and configure according to your environment or security needs.
SSH Service Options
Use the SSH screen to configure the system for SFTP.
See ServicesSSH for information on SSH screen settings.
SFTP Connections
Open FileZilla or another FTP client, or command line.
This example uses FileZilla.
Using FileZilla, enter SFTP://TrueNAS IP, username, password, and port 22 to connect. Where TrueNAS IP is the IP address for your system, and username and password are those you use to connect to the FTP client. Or enter SFTP://'TrueNAS IP', 'username', 'password', and port 22 to connect.
Chroot is not 100% secure, but SFTP does not have chroot locking.
The lack of chroot allows users to move up to the root directory. They can view internal system information. If this level of access is a concern, FTP with TLS may be the more secure choice.
SFTP in a TrueNAS Jail
Setting up a jail and enabling SSH is another way to allow SFTP access. This does not grant read access to other areas of the NAS itself.
Setting up a Jail for SFTP
Go to Jails > Add.
Provide a name for the jail and pick a target FreeBSD image.
This example uses 11.3.
Select the networking options for either DHCP or a static IP and confirm to create.
After the jail is created, click the expand icon > on the right-hand side of the jail to open it.
Click START and open > SHELL.
Create a user in the jail.
Enter command adduser. Follow the prompts. Include the password and home directory location.
When complete, the jail asks to confirm the credentials.
Enable SSH by editing the /etc/rc.conf file.
Enter command vi /etc/rc.conf or ee /etc/rc.conf depending on preference, add sshd_enable = "YES" to the file, save, and exit.
Enter command service sshd enabled to enable the service (enabled vs start indicates whether sshd starts one time or on every reboot).
Using an FTP client, such as FileZilla, log in with the jail IP address and user credentials. It is like SSH on TrueNAS. Browsing to other folders and locations beyond the user home directory is possible. But unlike running on TrueNAS directly, only the components of the jail are available.
2.13.3 - Configuring FTP
Provides information on how to configure File Transfer Protocol (FTP) on your TrueNAS.
FTP Connections
FTP connections cannot share connections with other accounts, such as SMB connections. FTP connections need a new dataset and local user account.
Go to Storage > Pools to add a new dataset.
See Creating Datasets for information on how to create the dataset. After this step is completed, the new dataset appears nested beneath the pool.
Next, go to Accounts > Users > Add to create a local user on the TrueNAS.
Assign a user name and password. Link the new dataset for the FTP share as the home directory of the user.
Link the new dataset for the FTP share on a per user basis, or create a global account for FTP. Example: OurOrgFTPacnt, etc.
Return to Storage > Pools, find the new dataset, and click more_vert> Edit Permissions.
In the Owner fields, select the new user account as the User and Group from the dropdown list.
Be sure to select Apply User and Apply Group before saving.
Service Configuration
To configure FTP, go to the Services page, find the FTP entry, and click the edit.
Configure the options according to your environment and security considerations. See FTP Screen
Advanced Options
Enable chroot to help confine FTP sessions to a local user home directory and allow Local User Login.
Unless necessary, do not allow anonymous or root access. For better security, enable TLS when possible.
This is effectively FTPS.
Enable TLS when FTP involves a WAN.
FTP Connection
Use a browser or FTP client to connect to the TrueNAS FTP share.
The images here show using FileZilla, a free option.
The user name and password are those of the local user account on the TrueNAS.
The default directory is the same as the user /home directory.
After connecting, you can create directories and upload or download files.
2.13.4 - Configuring Rsync
Provides information on how to configure remote sync (rsync) on your TrueNAS.
Rsync is an open source cross-platform file transfer and synchronization utility. It is a fast and secure way to copy data to another system for backup or to migrate data to a new system.
Use the default settings unless you require a specific change. Don’t forget to click SAVE after changing any settings.
Log in to the TrueNAS web interface and go to Services > Rsync. Click the edit icon to edit the Rsync settings.
Rsync Configuration Screen
Enter the TCP Port you want Rsync to listen on, then enter any rsyncd.conf(5)Auxiliary Parameters.
Rsync Modules
TrueNAS lists all created modules here. Use this Rsync Modules list to EDIT or DELETE a module. Click to select a module to edit.
To create a new module, click ADD.
Name the module and select a Path to store it in. Select an Access Mode and fill out the rest of the fields to your needs.
Rsync Services Add Module Options Defined
General
Name
Description
Name
Enter the IP address or host name of the system that will store the copy. Use the format username@remote_host if the user name differs on the remote host.
Path
Browse to pool or dataset to store received data.
Comment
Enter a description for this module.
Enabled
Select to activate this rsync module. Clear to deactivate but retain module configuration.
Access Mode
Select from dropdown list. Read Only, Write Only, Read and Write.
Max Connections
Enter a maximum number of connections. 0 is unlimited.
User
Select from dropdown list a user to run as during file transfers to and from this module.
Group
Select from dropdown list a group to run as during file transfers to and from this module.
Hosts Allow
Enter a value from rsyncd.conf(5). A list of patterns to match with the host name and IP address of a connecting client. Connection rejected if no patterns match. Separate entries by pressing Enter.
Hosts Deny
Enter a value from rsyncd.conf(5). A list of patterns to match with the host name and IP address of a connecting client. Connection rejected when the patterns match. Separate entries by pressing Enter.
When a Hosts Allow list is defined, only the IPs and hostnames on the list are able to connect to the module.
2.13.5 - Configuring LLDP
Provides information on how to configure Link Layer Discovery Protocol (LLDP) on your TrueNAS.
Network devices use the Link Layer Discovery Protocol (LLDP) to advertise their identity, capabilities, and neighbors on an Ethernet network.
TrueNAS uses the ladvd LLDP implementation.
LLDP service is often used in a local network environment with managed switches. Configuring and starting the LLDP service allows the TrueNAS system to advertise itself on the network.
To configure LLDP, go to the Services page, find the LLDP entry, and click the edit icon.
Select Interface Description and enter a Country Code. The location of the system is optional.
Click SAVE to save the current selections and return to the Services screen.
Click the toggle on the Services screen to turn the LLDP service on. The toggle turns blue when it is running.
2.13.6 - Configuring OpenVPN
Provices information on how to configure Open Virtual Private Network (OpenVPN) services on your TrueNAS.
About OpenVPN
A virtual private network (VPN) is an extension of a private network over public resources. It allows remote clients on a public network to access a private network via a secure connection. TrueNAS provides OpenVPN as a system level service that provides VPN server or client functionality. TrueNAS uses a single TCP or UDP port to act as a primary VPN server. This allows remote clients access to data stored on the system. VPN integration is possible even if the system is in a separate physical location, or only has access to public networks.
Obtaining a Public Key Infrastructure (PKI)
Public key infrastructure (PKI) must be in place before configuring TrueNAS as either an OpenVPN server or client. PKI utilizes certificates and certificate authorities created in or imported to TrueNAS.
What does this do?
TrueNAS authenticates with clients or servers by confirming network credentials. These must be signed by a valid master certificate authority (CA).
To read more about the required PKI for OpenVPN, see the OpenVPN PKI Overview.
Configuring OpenVPN: Process Overview
The general process to configure OpenVPN (server or client) on TrueNAS is to:
Select the networking credentials
Set the connection detail
Choose any additional security or protocol options
Configuring OpenVPN Client
Go to the Services page and find the OpenVPN Client entry.
Click the edit to configure the service.
Choose the certificate to use as an OpenVPN client.
This certificate must exist in TrueNAS and be in an active (unrevoked) state.
Enter the host name or IP address of the Remote OpenVPN server.
Select any other connection settings that fit with your network environment. Check for performance requirements.
The Device Type must match with the OpenVPN server Device Type.
Nobind prevents using a fixed port for the client.
Enabled by default, it allows the OpenVPN client and server to run at the same time.
Review the Security Options and select settings that meet your network security requirements.
Determine if the OpenVPN server is using TLS Encryption. If so, copy the static TLS encryption key and paste into the TLS Crypt Auth field.
OpenVPN Server
Go to the Services page and find the OpenVPN Server entry.
Click the edit to configure the service.
Choose a Server Certificate for this OpenVPN server.
This certificate must exist in TrueNAS and be in an active (unrevoked) state.
Define a IP address and netmask for the OpenVPN. Enter these values in Server.
Continue to select the remaining Connection Settings that fit with your network environment and performance requirements.
When selecting TUN in Device Type, you can select a virtual addressing method for the server in Topology. Options are:
NET30: Use one /30 subnet per client in a point-to-point topology.
Designed for use when connecting clients are Windows systems.
P2P: Point-to-point topology. Points the local server and remote client endpoints to each other.
One IP address given to each client.
This is only recommmended when none of the clients are a Windows system.
SUBNET: The interface uses an IP address and subnet.
One IP address given to each client.
Windows clients need the TAP-Win32 driver version 8.2 or newer.
TAP devices always use the SUBNET specified in Topology.
The Topology selection is automatically applied to any connected clients.
When TLS Crypt Auth Enabled is selected, TrueNAS generates a static key for the TLS Crypt Auth field after saving the options.
To change this key, click RENEW STATIC KEY.
Any clients connecting to the server need this key.
Keys stored in the system database are included in a generated client config file. A good practice is to back up keys in a secure location.
Review the Security Options and choose settings that meet your network security requirements.
Configure and save your OpenVPN server settings.
OpenVPN client systems that are connecting to this server will need to import client configuration files. To generate client configuration files, you need the client certificate from the client system. The client certificate was previously imported to the client system. Click DOWNLOAD CLIENT CONFIG and select the Client Certificate.
Connection Settings
See OpenVPN Screens for more information on the client and server settings.
Security Options
Connecting to a private network still sends data over less secure public resources. OpenVPN includes several security features that are optional. These optional security features help protect the data sent into or out of the private network.
Authentication Algorithm: This is used to validate packets that are sent over the network connection. Your network environment might require a specific algorithm. SHA1 HMAC is a good standard algorithm to use if a particular algorithm is not required.
Cipher: This is an algorithm to encrypt data packets sent through the connection. While not required, choosing a cipher can increase connection security. Verify the required ciphers for your networking environment. If there are no specific cipher requirements, AES-256-GCM is a good default choice.
TLS Encryption: Selecting TLS Crypt Auth Enabled encrypts all TLS handshake messages. This adds another layer of security. OpenVPN server and clients share a required static key.
Service Activation
When finished configuring the server or client service, click SAVE.
Start the service by clicking the related toggle in Services.
To check the current state of the service, hover over the toggle.
Start Automatically: Selecting this option starts the OpenVPN service whenever TrueNAS completes booting. The network and data pools must be running.
2.13.7 - Configuring S.M.A.R.T.
Configurinng Self-Monitoring, Analysis and Reporting Technology (S.M.A.R.T.) on your TrueNAS.
S.M.A.R.T. Self-Monitoring, Analysis and Reporting Technology (SMART) is an industry standard. It performs disk monitoring and testing. Several different kinds of self-tests check disks for problems.
Click the edit in Services > S.M.A.R.T. to configure the service.
General Options
Name
Description
Check Interval
Enter number of minutes to determine how often the smartd daemon monitors for configured tests to be run.
Power Mode
Select from dropdown list: Never, Sleep, Standby or Idle. Tests only run with Never.
Difference
Enter in degrees Celsius. S.M.A.R.T. sends alerts if the temperature of a drive changes by N degrees Celsius since the last report.
Informational
Enter in degrees Celsius. S.M.A.R.T. sends messages with a log level of LOG_INFO if the temperature exceeds the threshold.
Critical
Enter in degrees Celsius. S.M.A.R.T. sends messages with a log level of LOG_CRIT if the temperature exceeds the threshold.
Service Activation
Click SAVE when finished configuring the server or client service.
Start the service by clicking the related toggle in Services.
To check the current state of the service, hover over the toggle.
Selecting Start Automatically starts the service whenever TrueNAS completes booting. The network and data pools must be running.
2.13.8 - Configuring S3
Provides information on how to start a local S3 service on your TrueNAS.
Due to security vulnerabilities and maintainability issues, the S3 service is deprecated in TrueNAS CORE 13.0 and removed in CORE 13.3.
Beginning in CORE 13.0-U6, the CORE web interface generates an alert when the deprecated service is either actively running or is enabled to start on boot.
TrueNAS Enterprise
Beginning in CORE 13.0-U6, Enterprise customers with the S3 service running or enabled are prevented from upgrading to the next major version.
Users should plan to migrate to a separately maintained MinIO plugin or otherwise move any production data away from the S3 service storage location.
Migrating from the built-in S3 service to the plugin could result in an extended data migration window and potential disruption to S3 data access.
See the CORE 13.0 MinIO Plugin tutorial for detailed migration instructions.
This tutorial describes how to start a local S3 service on TrueNAS and connect to it from a networked client system with the MinIO Browser, s3cmd, and S3 Browser.
Background
S3 is an object storage protocol used by many major cloud providers, including Amazon Web Services™. On TrueNAS, the service is another way to store files. You can view these files with a web browser. S3 is the de facto standard for cloud-based storage. Organizations or online application developers can use TrueNAS with an S3 service. This can replace or archive expensive cloud storage.
Having large numbers of files (>100K for instance) in a single bucket with no sub-directories is not recommended. It can harm performance and cause stability issues.
Setting up the S3 service
Go to the Services page and find S3 on the list.
Click the toggle to stop the service if it is running.
Select Start Automatically to start the service when TrueNAS boots.
The IP address 0.0.0.0 allows the service to listen on any IPv4 address.
:: allows the same for any IPv6 address.
Select the TrueNAS IP address to constrain it to a specific network.
Select a clean dataset.
If there is no dataset, click CANCEL and then go to Storage > Pools and click more_vert> Add Dataset.
MinIO manages files as objects. These objects cannot mix with other dataset files.
Configure the rest of the options as needed in your environment.
Make sure to start the service after saving any changes.
2.13.9 - S3 for MinIO
Provides information on how to configure S3 for MinIO on your TrueNAS.
Due to security vulnerabilities and maintainability issues, the S3 service is deprecated in TrueNAS CORE 13.0 and removed in CORE 13.3.
Beginning in CORE 13.0-U6, the CORE web interface generates an alert when the deprecated service is either actively running or is enabled to start on boot.
TrueNAS Enterprise
Beginning in CORE 13.0-U6, Enterprise customers with the S3 service running or enabled are prevented from upgrading to the next major version.
Users should plan to migrate to a separately maintained MinIO plugin or otherwise move any production data away from the S3 service storage location.
Migrating from the built-in S3 service to the plugin could result in an extended data migration window and potential disruption to S3 data access.
See the CORE 13.0 MinIO Plugin tutorial for detailed migration instructions.
MinIO connections and service is configured using the ServicesS3 screen.
MinIO deprecated Access key and Secret key. MinIO now utilizes MINIO_ROOT USER and MINIO_ROOT_PASSWORD arguments and their values. For the ROOT_USER value, use a name up to 20 characters. For the ROOT_PASSWORD, use a string of 8 to 40 randomized characters. MinIO recommends using a long password string of unique random characters.
Testing Minio Connections
To test access to the MinIO Browser, select Enable Browser. Open a web browser and type the TrueNAS IP address with the TCP port. Example: https://192.168.0.3:9000. Allow the port specified in Port through the network firewall. This permits bucket creation and file uploads.
MinIO Connection Methods
Different methods are used for connecting to and using MinIO:
s3cmd
Linux or macOS users must have the s3cmd service installed before beginning this setup.
On Windows, users can also refer to S3Express for a similar command line experience.
The s3cmd --configure command is available for Ubuntu or other Linux distributions. Using this command you can configure important settings step by step.
Enter the specified access key and the secret key.
Under the S3 Endpoint, enter the TrueNAS IP address followed by TCP port, and reply N to the DNS-style bucket+hostname.
Save the file.
On Linux, the default is in the home directory ~/.s3cfg.
If the connection has any issues, open .s3cfg again to troubleshoot.
In Ubuntu, use command nano .s3cfg or vi .s3cfg or gedit .s3cfg depending on the preferred text editor.
For other operating systems, .s3cfg file location and editing tools may vary.
Scroll down to the host_bucket area. Make sure the %(bucket)s. portion is removed. The IP address should point to the IP_address:TCP_port for the system.
In the S3 Browser settings, select S3 Compatible Storage as the Account Type. Enter the MinIO access point. Example: (TrueNAS_IP_address:9000 or other port).
Select the SSL settings appropriate for the particular setup.
The default assumes SSL in S3 Browser, but for a LAN attached session, this may or may not already be set.
It is possible to access, create new buckets, or upload files to created buckets.
2.13.10 - Configuring SNMP
Provides information on how to configure Simple Network Management Protocol (SNMP) on your TrueNAS.
SNMP (Simple Network Management Protocol) monitors network-attached devices for conditions that warrant administrative attention.
TrueNAS uses Net-SNMP to provide SNMP.
To configure SNMP, go to the Services page, find the SNMP entry, and click the edit.
After starting the SNMP service, port UDP 161 listens for SNMP requests.
Checking the Management Information Bases (MIBs) Directory
Locate available Management Information Bases (MIBs). Go to /usr/local/share/snmp/mibs. This directory contains many files routinely added or removed from the directory. Check the directory on your system. Open the shell and enter command ls /usr/local/share/snmp/mibs.
Here is a sample of the directory contents:
2.13.11 - Configuring SSH
Provides instructions on configuring Secure Shell (SSH) on your TrueNAS.
Allowing external connections to TrueNAS is a security vulnerability!
Only enable SSH when there is a need for external connections.
See Security Recommendations for more security considerations when using SSH.
Service Configuration
To configure SSH, disable the service and click the edit.
Configure the options as needed to match your network environment.
Root access to the system from a remote client is never recommended.
If an unavoidable critical situation requires allowing root access, it is recommended to configure two-factor authentication first.
Also, disable root logins as soon as possible.
Re-enable the SSH service on the Services page when all configuration changes are complete.
To create and store specific SSH connections and keypairs, go to the System menu section.
Advanced: Restricting Command Line Users to scp or sftp
This only works for users that use command line versions of commands scp and sftp.
With SSH configured, authenticated users with a user account can use ssh to log into the TrueNAS system over the network.
Create user accounts by going to Accounts > Users and clicking ADD.
By default, the user sees their home directory after logging in with SSH.
The user can still find system locations outside their home directory. Take security precautions before granting users SSH access to the system.
One method to increase security is to change shell for a user to only allow file transfers.
Users can still use commands scp and sftp to transfer files between their local computer and their home directory. But the TrueNAS system restricts them from logging into the system using ssh.
To configure this scenario, go to Accounts > Users and edit the desired user account.
Change the Shell to scponly.
Repeat for each user that needs restricted SSH access.
Test the configuration from another system. Run the sftp, ssh, and scp commands as that user account.
sftp and scp work but ssh fails.
2.13.12 - Configuring TFTP
Configuring Trivial File Transfer Protocol (TFTP) on your TrueNAS.
Setting Up TFTP
The Trivial File Transfer Protocol (TFTP) is a light-weight version of FTP. It is often used in a local environment. It can transfer configuration or boot files between machines, such as routers.
TFTP offers a very limited set of commands and provides no authentication.
Determine the usage requirements for the TrueNAS system. If they are minimal, configure TFTP. For example, if the TrueNAS system is only used for storing images. Or if it is only used to store configuration files for network devices.
If the system has minimal usage requirements, start the service. Starting the TFTP service opens UDP port 69.
Use the TFTP screen to configure the system for SFTP.
2.13.13 - Configuring UPS
Provides information on configuring UPS service on your TrueNAS.
An Uninterruptible Power Supply (UPS) is a power backup system that ensures continuous electricity during outages, preventing downtime and damage.
TrueNAS uses NUT (Network UPS Tools) to provide UPS support.
For supported device and driver information, see their hardware compatibility list.
See UPS Screen for more information on UPS settings.
Some UPS models can be unresponsive with the default polling frequency.
This shows in TrueNAS logs as a recurring error like libusb_get_interrupt: Unknown error.
The default polling frequency is two seconds. Decrease the polling frequency by adding an entry to Auxiliary Parameters (ups.conf): pollinterval = 10. This should resolve the error.
upsc(8) can get status variables like the current charge and input voltage from the UPS daemon.
Run this command from the shell using the syntax upsc ups@localhost.
The upsc(8) manual page has other usage examples.
If the hardware supports sending the command, upscmd(8) can send commands directly to the UPS.
Only users with administrative rights can administer these commands.
Create these users in the Extra Users field.
How do I find a device name?
Determine the correct device name for the UPS. Go to System > Advanced and select Show console messages.
Plug in the USB device and look for a /dev/ugen or /dev/uhid device name in the console messages.Can I attach multiple computers to one UPS?
A UPS with adequate capacity can power multiple computers.
Connect one computer to the UPS data port with a serial or USB cable.
This primary system makes UPS status available on the network for other computers.
The secondary computers receive UPS status data from the primary computer. The secondary computers receive power from the UPS.
See the NUT User Manual and NUT User Manual Pages.
2.13.14 - FTP, SFTP, and TFTP
Configuring FTP, SFTP and TFTP on your TrueNAS.
The File Transfer Protocol (FTP) is a simple option for data transfers.
The additional SSH options provide secure config file transfer methods. Trivial FTP options provide only simple config file transfer methods.
Options for configuring FTP, SSH, and TFTP are in the system Services.
Click the edit to configure the related service.
2.14 - Jails, Plugins, and VMs
Tutorials about configuring TrueNAS CORE jails, specialized jails called plugins, and virtual machines for full operating system deployments.
TrueNAS CORE has a number of different features for deploying or using supplemental software on top of the CORE operating system.
The articles contained here describe and guide through deploying and using these features.
Contents
Jails: Information on creating jails, and articles related to jails, plugins and virtual machines in TrueNAS CORE.
Managing Jails: Describes how to manage Jails in TrueNAS CORE.
Virtual Machines: Provides instructions on creating and managing a basic virtual machine, and lists other tutorials about virtual machines in TrueNAS CORE.
Setting Up NPIV: Describes how to configure NPIV on TrueNAS CORE.
2.14.1 - Jails
Information on creating jails, and articles related to jails, plugins and virtual machines in TrueNAS CORE.
As of TrueNAS CORE 13.3, this feature is untested and provided without support to the TrueNAS Community.
Users with a critical need to use containers or virtualization solutions in production should migrate to the tested and supported virtualization features available in TrueNAS SCALE.
TrueNAS Enterprise customers can contact iXsystems to schedule a TrueNAS SCALE deployment.
See CORE to SCALE Migrations for more information.
Jails are a lightweight, operating-system-level virtualization.
One or multiple services can run in a jail, isolating those services from the host TrueNAS system.
The main differences between a user-created jail and a plugin are that plugins are preconfigured and usually provide only a single service.
Why use a Jail instead of a VM?
By default, jails run the FreeBSD operating system.
These jails are independent instances of FreeBSD.
The jail uses the host hardware and runs on the host kernel, avoiding most of the overhead usually associated with virtualization.
The jail installs FreeBSD software management utilities so FreeBSD packages or ports can be installed from the jail command line.
This allows compiling FreeBSD ports and installing FreeBSD packages from the command line of the jail.
It is important to understand that users, groups, installed software, and configurations within a jail are isolated from both the TrueNAS host operating system and any other jails running on that system.
The ability to create multiple jails offers flexibility regarding software management.
For example, an administrator can choose to provide application separation by installing different applications in each jail, to create one jail for all installed applications, or to mix and match how software is installed into each jail.
Setting Jail Storage
You must create a data storage pool before using jails.
Make sure the pool has enough storage for all of the intended jails.
The Jails screen displays a message and the CREATE POOL button if a pool does not exist on the TrueNAS system.
If pools exist, but one is not chosen to use with jails or plugins, a dialog displays prompting you to choose a pool. Select a pool and click CHOOSE.
To select a different pool for jail and plugin storage, click the settings icon, then select a different pool from the dropdown list.
TrueNAS uses iocage for jail and plugin management.
Jails and downloaded FreeBSD release files are stored in a dataset named iocage.
About the iocage Dataset
The iocage dataset, automatically uses the first pool that is not a root pool for the TrueNAS system.
It should have at least 10 GiB of free space (recommended), and cannot be located on a share.
A defaults.json file contains the default settings used when a new jail is created.
The file is created automatically when not already present.
When the file is present but corrupted, iocage shows a warning and uses default settings from memory.
Each new jail installs into a new child dataset of the iocage dataset.
For example, with the iocage/jails dataset in pool1, a new jail called jail1 installs into a new dataset named pool1/iocage/jails/jail1.
Go to Storage > Pools, click on the iocage dataset to expand it, then click on Jails to see jail datasets added for a new a jail from the Jails wizard screen or for a plugin jail from the add plugin wizard screen.
FreeBSD releases are fetched as a child dataset into the /iocage/download dataset.
This dataset is then extracted into the /iocage/releases dataset to use in jail creation.
Go to Storage > Pools, click on the iocage dataset to expand it, then click on download to see releases added from the Jails wizard screen.
You can then remove the dataset in /iocage/download without affecting the availability of fetched releases or an existing jail.
The iocage datasets on activated pools are independent of each other and do not share any data.
iocage jail configs are stored in /mnt/poolname/iocage/jails/jailname.
When iocage is updated, the config.json configuration file is backed up as /mnt/poolname/iocage/jails/jailname/config_backup.json.
You can rename the backup file to config.json to restore previous jail settings.
TrueNAS has two options to create a jail, the jail Wizard or ADVANCED JAIL CREATION.
The jail Wizard provides the simplest process to create and configure a new jail. The ADVANCED JAIL CREATION alternate method has every possible configurable jail option.
See [Jails Screen](/core/uireference/jailspluginsvms/jailsscreens/ for more information on jails screens and configuration settings.
To add a new jail, go to Jails then click ADD. The Wizard opens.
To access the advanced configuration option, click ADVANCED JAIL CREATION at the bottom of the Wizard screen. We recommend only advanced users with very specific use applications use this method to create a jail.
Enter a name for the jail. Names can contain letters, numbers, periods (.), dashes (-), and underscores (_).
Select the jail type. Default (Clone Jail) or Basejail.
Clone jails are clones of the specified FreeBSD release.
They are linked to that release, even if they are upgraded.
Basejails mount the specified release directories as nullfs mounts over the jail directories. Basejails are not linked to the original release when upgraded.
Specify the release to use. Options are 12.4-RELEASE or 13.2-RELEASE.
Jails can run FreeBSD versions up to the same version as the host TrueNAS system. Newer releases are not shown.
Versions of FreeBSD are downloaded the first time they are used in a jail.
Additional jails created with the same version of FreeBSD are created faster because the download is already completed.
Click Next to display the Configure Networking wizard screen with a simplified list of networking options.
Jail Supported Networking Options
Jails support several different networking solutions:
VNET adds a virtual network interface to the jail.
This interface can select NAT, DHCP, or static jail network configurations.
Since VNET provides the jail with an independent networking stack, it can broadcast an IP address, which is required by some applications.
NAT (Network Address Translation) uses the TrueNAS IP address and selects a unique port for the jail to use.
VNET is required when NAT is selected.
DHCP Autoconfigure IPv4 sets the jail receive its IP address from a DHCP server.
Configure networking by entering values in either the IPv4 Address or IPv6 Address fields.
You can configure any combination of these fields.
Multiple interfaces are supported for IPv4 and IPv6 addresses.
To add more interfaces and addresses, click ADD.
Setting IPv4 Default Router and IPv6 Default Router to auto automatically configures these values.
You must select VNET to enable the IPv4 Default Router field.
When manually configuring IP addresses and if no interface is selected, TrueNAS automatically assigns the given jail IP address to the current active interface of the host system.
Selecting a proxy in the TrueNAS network settings also configures new jails to use the proxy settings, except when performing DNS lookups.
Make sure a firewall is properly configured to maximize system security.
When pairing the jail with a physical interface, edit the network interface and select Disable Hardware Offloading.
This prevents a network interface reset when the jail starts.
Additional VMware Requirements
Jail Networking
If you have installed TrueNAS in VMware, you need functional networking to create a jail.
For the jail to have functional networking, you have to change the VMware settings to allow Promiscuous, MAC address changes, and Forged Transmits.
Setting
Description
Promiscuous Mode
When enabled at the virtual switch level, objects defined within all portgroups can receive all incoming traffic on the vSwitch.
MAC Address Changes
When set to Accept, ESXi accepts requests to change the effective MAC address to a different address than the initial MAC address.
Forged Transmits
When set to Accept, ESXi does not compare source and effective MAC addresses.
Click NEXT to view a summary of the chosen jail options.
Click SUBMIT to create the new jail. After a few moments, the new jail is added to the Jails screen list.
Advanced Jail Creation
From the Jails screen click on ADD to open the Wizard, then click on ADVANCED JAIL CREATION at the bottom of the screen to open the Advanced Jail Creation form.
Enter the jail name, type, and select the release just as in the Name Jail and Choose FreeBSD Release Wizard screen.
Enter the networking settings leave all blank to create the jail without networking.
Click on Jail Properties to enter the settings for a jail ruleset to follow, commands to run in the system or jail environment, add a jail user, set allow or deny SYSV IPC message, shared memory, or semaphore primitives.
You can also add VNET interfaces and other jail settings on this screen.
Click on Network Properties to add interfaces, host names, domain names, and resolver addresses, disable IPv4 or IPv6 source address selection for the jail in favor of the primary IPv4 or IPv6 address of the jail (only available when the jail is not configured to use VNET).
You can also set the IPv4 or IPv6 IP address to inherit or restrict access to all system addresses or stop the jail from using either IPv4 or IPv6 entirely.
You can configure MAC address settings.
Click Custom Properties to add the priority for the jail at boot time, jail host ID, set up the jail as a template.
You can add system host time to synchronize time between the jail and host, enabling ZFS jailing inside the jail, define a dataset to be jailed and to be fully handed over to a jail, enter a mount point for the jail_zfs_dataset, configure tun settings, and add other local host, IP host name, and IPV6 autoconfigure settings.
Click SAVE to add the jail and return to the Jails screen.
Creating a Jail without Networking
You can create a usable jail without any networking by entering only the required Jail Name, selecting the Jail Type, and Release.
To create a jail without networking, leave all network checkboxes cleared and fields empty to initialize the jail without any networking abilities.
To add networking to the jail after creation, go to Jails, click the chevron_right for the jail, then click editEdit.
Configure the network settings in the Basic Properties area when the jail needs to communicate over the local network or out to the internet.
If you are an experienced user you can access additional advanced configuration settings in the Network Properties, and Custom Properties sections.
For more information on the configuration screens, see Jails Screens.
Creating a Template Jail
A template jail is a jail using the basejails type and customized with other software that can efficiently create other jails with the same configuration.
To create a template jail go to Jails, click ADD then click ADVANCED JAIL CREATION at the bottom of the Wizard screen, then:
Create a jail to use as a template.
a. Enter a name for the jail template, select Basejail as the Jail Type, and select the release from the Release dropdown.
b. Configure the other jail setting you want to save in the template.
c. Click SAVE to create the template and add this jail to the iocage/templates folder and list of available releases.
Start this new jail, then click Shell to install the custom software packages.
See Installing Jail Software for more information on customizing your jail template.
Click SAVE.
Click Stop to stop the jail.
Click Edit to open the Edit Advanced Jail Creation screen and make the jail a template.
a. Click on Custom Properties to show that section, then select Template.
b. Click Save.
The new template jail shows on the Releases dropdown list.
Add a new jail from the template.
a. Click ADD to open the Wizard.
b. Enter a name, select Default (Clone Jail), then select the name of the template from the Releases dropdown list.
c. Click NEXT to enter networking settings.
d. Click NEXT to review your settings and if satisfied with the settings, click SUBMIT to add the jail.
You can select the Advanced Jail Creation option if you want to enter any other advanced settings not included in the template.
You must use the ADVANCED JAIL CREATION screens to create the basejail you want to use as a template.
If you use the Wizard to create the basejail, then edit it to make it a template, any new jails created from this template do not start.
Jails Articles
Managing Jails: Describes how to manage Jails in TrueNAS CORE.
As of TrueNAS CORE 13.3, this feature is untested and provided without support to the TrueNAS Community.
Users with a critical need to use containers or virtualization solutions in production should migrate to the tested and supported virtualization features available in TrueNAS SCALE.
TrueNAS Enterprise customers can contact iXsystems to schedule a TrueNAS SCALE deployment.
See CORE to SCALE Migrations for more information.
The Jails screen displays a list of jails installed on your system.
Jail status messages and command output are stored in /var/log/iocage.log.
Applying Operations to Multiple Jails
Operations can be applied to multiple jails by selecting those jails with the checkboxes on the left.
After selecting one or more jails, icons display which can be used on the selected jails:
play_arrow starts jails
stop stops jails
update updates jails
delete deletes jails
To see more information such as IPV4, IPV6, jail TYPE, and whether it is a TEMPLATE or BASEJAIL click > to expand a jail.
Additional options for that jail also display.
To modify the IP address information for a jail, click the chevron_right for the jail and then EDIT instead of issuing the networking commands directly from the command line of the jail.
This ensures changes are saved and survive a jail or TrueNAS reboot.
2.14.1.2 - Accessing Jails Using SSH
Describes how to access Jails using SSH in TrueNAS CORE.
As of TrueNAS CORE 13.3, this feature is untested and provided without support to the TrueNAS Community.
Users with a critical need to use containers or virtualization solutions in production should migrate to the tested and supported virtualization features available in TrueNAS SCALE.
TrueNAS Enterprise customers can contact iXsystems to schedule a TrueNAS SCALE deployment.
See CORE to SCALE Migrations for more information.
Accessing a Jail Using SSH
You must enable the ssh daemon sshd(8) in a jail to allow SSH access to that jail from another system.
The jail STATE must be up before the SHELL option is available.
Starting a Jail
When the jail is not up, start it by clicking Jails > and then the jail chevron_right, then click START for the desired jail.
Click chevron_right, then SHELL to open a shell inside the jail:
FreeBSD 11.1-STABLE (FreeNAS.amd64) #0 0ale9f753(freenas/11-stable): FriApr 6 04:46:31 UTC 2018

Welcome to FreeBSD!

Release Notes, Errata: https://www.FreeBSD.org/releases/
Security Advisories:   https://www.FreeBSD.org/security/

FreeBSD FAQ:           https://www.FreeBSD.org/faq/
Questions List: https://lists.FreeBSD.org/mailman/listinfo/freebsd-questions/
FreeBSD Forums:        https://forums.FreeBSD.org/

Documents installed with the system are in the /usr/local/share/doc/freebsd/
directory, or can be installed later with: pkg install en-freebsd-doc
For other languages, replace "en" with a language code like de or fr.

Show the version of FreeBSD installed: freebsd-version ; uname -a
Please include that output and any error messages when posting questions.
Introduction to manual pages: man man
FreeBSD directory layout:     man hier

Edit /etc/motd to change this login announcement.
root@jailexamp:~ #
You can also enter a jail shell from the root shell.
Open shell and enter the command iocage console jailname.
Enable sshd:
sysrc sshd_enable="YES"
sshd_enable: NO -> YES
Start the SSH daemon: service sshd start.
The first time the service runs, the jail RSA key pair is generated and the key fingerprint is displayed.
Add a user account with adduser and follow the prompts.
Enter accepts the default value.
Users that require root access must also be a member of the wheel group.
Enter wheel when prompted to invite user into other groups?
root@jailexamp:~ # adduser
Username: jailuser
Full name: Jail User
Uid (Leave empty for default):
Login group [jailuser]:
Login group is jailuser. Invite jailuser into other groups? []: wheel
Login class [default]:
Shell (sh csh tcsh git-shell zsh rzsh nologin) [sh]: csh
Home directory [/home/jailuser]:
Home directory permissions (Leave empty for default):
Use password-based authentication? [yes]:
Use an empty password? (yes/no) [no]:
Use a random password? (yes/no) [no]:
Enter password:
Enter password again:
Lock out the account after creation? [no]:
Username   : jailuser
Password   : *****
Full Name  : Jail User
Uid        : 1002
Class      :
Groups     : jailuser wheel
Home       : /home/jailuser
Home Mode  :
Shell      : /bin/csh
Locked     : no
OK? (yes/no): yes
adduser: INFO: Successfully added (jailuser) to the user database.
Add another user? (yes/no): no
Goodbye!
root@jailexamp:~
After creating the user, set the jail root password to allow users to use su to gain superuser privileges.
To set the jail root password, use passwd.
Nothing echoes back when using passwd:
root@jailexamp:~ # passwd
Changing local password for root
New Password:
Retype New Password:
root@jailexamp:~ #
Finally, test that the user can successfully ssh into the jail from another system and gain superuser privileges.
In this example, a user named jailuser uses ssh to access the jail at 192.168.2.3.
The host RSA key fingerprint must be verified the first time a user logs in.
ssh jailuser@192.168.2.3
The authenticity of host '192.168.2.3 (192.168.2.3)' can't be established.
RSA key fingerprint is 6f:93:e5:36:4f:54:ed:4b:9c:c8:c2:71:89:c1:58:f0.
Are you sure you want to continue connecting (yes/no)? yes
Warning: Permanently added '192.168.2.3' (RSA) to the list of known hosts.
Password:
Every jail has its own user accounts and service configuration.
These steps must be repeated for each jail that requires SSH access.
2.14.1.3 - Installing Software
Describes how to install software using Jails in TrueNAS CORE.
As of TrueNAS CORE 13.3, this feature is untested and provided without support to the TrueNAS Community.
Users with a critical need to use containers or virtualization solutions in production should migrate to the tested and supported virtualization features available in TrueNAS SCALE.
TrueNAS Enterprise customers can contact iXsystems to schedule a TrueNAS SCALE deployment.
See CORE to SCALE Migrations for more information.
A jail is created with no software aside from the core packages installed as part of the selected version of FreeBSD.
To install software into a jail, go to the Jails screen and expand the jail entry.
Start the jail, then after the jail boots, click > SHELL.
Installing FreeBSD Packages
The quickest and easiest way to install software inside the jail is to install a FreeBSD package.
FreeBSD packages are precompiled and contain all the binaries and a list of dependencies required for the software to run on a FreeBSD system.
A huge amount of software has been ported to FreeBSD.
Most of that software is available as packages.
One way to find FreeBSD software is to use the search bar at FreshPorts.org.
After finding the name of the desired package, use the pkg install command to install it.
For example, to install the audiotag package, enter pkg install audiotag.
When prompted, press y to complete the installation.
Messages show the download and installation status.
Confirming the Installation
A successful installation is confirmed by querying the package database:
pkg info -f audiotag
audiotag-0.19_1
Name:           audiotag
Version:        0.19_1
Installed on:   Fri Nov 21 10:10:34 PST 2014
Origin:         audio/audiotag
Architecture:   freebsd:9:x86:64
Prefix:         /usr/local
Categories:     multimedia audio
Licenses:       GPLv2
Maintainer:     ports@FreeBSD.org
WWW:            https://github.com/Daenyth/audiotag
Comment:        Command-line tool for mass tagging/renaming of audio files
Options:
  DOCS:         on
  FLAC:         on
  ID3:          on
  MP4:          on
  VORBIS:       on
Annotations:
  repo_type:    binary
  repository:   FreeBSD
Flat size:      62.8KiB
Description:   Audiotag is a command-line tool for mass tagging/renaming of audio files
               it supports the vorbis comment, id3 tags, and MP4 tags.
WWW:           https://github.com/Daenyth/audiotag
In FreeBSD, third-party software is always stored in /usr/local to differentiate it from the software that came with the operating system.
Binaries are almost always located in a subdirectory called bin or sbin and configuration files in a subdirectory called etc.
Compiling FreeBSD Ports
Compiling a port is another option. Compiling ports offer these advantages:
Some ports, but not every port, have an available package. This is usually due to licensing restrictions or known, unaddressed security vulnerabilities.
Sometimes the package is out-of-date and a feature is needed that only became available in the newer version.
Some ports provide compile options that are not available in the pre-compiled package. These options are used to add or remove features or options.
Compiling a port has these disadvantages:
It takes time. Depending upon the size of the application, the amount of dependencies, the speed of the CPU, the amount of RAM available, and the current load on the TrueNAS system, the time needed can range from a few minutes to a few hours or even to a few days.
If the port does not provide any compile options, it saves time and preserves the TrueNAS system resources to use the pkg install command instead. The FreshPorts.org listing shows whether a port has any configurable compile options.
Audiotag Port Information
Packages are built with default options.
Ports let the user select options.
You must install the FreeBSD Ports Collection in the jail before ports can be compiled.
Inside the jail, use the portsnap command utility.
This command downloads the ports collection and extracts it to the /usr/ports/ directory of the jail:
portsnap fetch extract
To install additional software at a later date, make sure the ports collection is updated with portsnap fetch update.
To compile a port, cd into a subdirectory of /usr/ports/.
The entry for the port at FreshPorts provides the location to cd into and the make command to run.
This example compiles and installs the audiotag port:
cd /usr/ports/audio/audiotag
make install clean
The configure screen displays the first time this command is run.
Audiotag Port Configuration Options
This port has several configurable options: DOCS, FLAC, ID3, MP4, and VORBIS.
Selected options are shown with a *.
Use the arrow keys to select an option and press spacebar to toggle the value.
Press Enter when satisfied with the options.
The port begins to compile and install.
After options are selected, the configuration screen does not normally display again.
Use make config to display the screen and change options before rebuilding the port with make clean install clean.
Many ports depend on other ports.
Those other ports also have configuration screens that are shown before compiling begins.
It is a good idea to watch the compile until it finishes and the command prompt returns.
Installed ports are registered in the same package database that manages packages.
The pkg info command determines which ports installed.
Starting Installed Software
After packages or ports are installed, you must configure and stare them.
Configuration files are usually in /usr/local/etc or a subdirectory of it.
Many FreeBSD packages contain a sample configuration file as a reference.
Take some time to read the software documentation to learn which configuration options are available and which configuration files require editing.
Most FreeBSD packages that contain a startable service include a startup script that is automatically installed to /usr/local/etc/rc.d/.
After the configuration is complete, test starting the service by running the script with the onestart option.
For example, when openvpn is installed in a jail, these commands verify that the service has started:
/usr/local/etc/rc.d/openvpn onestart
Starting openvpn.

/usr/local/etc/rc.d/openvpn onestatus
openvpn is running as pid 45560.

sockstat -4
USER COMMAND         PID     FD      PROTO   LOCAL ADDRESS   FOREIGN ADDRESS
root openvpn         48386   4       udp4    *:54789         *:*
If it produces an error:
/usr/local/etc/rc.d/openvpn onestart
Starting openvpn.
/usr/local/etc/rc.d/openvpn: WARNING: failed to start openvpn
Enter tail /var/log/messages to see any error messages if an issue is found.
Most startup failures are related to a misconfiguration in a configuration file.
After verifying that the service starts and is working as intended, add a line to /etc/rc.conf to start the service automatically when the jail is started.
The line to start a service always ends in _enable="YES" and typically starts with the name of the software.
For example, this is the entry for the openvpn service:
openvpn_enable="YES"
When in doubt, the startup script shows the line to put in /etc/rc.conf.
This is the description in /usr/local/etc/rc.d/openvpn:
# To run additional instances link this script to something like
# % ln -s openvpn openvpn_foo

# and define additional openvpn_foo_* variables in one of
# /etc/rc.conf, /etc/rc.conf.local or /etc/rc.conf.d /openvpn_foo

#
# Below NAME should be substituted with the name of this script. By default
# it is openvpn, so read as openvpn_enable. If you linked the script to
# openvpn_foo, then read as openvpn_foo_enable etc.
#
# The following variables are supported (defaults are shown).
# You can place them in any of
# /etc/rc.conf, /etc/rc.conf.local or /etc/rc.conf.d/NAME
#
# NAME_enable="NO"
# set to YES to enable openvpn
The startup script also indicates if any additional parameters are available:
# NAME_if=
# driver(s) to load, set to "tun", "tap" or "tun tap"
#
# it is OK to specify the if_ prefix.
#
# # optional:
# NAME_flags=
# additional command line arguments
# NAME_configfile="/usr/local/etc/openvpn/NAME.conf"
# --config file
# NAME_dir="/usr/local/etc/openvpn"
# --cd directory
2.14.1.4 - Setting Up Jail Storage
Describes how to set up jail storage in TrueNAS CORE.
As of TrueNAS CORE 13.3, this feature is untested and provided without support to the TrueNAS Community.
Users with a critical need to use containers or virtualization solutions in production should migrate to the tested and supported virtualization features available in TrueNAS SCALE.
TrueNAS Enterprise customers can contact iXsystems to schedule a TrueNAS SCALE deployment.
See CORE to SCALE Migrations for more information.
Jails can be given access to an area of storage outside of the jail that is configured on the TrueNAS system.
It is possible to give a FreeBSD jail access to an area of storage on the TrueNAS system.
This is useful for applications or plugins that store large amounts of data or if an application in a jail needs access to data stored on the TrueNAS system.
For example, the Transmission plugin that stores data using BitTorrent.
Add the TrueNAS external storage using the mount_nullfs(8) mechanism, which links data that resides outside of the jail as a storage area within a jail.
Stop the jail before adding a mount point. A jail must have a STATE of down before adding a new mount point.
Click chevron_right and stop for the jail to change the jail to the down state.
To add storage, click on the chevron_right to expand the jail, then click on MOUNT POINTS.
The MOUNT POINT screen lists all of the currently defined mount points.
Click on Actions and select Add on the Mount Point screen to add storage to a jail.
Browse to the Source and Destination mount points (paths to the datasets), where:
Source is the directory or dataset on the TrueNAS system you give the jail access to. This is the dataset you create for this purpose.
TrueNAS creates the directory if it does not exist.
This directory must reside outside of the pool or dataset the jail uses.
This is why it is recommended to create a separate dataset to store jails.
The dataset holding the jails is always separate from any datasets used for storage on the TrueNAS system.
Destination is an existing and empty directory (listed on the screen) within the jail to link to the Source storage area. This is the directory you want to use.
Add a backslash / and a name to the end of the path to allow TrueNAS to create a new directory.
New directories created must be within the jail directory structure. For example, the path is /mnt/iocage/jails/jailname/root/new-directory*.
Creating a Mount Point in an SSH Session
Using the same example above, you can create a mount point from an SSH session by entering the following commands:
After adding or creating storage, it displays on the Mount Points screen for that jail.
Storage automatically mounts as it is created.
Mounting a dataset does not automatically mount child datasets inside it.
Each dataset is a separate file system, so child datasets must each have separate mount points.
Dataset Permissions and Mount Points
Storage is typically added because the user and group account associated with an application installed inside of a jail needs to access data stored on the TrueNAS system.
Before selecting the Source, it is important to ensure that the permissions of the selected directory or dataset grant permission to the user or group account inside the jail.
This is not the default, as the users and groups created inside a jail are separate from the users and groups created on the TrueNAS system.
Typical Adding Jail Storage Workflow
Here is a typical workflow for adding jail storage:
Determine the name of the user and group account used by the application.
For example, the installation of the Transmission application automatically creates a user account and group account each named transmission.
When in doubt, check the files /etc/passwd (to find the user account) and /etc/group (to find the group account) inside the jail.
Typically, the user and group names are similar to the application name.
Also, the UID and GID are usually the same as the port number used by the service.
A media user and group (GID 8675309) are part of the base system.
Having applications run as this group or user makes it possible to share storage between multiple applications in a single jail, between multiple jails, or even between the host and jails.
Create a user account and group account that match the user and group names used by the jail application on the TrueNAS system.
Decide if the jail needs access to existing data or if a new storage area should be created.
If the jail needs to access existing data, edit the permissions of the pool or dataset so the user and group accounts have read and write access.
When multiple applications or jails need access to the same data, create a new group and add each new user account to that group.
If you are setting aside a new storage area for that jail or application, create a dataset.
Edit the dataset permissions so the user and group account has the desired read and write access.
Use the jail chevron_right, then click MOUNT POINTS.
Next click on ACTIONS and select Add, then browse to select the data source and the jail mount destination paths.
To prevent writes to the storage, select Read-Only.
Deleting a Mount Point
Click more_vert and then Delete to delete the storage.
Adding Pointers to Datasets (Directories)
Remember that added storage is just a pointer to the selected storage directory on the TrueNAS system.
It does not copy that data to the jail.
Files that are deleted from the Destination directory in the jail are also deleted from the Source directory on the TrueNAS system.
However, removing the jail storage entry only removes the pointer.
This leaves the data intact but no longer accessible to the jail.
If you want to access data stored in a dataset from a directory in the plugin, add a jail mount point from the host dataset to the plugin directory. Remember to stop the jail before adding mount points, and when finished, start the jail again.
For example, the host path /mnt/tank/all-media wants to see what is in the /media directory for the plugin, then create a mount point to add /mnt/tank/all-media in the /media directory to see the files in the host dataset all-media.
Do this for each dataset you want to see in a jail.
Make sure the user and group permissions are set to allow what the plugin expects.
2.14.2 - Plugins
How to install plugins in TrueNAS CORE, and more articles.
As of TrueNAS CORE 13.3, this feature is untested and provided without support to the TrueNAS Community.
Users with a critical need to use containers or virtualization solutions in production should migrate to the tested and supported virtualization features available in TrueNAS SCALE.
TrueNAS Enterprise customers can contact iXsystems to schedule a TrueNAS SCALE deployment.
See CORE to SCALE Migrations for more information.
Plugins allow extending the built-in NAS services by installing additional software.
A plugin is a pre-packaged application that is installed into a FreeBSD jail.
The plugin jail is limited to installing and using only the plugin software.
Before getting started...
Create a data pool if one does not exist.
A pool must be available for plugin storage.
Verify the system is connected to the internet.
Go to Network > Interfaces, edit the intended plugin interface, and set Disable Hardware Offloading.
Installing a Plugin
To see the plugin catalog, go to the Plugins screen.
First time in this menu?
Going to the Jails or Plugins screen for the first time prompts you to select a location on the system for storing Jail related data.
By default, this location stores all data related to jails and plugins, including downloaded applications, data managed by the jail or plugin, and any jail snapshots.
Disconnecting or deleting the pool that stores jail data can result in permanent data loss!
Make sure you back up any critical data or snapshots that are stored in a jail before changing the storage configuration.
To change the Jails and Plugins storage location, click , select a new pool, and click CHOOSE.
Community for open source plugins created and maintained by the TrueNAS community.
By default, the Plugins screen shows the iXsystems-supported plugins.
To view the community-supported plugins, click on Browse a Collection and select Community.
Installation Options
To install a plugin, click on the plugin icon, then Install.
This example shows installing Tarsnap, a popular backup solution.
Enter a name for the plugin in Jail Name and adjust the networking settings as needed.
Most plugins default to using Network Address Translation (NAT) for their Internet connection.
Select DHCP to use a dynamically-generated address.
Clear the DHCP checkbox to enter static IP addresses for the plugin jail or to select NAT.
Using NAT is recommended as it does not require manual configuration of multiple available IP addresses and prevents addressing conflicts on the network.
Some plugins default to DHCP as their management utility conflicts with NAT.
Keep these plugins set to DHCP unless a manually configured IP address is preferred.
Plugins can take several minutes to download and install.
A dialog confirms when the installation completes and shows any post-install notes.
You can view the post-install notes later by expanding the entry for the installed plugin in Plugins and clicking Post Install Notes.
Troubleshooting
If a plugin download or update fails with an unable to fetch an artifact or download a package error, you might need to investigate your networking environment.
Some home routers can have a security feature that prevent DHCP enabled plugins (or bridged devices with virtual MAC addresses) from resolving addresses.
Also, sometimes additional DNS validation is required that is not supported by the router or the router has a caching resolver that is holding on to a stale record.
A couple of possible solutions are to hard reset your router to clear any stale records or try using an alternate DNS server for the plugin.
S3 Secret Keys
If the plugin requires an S3 secret key, and you use a random password generation program, check the character string produced for disallowed characters.
The AWS secret key allows using upper and lowercase alphanumeric characters (a-z, A-Z, digits 0-9), and the exclamation point (!), hypen (-), underscore (_), period (.), asterisk (*), single quote (’), open parenthesis ((), and closed parenthesis ()) special characters.
If the random password includes other special characters it can result in failed authentication.
Post-Installation Configuration
After a plugin is installed, the Plugins screen shows the added entry.
Click chevron_right to manage the plugin state, update the plugin application, configure the plugin jail mount points to storage datasets, and, when supported, open a link to the management portal for the plugin application.
Plugin jails are preconfigured and require very little tuning.
However, jail properties are available in the event a setting needs to change.
To update or reconfigure the plugin jail, go to the Jails screen and expand the entry for one of the plugin jails.
Click and stop the jail before changing it.
Uninstalling a plugin destroys all datasets or snapshots that are associated with the plugin!
Back up any important data stored in the plugin jail before deleting it!
Backing up Jail Data
To find data stored in a jail, go to Storage > Pools and expand the entry for the pool that stores plugin and jail data.
Expand the iocage and jails datasets to find the plugin jail storage dataset.
One option to back up stored data is to create a local replication.
You can configure the replication task to run periodically and automatically back up new changes to the jail dataset.
To convert a jail snapshot into a new storage dataset, go to Storage > Snapshots and find a snapshot of the jail dataset.
Expand the snapshot entry, click filter_none, and define the path and name of the new dataset to create from the snapshot.
Then go to Storage > Pools, open the more_vert for the new dataset, and click Promote Dataset.
Uninstalling a Plugin
To remove a plugin, go to Plugins, expand the installed plugin entry, and click delete.
Confirm the plugin removal by typing in the name of the plugin jail and selecting Confirm.
Uninstalling can take a few moments while the plugin is deleted from both Plugins and Jails.
The plugin dataset also deletes from POOL/iocage/jails/ and any jail snapshots from Storage > Snapshots.
Contents
MinIO Plugin: Describes how to configure the MinIO plugin on TrueNAS CORE and gives migration instructions from the deprecated S3 built-in service.
Plex Plugin: Describes how to install the Plex application as a plugin on TrueNAS CORE.
Custom Plugins: Describes how to configure plugins on TrueNAS CORE.
2.14.2.1 - MinIO Plugin
Describes how to configure the MinIO plugin on TrueNAS CORE and gives migration instructions from the deprecated S3 built-in service.
The Minio official plugin from the iXsystems catalog is a High-performance object (S3) storage suite, natively available on TrueNAS CORE.
Background
S3 is an object storage protocol used by many major cloud providers, including Amazon Web Services™. You can view these files with a web browser. S3 is the de facto standard for cloud-based storage. Organizations or online application developers can use TrueNAS with the Minio plugin to manage S3 storage. This can replace or archive expensive cloud storage.
This tutorial describes how to install the Minio plugin on TrueNAS SCALE.
S3 Service Deprecation and Migration
Due to security vulnerabilities and maintainability issues, the S3 service is deprecated in TrueNAS CORE 13.0 and removed in CORE 13.3.
Beginning in CORE 13.0-U6, the CORE web interface generates an alert when the deprecated service is either actively running or is enabled to start on boot.
TrueNAS Enterprise
Beginning in CORE 13.0-U6, Enterprise customers with the S3 service running or enabled are prevented from upgrading to the next major version.
Users should plan to migrate to a separately maintained MinIO plugin or otherwise move any production data away from the S3 service storage location.
Migrating from the built-in S3 service to the plugin could result in an extended data migration window and potential disruption to S3 data access.
See the CORE 13.0 MinIO Plugin tutorial for detailed migration instructions.
The TrueNAS S3 service is based on version 2021-11-24T23:19:33Z and utilizes MinIO Filesystem/Gateway mode. Filesystem/Gateway mode is deprecated, beginning with MinIO version RELEASE.2022-10-24T18-35-07Z. Newer deployments of MinIO are unable to access data from the TrueNAS S3 service.
The MinIO client provides provisions for properly migrating and converting MinIO data stored in buckets. However, all configuration data must be migrated by manually recreating users, policies, buckets, and other resources on the new deployment.
You can create a dataset to use for Minio Plugin storage or allow the plugin to create one for you.
MinIO manages files as objects.
These objects cannot mix with other dataset files.
For better performance, total pool capacity should not exceed 80%.
For example, if the S3 dataset is 50TB, the total pool capacity should be at least 62.5TB (50TB plus 20% overhead).
Edit permissions for the new dataset.
Set User as minio and Group as wheel.
Installing the Minio Plugin
Go to the Plugins screen.
If you have not previously configured plugins on the system, follow the initial setup instructions in Plugins.
Enter a name for the plugin in Jail Name and adjust the networking settings as needed.
You can use the default Network Address Translation (NAT), enable DHCP, or manually define IP addresses.
If migrating data from an existing S3 service deployment, ensure ports for the Minio plugin are different from the existing service.
Click Save to install.
A dialog confirms when the installation completes and shows post-install notes, including the MINIO_ACCESS_KEY and MINIO_SECRET_KEY used to access the MinIO UI.
MINIO_ACCESS_KEY and MINIO_SECRET_KEY are deprecated. MinIO now utilizes MINIO_ROOT_USER and MINIO_ROOT_PASSWORD arguments and their values.
When logging into the MinIO UI, enter the MINIO_ACCESS_KEY/MINIO_ROOT_USER in Username and the MINIO_SECRET_KEY/MINIO_ROOT_PASSWORD in Password.
Do not use these credentials to configure client applications for S3 data access.
Instead, create key pairs from the MinIO UI Access Keys screen.
Write down the generated key values or save them in a secure location as the Secret Key only displays one time, at creation.
You can view the post-install notes later by expanding the entry for the installed plugin in Plugins and clicking Post Install Notes.
Describes how to install the Plex application as a plugin on TrueNAS CORE.
As of TrueNAS CORE 13.3, this feature is untested and provided without support to the TrueNAS Community.
Users with a critical need to use containers or virtualization solutions in production should migrate to the tested and supported virtualization features available in TrueNAS SCALE.
TrueNAS Enterprise customers can contact iXsystems to schedule a TrueNAS SCALE deployment.
See CORE to SCALE Migrations for more information.
This tutorial provides instructions on adding the community-favorite Plex application as a plugin.
You need an account with Plex to complete these instructions.
Installing Plex
Create a dataset called audio and a dataset called video to be used as mount points for Plex.
Next, go to the Plugins page.
Installing a basic PlexMedia plugin:
Select the Plex Media Server plugin and click INSTALL.
Enter a name in Jail Name. For example, plex or whatever name you prefer.
DHCP is set automatically.
Click SAVE.
A dialog window shows the installation progress.
When available, Plugin Installation Notes display when the install completes.
The plugin Status shows as up, with the Boot option selected.
4. Add the Plex mount points. Click > to expand the Plex plugin row.
Click Stop, then click Mount Points.
Click Actions, then Add.
Fill out one mount point for each previously created dataset.
The Source is the created dataset and the Destination is the media directory with /datasetname appended (see example):
Click Submit. Do this for as many mount points as needed. In this example, we have audio and video.
Modify the dataset permissions for each dataset added as a mount point in Plex.
Go to Storage > Pools and click more_vert for your source dataset, then click Edit Permissions.
Click Create a custom ACL and Continue.
Click ADD ACL ITEM and enter the values pictured below:
Set Apply permissions recursively and click Save.
Go to Plugins, find the Plex entry, and click the > to expand the row. Click Start to start the plugin.
Accessing Plex
When the Plex plugin status is up, click the >, then Manage.
Enter your Plex login information.
2.14.2.3 - Custom Plugins
Describes how to configure plugins on TrueNAS CORE.
As of TrueNAS CORE 13.3, this feature is untested and provided without support to the TrueNAS Community.
Users with a critical need to use containers or virtualization solutions in production should migrate to the tested and supported virtualization features available in TrueNAS SCALE.
TrueNAS Enterprise customers can contact iXsystems to schedule a TrueNAS SCALE deployment.
See CORE to SCALE Migrations for more information.
Plugins are a technology for easily and securely deploying 3rd party applications directly on TrueNAS storage systems.
The web interface allows users to deploy, start, stop, and update applications, along with configuration tasks such as assigning storage to them.
Plugins are popular for content, security, development, collaboration, and backup applications for home and business use.
Plugin Technology
Jails form the core of TrueNAS plugins.
Jails are the FreeBSD container technology and are:
resource efficient
secure
flexible with networking infrastructure
Additionally, TrueNAS integrates the iocage application for its jail container management framework.
Each of the most popular TrueNAS plugins such as Plex Media Server, NextCloud, and SyncThing begin as FreeBSD ports: multimedia/plexmediaserver/, deskutils/nextcloudclient/, and net/syncthing/ respectively.
These install to a FreeBSD system using the command pkg package manager.
For example, FreeBSD uses command pkg install plexmediaserver and then configures the application manually.
This tutorial guides you through creating a custom plugin using the SABnzbd newsreader plugin as an example.
A plugin adds metadata that provides an installation source, reasonable defaults, and user interface elements such as an icon.
The components for the sabnzbd plugin are:
README.md: A popular convention for a file in markdown format for describing the project.
sabnzbd.json: The JSON artifact file containing various plugin properties including an inventory of all other metadata components which might be in the same or a remote repository.
overlay/: An optional directory containing the files to copy into the Jail.
ui.json: A file containing the plugin management interface URL and port number.
settings.json: An optional JSON file that contains variables used during plugin startup and for its configuration.
sabnzbd.png: A .png image such as sabnzbd.png that displays in the TrueNAS plugins Index. It is used as the icon.
post_install.sh: A shell script to run after jail creation to perform necessary configuration steps. It runs only once.
Requirements
TrueNAS provides everything necessary for custom plugin development, but a FreeBSD system is also a good choice. The requirements are:
A TrueNAS or FreeBSD system running iocage (iocage).
An internet connection and at least 1 GiB of available disk space.
A publicly-accessible git repository (git), self-hosted or on a service like GitHub, Gitea or GitLab. You can run GitLab as its own plugin.
A text editor such as vi, ee, or nano, all of which are available in TrueNAS.
// and # comments are not supported in JSON.
Copy any examples from the files in the Git repository using raw mode.
Custom Plugin Files
Artifact File
sabnzbd.json (artifact file)
{
  "name": "sabnzbd",                //The name of the Plugin and resulting Jail
  "plugin_schema": "2",             //The Plugin schema version
  "release": "11.3-RELEASE",        //FreeBSD version (not significantly newer than host)
  "artifact": "https://github.com/ConorBeh/iocage-plugin-sabnzbd.git",      //The Git repository containing the Plugin
  "properties": {                   //Jail properties that can be overridden by the user
    "nat": 1,
    "nat_forwards": "tcp(8080:8080)"
  },
  "pkgs": [                 //FreeBSD packages to be installed, one per line
    "sabnzbdplus",
  ],
  "packagesite": "https://pkg.FreeBSD.org/FreeBSD:11:amd64/latest",          //The package site, latest, quarterly, or self-hosted
  "fingerprints": {
    "iocage-plugins": [
      {
        "function": "sha256",
        "fingerprint": "b0170035af3acc5f3f3ae1859dc717101b4e6c1d0a794ad554928ca0cbb2f438"       //The checksum of the FreeBSD port
      }
    ]
  },
  "revision": "0"       //Internal version number
}
Artifact File Properties
These are commonly-used properties specified in the artifact file.
You can specify any supported iocage property.
Here are a few:
nat: Enables NAT to utilize the host IP address.
nat_forwards: Required when NAT is enabled. Syntax: < protocol > ( < jailport >:< hostport > )
dhcp: Enables DHCP on the jail to allow it to automatically obtain an IP address.
allow_tun: Allows the creation of a tun network device inside the jail, required for VPN connections.
allow_raw_sockets: Allows the jail to create raw sockets.
Artifact Repository Options
The official FreeBSD repository provides latest and quarterly branches.
The latest branch contains binary packages that are updated immediately, while the quarterly branch binaries are only updated every quarter, and are the default for FreeBSD releases.
The fingerprint remains the same for all official FreeBSD repositories.
If custom port build options are required, the preferred solution is to set up a custom Poudriere build server.
overlay/ File
The overlay/ is a directory of files copied into the jail after creation and before the execution of post_install.sh.
The layout of these files follows the same paths as in the root jail file system.
For example, a file placed in /overlay/usr/local/www/lighttpd/ inside the git repository goes into /usr/local/www/lighttpd in the jail.
This is very useful for providing pre-made configuration files, additional scripts, or even binaries that might not be available in the pkg repository.ui.json File
This is a small JSON file containing the address of the WebUI and port.
Use the variable %%IP%% to automatically display the correct IP address.
Make sure to include any extra components in the URL following the domain name or IP address, for example /admin or /web/index.settings.json File
A JSON file that is used when working with generated or user-specified data such as passwords or database names.
You can use these variables in post_install.sh.
In addition to these variables, you must also set the servicerestart command.
This command runs when a setting changes or the jail restarts, like a web server restart.sabnzbd.png (Icon File)
A link to a .png file to display in the TrueNAS Plugins Index.
The image requires a transparent background and must be 128 pixel by 128 pixel square in size to produce quality results when resized.post_install.sh File
A POSIX shell script that leverages all other files to automate plugin installation.
Simple plugins typically only have a few lines in this file, to enable and start a few services.
Note that iocage executes the file contents simultaneously, not line by line.
Remember to make the file executable before uploading it to the Git repository.
To make the post_install.sh executable, enter command chmod +x post_install.sh.
Common post-installation steps include:
Setting file and directory permissions
Moving, copying, and editing configuration files
Generating random passwords
Adding a user and/or group
Creating a database
/root/PLUGIN_INFO File
A text file with easily accessible information that clicking Post Install Notes can recall again from the web interface.
Inter information into this file using command echo {information/notes} >> /root/PLUGIN_INFO in post_install.sh, where {information/notes} is the relevant information about the plugin.
Git Repository Initialization
Create and initialize a git repository and README for the plugin.
Use this naming schema iocage-plugin-{PLUGIN_NAME}, where {PLUGIN_NAME} is the name of the plugin.
For example, iocage-plugin-sabnzbd is the name of the Github repository in this example.
Put all the necessary files and directories in the newly created artifact repository.
The necessary files are listed above.
Next, open a pull request to the plugin hub index that adds the artifact file, icon, and entry into the INDEX file.
Remember to put a link to your newly created artifact repository in the comments of the pull request.
This way a moderator can fork your repository and can make available in the community list of plugins.
Describes how to update jails and plugins in TrueNAS CORE.
As of TrueNAS CORE 13.3, this feature is untested and provided without support to the TrueNAS Community.
Users with a critical need to use containers or virtualization solutions in production should migrate to the tested and supported virtualization features available in TrueNAS SCALE.
TrueNAS Enterprise customers can contact iXsystems to schedule a TrueNAS SCALE deployment.
See CORE to SCALE Migrations for more information.
The Jails screen displays a list of jails installed on your system.
Plugins are created as a jail with specific software installed in that jail.
The update process for a jail and plugin is identical, while plugins have an additional step to update software installed inside the jail.
Jail Operating System Updates and Upgrades
FreeBSD Jails are installed with a specific FreeBSD release, such as 12.3, 13.1, or 14.0.
These major releases can have numerous patches to address issues with the release before the next release is available.
Updating a jail applies the latest patch level to the installed FreeBSD release.
Upgrading a jail adjusts the Jail to use a newer FreeBSD release.
Both updates and upgrades require the jail can connect to the update.FreeBSD.org mirrors.
Update a Jail
To update a jail to the most current patch level of the installed FreeBSD release, go to Jails and find the installed jail. Click > to expand the jail and then click Update.
This does not change the installed FreeBSD release.
For example, a jail installed with FreeBSD 11.2-RELEASE can update to p15 or the latest patch of 11.2, but not an 11.3-RELEASE-p# version of FreeBSD.
Upgrade a Jail
Using Upgrade replaces the jail FreeBSD operating system with a new release of FreeBSD, such as taking a jail from FreeBSD 11.2-RELEASE to 11.3-RELEASE.
To upgrade a jail, stop it, open the shell and enter command iocage upgrade name -r release, where name is the plugin jail name and release is the desired FreeBSD release.
You might be prompted to approve additional FreeBSD component installation.
The jail upgrade process can take a long time to download the FreeBSD release and apply it to a jail.
When the chosen FreeBSD release is already stored in the iocage dataset, the jail upgrade process is much faster.
Jail status messages and command output are stored in /var/log/iocage.log.
Removing Unused FreeBSD Releases
As a space saving measure, you can manually remove unused releases from the /iocage/releases/ dataset after upgrading a jail.
The release must not be in use by any jail on the system.
Update Installed Plugin Software
Updating software installed in a jail requires the jail communicate with the online iocage plugins repository servers.
The process involves opening a shell from within the running jail and using FreeBSD pkg commands to view and update the installed software.
To update the installed software stored within a Plugin jail, go to Jails and expand the installed plugin jail.
Click > SHELL to open a command prompt from within the jail.
Enter pkg info to see a list of all installed software.
This example shows the installed software from within the jail created when the Minio plugin was installed:
To update the installed software, enter pkg install name and replace name with the name returned from running pkg info.
The command checks if an update is available and prompts to proceed when the software can be updated.
This example shows attempting to update the minio software but no update was available.
2.14.4 - Virtual Machines
Provides instructions on creating and managing a basic virtual machine, and lists other tutorials about virtual machines in TrueNAS CORE.
Basic Virtual Machine Management
As of TrueNAS CORE 13.3, this feature is untested and provided without support to the TrueNAS Community.
Users with a critical need to use containers or virtualization solutions in production should migrate to the tested and supported virtualization features available in TrueNAS SCALE.
TrueNAS Enterprise customers can contact iXsystems to schedule a TrueNAS SCALE deployment.
See CORE to SCALE Migrations for more information.
A virtual machine (VM) is an environment on a host computer that can be used as if it were a separate physical computer.
VMs can be used to run multiple operating systems simultaneously on a single computer.
Operating systems running inside a VM see emulated virtual hardware rather than the actual hardware of the host computer.
This provides more isolation than jails, but a VM consumes more system resources.
What system resources do VMs require?
A VM requires a portion of system RAM and a new zvol assigned to it.
While a VM is running, these resources are not available to the host computer or other VMs.
TrueNAS VMs use the bhyve virtual machine software.
This type of virtualization requires an Intel processor with Extended Page Tables (EPT) or an AMD processor with Rapid Virtualization Indexing (RVI) or Nested Page Tables (NPT).
VMs cannot be created unless the host system supports these features.
To verify that an Intel processor has the required features, open an SSH session or local console shell and run grep VT-x /var/run/dmesg.boot.
If the EPT and UG features are shown, this processor can use the bhyve VM software.
To verify that an AMD processor has the required features, open and SSH session or local console shell and run grep POPCNT /var/run/dmesg.boot.
If the output shows the POPCNT feature, this processor can use the bhyve VM software.
Note that AMD K10 Kuma processors include POPCNT but do not support NRIS, which is required for use with bhyve.
Production of these processors ceased in 2012-2013.
Creating a Virtual Machine
Before creating the virtual machine, you need an installer .iso or image file for the operating system you intend to install and a storage pool available for both the virtual disk and operating system install file.
To create a new VM, go to Virtual Machines and click Add.
Configure each category of the VM according to your specifications, starting with the Operating System.
Using the Grub boot method as the guest operating system is not supported by Windows.
Compare the recommended specifications for your guest operating system with the available host system resources when allocating values in Virtual CPUs, Cores, Threads, and Memory Size.
Avoid allocating too much memory to a VM.
Activating a VM that has all available memory allocated to it can slow the host system or prevent other VMs from starting.
AHCI is the recommended disk type for Windows VMs.
VirtIO as network interface requires that the chosen guest operating system support VirtIO paravirtualized network drivers.
VirtIO compatibility with Windows 10 21H1
VirtIO drivers are unstable with Windows 10 21H1 during the installation process and can result in VM install failure.
Avoid using VirtIO drivers with Windows 10 21H2 Virtual Machines.
Adding and Removing Devices
After creating the VM, you can add and remove virtual devices by expanding the VM entry in Virtual Machines and clicking the device_hubDevices option.
Device notes:
The virtual machine attempts to boot from devices according to the the Device Order setting, starting with 1000, then ascending.
The CD-ROM device option allows booting a VM from a CD-ROM image like an installation CD.
The CD image must be available in the system storage.
Managing a Virtual Machine
After creating a VM and configuring any devices for it, manage the VM by expanding its entry in Virtual Machines.
Options for settings_ethernet or keyboard_arrow_right connections are available after activating the VM.
If the VNC connection screen appears garbled, try adjusting the VNC device resolution.
Using the State toggle or clicking stop follows a standard shutdown procedure to cleanly shut down the running VM.
Clicking power_settings_new immediately halts and deactivates the VM, similar to unplugging a computer.
If the VM does not have a guest OS installed, the VM State toggle and stop button might not function as expected.
These buttons try to send an ACPI power-down command to the VM operating system, but since an OS is not installed, the commands time out.
Use the POWER OFF button instead.
Virtual Machine Articles
Setting Up NPIV: Describes how to configure NPIV on TrueNAS CORE.
2.14.4.1 - Setting Up NPIV
Describes how to configure NPIV on TrueNAS CORE.
NPIV (N_Port ID Virtualization)
NPIV allows the administrator to use switch zoning to configure each virtual port as if it was a physical port in order to provide access control.
This is important in an environment with a mix of Windows systems and virtual machines in order to prevent automatic or accidental reformatting of targets containing unrecognized file systems.
It can also be used to segregate data; for example, to prevent the engineering department from accessing data from the human resources department.
Refer to the switch documentation for details on how to configure zoning of virtual ports.
Creating NP Virtual Ports
To create virtual ports on the TrueNAS system, go to System > Tunables and click ADD.
Enter these options:
Variable : input hint.isp.X.vports, replacing X with the number of the physical interface.
Value : input the number of virtual ports to create. There cannot be more than 125 SCSI target ports, including all physical Fibre Channel ports, all virtual ports, and all configured combinations of iSCSI portals and targets.
Type : make sure loader is selected.
In the example shown:
Two physical interfaces are each assigned 4 virtual ports.
Two tunables are required, one for each physical interface.
After the tunables are created, the configured number of virtual ports appears in Sharing > Block Shares (iSCSI) > Fibre Channel Ports screen so they can be associated with targets.
They are also advertised to the switch so zoning can be configured on the switch.
After associating a virtual port with a target, add it to the Target tab of Reporting so you can view its bandwidth usage.
2.15 - Updating CORE
Tutorials for updating or upgrading a TrueNAS CORE system.
TrueNAS CORE has an integrated update system to make it easy to keep up to date.
TrueNAS Enterprise
TrueNAS CORE Enterprise High Availability (HA) customers should see Updating CORE Enterprise for additional considerations.
Prepare the System
We recommend performing updates when the TrueNAS system is idle, with no clients connected and no scrubs or other disk activity happening.
Most updates require a system reboot.
Plan updates around scheduled maintenance times to avoid disrupting user activities.
The update process does not proceed unless there is enough free space in the boot pool for the new update files.
If a space warning displays, go to System > Boot to remove unneeded boot environments.
Updates and Trains
TrueNAS uses cryptographically signed update files to update.
Update files provide flexibility in deciding when to upgrade the system.
TrueNAS installs updates in a new Boot Environment, allowing you to install and test an update, but revert to a previous Boot Environment in System > Boot if anything goes wrong.
TrueNAS defines software branches known as trains.
We have several trains available for updates, but the web interface only displays trains you can select as an upgrade.
Update trains have a numeric version followed by a short description.
The current version receives regular bug fixes and new features.
Supported older versions of TrueNAS only receive maintenance updates.
See the Software Development Life Cycle for more details about the development and support timeline for TrueNAS versions.
We use three different terms to describe train types:
STABLE: Bug fixes and new features are available from this train. Upgrades available from a STABLE train are tested and ready to apply to a production environment.
Nightlies: Experimental train used for testing future versions of TrueNAS.
SDK: Software Developer Kit train has additional tools for testing and debugging TrueNAS.
The UI shows a warning when the selected train does not suit production use.
Before using a non-production train, be prepared to experience bugs or problems.
Testers are encouraged to submit bug reports at https://ixsystems.atlassian.net.
Check for Updates
The system checks daily for updates and downloads an update if one is available.
An alert is issued when a new update becomes available.
The automatic check and download of updates are disabled by unsetting Check for Updates Daily and Download if Available.
Click (Refresh) to perform another check for updates.
To change the train, use the drop-down menu to make a different selection.
The train selector does not allow downgrades.
For example, you cannot select the STABLE train while booted into a Nightly boot environment or a 9.10 train while booted into an 11 boot environment.
To go back to an earlier version after testing or running a more recent version, reboot and select a boot environment for that earlier version.
Information about the update displays with a link to the release notes.
Alwys read the release notes before updating to determine if any of the changes in that release impact system use.
Save the Configuration File
A dialog to save the system configuration file appears before installing updates.
Keep the system configuration file secure after saving it.
The security information in the configuration file can grant unauthorized access to your TrueNAS system.
Update the System
Ensure the system is in a low-usage state as described above in Preparing for Updates.
Click DOWNLOAD UPDATES to download and install an update.
The Save Configuration dialog appears so you can save the current configuration to external media.
A confirmation window appears before installing the update.
If you set Apply updates and reboot system after downloading, clicking CONTINUE downloads and applies the update, then reboots the system.
The update can be downloaded for a later manual installation by unsetting Apply updates and reboot system after downloading.
APPLY PENDING UPDATE displays when an update is downloaded and ready to install.
Setting Confirm and clicking CONTINUE updates and reboots the system.
Each update creates a boot environment.
If the update process needs more space, it attempts to remove old boot environments.
TrueNAS does not remove boot environments marked with the Keep attribute as shown in System > Boot.
The upgrade fails if your system does not have space for a new boot environment.
Space on the operating system device can be manually freed by going to System > Boot and removing the Keep attribute or deleting any boot environments that are no longer needed.
Can I force a full update?
TrueNAS defaults to delta packages for updates.
While updating, TrueNAS only downloads files that changed in the base operating system since the previous update.
Delta update packages are more efficient than full update packages, providing a faster update and taking less bandwidth.
By contrast, a full update package downloads all the files included in the base system, even if those files have not changed.
While the full package might require more time to install, there are some rare cases where it is necessary, such as when aplying a patch as a temporary fix to a local system.
A patch fixes a bug within the main codebase.
While software patches often fix bugs, they can also repair security issues or add new features.
To force a full update, open the shell and enter this command:
The updater downloads the full package containing all the files from the latest software release.
When the download completes, the system reboots with the standard configuration.
Manual Updates
You can manually download and apply updates in System > Update.
You cannot use manual updates to upgrade from older major versions.
Go to https://download.freenas.org/ and find an update file of the desired version.
Manual update file names end with manual-update.tar.
Download the desired update file to your local system.
Log in to the TrueNAS web interface and go to System > Update.
Click INSTALL MANUAL UPDATE FILE.
The Save Configuration dialog opens.
You can save a copy of the current configuration to external media for backup in case of an update problem.
After the dialog closes, the manual update screen displays.
The current version of TrueNAS displays for verification.
Select the manual update file saved to your local system using Browse.
Set Reboot After Update to reboot the system after the update installs.
Click APPLY UPDATE to begin the update.
Update in Progress
Starting an update shows a progress dialog.
When an update is in progress, the web interface shows an animated system_update_alt icon in the top row.
Dialogs also appear in every active web interface session to warn that a system update is in progress.
Do not interrupt a system update.
Upgrade Via ISO
To upgrade TrueNAS to a new major version using an .iso file, use the Release List to download the .iso to the computer that prepares the installation media.
Burn the downloaded .iso file to a CD or USB stick. Refer to the Prepare the Install File instructions in the Installation article for tips about burning the .iso to media using different Operating Systems.
Insert the prepared media into the system and boot from it.
The installer waits ten seconds in the installer boot menu before booting the default option.
If needed, press Spacebar to stop the timer and choose another boot option.
After the media finishes booting into the installation menu, press Enter to select the default option 1 Install/Upgrade.
The installer presents a screen showing all available drives.
All drives display, including boot drives and storage drives.
Only choose boot drives when upgrading.
Choosing the wrong drives to upgrade or install causes data loss.
If you are unsure which drives contain the TrueNAS operating system, reboot and remove the install media.
Log in to the TrueNAS web interface and go to System > Boot > ACTIONS > Boot Pool Status to identify the boot drives.
More than one drive displays when using a mirror.
Highlight the drive where TrueNAS is installed and press Spacebar to mark it with a star.
If using a mirror for the operating system, mark all the drives where the TrueNAS operating system is installed.
Press Enter when done.
The installer recognizes earlier versions of FreeNAS/TrueNAS installed on the boot drives and asks to either upgrade or do a fresh install:
To perform an upgrade, press Enter to accept the default Upgrade Install.
The installer displays another reminder that you should install the operating system on a disk you are not using for storage.
You can install the updated system in a new boot environment or format the entire operating system device to start fresh.
Installing into a new boot environment preserves the old code, allowing a roll-back to previous versions if necessary.
Formatting the boot device is usually not necessary but can reclaim space.
TrueNAS preserves user data and settings when installing in a new boot environment and formatting the operating system device.
Move the highlight to one of the options and press Enter to start the upgrade.
The installer unpacks the new image and checks for upgrades to the existing database file.
The database file that is preserved and migrated contains your TrueNAS configuration settings.
Press Enter.
TrueNAS indicates that the upgrade is complete and a reboot is required.
Press OK, highlight 3 Reboot System, then press Enter to reboot the system.
If the upgrade installer was booted from CD, remove the CD.
During reboot, the previous configuration database can convert to the new version.
The conversion happens during the reboot Applying database schema changes line.
The conversion can take a long time to finish, sometimes fifteen minutes or more, and can cause the system to reboot again.
The system boots normally afterwards.
If database errors display but the web interface is accessible, log in, go to System > General, and use the UPLOAD CONFIG button to upload the configuration backup you downloaded before starting the upgrade.
2.15.1 - Updating CORE Enterprise
Describes how to update Enterprise-licensed TrueNAS CORE deployments.
TrueNAS Enterprise
This is Enterprise content that specifically applies to High Availability (HA) systems with a TrueNAS Enterprise license active.
Updating a TrueNAS Enterprise system configured for High Availability (HA) has a slightly different flow from non-HA systems on TrueNAS Core.
The system downloads the update to both controllers, updates and reboots the standby TrueNAS controller, and finally fails over from and updates the active TrueNAS controller.
Prepare the System
An update usually takes between thirty minutes and an hour.
The system must reboot after the update, so it is recommended to schedule updates during a maintenance window, allowing two to three hours to update, test, and possibly roll back if issues appear.
On large systems, we recommend a proportionally longer maintenance window.
For individual support during an upgrade, please contact iXsystems Support to schedule your upgrade.
Contacting iXsystems Support
Customers who purchase iXsystems hardware or that want additional support must have a support contract to use iXsystems Support Services. The TrueNAS Community forums provides free support for users without an iXsystems Support contract.
Monday - Friday, 6:00AM to 6:00PM Pacific Standard Time:
US-only toll-free: 1-855-473-7449 option 2 Local and international: 1-408-943-4100 option 2
Telephone
After Hours (24x7 Gold Level Support only):
US-only toll-free: 1-855-499-5131 International: 1-408-878-3140 (international calling rates apply)
Scheduling at least two days ahead of a planned upgrade gives time to ensure a specialist is available for assistance.
Updating from earlier than version 9.3 of TrueNAS must be scheduled with iXsystems Support.
The update process will not proceed unless there is enough free space in the boot pool for the new update files.
If a space warning displays, go to System > Boot and remove any unneeded boot environments.
Operating system updates only modify the OS devices and do not affect end-user data on storage drives.
An update could involve upgrading the version of ZFS installed on the storage drives.
When a ZFS version upgrade is available, an notificationsAlert appears in the web interface.
We do not recommend upgrading the ZFS version on storage drives until you verify that you do not need to roll back to previous operating system versions or swap the storage drives with another system with an earlier ZFS version.
After a ZFS version upgrade, the storage devices are not accessible by earlier TrueNAS versions.
Start the Update
In the web interface Dashboard, find the entry for the active TrueNAS controller and click CHECK FOR UPDATES.
This button changes to UPDATES AVAILABLE when there is an available update.
Clicking the button goes to System > Update and shows the option to Download Updates or, when the system has detected and staged an update, Apply Pending Update.
When you click Download Updates or Apply Pending Update, TrueNAS gives an opportunity to save the current system configuration.
We recommend backing up the system configuration before starting the update.
Including the Password Secret Seed in the system configuration removes the encryption from sensitive system data, like stored passwords.
When enabling this option, take extra precautions to store the downloaded system configuration file in a secure location.
After downloading the system configuration, you can continue the system update.
While updating and rebooting controllers, HA and other system services are briefly unavailable.
Other users logged in to the web interface see a warning dialog.
A System Updating icon displays in the top bar of the web interface while the update is in progress.
Update progress displays for both TrueNAS controllers.
The standby TrueNAS controller reboots when it finishes updating.
This can take several minutes.
When the standby controller finishes booting, the system must fail over to update and reboot the active TrueNAS controller.
Failover to Complete the Update
To deactivate the active TrueNAS controller and finish the update, go to the Dashboard, find the entry for the Standby controller, and click INITIATE FAILOVER.
The failover briefly interrupts TrueNAS services and availability.
The browser logs out of the web interface while the active TrueNAS controller deactivates and the standby TrueNAS controller is brought online.
The web interface login screen reappears when the standby TrueNAS controller finishes activating.
Log in to the web interface and check the cloud HA status in the top toolbar.
This icon shows that HA is unavailable while the previously active TrueNAS controller reboots.
When HA is available, a dialog asks to finish the update.
Click CONTINUE to finish updating the previously active TrueNAS controller.
Verify that the update is complete by going to the Dashboard and confirming that the Version is the same on both TrueNAS controllers.
Reverting an Update
If the update did not install on one of the controllers, the web interface generates an alert about a mismatch between controller versions.
If something else goes wrong with the update, the system generates an alert and writes details to /data/update.failed.
You can return the system to its pre-update state by activating a previous boot environment during system boot.
To ensure the versions match, do this procedure for both TrueNAS controllers.
This requires physical or IPMI access to the TrueNAS controller console.
Reboot the system and press the space bar when the boot menu appears, pausing the boot process.
Open the Boot Environments menu and cycle the Active boot environment until one dated prior to the update displays.
Return to the first screen and press Enter to boot into that version of TrueNAS.
Manually Updating an Enterprise HA System
Enterprise customers should contact iX Support for assistance updating their TrueNAS system.
Set the Include Password Secret Seed checkbox and click the Save Configuration button.
Select the Update File Temporary Storage Location and click Choose File. Select the manual upgrade file you downloaded. Wait for the file to upload, then click APPLY UPDATE.
The Manual update uploads the file, installs it to both controllers, then reboots the Standby Controller. To complete the upgrade, click Close in the dialog box. Initiate a failover of the standby controller, as instructed, by clicking INITIATE FAILOVER from the Standby Controller’s Dashboard card.
Log into the system.
Click Continue in the Pending Upgrade dialog box. The standby controller reboots completing the upgrade.
2.16 - Setting UI Preferences
Use the Interface Preferences screen to display a list of general preferences or to change preference settings for your TrueNAS.
There are a few adjustable interface preferences. Also included is a built-in theme editor for creating your own TrueNAS color schemes.
To access user preferences, click settings> Preferences.
This page has options to adjust global settings in the web interface. There are also options to manage custom themes and create new themes.
Tuning the Visibility of UI Elements.
Click the Choose Theme dropdown list to change the color appearance of the web interface. Select from a range of prebuilt or custom created themes.
The High Contrast option offers the most visibility.
Select Prefer buttons with icons only when working with limited screen space. This displays icons and tooltips without text labels.
For increased security, clear the Enable Password Toggle checkbox.
This removes all the visibility icons next to password fields. It prevents the actual password characters from being visible.
Creating a Custom Theme
To create a custom theme, click CREATE NEW THEME.
Click Load colors from existing theme to change colors within an existing theme. Select an existing theme from the dropdown list to import into the configuration. This is useful when you have a theme you like but want to change a few colors within it.
Click the COLORS tab to define the color values for this new theme.
Define color choices as either RGBA or hexadecimal values. Or click a color swatch to open a visual color picker.
Define color selections in the COLORS tab. These selections determine the options available on the GENERAL tab.
Color selections display in the Preview. The Preview updates to reflect your current choices. You can turn this feature off. Click the PREVIEW tab then click the Global Preview toggle. This allows you to compare these selections with the currently active theme.
Go to the GENERAL tab and choose the primary, accent, and topbar colors for the theme. The color selections you made in the COLORS tab determine the options shown here.
Name and label the theme. Click SUBMIT to save it and add it to the options on the Preferences page.
3 - UI Reference Guide
This book contains descriptions of the various screens and fields available in the TrueNAS User Interface.
Welcome to the TrueNAS CORE UI Reference Guide!
This document shows and describes each screen and configurable option contained within the TrueNAS web interface.
The document is arranged in a parallel manner to the TrueNAS web interface, beginning with the top panel and then descending through each option displayed in the web interface left side menu.
To display this document in a linear HTML format, export it to PDF, or physically print it, please select ⎙ Download or Print.
Table of Contents
⎙ Download or Print: View all CORE UI Reference content as a single page for download or print.
Top Menu: Reference documentation for the options panel that displays at the top of the TrueNAS UI.
Task Manager: Displays a list of tasks performed by your TrueNAS.
Alert Notifications: Displays system alerts and provides options to dismiss or reopen dismissed alerts on your TrueNAS.
Click the links above to jump to the sections with details on these top toolbar options.
Logos and Side Panel Controls
The logo in the upper-left corner shows the installed TrueNAS software.
Clicking the image takes you to the system Dashboard.
The next two buttons control how the side menu displays.
Click the (menu icon) to hide or show the entire left side panel.
Click the (chevron left icon) to collapse the left side panel to shortcut icons or expand to show icons and text.
Click the iXsystems logo to open the iXsystems corporate website in a new browser tab.
Status Icons
The remaining icons in the top menu show various statuses. They also provide system options.
The icon next to the iXsystems logo shows TrueCommand Cloud connection options.
Clicking the icon shows options for signing up for TrueCommand Cloud. It also displays options for connecting/disconnecting from TrueCommand Cloud.
When the system is not connected to TrueCommand Cloud the options are not available.
The icon appears but is gray in color.
TrueNAS Enterprise compatible hardware has a (cloud with HA text) icon that shows the current status of High Availability (HA) on the system.
A checkmark () cloud icon indicates HA is functional.
An on top of the cloud icon indicates HA disabled or otherwise unavailable.
Task Manager
The (clipboard icon) is the system Task Manager.
Click the icon to show a list of running or completed TrueNAS tasks.
Tasks are sortable by their success or error State, task Method, and Progress.
Typing text in the Filter field shows tasks that match the characters typed into the field.
Clicking an entry shows more details about that task. This includes start and end timestamps.
Alerts
The (bell icon) contains system notification messages.
The icon changes to when TrueNAS creates a new alert.
Clicking the icon slides out a panel from the right side of the screen that lists each alert.
Dismiss or reopen alerts in this panel.
Dismissing an alert does not prevent it from recurring. TrueNAS might create a new alert if the alert conditions continue to exist on the system.
Configure the alert system in System > Alert Settings.
Settings
The (gear icon) contains links to various system specific options.
Change Password is a shortcut for changing the administrator (root) account password.
Password required to log in to the TrueNAS web interface.
Back up or otherwise memorize the updated password when changing it.
Preferences contains theme and other visual options for the web interface:
Preferences Options
Name
Description
Choose Theme
Select a preferred theme from the dropdown list. There are several built-in themes designed for light and dark modes. High contrast viewing options of the web interface are also listed.
Prefer buttons with icons only
Select to preserve screen space using icons and tooltips instead of text labels.
Enable Password Toggle
Select to display an eye icon next to password fields. Clicking the icon reveals the password.
Reset Table Columns to Default
Select to reset all tables to display system default table columns.
Retro Logo
Select to revert branding back to FreeNAS.
Reset All Preferences to Default
Select to reset all user preferences to their default values. Preserves custom themes.
Update Preferences
Click to save changes to the General Preferences.
Click Create New Theme on this screen to create and manage custom themes.
API Keys opens the API Keys screen where you can create or view API keys on the system. Click Add to create a new API key. Click Docs to open the API documentation for the current release.
About opens the TrueNAS CORE looking for help widget. This same widget is available on the system Dashboard, and provides links to the TrueNAS Documentation, community forum, TrueNAS CORE Enterprise web sites.
Power
The (power icon) has the options for changing the system state.
Log Out exits the web interface and shows the login screen.
The system remains powered on.
Restart initiates a power cycle.
The web interface closes. Discontinues power to the system which is then re-enabled.
The login screen appears when the boot cycle completes.
Shut Down exits the web interface. The process to safely discontinue power to the system begins.
The system remains offline until the power situation corrects.
Top Menu Contents
Alert Notifications: Displays system alerts and provides options to dismiss or reopen dismissed alerts on your TrueNAS.
Task Manager: Displays a list of tasks performed by your TrueNAS.
3.1.1 - Task Manager
Displays a list of tasks performed by your TrueNAS.
The Task Manager displays a list of tasks performed by the TrueNAS system. It starts with the most recent. Click the assignment to open the Task Manager.
Name
Description
Filter
Search function to locate or filter the list for a particular running task.
View Logs
Tasks with log file output have a View Logs button to show the log files.
State
Column header for tasks that shows the current condition of the task. Indicates whether the task completed or is still in progress. Click State to sort by this column.
Method
Column header for tasks that indicates both the name of the task and the method used. Click Method to sort by this column.
Progress
Column header for tasks that indicates the progress of the the task. Measured by percentage from start to completion. Click Progress to sort by this column.
CLOSE
Closes the Task Manager dialog. Click anywhere off the dialog or use the Esc to close this dialog.
3.1.2 - Alert Notifications
Displays system alerts and provides options to dismiss or reopen dismissed alerts on your TrueNAS.
The Alert Notifications panel displays system alerts. It provides options to dismiss or reopen dismissed alerts on your TrueNAS.
Alerts Panel Options
Name
Description
Dismiss
Dismisses a single alert.
Re-Open
Re-opens a recently dismissed alert.
Dismiss All Alerts
Dismisses all alerts.
Re-Open All Alerts
Displays at the bottom of the panel if you dismiss more than one alert. Click to re-open all dismissed alerts if they are still active.
Alert Levels
Level
Icon
Notification
Warning
Critical
One-shot Critical
3.1.3 - Interface Preferences
Displays a list of general preferences for your TrueNAS.
There are a few adjustable interface preferences. Also included is a built-in theme editor for creating your own TrueNAS color schemes.
To access user preferences, click settings> Preferences.
This page has options to adjust global settings in the web interface. There are also options to manage custom themes and create new themes.
General Preferences
Name
Description
Choose Theme
Select a preferred theme from the dropdown list. Prebuilt and custom themes are visible here.
Prefer buttons with icons only
Select checkbox to preserve screen space. Displays icons and tooltips instead of text labels.
Enable Password Toggle
Select checkbox to make an eye icon appear next to password fields. Click the icon to reveal the password.
Reset Table Columns to Default
Select checkbox to reset the display of all table columns as system default.
Retro Logo
Select checkbox to revert branding back to FreeNAS.
Reset All Preferences to Default
Select checkbox to reset all user preferences to their default values. Does not reset custom themes.
UPDATE PREFERENCES
Cick button to apply the current checkbox settings to the web interface.
Manage Custom Themes
Name
Description
theme name (variable)
Use checkbox to select a custom theme if listed.
DELETE SELECTED
Click button to remove each selected custom theme from the system.
CREATE NEW THEME
Click button to open the theme editor.
Custom Theme Editor
Create Theme
Name
Description
Load colors from existing theme
Select the theme option from the dropdown list. Imports settings into the Create Theme and Preview tabs.
GENERAL
Click to display the GENERAL tab with the primary options for a new theme.
COLORS
Click to display the COLORS tab with color options for a new theme.
PREVIEW
Click to display the PREVIEW tab. The PREVIEW updates to reflect current selections.
GENERAL
Name
Description
Custom Theme Name
Enter a name to identify the new theme.
Menu Label
Enter a short name to use in the TrueNAS web interface menus.
Description
Enter a short description of the new theme.
Choose Primary
Select a generic color from the dropdown list to use as the primary theme color. Or import a specific color setting.
Choose Accent
Select a generic color from the dropdown list to use as the accent color for the theme. Or import a specific color setting.
Choose Topbar
Select a color from the dropdown list to use as the color for the top menu bar in the web interface.
SUBMIT
Click to save the current selections and create the new theme.
CANCEL
Click to return to the Preferences screen without creating a new theme.
COLORS
Name
Description
Background 1
Either click on the color swatch or enter a hex value. This value applies to the bg1 option in the GENERAL tab.
Background 2
Either click on the color swatch or enter a hex value. This value applies to the bg2 option in the GENERAL tab.
Foreground 1
Either click on the color swatch or enter a hex value. This value applies to the fg1 option in the GENERAL tab.
Foreground 2
Either click on the color swatch or enter a hex value. This value applies to the fg2 option in the GENERAL tab.
Alt Background 1
Either click on the color swatch or enter a hex value. This value applies to the alt-bg1 option in the GENERAL tab.
Alt Background 2
Either click on the color swatch or enter a hex value. This value applies to the alt-bg2 option in the GENERAL tab.
Alt Foreground 1
Either click on the color swatch or enter a hex value. This value applies to the alt-fg1 option in the GENERAL tab.
Alt Foreground 2
Either click on the color swatch or enter a hex value. This value applies to the alt-fg2 option in the GENERAL tab.
Yellow
Either click on the color swatch or enter a hex value. This value applies to the yellow option in the GENERAL tab.
Orange
Either click on the color swatch or enter a hex value. This value applies to the orange option in the GENERAL tab.
Red
Either click on the color swatch or enter a hex value. This value applies to the red option in the GENERAL tab.
Magenta
Either click on the color swatch or enter a hex value. This value applies to the magenta option in the GENERAL tab.
Violet
Either click on the color swatch or enter a hex value. This value applies to the violet option in the GENERAL tab.
Blue
Either click on the color swatch or enter a hex value. This value applies to the blue option in the GENERAL tab.
Cyan
Either click on the color swatch or enter a hex value. This value applies to the cyan option in the GENERAL tab.
Green
Either click on the color swatch or enter a hex value. This value applies to the green option in the GENERAL tab.
SUBMIT
Click the button to save the current selections and create the new theme.
CANCEL
Click the button to return to the Preferences screen without creating a new theme.
PREVIEW
Name
Description
Global Preview
Color selections display in the PREVIEW. Click the toggle to turn the display of the PREVIEW widget on or off.
Preview
Name
Description
Buttons
This tab shows examples of web interface buttons. The buttons display with the current theme settings applied.
Forms
This tab shows examples of web interface form options. The options display with the current theme settings applied.
3.2 - Dashboard
CORE Dashboard reference.
The web interface dashboard provides system details and shortcuts to various configuration screens.
Dashboard Cards
Card
Description
System Information
Shows simple system-level information about TrueNAS, including hardware name (with compatible systems), TrueNAS version, system hostname, and system uptime. Includes a button to update the installed version of TrueNAS.
CPU
Shows current CPU utilization and heat (with compatible hardware). Includes a shortcut icon to the in-depth CPU reporting screen.
Memory
Shows total memory available to the system and the current breakdown of memory usage. Includes a shortcut icon to the in-depth memory utilization screen.
Pool
Shows details about a configured storage pool. One card is created for each storage pool on the system. Includes shortcut icons to the pool configuration and statistics screens.
Interface
Shows details about system network interfaces, including current status and configuration details. Includes shortcut icons to the interface configuration and statistics screens.
TrueNAS Help
Contains links to verious documentation and assistance portals.
3.3 - Accounts
CORE UI User and Group screens documentation.
This section has articles documenting the TrueNAS local User and Group screens.
Accounts Contents
Groups: Describes the fields on the Groups screen in TrueNAS CORE.
Users: Describes the fields on the Users screens in TrueNAS CORE.
3.3.1 - Groups
Describes the fields on the Groups screen in TrueNAS CORE.
The Groups screen lets you create and manage UNIX-style groups.
Groups List
Name
Description
Filter Groups
Filters groups by keyword.
COLUMNS
Lets users display/hide list columns.
ADD
Opens the Group Configuration form
Displays/hides built-in groups
Group
Group name.
GID
Group ID number.
Builtin
Whether or not the group is built-in.
Permit Sudo
Whether or not the group has Permit Sudo enabled.
Samba Authentication
Whether or not the group has Samba Authentication enabled.
Groups Configuration
Fields with an * must be configured to submit or change the UI configuration.
Name
Description
GID
A unique number used to identify a Unix group.
Name
Descriptive name for the group.
Permit Sudo
Allows group members to act as the root account with sudo. Group members are prompted for their password when using sudo.
Samba Authentication
Allows group to be used for Samba permissions and authentication.
Allow Duplicate GIDs
Allows more than one group to have the same group ID.
3.3.2 - Users
Describes the fields on the Users screens in TrueNAS CORE.
The Users screen lets you create and manage user accounts.
Users List
Name
Description
Filter Users
Filters users by keyword.
COLUMNS
Lets users display/hide list columns. Username, UID, Builtin, and Full Name are default.
ADD
Opens the User ID and Groups form
Displays/hides built-in users
Username
Descriptive name for the user.
UID
User ID number.
Builtin
Whether or not the user is built-in.
Full Name
Shows the saved Full Name of the account.
User Configuration
Fields with an * must be configured to submit or change the UI configuration.
Identification
Name
Description
Full Name
Descriptive name for the user.
Username
User login name.
Email
User email address.
Password
User login password.
Confirm Password
Re-enter user password.
User ID and Groups
Name
Description
User ID
A unique number used to identify a user.
New Primary Group
Creates a new group with the same name as the user.
Primary Group
Primary group to add the user to.
Auxiliary Groups
Additional groups to add the user to.
Directories and Permissions
Name
Description
Home Directory
Path to the user home directory.
Home Directory Permissions
Default user home directory Unix permissions.
Authentication
Name
Description
SSH Public Key
Public SSH key for key-based authentication.
Disable Password
Enables/Disables password field.
Shell
The shell to use for local and SSH logins.
Lock User
Prevents user from logging in or using password-based services.
Permit Sudo
Enable or disable issuing commands as the root account with sudo.
Microsoft Account
Allows Windows authentication methods.
Samba Authentication
Lets users authenticate to Samba shares.
3.4 - System
Reference documentation for the screens within the System menu option.
The TrueNAS CORE web interface System section has numerous features related to configuring the system and integrating it with specific environments or external accounts.
System Content
General: Describes the fields for the general system settings for TrueNAS CORE.
NTP Servers: Describes the fields for the NTP Server Settings screen on TrueNAS CORE.
Boot: Provides information about the Boot screen for the TrueNAS CORE.
Advanced: Describes the System > Advanced screen on TrueNAS CORE.
View Enclosure: Provides information about the View Enclosure screen on TrueNAS CORE.
Email: Describes the Email screen and settings on TrueNAS CORE.
System Dataset: Describes the System Dataset screen on TrueNAS CORE.
Reporting: Contains information about the Reporting screen on TrueNAS CORE.
Alert Services: Describes the fields on the Alert Services screen on TrueNAS CORE.
Alert Settings: Describes the Alert Settings screen on TrueNAS CORE.
Cloud Credentials: Describes the fields in the Cloud Credentials screen in TrueNAS CORE.
SSH Connections: Describes the SSH screen fields on TrueNAS CORE.
SSH Keypairs: Describes the SSH Keypair screen on TrueNAS CORE.
Tunables: Describes the Tunable screen fields on TrueNAS CORE.
Update: Describes the fields in the Update screen in TrueNAS CORE.
CAs: Describes the Certificate Authorities screen settings and functions.
Certificates: Explains the fields located on the Certificates screen in TrueNAS CORE.
ACME DNS: Describes the fields in the Add ACME DNS Authenticators screen on TrueNAS CORE.
KMIP: Describes the fields in the KMIP Key Status screen on TrueNAS CORE Enterprise.
Failover (HA): Describes the fields in the Failover Configuration screen on TrueNAS CORE.
Support: Describes the Support screen on TrueNAS CORE.
Describes the fields for the general system settings for TrueNAS CORE.
GUI
Name
Description
GUI SSL Certificate
The system uses a self-signed certificate to enable encrypted web interface connections. To change the default certificate, select a different certificate that was created or imported in the Certificates menu.
Web Interface IPv4 Address
Choose a recent IP address to limit the usage when accessing the administrative GUI. The built-in HTTP server binds to the wildcard address of 0.0.0.0 (any address) and issues an alert if the specified address becomes unavailable.
Web Interface IPv6 Address
Choose a recent IPv6 address to limit the usage when accessing the administrative GUI. The built-in HTTP server binds to the wildcard address of 0.0.0.0 (any address) and issues an alert if the specified address becomes unavailable.
Web Interface HTTP Port
Allow configuring a non-standard port to access the GUI over HTTP. Changing this setting might require changing a Firefox configuration setting.
Web Interface HTTPS Port
Allow configuring a non-standard port to access the GUI over HTTPS.
HTTPS Protocols
Cryptographic protocols for securing client/server connections. Select which Transport Layer Security (TLS) versions TrueNAS can use for connection security.
Web Interface HTTP -> HTTPS Redirect
Redirect HTTP connections to HTTPS. A GUI SSL Certificate is required for HTTPS. Activating this also sets the HTTP Strict Transport Security (HSTS) maximum age to 31536000 seconds (one year). This means that after a browser connects to the web interface for the first time, the browser continues to use HTTPS and renews this setting every year.
Localization
Name
Description
Language
Select a language from the drop-down menu.
Date Format
Choose a date format.
Console Keyboard Map
Select a keyboard layout.
Timezone
Select a time zone.
Time Format
Choose a time format.
Other Options
Name
Description
Crash reporting
Send failed HTTP request data which can include client and server IP addresses, failed method call tracebacks, and middleware log file contents to iXsystems.
Usage collection
Enable sending anonymous usage statistics to iXsystems.
SAVE CONFIG: Saves a backup copy of the current configuration database in the format hostname-version-architecture.
UPLOAD CONFIG: Browse to a previously saved configuration file to restore that configuration.
RESET CONFIG: Reset the configuration database to the default base version.
3.4.2 - NTP Servers
Describes the fields for the NTP Server Settings screen on TrueNAS CORE.
NTP Server Settings
Name
Description
Address
Enter the hostname or IP address of the NTP server.
Burst
Recommended when Max. Poll is greater than 10. Only use on personal NTP servers or those under direct control. Do not enable when using public NTP servers.
IBurst
Speeds up the initial synchronization (seconds instead of minutes).
Prefer
Should only be used for highly accurate NTP servers such as those with time monitoring hardware.
Min Poll
The minimum polling interval, in seconds, as a power of 2. For example, 6 means 2^6, or 64 seconds. The default is 6, minimum value is 4.
Max Poll
The maximum polling interval, in seconds, as a power of 2. For example, 10 means 2^10, or 1,024 seconds. The default is 10, maximum value is 17.
Force
Forces the addition of the NTP server, even if it is currently unreachable.
3.4.3 - Boot
Provides information about the Boot screen for the TrueNAS CORE.
Name
Description
Actions
Lets users add boot environments and check their stats/settings, as well as manage and scrub the boot pool.
Name
The name of the boot entry as it appears in the boot menu.
Active
Indicates which entry boots by default if a boot environment is not active.
Created
Indicates the boot environment creation date and time.
Space
Shows boot environment size.
Keep
Indicates whether or not TrueNAS deletes this boot environment when a system update does not have enough space to proceed.
3.4.4 - Advanced
Describes the System > Advanced screen on TrueNAS CORE.
System > Advanced contains advanced options for configuring system settings.
These options have reasonable defaults in place.
Make sure you are comfortable with ZFS, FreeBSD, and system configuration backup and restoration before making any changes.
Console
Name
Description
Show Text Console without Password Prompt
Unset to add a login prompt to the system before the console menu is shown.
Enable Serial Console
Do not set this if the Serial Port is disabled. Serial Port and Serial Speed show when this is set.
Serial Port
When Enable Serial Console is set, the available serial port hex addresses are 0x2F8 or 0x3f8.
Serial Speeds
When Enable Serial Console is set, the available serial speeds the serial port can use are 9600 bps, 19200 bps, 38400 bps, 57600 bps, or 115200bps.
MOTD Banner
The message to show when a user logs in with SSH.
Storage
Name
Description
Swap Size in GiB
(CORE only) By default, all data disks are created with the amount of swap specified. Changing the value does not affect the amount of swap on existing disks, only disks added after the change. Does not affect log or cache devices as they are created without swap. Setting to 0 disables swap creation completely. STRONGLY DISCOURAGED
LOG (Write Cache) Overprovision Size in GiB
Overprovisioning a ZFS Log SSD can increase its performance and lifespan by distributing writes and erases across more drive flash blocks. Defining a number of GiB here overprovisions ZFS Log disks during pool creation or extension. Examples: 50 GiB, 10g, 5GB
GUI
Name
Description
Show Console Messages
Display console messages in real time at the bottom of the browser.
Show Advanced Fields by Default
Set to always show advanced fields, when available.
Kernel
Name
Description
Enable Autotune
Activates a tuning script which attempts to optimize the system depending on the installed hardware. Warning: Autotuning is only used as a temporary measure and is not a permanent fix for system hardware issues.
Enable Debug Kernel
Set to boot a debug kernel after the next system reboot.
Self-Encrypting Drive
Name
Description
ATA Security User
User passed to camcontrol security -u to unlock SEDs.
SED Password
Global password to unlock SEDs.
Syslog
Name
Description
Use FQDN for Logging
Set to include the Fully-Qualified Domain Name (FQDN) in logs to precisely identify systems with similar host names.
Syslog Level
When Syslog Server is defined, only logs matching this level are sent.
Syslog Server
Remote syslog server DNS host name or IP address. Add a colon and the port number to the host name to use nonstandard port numbers. For example: mysyslogserver:1928. Log entries are written to local logs and sent to the remote syslog server.
Syslog Transport
Transport Protocol for the remote system log server connection. Selecting Transport Layer Security (TLS) also requires selecting a preconfigured system certificate and certificate authority.
Syslog TLS Certificate
Select the preconfigured system certificate to use for authenticating the TLS protocol connection to the remote system log server from the dropdown list.
Syslog TLS Certificate Authority
The preconfigured system certificate authority to use for authenticating the TLS protocol connection to the remote system log server from the dropdown list.
Replication
Name
Description
Replication Tasks Limit
Limit the maximum number of replication tasks the system can execute simultaneously.
SAVE DEBUG generates text files that contain diagnostic information.
3.4.5 - View Enclosure
Provides information about the View Enclosure screen on TrueNAS CORE.
TrueNAS Enterprise
The View Enclosure screen only displays on TrueNAS CORE Enterprise systems with compatible hardware.
The UI options to select System > View Enclosure is not present on incompatible non-Enterprise systems.
The System Information widget on the main Dashboard displays an image of the specific TrueNAS system. Hover the mouse over the image to see the View Enclosure label.
Click anywhere on the system image to open the View Enclosure screen.
View Enclosure Screen
The View Enclosure screen displays an image of the TrueNAS platform.
Additional information about storage pools, drives, and other hardware components is available through clickable elements and buttons.
Enclosure Elements
The top of the View Enclosure screen displays options to view information about the system or expansion shelf.
The options vary by TrueNAS platform, whether or not the system has expansion shelves, and if you have an expansion shelf image selected instead of the TrueNAS system.
All TrueNAS systems include the Disks option. TrueNAS systems with expansion shelves include the Temperature, Power Supply, and Voltage options.
Expansion shelves include the Disks, Cooling, Services, Power Supply, SAS Expander, Temperature Sensors, and Voltage Sensor options.
Each option displays a table with readings from the system’s internal components taken over time.
System Image Screens
System images display the front view of the server by default.
If the system model includes a rear view, REAR changes the image to the back of the system. FRONT switches to the front view of the system chassis.
EDIT LABEL displays for system models other than the Mini.
EDIT LABEL opens the Change Enclosure Label window. Type a name or description for the system and click SAVE to apply the label. Reset to default restores the default name for the system.
System image screens include three options to change the information on the screen:
SHOW POOLS that highlights disks in pools on the system image.
SHOW STATUS that shows healthy disks in the system and a status indicator color legend.
SHOW EXPANDER STATUS that shows the status of SAS expanders in the system or expansion shelf (only systems with an expansion shelf).
Disk Image Screens
Click on a drive image to display a screen with information for that drive. Disk drive information includes the system pool, status, hardware details, and stats.
IDENTIFY DRIVE on disk detail screens turns on the LED indicator on a physical drive bay in the system server.
IDENTIFY DRIVE helps to identify the physical drive bay corresponding to the CORE identification number for that drive.
Select the drive on the image and then click IDENTIFY DRIVE. Go to the location of the system server to locate the drive bay with the LED indication turned on, then check the drive location on the View Enclosure screen.
TrueNAS Mini and R30 systems do not include the IDENTIFY DRIVE function.
Mini Enclosure Screen Example
TrueNAS Mini systems only display the front view of the system hardware.
Pool information displays at the top of the screen. The drive bay number and disk label display to the left of the image, and the status is to the right. A disk image screen shows details for the drive you click on.
The Disks Overview section displays the system drive hardware and capacity.
The Drive Temperatures section displays current readings for each drive in the system.
The right side of the screen includes smaller images of both the system and expansion shelves connected to it. The selected system has a blue vertical line next to it.
The system and expansion shelf image screens include three options to change the information shown on the screen:
SHOW POOLS that highlights disks in pools on the system image.
SHOW STATUS that shows healthy disks in the system and a status indicator color legend.
SHOW EXPANDER STATUS that shows the status of SAS expanders in the system or expansion shelf (only systems with an expansion shelf).
Click on a drive image in the system or an expansion shelf image to display a drive information screen for that drive. Disk drive information includes the system pool, disk status, hardware details, and stats.
The expansion shelf image varies based on the type of expansion shelf installed, but the disk information displayed is the same as for disks in other system disks.
3.4.6 - Email
Describes the Email screen and settings on TrueNAS CORE.
General Options
General Options
Name
Description
From Email
The user account Email address for the From email address. You must configure the user account Email in Accounts > Users first.
From Name
The friendly name to show in front of the sending email address. Example: Storage System 01it@example.com
Send Mail Method
Name
Description
SMTP
Shows SMTP configuration options.
GMail OAuth
Shows GMail authentication options.
Send Mail Method
SMTP
Name
Description
Outgoing Mail Server
Hostname or IP address of SMTP server used for sending email.
Mail Server Port
SMTP port number. Typically 25/465 (secure SMTP), or 587 (submission).
Security
Choose an encryption type. Choices are Plain (No Encryption), SSL (Implicit TLS), or TLS (STARTTLS).
SMTP Authentication
Set when the SMTP server uses authentication credentials. Shows additional credentials options.
GMail OAuth
Name
Description
LOG IN TO GMAIL
Login to Gmail using OAuth.
3.4.7 - System Dataset
Describes the System Dataset screen on TrueNAS CORE.
The system dataset stores debugging core files, encryption keys for encrypted pools, and Samba4 metadata such as the user and group cache and share level permissions.
Name
Description
System Dataset Pool
Select the pool to contain the system dataset.
Syslog
Store system logs on the system dataset. Unset to store system logs in /var/ on the operating system device.
3.4.8 - Reporting
Contains information about the Reporting screen on TrueNAS CORE.
TrueNAS has a built in reporting engine that displays helpful graphs and information about the system processes.
TrueNAS uses Graphite for metric gathering and visualizations.
Configure system reporting on the System > Reporting screen.
-
Name
Description
Graph Age in Months
Maximum time (in months) TrueNAS stores a graph. Allowed values are 1-60. Changing this value causes the Confirm RRD Destroy dialog to display. Changes do not take effect until TrueNAS destroys the existing reporting database.
Number of Graph Points
The number of points for each hourly, daily, weekly, monthly, or yearly graph. Allowed values are 1-4096. Changing this value displays the Confirm RRD Destroy dialog. Changes do not take effect until TrueNAS destroys the existing reporting database.
Reset to Defaults
Resets all entered values and settings back to defaults.
Report history is cleared after changing and saving CPU reporting, graph age, or graph points.
For information on the Reporting screen graphs see System Reporting.
Reporting data is saved and preserved across system upgrades and reboots.
This allows viewing usage trends over time.
This data is frequently written and should not be stored on the boot pool or operating system device.
Reporting data is saved in /var/db/collectd/rrd/.
3.4.9 - Alert Services
Describes the fields on the Alert Services screen on TrueNAS CORE.
Name and Type
Name
Description
Name
Name of the new alert service.
Enabled
Unset to disable this service without deleting it.
Type
Choose an alert service to display options for that service.
Enter or paste the API key. Find the API key by signing into the OpsGenie web interface and going to Integrations/Configured Integrations. Click the desired integration, Settings, and read the API Key field.
API URL
Leave empty for default OpsGenie API.
PagerDuty
Name
Description
Service Key
Enter or paste the “integration/service” key for this system to access the PagerDuty API.
Hostname or IP address of the system to receive SNMP trap notifications.
Port
UDP port number on the system receiving SNMP trap notifications. The default is 162.
SNMPv3 Security Model
Enable the SNMPv3 security model.
SNMP Community
Network community string. The community string acts like a user ID or password. A user with the correct community string has access to network information. The default is public. For more information, see this helpful SNMP Community Strings tutorial.
Describes the Alert Settings screen on TrueNAS CORE.
Options
Name
Description
Set Warning Level
Customizes the importance of the alert. Each level of importance has a different icon and color to express the level of importance: Info, Notice, Warning, Error, Critical (Default), Alert, and Emergency.
Set Frequency
Adjust how often alert notifications are sent. Setting the Frequency to NEVER prevents that alert from being added to alert notifications, but the alert can still show in the web interface if it is triggered. Options: Immediately (Default), Hourly, Daily, and Never.
Alert Warning Levels
Level
Icon
Alert Notification?
1 INFO
No
2 NOTICE
Yes
3 WARNING
Yes
4 ERROR
Yes
5 CRITICAL
Yes
6 ALERT
Yes
7 EMERGENCY
Yes
3.4.11 - Cloud Credentials
Describes the fields in the Cloud Credentials screen in TrueNAS CORE.
These providers are supported for Cloud Sync tasks in TrueNAS CORE:
Third-party Cloud service providers. Choose a provider to configure connection credentials.
Authentication
Amazon S3 Advanced Options
Name
Description
Endpoint URL
S3 API endpoint URL. When using AWS, the endpoint field can be empty to use the default endpoint for the region, and available buckets are automatically fetched. Refer to the AWS Documentation for a list of Simple Storage Service Website Endpoints.
Region
AWS resources in a geographic area. Leave empty to automatically detect the correct public region for the bucket. Entering a private region name allows interacting with Amazon buckets created in that region. For example, enter us-gov-east-1 to discover buckets created in the eastern AWS GovCloud region.
Disable Endpoint Region
Select to prevent automatic detection of the bucket region. Select only if your AWS provider does not support regions.
User Signature Version 2
Select to force using Signature Version 2 to sign API requests. Select only if your AWS provider does not support default version 4 signatures.
BackBlaze B2
Name
Description
Key ID
Alphanumeric Backblaze B2 Application Key ID. To generate a new application key, log in to the Backblaze account, go to the App Keys page, and add a new application key. Copy the application keyID string to this field.
Application Key
Backblaze B2 Application Key. To generate a new application key, log in to the Backblaze account, go to the App Keys page, and add a new application key. Copy the applicationKey string to this field.
Box
Name
Description
Access Token
A User Access Token for Box. An access token enables Box to verify a request belongs to an authorized session. Example token: T9cE5asGnuyYCCqIZFoWjFHvNbvVqHjl.
Microsoft Onedrive Access Token. Log in to the Microsoft account to add an access token.
Drives List
Drives and IDs registered to the Microsoft account. Selecting a drive also fills the Drive ID field.
Drive Account Type
Type of Microsoft acount. Logging in to a Microsoft account automatically chooses the correct account type. Options: Personal, Business, Document_Library
Drive ID
Unique drive identifier. Log in to a Microsoft account and choose a drive from the Drives List drop-down to add a valid ID.
Name of this SSH connection. SSH connection names must be unique.
Setup Method
Manual requires configuring authentication on the remote system. This can include copying SSH keys and modifying the root user account on that system.
Semi-automatic only works when configuring an SSH connection with a remote TrueNAS system. This method uses the URL and login credentials of the remote system to connect and exchange SSH keys.
Authentication
Name
Description
TrueNAS URL
Hostname or IP address of the remote system. A valid URL scheme is required. Example: https://10.231.3.76
Username
Username for logging in to the remote system.
Password
User account password for logging into the remote system.
Private Key
Choose a saved SSH Keypair or select Generate New to create a new keypair and use it for this connection.
More Options
Name
Description
Cipher
Standard is most secure, but has the greatest impact on connection speed.
Fast is less secure than Standard but can give reasonable transfer rates for devices with limited cryptographic speed.
Disabled removes all security in favor of maximizing connection speed. Disabling the security should only be used within a secure, trusted network.
Connect Timeout
Time (in seconds) before the system stops attempting to establish a connection with the remote system.
3.4.13 - SSH Keypairs
Describes the SSH Keypair screen on TrueNAS CORE.
Name
Description
Name
A unique name to identify this keypair. Automatically generated keypairs are named after the object that generated the keypair with " Key" appended to the name.
Describes the Tunable screen fields on TrueNAS CORE.
Tunables manage TrueNAS sysctls, loaders, and rc.conf options.
Name
Description
Variable
Enter the name of the loader, sysctl, or rc.conf variable to configure. loader tunables are used to specify parameters to pass to the kernel or load additional modules at boot time. rc.conf tunables are for enabling system services and daemons and only take effect after a reboot. sysctl tunables are used to configure kernel parameters while the system is running and generally take effect immediately.
Creating or editing a sysctl immediately updates the Variable to the configured Value. A restart is required to apply loader or rc.conf tunables. Configured tunables remain in effect until deleted or Enabled is unset.
Description
Enter a description of the tunable.
Enabled
Enable this tunable. Unset to disable this tunable without deleting it.
3.4.15 - Update
Describes the fields in the Update screen in TrueNAS CORE.
Name
Description
Check for Updates Daily and Download if Available
Check the update server daily for any updates on the chosen train. Automatically download an update if one is available. Click APPLY PENDING UPDATE to install the downloaded update.
(Refresh)
Check for updates.
Operation
Lists operations TrueNAS performs during the update.
Describes the Certificate Authorities screen settings and functions.
Identifier and Type
Setting
Description
Name
Descriptive identifier for this certificate authority.
Type
Select the CA type from the dropdown list of options. Select Internal CA for a certificate authority that functions like a publicly-trusted CA used to sign certificates for an internal network. This CA is not trusted outside the private network. Select Intermediate CA for a CA that lives between the root and end-entity certificates. Its main purpose is to define and authorize the types of certificates requested from the root CA. Select Import CA for a CA that allows importing an existing CA onto the system. For more information, see What are Subordinate CAs and Why Would You Want Your Own?.
Profiles
Select predefined certificate extensions from the dropdown list. Options are Opentvpn Root CA and CA. Choose a profile that best matches your certificate usage scenario.
Internal and Intermediate CAs
Certificate Options
Certificate options change based on the option selected in Type.
Setting
Description
Signing Certificate Authority
(Required) Select a previously imported or created CA. Displays when Type is set to Intermediate CA.
(Required) Select the number of bits in the key used by the cryptographic algorithm from the dropdown list. Options are 1024, 2048 or 4096. For security reasons, a minimum key length of 2048 is recommended.
Digest Algorithm
(Required) Select the cryptographic algorithm to use from the dropdown list of options. Only change the default SHA256 if the organization requires a different algorithm.
Lifetime
(Required) Enter the lifetime of the CA specified in days.
Certificate Subject
Setting
Description
Country
(Required) Select the country of the organization from the dropdown list.
State
(Required) Enter the state or province of the organization.
Locality
(Required) Enter the location of the organization. For example, the city.
Organization
(Required) Enter the name of the company or organization.
Organizational Unit
Organizational unit of the entity.
Email
(Required) Enter the email address of the person responsible for the CA.
(Required) Enter additional domains to secure for multi-domain support. Separate domains by pressing Enter. For example, if the primary domain is example.com, entering www.example.com secures both addresses.
Basic Constraints
Setting
Description
Enabled
Select to activate this certificate extension.
Path Length
Enter the number of non-self-issued intermediate certificates that can follow this certificate in a valid certification path. Entering 0 allows a single additional certificate to follow in the certificate path. Cannot be less than 0.
Basic Constraints Config
Select the basic constraints extension that identifies whether the subject of the certificate is a CA and the maximum depth of valid certification paths that include this certificate. See RFC 3280, section 4.2.1.10 for more information.
Authority Key Identifier
Setting
Description
Enabled
Select to activate this certificate extension.
Authority Key Config
Select the authority key identifier extension that provides a means of identifying the public key corresponding to the private key used to sign a certificate. This extension is used where an issuer has multiple signing keys (either due to multiple concurrent key pairs or due to changeover). The identification can be based on either the key identifier (the subject key identifier in the issuer certificate) or on the issuer name and serial number. See RFC 3280, section 4.2.1.1 for more information.
Extended Key Usage
Setting
Description
Enabled
Select to activate this certificate extension.
Usages
Select the options that identify the purpose for this public key from the dropdown list. Is used for end entity certificates. Multiple usages can be selected. Do not mark this extension critical when the Usage is ANY_EXTENDED_KEY_USAGE. Using both Extended Key Usage and Key Usage extensions requires that the purpose of the certificate is consistent with both extensions. See RFC 3280, section 4.2.1.13 for more details.
Critical Extension
Select to identify this extension as critical for the certificate. The certificate-using system must recognize critical extensions, or it will reject the certificate. The certificate-using system can ignore non-critical extensions and still approve the certificate.
Key Usage
Setting
Description
Enabled
Select to activate this certificate extension.
Key Usage Config
Select the key usage extension that defines the purpose (e.g., encipherment, signature, certificate signing) of the key contained in the certificate. The usage restriction might be employed when a key that could be used for more than one operation is to be restricted. For example, when an RSA key should be used only to verify signatures on objects other than public key certificates and CRLs, the Digital Signature bits would be asserted. Likewise, when an RSA key should be used only for key management, the Key Encipherment bit would be asserted. See RFC 3280, section 4.2.1.3 for more information.
Import CAs
Certificate Subject
Setting
Description
Certificate
Paste the certificate for the CA.
Private Key
Paste the private key associated with the Certificate when available. Provide a key at least 1024 bits long.
Passphrase
Enter the passphrase for the private key.
Confirm Passphrase
Confirm the passphrase for the Private Key.
3.4.17 - Certificates
Explains the fields located on the Certificates screen in TrueNAS CORE.
Identifier and Type
Name
Description
Name
Descriptive identifier for this certificate.
Type
Internal Certificate is used for internal or local systems. Certificate Signing Request is used to get a CA signature. Import Certificate allows an existing certificate to be imported onto the system. Import Certificate Signing Request allows an existing CSR to be imported onto the system.
Profiles
Predefined certificate extensions. Choose a profile that best matches your certificate usage scenario.
Internal Certificate and Certificate Signing Request
Multi-domain support. Enter additional domains to secure. Separate domains by pressing Enter. For example, if the primary domain is example.com, entering www.example.com secures both addresses.
Basic Constraints
Name
Description
Enabled
Activate this certificate extension.
Path Length
How many non-self-issued intermediate certificates that can follow this certificate in a valid certification path. Entering 0 allows a single additional certificate to follow in the certificate path. Cannot be less than 0.
Basic Constraints Config
The basic constraints extension identifies whether the subject of the certificate is a CA and the maximum depth of valid certification paths that include this certificate. See RFC 3280, section 4.2.1.10 for more information.
Authority Key Identifier
Name
Description
Enabled
Activate this certificate extension.
Authority Key Config
The authority key identifier extension provides a means of identifying the public key corresponding to the private key used to sign a certificate. This extension is used where an issuer has multiple signing keys (either due to multiple concurrent key pairs or due to changeover). The identification MAY be based on either the key identifier (the subject key identifier in the issuer’s certificate) or on the issuer name and serial number. See RFC 3280, section 4.2.1.1 for more information.
Extended Key Usage
Name
Description
Enabled
Activate this certificate extension.
Usages
Identify the purpose for this public key. Typically used for end entity certificates. Multiple usages can be selected. Do not mark this extension critical when the Usage is ANY_EXTENDED_KEY_USAGE. Using both Extended Key Usage and Key Usage extensions requires that the purpose of the certificate is consistent with both extensions. See RFC 3280, section 4.2.1.13 for more details.
Critical Extension
Identify this extension as critical for the certificate. Critical extensions must be recognized by the certificate-using system or this certificate will be rejected. Extensions identified as not critical can be ignored by the certificate-using system and the certificate still approved.
Key Usage
Name
Description
Enabled
Activate this certificate extension.
Key Usage Config
The key usage extension defines the purpose (e.g., encipherment, signature, certificate signing) of the key contained in the certificate. The usage restriction might be employed when a key that could be used for more than one operation is to be restricted. For example, when an RSA key should be used only to verify signatures on objects other than public key certificates and CRLs, the Digital Signature bits would be asserted. Likewise, when an RSA key should be used only for key management, the Key Encipherment bit would be asserted. See RFC 3280, section 4.2.1.3 for more information.
Import Certificate and Import Certificate Signing Request
Certificate Options (Import Certificate)
Name
Description
CSR exists on this system
Check this box if importing a certificate for which a CSR exists on this system
Signing Certificate Authority
Select a previously imported or created CA.
Certificate Subject
Name
Description
Certificate (Import Certificate)
Paste the certificate for the CA.
Signing Request (Import CSR)
Paste the contents of your Certificate Signing Request here.
Private Key
Paste the private key associated with the Certificate when available. Please provide a key at least 1024 bits long.
Passphrase
Enter the passphrase for the Private Key.
Confirm Passphrase
Confirm the passphrase for the Private Key.
3.4.18 - ACME DNS
Describes the fields in the Add ACME DNS Authenticators screen on TrueNAS CORE.
DNS provider for the authenticator. Amazon Route 53 is the only supported DNS provider in TrueNAS CORE.
Access ID Key
Key generated by the Amazon Web Services account. See the AWS Access Key documentation for instructions to generate the key.
Secret Access Key
Key generated by the Amazon Web Services account. See the AWS Access Key documentation for instructions to generate the key.
3.4.19 - KMIP
Describes the fields in the KMIP Key Status screen on TrueNAS CORE Enterprise.
TrueNAS Enterprise
KMIP is only available for TrueNAS Enterprise licensed systems.
Contact the iXsystems Sales Team to inquire about purchasing TrueNAS Enterprise licenses.
KMIP on TrueNAS Enterprise is used to integrate the system within an existing centralized key management infrastructure and use a single trusted source for creating, using, and destroying SED passwords and ZFS encryption keys.
KMIP Server
Name
Description
Server
Host name or IP address of the central key server.
Port
Connection port number on the central key server.
Certificate
Certificate to use for key server authentication. A valid certificate is required to verify the key server connection. WARNING: for security reasons, please protect the Certificate used for key server authentication.
Certificate Authority
Certificate Authority (CA) to use for connecting to the key server. A valid CA public certificate is required to authenticate the connection. WARNING: for security reasons, please protect the Certificate Authority used for key server authentication.
Manage SED Passwords
Self-Encrypting Drive (SED) passwords can be managed with KMIP. Enabling this option allows the key server to manage creating or updating the global SED password, creating or updating individual SED passwords, and retrieving SED passwords when SEDs are unlocked. Disabling this option leaves SED password management with the local system.
Manage ZFS Keys
Use the KMIP server to manage ZFS encrypted dataset keys. The key server stores, applies, and destroys encryption keys whenever an encrypted dataset is created, when an existing key is modified, an encrypted dataset is unlocked, or an encrypted dataset is removed. Unsetting this option leaves all encryption key management with the local system.
Enabled
Activate KMIP configuration and begin syncing keys with the KMIP server.
Change Server
Move existing keys from the current key server to a new key server. To switch to a different key server, key synchronization must be Enabled, then enable this setting, update the key server connection configuration, and click SAVE.
Validate Connection
Tests the server connection and verifies the chosen Certificate chain. To test, configure the Server and Port values, select a Certificate and Certificate Authority, enable this setting, and click SAVE.
Force Clear
Cancel any pending Key synchronization.
3.4.20 - Failover (HA)
Describes the fields in the Failover Configuration screen on TrueNAS CORE.
TrueNAS Enterprise
This article only applies to licensed TrueNAS Enterprise High availability (HA) systems.
Contact the iXsystems Sales Team to inquire about purchasing TrueNAS Enterprise licenses.
Failover Configuration
Name
Description
Disable Failover
Disable automatic failover.
Default TrueNAS Controller
Make the currently active TrueNAS controller the default when both TrueNAS controllers are online and HA is enabled. To change the default TrueNAS controller, unset this option on the default TrueNAS controller and allow the system to fail over. This briefly interrupts system services.
Network Timeout Before Initiating Failover
The number of seconds to wait after a network failure before triggering a failover. 0 means a failover occurs immediately or after two seconds when the system is using a link aggregation.
SYNC TO/FROM PEER
Synchronizes the active and standby TrueNAS controllers.
3.4.21 - Support
Describes the Support screen on TrueNAS CORE.
The Support screen displays system information. Users may also manage thier Enterprise license and create support tickets.
TrueNAS CORE
Name
Description
Username
Your JIRA username.
Password
Your JIRA password.
Type
Select Bug when reporting an issue or Feature when requesting new functionality.
Category
Category that best describes the bug or feature.
Attach Debug
Generates and attaches an overview of the system hardware, build string, and configuration.
Subject
A descriptive title for the new issue.
Description
A one to three paragraph summary of the issue.
Browse…
Attaches screenshots that illustrate the problem.
TrueNAS Enterprise
TrueNAS Enterprise
Proactive Support and the Contact Support fields below are only available on TrueNAS Enterprise licensed systems.
Contact the iXsystems Sales Team to inquire about purchasing TrueNAS Enterprise licenses.
Proactive Support
Name
Description
Name
Primary/Secondary Contact name.
Email
Primary/Secondary Contact email address.
CC
Primary/Secondary Contact email address.
Phone Number
Primary/Secondary Contact phone number.
Enable iXsystems Proactive Support
Set to enable the Enterprise Proactive Support feature.
Contact Support
Name
Description
Name
Contact name.
Email
Contact email address.
Phone
Contact phone number.
Type
Select Bug when reporting an issue or Feature when requesting new functionality.
Environment
Select the appropriate environment.
Criticality
Select the appropriate level of criticality.
Attach Debug
Generates and attaches an overview of the system hardware, build string, and configuration.
Subject
A descriptive title for the new issue.
Description
A one to three paragraph summary of the issue.
Choose Files
Attaches screenshots that illustrate the problem.
3.4.22 - 2FA (Two-Factor Authentication)
Describes the Two-Factor Authentication User Settings screen on TrueNAS CORE.
TrueNAS offers Two-Factor Authentication (2FA) to ensure that a compromised administrator (root) password cannot be used by itself to gain access to the administrator interface.
2FA Configuration
User Settings
Name
Description
One Time Password (OTP) Digits
The number of digits in the One-Time Password. The default is 6, which is Google’s standard OTP length. Check your app/device settings before selecting this.
Interval
The lifespan (in seconds) of each OTP. Default is 30 seconds. The minimum is 5 seconds.
Window
Extends password validity beyond the Interval setting. For example, 1 means that one password before and after the current one is valid, leaving three valid passwords. Extending the window is useful in high-latency situations.
Enable Two-Factor Auth for SSH
Enable 2FA for system SSH access. We recommend leaving this DISABLED until after you successfully test 2FA with the UI.
System Generated Settings
Name
Description
Secret (Read-only)
The secret TrueNAS creates and uses to generate OTPs when you first enable 2FA.
Provisioning URI (includes Secret - Read-only)
The URI used to provision an OTP. TrueNAS encodes the URI (which contains the secret) in a QR Code. To set up an OTP app like Google Authenticator, use the app to scan the QR code or enter the secret manually into the app. TrueNAS produces the URI when you first activate 2FA.
3.5 - Tasks
Reference documentation of screens within the Tasks menu option.
TrueNAS includes an easy-to-use interface for common tasks a sysadmin needs to preform on a NAS on a regular basis.
These can roughly be broken down into three groups: system level, data backup, and ZFS tasks.
Tasks Contents
Cron Jobs: Describes the fields on the Cron Jobs screen on TrueNAS CORE.
Init/Shutdown Scripts: Explains the fields on the Init/Shutdown Script screen on TrueNAS CORE.
Rsync Tasks: Provides information about the Rsync Tasks screen on TrueNAS CORE.
S.M.A.R.T. Tests: Describes the fields on the S.M.A.R.T. Test screen on TrueNAS CORE.
Periodic Snapshot Tasks: Defines the fields in the Periodic Snapshot Tasks Screen on TrueNAS CORE.
Replication Tasks: Decribes the fields on the Replication Tasks screen for TrueNAS CORE.
Resilver Priority: Describes the Resilver Priority screen on TrueNAS CORE.
Scrub Tasks: Describes the fields on the Scrub Task screen on TrueNAS CORE.
Cloud Sync Tasks: Describes the Cloud Sync Tasks screen on TrueNAS CORE.
Advanced Scheduler: Describes the fields in the Advanced Scheduler in TrueNAS CORE.
3.5.1 - Cron Jobs
Describes the fields on the Cron Jobs screen on TrueNAS CORE.
Cron Job
Name
Description
Description
Enter a description of the cron job.
Command
Enter the full path to the command or script to be run.
Run as User
Select a user account to run the command. The user must have permissions allowing them to run the command or script.
Schedule
Select a schedule preset or choose Custom to open the advanced scheduler. Note that an in-progress cron task postpones any later scheduled instance of the same task until the running task is complete.
Hide Standard Output
Hide standard output (stdout) from the command. When cleared, any standard output is mailed to the user account cron used to run the command.
Hide Standard Error
Hide error output (stderr) from the command. When cleared, any error output is mailed to the user account cron used to run the command.
Enabled
Enable this cron job. When cleared, disable the cron job without deleting it.
3.5.2 - Init/Shutdown Scripts
Explains the fields on the Init/Shutdown Script screen on TrueNAS CORE.
Init/Shutdown Script
Name
Description
Description
Comments about this script.
Type
Select Command for an executable command or Script for an executable script.
Command
Enter the command with any options. When Script is selected, click the folder to define the path to the script file.
When
Pre Init is early in the boot process, after mounting filesystems and starting networking. Post Init is at the end of the boot process, before TrueNAS services start. Shutdown is during the system power off process.
Enabled
Enable this task. Clear to disable the task without deleting it.
Timeout
Automatically stop the script or command after the specified seconds.
3.5.3 - Rsync Tasks
Provides information about the Rsync Tasks screen on TrueNAS CORE.
Remote sync is a utility that copies data across a network. Rsync first copies the initial data. Later copies contain only the data that is different between the source and destination files. This reduces network traffic. Use Rsync to create backups, and to synchronize data across systems.
Create a New Rsync Task
Go to Tasks > Rsync Tasks. The Rsync Tasks menu displays.
Click ADD.
Source
Name
Description
Path
Browse to the path to be copied. FreeBSD file path limits apply. Other operating systems can have different limits which might affect how they can be used as sources or destinations.
User
Select the user to run the rsync task. The user selected must have permissions to write to the specified directory on the remote host.
Direction
Direct the flow of data to the remote host. During a push, the dataset transfers to the remote module. During a pull, the dataset stores files from the remote system.
Description
Enter a description of the rsync task.
Schedule
Name
Description
Schedule
Select a schedule preset or select Custom to open the advanced scheduler.
Recursive
Select to include all sub-directories of the specified directory. When cleared, only the specified directory is included.
Remote
Name
Description
Remote Host
Enter the IP address or host name of the remote system that will store the copy. Use the format username@remote_host if the user name differs on the remote host.
Rsync Mode
Select to use a custom-defined remote module of the rsync server. Or to use an SSH configuration for the rsync task.
More Options
Name
Description
Times
Select to preserve modification times of files.
Compress
Select to reduce the size of data to transmit. Recommended for slow connections.
Archive
When selected, rsync runs recursively. Preserves symlinks, permissions, modification times, group, and special files. When run as root, owner, device files, and special files are also preserved. Equal to passing the flags -rlptgoD to rsync.
Delete
Delete files in the destination directory that do not exist in the source directory.
Quiet
Select to suppress informational messages from the remote server.
Preserve Permissions
Select to preserve original file permissions. Useful when the user is set to root.
Saves a temporary file from each updated file to a holding directory until the end of the transfer. All transferred files renamed once the transfer is complete.
Auxiliary Parameters
Additional rsync(1) options to include. Separate entries by pressing Enter. Note: The emergency character must be escaped with a backslash \ or used inside single quotes (’*.txt’).
Enabled
Select to enable this rsync task. Clear to disable this rsync task without deleting it.
3.5.4 - S.M.A.R.T. Tests
Describes the fields on the S.M.A.R.T. Test screen on TrueNAS CORE.
Name
Description
Disks
Select the disks to monitor from the dropdown list.
All Disks
Select to monitor every disk on the system with S.M.A.R.T. enabled. Leave clear to choose individual disks on the Disks dropdown list to include in the test.
Type
Select the test type from the dropdown list. Options are LONG, SHORT, CONVEYANCE or OFFLINE. See smartctl(8) for descriptions of each type. Some types degrade performance or take disks offline.
Description
Enter information about the S.M.A.R.T. test.
Schedule
Select a preset test schedule from the dropdown list. Select Custom to open the advanced scheduler and define a new schedule for running the test.
3.5.5 - Periodic Snapshot Tasks
Defines the fields in the Periodic Snapshot Tasks Screen on TrueNAS CORE.
Dataset
Name
Description
Dataset
Select a pool, dataset, or zvol.
Recursive
Select to take separate snapshots of the dataset and each of its child datasets. Clear to take a single snapshot only of the specified dataset without child datasets.
Exclude
Exclude specific child datasets from the snapshot. Use with recursive snapshots. List paths to any child datasets to exclude. Example: pool1/dataset1/child1. A recursive snapshot of pool1/dataset1 will include all child datasets except child1. Separate entries by pressing Enter.
Schedule
Name
Description
Snapshot Lifetime
Define a length of time to retain the snapshot on this system using a numeric value and a single lowercase letter for units. Examples: 3h is three hours, 1m is one month, and 1y is one year. Does not accept Minute values. After the time expires, the snapshot is removed. Snapshots which have been replicated to other systems are not affected.
Naming Schema
Snapshot name format string. The default is auto-%Y-%m-%d_%H-%M. Must include the strings %Y, %m, %d, %H, and %M, which are replaced with the four-digit year, month, day of month, hour, and minute as defined in strftime(3). For example, snapshots of pool1 with a Naming Schema of customsnap-%Y%m%d.%H%M have names like pool1@customsnap-20190315.0527.
Schedule
Choose one of the presets or Custom to use the advanced scheduler.
Allow Taking Empty Snapshots
Creates dataset snapshots even when there have been no changes to the dataset from the last snapshot. Recommended for long-term restore points, multiple snapshot tasks pointed at the same datasets, or compatibility with snapshot schedules or replications created in TrueNAS 11.2 and earlier. For example, allowing empty snapshots for a monthly snapshot schedule allows that monthly snapshot to be taken, even when a daily snapshot task has already taken a snapshot of any changes to the dataset.
Enabled
To activate this periodic snapshot schedule, select this option. To disable this task without deleting it, clear this option.
3.5.6 - Replication Tasks
Decribes the fields on the Replication Tasks screen for TrueNAS CORE.
Basic Creation
What and Where
Name
Description
Load Previous Replication Task
Use settings from a saved replication.
Source Location
Storage location for the original snapshots that are replicated.
Destination Location
Storage location for the replicated snapshots.
Task Name
Name of this replication configuration.
Source Location: On this System
Name
Description
Source
Define the path to a system location that has snapshots to replicate. Click the folder to see all locations on the source system or click in the field to manually type a location (Example: pool1/dataset1). Multiple source locations can be selected or manually defined with a comma (,) separator. Selecting a location displays the number of existing snapshots that can be replicated. Selecting a location that has no snapshots configures the replication task to take a manual snapshot of that location and replicate it to the destination.
Recursive
Select to also replicate all snapshots contained within the selected source dataset snapshots. Clear to only replicate the selected dataset snapshots.
Replicate Custom Snapshots
Replicate snapshots that are not created by an automated snapshot task. Requires setting a naming schema for the custom snapshots.
Naming Schema
Pattern of naming custom snapshots replicated. Enter the name and strftime(3) {0}, {1}, {2}, {3}, and {4} strings that match the snapshots to include in the replication. Separate entries by pressing Enter. The number of snapshots matching the patterns display.
Source Location: On a Different System
Name
Description
SSH Connections
Select an existing SSH connection to a remote system or choose Create New to create a new SSH connection.
Source
Define the path to a system location that has snapshots to replicate. Click the folder to see all locations on the source system or click in the field to manually type a location (Example: pool1/dataset1). Multiple source locations can be selected or manually defined with a comma (,) separator. Selecting a location displays the number of existing snapshots that can be replicated. Selecting a location that has no snapshots configures the replication task to take a manual snapshot of that location and replicate it to the destination.
Recursive
Select to also replicate all snapshots contained within the selected source dataset snapshots. Clear to only replicate the selected dataset snapshots.
Naming Schema
Pattern of naming custom snapshots to be replicated. Enter the name and strftime(3) {0}, {1}, {2}, {3}, and {4} strings that match the snapshots to include in the replication. Separate entries by pressing Enter. The number of snapshots matching the patterns are shown.
SSH Transfer Security
Data transfer security. The connection is authenticated with SSH. Data can be encrypted during transfer for security or left unencrypted to maximize transfer speed. Encryption is recommended, but can be disabled for increased speed on secure networks.
Destination Location: On this System
Name
Description
Destination
Define the path to a system location that stores replicated snapshots. Click the folder to see all locations on the destination system or click in the field to manually type a location path (Example: pool1/dataset1). Selecting a location defines the full path to that location as the destination. Appending a name to the path creates a new zvol at that location. For example, selecting pool1/dataset1 stores snapshots in dataset1, but clicking the path and typing /zvol1 after dataset1 creates zvol1 for snapshot storage.
Encryption
Select to use encryption when replicating data. Additional encryption options appear.
Destination Location: On a Different System
Name
Description
SSH Connections
Select a saved remote system SSH connection or choose Create New to create a new SSH connection.
Destination
Define the path to a system location that stores replicated snapshots. Click the folder to see all locations on the destination system or click in the field to manually type a location path (Example: pool1/dataset1). Selecting a location defines the full path to that location as the destination. Appending a name to the path creates a new zvol at that location. For example, selecting pool1/dataset1 stores snapshots in dataset1, but clicking the path and typing /zvol1 after dataset1 creates zvol1 for snapshot storage.
Encryption
Select to use encryption when replicating data. Additional encryption options appear.
When
Name
Description
Replication Schedule
Text
Destination Snapshot Lifetime
When replicated snapshots are deleted from the destination system. Same as Source uses the configured snapshot lifetime value from the source dataset periodic snapshot task. Never Delete never deletes snapshots from the destination system. Custom sets a how long a snapshot remains on the destination system. Enter a number and choose a measure of time from the dropdown list.
Schedule
Select specific times to snapshot what you specified in Source Datasets and replicate the snapshots to the location in Destination Dataset. Select a preset schedule or choose Custom to use the advanced scheduler.
Advanced Creation
General
Name
Description
Name
Descriptive name for the replication.
Direction
PUSH sends snapshots to a destination system. PULL connects to a remote system and retrieves snapshots matching a naming schema.
Transport
SSH is supported by most systems. It requires a previously created connection in System > SSH Connections. SSH+NETCAT uses SSH to establish a connection to the destination system, then uses py-libzfs to send an unencrypted data stream for higher transfer speeds. This only works when replicating to a FreeNAS, TrueNAS, or other system with py-libzfs installed. LOCAL efficiently replicates snapshots to another dataset on the same system without using the network. LEGACY uses the legacy replication engine from FreeNAS 11.2 and earlier.
Number of retries for failed replications
Number of times the replication is attempted before stopping and marking the task as failed.
Logging Level
Message verbosity level in the replication task log.
Enabled
Activates the replication schedule.
Transport Options
Name
Description
SSH Connection
Choose a connection that has been saved in System > SSH Connections.
Stream Compression
Select a compression algorithm to reduce the size of the data being replicated. Only appears when SSH is chosen for Transport type.
Limit
Limit replication speed to this number of bytes per second.
Allow Blocks Larger than 128KB
Allow this replication to send large data blocks. The destination system must also support large blocks. This setting cannot be changed after it has been enabled and the replication task is created. For more details, see zfs(8).
Allow Compressed WRITE Records
Use compressed WRITE records to make the stream more efficient. The destination system must also support compressed WRITE records. See zfs(8).
Source
Name
Description
Source
Define the path to a system location that has snapshots to replicate. Click the folder to see all locations on the source system or click in the field to manually type a location (Example: pool1/dataset1). Multiple source locations can be selected or manually defined with a comma (,) separator.
Recursive
Replicate all child dataset snapshots. When selected, Exclude Child Datasets becomes available.
Include Dataset Properties
Include dataset properties with the replicated snapshots.
(Almost) Full Filesystem Replication
Completely replicate the selected dataset. The target dataset will have all of the properties, snapshots, child datasets, and clones from the source dataset.
Properties Exclude
List any dataset properties that will not be included with the replication.
Periodic Snapshot Tasks
Snapshot schedule for this replication task. Choose from previously configured periodic snapshot tasks. This replication task must have the same Recursive and Exclude Child Datasets values as the chosen periodic snapshot task. Selecting a periodic snapshot schedule removes the Schedule field.
Replicate Specific Snapshots
Only replicate snapshots that match a defined creation time. To specify which snapshots will be replicated, select this checkbox and define the snapshot creation times that will be replicated. For example, setting this time frame to Hourly will only replicate snapshots that were created at the beginning of each hour.
Also Include Naming Schema
Pattern of naming custom snapshots to include in the replication with the periodic snapshot schedule. Enter the strftime(3) strings that match the snapshots to include in the replication. When a periodic snapshot is not linked to the replication, enter the naming schema for manually created snapshots. Has the same {0}, {1}, {2}, {3}, and {4} string requirements as the naming schema in a periodic snapshot task. Separate entries by pressing Enter.
Saving Pending Snapshots
Prevent source system snapshots that have failed replication from being automatically removed by the Snapshot Retention Policy.
Destination
Name
Description
Destination
Define the path to a system location that stores replicated snapshots. Click the folder to see all locations on the destination system or click in the field to manually type a location path (Example: pool1/dataset1). Selecting a location defines the full path to that location as the destination. Appending a name to the path creates a new zvol at that location. For example, selecting pool1/dataset1 stores snapshots in dataset1, but clicking the path and typing /zvol1 after dataset1 creates zvol1 for snapshots.
Destination Dataset Read-only Policy
SET changes all destination datasets to readonly=on after finishing the replication. REQUIRE stops replication unless all existing destination datasets to have the property readonly=on. IGNORE disables checking the readonly property during replication.
Encryption
Select to use encryption when replicating data. Additional encryption options appear.
Encryption Key Format
Appears when Encryption is set. Choose between a Hex (base 16 numeral) or Passphrase (alphanumeric) style encryption key.
Passphrase
Appears when Encryption Key Format is set to PASSPHRASE. Enter an alphanumeric encryption key.
Store Encryption key in Sending TrueNAS database
Set to store the encryption key in the TrueNAS database.
Encryption Key Location in Target System
Appears when Store Encryption key in Sending TrueNAS database** is unset. Choose a temporary location for the encryption key that will decrypt replicated data.
Replication from scratch
If the destination system has snapshots but they do not have any data in common with the source snapshots, destroy all destination snapshots and do a full replication. Warning: enabling this option can cause data loss or excessive data transfer if the replication is misconfigured.
Snapshot Retention Policy
When replicated snapshots are deleted from the destination system. Same as Source: use the Snapshot Lifetime from from the source periodic snapshot task. Custom: define a Snapshot Lifetime for the destination system. None: never delete snapshots from the destination system.
Replication Schedule
Name
Description
Run Automatically
Select to either start this replication task immediately after the linked periodic snapshot task completes or continue to create a separate Schedule for this replication.
Schedule
Start time for the replication task.
Only Replicate Snapshots Matching Schedule
Appears when Schedule checkbox is set. Set to use the Schedule in place of the Replicate Specific Snapshots time frame. The Schedule values are read over the Replicate Specific Snapshots time frame.
3.5.7 - Resilver Priority
Describes the Resilver Priority screen on TrueNAS CORE.
Resilver Priority
Setting
Description
Enabled
Select to run resilver tasks between the configured times.
Begin
Select the hour and minute when a resilver task can start from the dropdown list. The resilver process can run at a higher priority.
End
Select the hour and minute when new resilver tasks are not allowed to start. This does not affect active resilver tasks. The resilver process returns to running at a lower priority. A resilver process running after this time can take much longer to complete, and runs at a lower priority compared to other disk and CPU activities, such as replications, SMB transfers, NFS transfers, Rsync transfers, S.M.A.R.T. tests, pool scrubs, user activity, etc.
Days of the Week
Select the days to run resilver tasks from the dropdown list. Select day(s) when demands on system I/O processing and activity are at a lower level.
3.5.8 - Scrub Tasks
Describes the fields on the Scrub Task screen on TrueNAS CORE.
Scrub Task
Name
Description
Pool
Choose a pool to scrub.
Threshold days
Controls the task schedule by setting how many days must pass before a completed scrub can run again. If you schedule a scrub to run daily and set Threshold days to 7, the scrub attempts to run daily. If the scrub succeeds, it will check but won’t run again until seven days pass. Using a multiple of seven ensures the scrub runs on the same weekday.
Description
Describe the scrub task.
Schedule
How often to run the scrub task. Choose one of the presets or Custom to use the Advanced Scheduler.
Enabled
Clear to disable the scheduled scrub without deleting it.
3.5.9 - Cloud Sync Tasks
Describes the Cloud Sync Tasks screen on TrueNAS CORE.
TrueNAS can send, receive, or synchronize data with a Cloud Storage provider.
These providers are supported for Cloud Sync tasks in TrueNAS CORE:
PUSH sends data to cloud storage. PULL receives data from cloud storage. Changing the direction resets the Transfer Mode to COPY.
Transfer Mode
SYNC: Files on the destination are changed to match those on the source. If a file does not exist on the source, it is also deleted from the destination. COPY: Files from the source are copied to the destination. If files with the same names are present on the destination, they are overwritten. MOVE: After files are copied from the source to the destination, they are deleted from the source. Files with the same names on the destination are overwritten.
Directory/Files
Select the directories or files to be sent to the cloud for Push syncs, or the destination to be written for Pull syncs. Be cautious about the destination of Pull jobs to avoid overwriting existing files.
Remote
Name
Description
Credential
Select the cloud storage provider credentials from the list of available Cloud Credentials.
Folder
Enter or select the cloud storage location to use for this task.
Control
Name
Description
Schedule
Select a schedule preset or choose Custom to open the advanced scheduler.
Enable
Enable this Cloud Sync Task. Clear to disable this Cloud Sync Task without deleting it.
Advanced Options
Name
Description
Follow Symlinks
Follow symlinks and copy the items to which they link.
Pre-script
Script to execute before running sync.
Post-script
Script to execute after running sync.
Exclude
List of files and directories to exclude from sync. Separate entries by pressing Enter. See rclone filtering for more details about the --exclude option.
Upload Chunk Size
Files are split into chunks of this size before upload. The number of chunks that can be simultaneously transferred is set by the Transfers number. The single largest file being transferred must fit into no more than 10,000 chunks.
Remote Encryption
Use rclone crypt to manage data encryption during PUSH or PULL transfers: PUSH: Encrypt files before transfer and store the encrypted files on the remote system. Files are encrypted using the Encryption Password and Encryption Salt values. PULL: Decrypt files that are being stored on the remote system before the transfer. Transferring the encrypted files requires entering the same Encryption Password and Encryption Salt that was used to encrypt the files. Additional details about the encryption algorithm and key derivation are available in the rclone crypt File formats documentation.
Transfers
Number of simultaneous file transfers. Enter a number based on the available bandwidth and destination system performance. See rclone –transfers.
Bandwidth Limit
A single bandwidth limit or bandwidth limit schedule in rclone format. Separate entries by pressing Enter. Example: 08:00,512 12:00,10MB 13:00,512 18:00,30MB 23:00,off. Units can be specified with the beginning letter: b, k (default), M, or G. See rclone –bwlimit.
Dry Run
TrueNAS connects to the Cloud Storage Provider and simulates a file transfer without sending or receiving data.
3.5.10 - Advanced Scheduler
Describes the fields in the Advanced Scheduler in TrueNAS CORE.
Name
Description
Choose a preset
Populates the rest of the fields.
Minutes
Minutes when the task runs.
Hours
Hours when the task runs.
Days
Days when the task runs.
Months
Months when the task runs.
Days of Week
Days of the week when the task runs.
3.6 - Network
Reference documentation of the various Network menu screens.
The TrueNAS CORE Network screens control how the system integrates into the overall network environment.
Network Contents
Interfaces Screen: Describes the fields in the Network Interface screen on TrueNAS CORE.
Network Summary Screen: Describes the fields in the Network Summary screen in TrueNAS CORE.
IPMI Screen: Describes the fields on the IPMI screen in TrueNAS CORE.
3.6.1 - Interfaces Screen
Describes the fields in the Network Interface screen on TrueNAS CORE.
Use the Network > Interface Screen to add various network interfaces to your TrueNAS.
Use the COLUMNS button to display options to modify the information displayed in the Interfaces table. Options are Type, Link State, DHCP, IPv6 Auto Configure, IP Addresses, Description, Active Media Type, Active Media Subtype, VLAN Tag, VLAN Parent Interface, Bridge Members, LAGG Ports, LAGG Protocol, MAC Address, MTU or Reset to Defaults.
To see the details for any interface click the chevron_right symbol to the right of the interface.
Interface Detail Screen
Each interface has a detailed view with the current interface settings and additional actions available for the interface.
Use EDIT to display the Network Interface Edit screen. Several settings are not editable and do not appear on the Edit screen.
Use RESET CONFIGURATION to reset the selected interface. Resetting the configuration interrupts network connectivity. The Reset Configuration dialog displays. You must select Confirm to activate the RESET CONFIGURATION button.
Interface Add Screen
The Interface Add screen displays additional configuration settings based on the type of interface selected.
Interface Settings
Settings
Description
Type
Select the type of interface from the dropdown list. Select Bridge to create a logical link between mutliple networks. Select Link Aggregation to combine multiple network connections into a single interface. Select VLAN for a virtual LAN to partition and isolate a segment of the connection.
Name
Enter a name for the interface. Use the format bridgeXlaggX or vlanX where X is a number representing a non-parent interface.
Description
Enter a description for the interface. For example, what it is used for.
DHCP
Select to enable DHCP. Leave checkbox clear to crate a static IPv4 or IPv6 configuration. Only one interface can be configured for DCHP.
Autoconfigure IPv6
Select to automatically configure the IPv6 address with rtsol(8). Only one interface can be configured this way.
Other Settings
Settings
Description
Disable Hardware Offloading
Select to turn off hardware offloading for network traffice processing. Warning! Disabling hardware offloading can reduce network performance, and is only recommended when the interface is managing jails, plugins or virtual machines.
MTU
A maximum transmission unit (MTU) is the largest protocol data unti that can be communicated. The largest workable MTU size varies with network interfaces and equipment. 1500 and 9000 are standard Ethernet MTU sizes. Leave blank restores this field to the default value of 1500.
Select an IP address from the dropdown list to define an alias for the interface on this TrueNAS controller. The alias can be an IPv4 or IPv6 address.
ADD
Adds a row to configure another IP address. A DELETE button displays to allow you to delete the extra IP address.
Bridge Settings
Settings
Description
Bridge Members
Select network interfaces to include in the bridge from the dropdown list.
Link Aggreation Settings
Settings
Description
Lagg Protocol
Select the lagg protocol from the dropdown list. This determines the outgoing and incoming traffic ports. LACP is the recommended protocol if the network switch is capable of active LACP. Failover is the default protocol choice and should be used if the network switch does not support active LACP. See lagg(4) for more details.
Lagg Interfaces
Select the interfaces on your TrueNAS to use in the aggregation from the dropdown list. Warning! Lagg creation fails if any of the selected interfaces have been manually configured.
VLAN Settings
Settings
Description
Parent Interface
Select the VLAN parent interface on your TrueNAS from the dropdown list. Usually Ethernet card connected to a switch port configured for the VLAN. New link aggregations are not available until the system is restared.
Vlan Tag
Enter the numeric tag configured in the switched network. This is a required field.
Priority Code Point
Select the Class of Service from the dropdown list. The available 802.1p class of service ranges from **Best effort (default) to Network control (highest).
Interface Edit Screen
The Interface Edit screen displays only the editable configuration settings for the inface selected.
Interface Settings
Settings
Description
Name
Displays the name for the selected interface. This field cannot be edited.
Description
Enter a description for the interface. For example, what it is used for.
DHCP
Select to enable DHCP. Leave checkbox clear to crate a static IPv4 or IPv6 configuration. Only one interface can be configured for DCHP.
Autoconfigure IPv6
Select to automatically configure the IPv6 address with rtsol(8). Only one interface can be configured this way.
Other Settings
Settings
Description
Disable Hardware Offloading
Select to turn off hardware offloading for network traffic processing. Warning! Disabling hardware offloading can reduce network performance, and is only recommended when the interface is managing jails, plugins, or virtual machines.
MTU
A maximum transmission unit (MTU) is the largest protocol data unti that can be communicated. The largest workable MTU size varies with network interfaces and equipment. 1500 and 9000 are standard Ethernet MTU sizes. Leave blank restores this field to the default value of 1500.
Select an IP address from the dropdown list to define an alias for the interface on this TrueNAS controller. The alias can be an IPv4 or IPv6 address.
ADD
Adds a row to configure another IP address. A DELETE button displays to allow you to delete the extra IP address.
Use APPLY to save changes to settings and return to the Interfaces screen.
3.6.2 - Network Summary Screen
Describes the fields in the Network Summary screen in TrueNAS CORE.
It is recommended to set up your system connections before setting up data sharing.
This allows integrating TrueNAS into your specific security and network environment before attempting to store or share critical data.
Network Summary
The Network Summary gives a concise overview of the current network setup.
Information about the currently active Interfaces, Default Routes, and Nameservers is provided.
These areas are not editable.
Interfaces shows any configured physical bridge, LAGG, and vlan interfaces.
All detected physical interfaces are listed, even when unconfigured.
The IPv4 or IPv6 address displays when a static IP is saved for an interface.
Default Routes lists all saved TrueNAS Default Routes.
Go to Network > Global Configuration to configure Default Routes.
Nameservers lists any configured DNS name servers that TrueNAS uses. To change this list, go to Network > Global Configuration.
The TrueNAS Hostname and Domain, Default Gateway, and other options are available in Network > Global Configuration.
Additional Network Configuration Screens
Define any Static Routes in Network > Static Routes.
Out-of-band management is managed from Network > IPMI. This option is visible only when TrueNAS detects the appropriate physical hardware.
3.6.3 - Global Configuration Screen
Describes how to use the Global Configuration screen in TrueNAS CORE.
The Network > Global Configuration screen has all the general TrueNAS networking settings that are not specific to any interface.
Disruptive Change
Making changes to the network interface the web interface uses can result in losing connection to TrueNAS!
Fixing any misconfigured network settings might require command line knowledge or physical access to the TrueNAS system.
Global Configuration Settings
Options are organized into several categories.
Can these options be configured elsewhere?
Many of these interface, DNS, and gateway options are also configured in the Console Setup Menu.
Be sure to check both locations when troubleshooting network connectivity issues.
Hostname and Domain
Many of these fields have default values you can change to meet requirements of the local network.
The Hostname and Domain field values display on the Dashboard > System Information card.
Some options only display when the appropriate hardware is present.
Setting
Description
Hostname
Enter the system host name. If an Enterprise system with two controllers, this is the first TrueNAS controller host name. Upper and lower case alphanumeric, (.) and (-) characters are allowed.
Hostname (TrueNAS Controller 2)
Enter the host name of second TrueNAS controller (for HA only). Upper and lower case alphanumeric, (.) and (-) characters are allowed.
Hostname (Virtual)
Ener the virtual host name. When using a virtualhost, this is also used as the Kerberos principal name. Enter the fully qualified host name plus the domain name. Upper and lower case alphanumeric, (.) and (-) characters are allowed.
Domain
Enter the system domain name.
Additional Domains
Enter additional domains to search. Separate entries by pressing Enter. Adding search domains can cause slow DNS lookups
Service Announcement
Setting
Description
NetBIOS-NS
Select to advertise the SMB service NetBIOS name. Legacy NetBIOS name server. Can be required for legacy SMB1 clients to discover the server. When advertised, the server appears in Network Neighborhood.
mDNS
Select to use the system host name (in Hostname) to advertise enabled and runnint services. Multicast DNS. For example, this controls if the server appears under Network on MacOS clients.
WS-Discovery
Select to use the SMB Service NetBIOS Name to advertise the server to WS-Discovery clients. This causes the computer to appear in the Network Neighborhood of modern Windows OSes.
DNS Servers
Setting
Description
Nameserver 1
Enter the primary DNS server IP address.
Nameserver 2
Enter the secondary DNS server IP address.
Nameserver 3
Enter the tertiary DNS server IP address.
Default Gateway
Setting
Description
IPv4 Default Gateway
Enter the IP address to use instead of the default gateway provided by DHCP for IPv4 service. Typically not set.
IPv6 Default Gateway
Enter the IP address to use instead of the default gateway provided by DHCP for IPv6 service. Typically not set.
Other Settings
Setting
Description
HTTP Proxy
Enter the proxy information for the network in the format http://my.proxy.server:3128 or http://user:password@my.proxy.server:3128.
Enable Netwait Feature
Select to prevents network services from starting until the interface can ping the addresses listed in the Netwait IP list.
Netwait IP List
Select only appears when Enable Netwait Feature is set. Enter a list of IP addresses to ping. Separate entries by pressing Enter. Each address is tried until one is successful or the list is exhausted. Leave empty to use the default gateway.
Host Name Database
Enter the database host name. Used to add one entry per line which is appended to /etc/hosts. Separate entries by pressing Enter. Use the format IP_address space hostname where multiple host names can be used if separated by a space. Hosts defined here are still accessible by name even when DNS is not available. See hosts for additional information.
3.6.4 - Static Routes Screen
Describes the Static Routes screen in TrueNAS CORE.
Use the Network Static Routes screen to define static routes on your TrueNAS. By default, no static routes are defined on a default TrueNAS system.
Use the blue Columns button to display options to change the information displayed in the Static Routes table. Options are Unselect All, Gateway, Description or Reset to Defaults.
Use Add to dispay the Static Routes Add screen.
Static Route Add Screen
Setting
Description
Destination
Enter the desination IP using the format A.B.C.D/E where E is the CIDR mask.
Gateway
Enter the IP address of the gateway.
Description
Enter any notes or identifiers describing the static route.
The SUBMIT button activates after entering values in the required fields. Use CANCEL to exit without saving and retun to the Static Routes screen.
3.6.5 - IPMI Screen
Describes the fields on the IPMI screen in TrueNAS CORE.
Use the Network > IPMI screen to configure the TrueNAS for an IPMI connection. The IPMI configuration screen provides a shortcut to the most basic IPMI configuration.
Setting
Description
TrueNAS Controller
Select a TrueNAS controller from the dropdown list. All IPMI changes are applied to that TrueNAS controller.
Channel
Select the communications channel to use from the dropdown list. Available channel numbers vary by hardware.
Password
Enter a password for connecting to the IPMI interface from a web browser. The password must include at least one upper case letter, one lower case letter, one digit, and one special character (punctuation, e.g. ! # $ %, etc.). It must also be 8-16 characters long.
DHCP
Select to use DHCP to set the IPv4 Address, IPv4 Netmask, and Ipv4 Default Gateway. If checkbox is clear you must manually enter these settings.
IPv4 Address
Enter the static IP address of the IPMI web interface. This is the address TrueNAS connects to when you click the MANAGE button.
IPv4 Netmask
Enter the subnet mask associated with the IP address.
IPv4 Default Gateway
Enter the default gateway of the IPv4 connection. This is associated with the IP address.
VLAN ID
Enter the VLAN identifier if the IPMI out-of-band management interface is not on the same VLAN as management networking.
IDENTIFY LIGHT
Displays a dialog to activate an IPMI identify light on the compatible connected hardware.
MANAGE
Connects the TrueNAS to the IPMI web interface login screen.
VMware-Snapshots Screen: Describes the fields in the VMware Snapshot screen on TrueNAS CORE.
Disks Screens: Describes the fields in the Disk Screens in TrueNAS CORE.
3.7.1 - Pools
Lists the screens related to Pools in TrueNAS CORE.
Use the Storage Pools screens to add or manage storage pools on your TrueNAS.
The Pools screen displays a table of all the pools and datasets configured in your TrueNAS.
Use the to display the Pools Actions dropdown list of pool operations.
Use ADD to display the Import Pool configuration wizard screens.
Use the for the root dataset to display the Action Menu for the root dataset which is different than the options for nested datasets.
Use the for nested datasets to display the Action Menu for nested datasets.
See Datasets Screen for more information on dataset screens.
Import Pools Screens
The import pool wizard has four configuration screens that allow you to add a new pool or import an existing pool based on the selection made.
Displays a dialog with the Auto TRIM and Confirm checkoboxes. Auto TRIM allows TrueNAS to periodically check the pool disks for storage blocks it can reclaim.
Export/Disconnect
Displays a dialog with a warning about unavailable data, backing up data before exporting/disconnecting, and lists services that could be disrupted by the process. Select from the three options:
Setting
Description
Destroy data on this pool?
Select to destroy data on the pool disks.
Delete configuration of shares that used this pool?
Selected by default to delete share configurations listed.
Confirm Export/Disconnect
Activates the Export/Disconnect button.
Export/Disconnect
Use to display the confirmation dialog where you must enter the name of the pool and confirm you want to proceed with this operation.
Use CANCEL to exit the process and close the dialog.
Use CANCEL to exit without saving and display the Pools screen.
Use ADD VDEVS to add vdevs to the exiting pool.
Scrub Pool
Displays a start-scrub confirmation dialog. Select Confirm to activate the START SCRUB button. Use CANCEL to exit back to the Pools screen without starting the scrub.
Expand Pool
Displays the Pool Status screen which displays the status of the pool, the datasets and the disks for the selected pool. Select the to display the options available to datasets and disks.
Use the Expand Pool function to add a new disk to a single-disk stripe pool in order to create or re-create a mirror pool, if the disk capacity of the new disk meets the requirements.
Pool Manager Screen
The Pool Manager screen displays after selecting either the Create new Pool radio button on the Create or Import Pool screen or the Add Vdev option for an existing pool.
Pool Manager adds the initial vdev when you create the pool or want to add to an existing pool.
At initial creation you have the option to select the type of vdev for this pool.
When accessing Pool Manager for an existing pool from the Pool Actions dropdown and selecing Add Vdev, the pool vdev type is already specified and limits what you can add as a Data type vdev. For example, a pool with a mirror vdev requires you to add a minimum of two disks to the existing mirror. In order to transform a single disk stripe to a mirror, use Expand Pool.
Displays the name of the pool for which you are adding the vdev.
Encryption
Select to apply encryption to the storage pool. All datasets created on an encrypted pool inherit encryption from this root dataset.
RESET LAYOUT
Click to reset the proposed layout displayed. Click before you save to remove any vdev types selected and move disks assigned to any vdev back to the Available Disks list.
ADD VDEV
Displays a dropdown list of the types of vdevs on the system. Vdev types are Data, Cache, Log, Hot Spare, Metadata or Dedup. Click to add vdev types to an existing or new pool vdev setup.
Available Disks
List of available disks on the TrueNAS. Select the checkbox to the left of the disk and then select the blue to the right of the vdev type (if more than one vdev type exists or is added with the ADD VDEV button) to move the disks to that vdev. To move it back to the Available Disks list select the disk checkbox(es) and the blue .
Data VDevs
List of disks assigned to the vdev(s). To move disks back to the Available Disks list select the disk checkbox(es) and the blue symbol.
vdev type
Displays under the Data Vdevs table(s). For an existing pool, the default vdev type is the vdev type for that existing pool. For initial pool creation, the default type is Stripe. After adding disks to the Data VDevs a expand symbol displays with avaialbe options to change the default type of vdev (for example, if two disks are moved to a Data VDev, the Mirror option displays along with Strip).
Estimated raw capacity: 0 B
Displays the raw storage capacity of the disks for the data vdev type.
Filter disks by name
Click on to display the field where you enter the filter or search parameters.
Filter disks by capacity
Click on to display the field where you enter the filter or search parameters.
Use CANCEL to exit without saving and display the Pools screen.
Use CREATE to add the pool vdev.
Use ADD VDEVS to add vdevs to the exiting pool.
Pool Status Screen
The Pool Status screen which displays the status of the pool, the datasets and the disks for the selected pool.
Each Dataset has two options available from the . Select either Extend which displays the Extend Vdev dialog that allows you to select a new disk from a dropdown list, or Remove which displays a confirmation dialog before you remove the dataset from the pool.
Each disk has four options available from the :
Edit displays the Edit Pool Disk screen where you can change disk settings.
Offline displays the Offline Disk conformation dialog where you confirm you want to offline the disk. Select the Confirm checkbox to activate the OFFLINE button or click CANCEL to exit the dialog and return to the Pool Status screen.
Replace displays the Replacing disk dialog where you select the member disk from a dropdown list. Use Force to override safety checks and add the disk to the pool. Warning, this erases data on the disk!
Detach displays the Detach Disk dialog where you must select Confirm before the DETACH button activates. This detaches the disk from the pool.
Edit Pool Disk Screen
The Edit Pool Disk screen displays disk configutation settings.
Settings on the Edit Pool Disk screen are the same as those on the Storage > Disks > Edit Disk screen. See Disk Screens for more information on disk settings.
Pools Edit Permissions Screen
Use the Edit Permissions option on the parent dataset Dataset Actions menu to display the Edit Permissions screen. This option is only availble on the parent dataset. See Dataset Screens and Setting Up Permissions for more information on pool and dataset permissions.
Pools Contents
Datasets Screens: Describes how to configure a dataset on TrueNAS CORE.
Zvols Screen: Describes the fields in the Storage Pools Add Zvol screen in TrueNAS CORE.
3.7.1.1 - Datasets Screens
Describes how to configure a dataset on TrueNAS CORE.
Use the Storage > Pools Add Dataset screen to add a dataset to your TrueNAS. A TrueNAS dataset is a file system that is created within a data storage pool. There are two settings options, BASIC OPTIONS and ADVANCED OPTIONS. Use the basic option unless you want to customize your dataset for specific uses cases.
Use SUBMIT without entering settings to quickly create a dataset with the default options or after entering settings to save and create the dataset.
Name and Options
The Name and Options fields are required to create the dataset.
Datasets typically inherit most of these settings from the root or parent dataset, only a dataset name is required before clicking SUBMIT.
Setting
Description
Name
Enter a unique identifier for the dataset. The name cannot be changed after the dataset is created.
Comments
Enter notes about the dataset.
Sync
Select an option from the dropdown list. Select Standard uses the sync settings requested by the client software. Select Always to wait for data writes to complete, or select Disabled to never wait for writes to complete.
Compression level
Select an option to encode information in less space than the original data occupies. It is recommended to choose a compression algorithm that balances disk performance with the amount of saved space: lz4 is generally recommended as it maximizes performance and dynamically identifies the best files to compress. zstd is the Zstandard compression algorithm that has several options for balancing speed and compression. gzip options range from 1 for least compression, best performance, through 9 for maximum compression with greatest performance impact. zle is a fast algorithm that only eliminates runs of zeroes. lzjb is a legacy algorithm that is not recommended for use.
Enable Atime
Select an option from the dropdown list. Inherit (off) inherits from the pool. on updates the access time for files when they are read. off disables creating log traffic when reading files to maximize performance.
Encryption
Select Inherit (non-encrypted) to inherit the root or parent dataset encryption properties. Clear the checkmark to either not encrypt the dataset or to configure encryption settings other than those used by the root or parent dataset. See Encryption for more information on encryption.
Other Options
Use the Other Options to help tune the dataset for particular data sharing protocols:
Setting
Description
ZFS Deduplication
Select an option to transparently reuse a single copy of duplicated data to save spacefrom the dropdown list. Options are Inherit (off), on, verify or off. Deduplication can improve storage capacity, but is RAM intensive. Compressing data is generally recommended before using deduplication. Deduplicating data is a one-way process. *Deduplicated data cannot be undeduplicated!
Case Sensitivity
Select an option from the dropdown list. Sensitive assumes file names are case sensitive. Insensitive assumes file names are not case sensitive. Mixed understands both types of file names. Case sensitivity cannot be changed after the dataset is created!
Share Type
Select an option from the dropdown list to define the type of data sharing the dataset uses to optimize the dataset for that sharing protocol. Options are Generic or SMB. AFP type shares use SMB unless directed to select Generic. The type of share cannot be changed after the dataset is created!
Dataset Advanced Options
Use ADVANCED OPTIONS to add additional dataset settings such as quota management tools, basic ACL permissions and a few additional Other Options settings fields.
Quota Settings for this dataset and/or this dataset and its child datasets
Setting
Description
Quota for this datset
Enter an integer to define the maximum allowed space for the dataset. 0 disables quotas.
Quota warning alert at, %
Enter an integer to generate a warning level alert when consumed space reaches the defined percentage. By default, Inherit is selected and the dataset inherits this value from the parent dataset. Clear the checkmark to change the value.
Quota critical alert at, %
Enter an integer to generate a critical level alert when consumed space reaches the defined percentage. By default, Inherit is selected and the dataset inherits this value from the parent dataset. Clear the checkmark to change the value.
Reserved space for this dataset
Enter an integer to reserve additional space for datasets that contain logs which could eventually take up all the available free space. 0 is unlimited.
Select an option from the dropdown list. On prevents the dataset being modified. Off allows users accessing the dataset to modify its contents.
Exec
Select an option from the dropdown list. On allows processes to executd from within this dataset. Off prevents processes from executing in the dataset. It is recommended to set to On.
Snapshot directory
Select an option to control visibility of the .zfs directory on the dataset. Options are Visible or Invisible.
Copies
Select an option from the dropdown list to specify the number of duplicate ZFS user data copies stored on this dataset. Choose between 1, 2, or 3 redundant data copies. This can improve data protection and retention, but is not a substitute for storage pools with disk redundancy.
Record Size
Select an option from the dropdown list for the Logical block size in the dataset. Matching the fixed size of data, as in a database, could result in better performance.
ACL Mode
Select an option from the dropdown list to determine how chmod behaves when adjusting file ACLs. See the zfsaclmode property. Passthrough only updates ACL entries that are related to the file or directory mode. Restricted does not allow chmod to make changes to files or directories with a non-trivial ACL. An ACL is trivial if it can be fully expressed as a file mode without losing any access rules. Restricted is typically used to optimize a dataset for SMB sharing, but can require further optimizations. For example, configuring an rsync task with this dataset could require adding --no-perms in the Rsync task Auxiliary Parameters field.
Metadata (Special) Small Block Size
Enter an integer for the threshold block size for including small file blocks into the special allocation class (fusion pools). Blocks smaller than or equal to this value are assigned to the special allocation class while greater blocks are assigned to the regular class. Valid values are zero or a power of two from 512B up to 1M. The default size 0 means no small file blocks are allocated in the special class. Add a special class vdev to the pool before setting this property.
Edit Datasets Screen
Use the Storage > Pools Edit Dataset screen to change setting for an existing dataset. The settings are identical to the Add Dataset screens above. to access the Edit Dataset screens, click the for a dataset and select Edit Options.
Dataset Edit Permissions Screen
Use the Storage > Pools Edit Permissions screen to change permissions settings for a parent dataset. To access the Edit Permissions screens, click the for a dataset and select Edit Options.
Displays the dataset path for the selected dataset.
Owner Settings
Setting
Description
User
Either type to search for or use dropdown list to select an existing user on the system that controls this dataset. Dropdown list displays all user on the TrueNAS system.
Apply User
Select to confirm selected user. As a check on errors, if not selected the user is not submitted.
Group
Either type to search for or use dropdown list to select an existing group on the system that controls this dataset. Dropdown list displays all user on the TrueNAS system.
Apply Group
Select to confirm selected group. As a check on errors, if not selected the group is not submitted.
Access Settings
Setting
Description
Access Mode
Select the Read, Write and Execute checkboxes for User, Group, and Other to set the permissions levels.
Advanced Settings
Setting
Description
Apply Permissions Recursively
Select to apply permissions recursively to all directories and files within the current dataset.
Traverse
Select to apply permissions recursively to all child datasets of the current dataset.
USE ACL Manager Screen
Click USE ACL MANAGER to open the ACL editor to further customize permissions. After selecting the Select a preset ACL radio buttons on the Create an ACL dialog, select a Default ACL Option from the dropdown list. Options are OPEN, Restricted or HOME. Or Create a custom ACL and then click CONTINUE to display the Edit ACL screen with the default permissions for the option you selected.
Displays the dataset path for the selected dataset.
User
Either type to search for or use dropdown list to select an existing user on the system that controls this dataset. Dropdown list displays all user on the TrueNAS system.
Apply User
Select to confirm selected user. As a check on errors, if not selected the user is not submitted.
Group
Either type to search for or use dropdown list to select an existing group on the system that controls this dataset. Dropdown list displays all user on the TrueNAS system.
Apply Group
Select to confirm selected group. As a check on errors, if not selected the group is not submitted.
Access Control List Settings - owner@, group@ and everyone@
Setting
Description
Who
Select from the dropdown list of options. Default for each of the three groups of settings is owner@, group@ and everyone@ but you can change this to either of these additional options User or Group. Selection modifies values displayed in other settings.
ACL Type
Select either Allow or Deny from the dropdown list to specify how permissions apply to the value selected in Who. Select Allow to grant the specified permissions or Deny to restrict the specified permissions.
Permissions Type
Select either Basic or Advanced from the dropdown list. Basic shows general permissions. Advanced shows each specific type of permission for finer control.
Permissions
Select the permissions to apply to the selected value in Who. The list of permissions changes based on the value selected in Permissions Type. See Permissions for more information on permissions by permissions type (Basic and Advanced).
Flags Type
Select the set of ACE inheritance flags to display. Options are Basic or Advanced. If Basic non-specific inheritance options show in the list. If Advanced the dropdown list shows specific inheritance settings for finer control.
Flags
Select how this ACE applies to newly created directories and files within the dataset. If Flag Type is set to Basic options are Inherit or No Inherit. If Flag Type is set to Advanced flags are File Inherit, Directory Inherit, No Propagate Inherit, Inherit Only, or Inherited.
Use ADD ACL ITEM to add another set of the ACL permission settings.
Select Apply permissions recursively to apply the ACL settings recursively to all directories and files in the current dataset.
Describes CORE Dataset User and Group Quota screen settings and functions.
TrueNAS allows setting data or object quotas for user accounts and groups cached on or connected to the system.
Go to Storage > Pools, find the desired dataset, and click to open the Dataset Actions menu and see the User Quota and Group Quota options.
User Quotas Screen
Clicking User Quotas from the Dataset Actions menu shows the User Quotas screen.
Setting
Description
Filter User Quotas
Enter a string to show saved quotas that match the string.
Columns
Displays options to customize the table view to add or remove information. Options are Select All, ID, Data Quota, DQ Used, DQ % Used, Object Quota, Objects Used, OQ % Used, and Reset to Defaults. After selecting Select All the option toggles to Unselect All.
Actions
Shows additional options to manage or add entries to this screen.
Actions
Setting
Description
Toggle Display
Changes the view between filter and list views. By default, only user accounts with a quota are shown (filter view). Switching to the list view shows all available users, even if the user has no quota assigned.
Set Quotas (Bulk)
Opens the Set User Quotas screen to add quotas.
User Expanded View
Click the expand_more icon to display a detailed individual user quota view.
Click the editEdit button to display the Edit User window.
Edit User Configuration Window
The Edit User window allows modifying individual user data and object quota values.
Settings
Description
User
Displays the name of the selected user.
User Data Quota (Examples: 500KiB, 500M, 2 TB)
Enter the amount of disk space the selected user can use. Entering 0 allows the user to use all disk space. You can enter human-readable values such as 50 GiB, 500M, 2 TB, etc.). If units are not specified, the value defaults to bytes.
User Object Quota
Enter the number of objects the selected user can own. Entering 0 allows unlimited objects.
Click Set Quota to save changes or Cancel to close the window without saving.
Set User Quotas Screen
Click Actions > Set Quotas (Bulk) to see the Set User Quotas screen.
Set Quotas Settings
Settings
Description
User Data Quota (Examples: 500KiB, 500M, 2 TB)
Enter the amount of disk space the selected user can use. Entering 0 allows the user to use all disk space. You can enter human-readable values such as 50 GiB, 500M, 2 TB, etc.). If units are not specified, the value defaults to bytes.
User Object Quota
Enter the number of objects the selected user can own. Entering 0 allows unlimited objects.
Apply Quotas to Selected Users Settings
Settings
Description
Select Users Cached by this System
Select the users from the dropdown list of options.
Search for Connected Users
Click in the field to see the list of users on the system or type a user name and press Enter. A clickable list displays of found matches as you type. Click on the user to add the name. A warning dialog displays if there are not matches found.
Click Submit to set the quotas or Cancel to exit without saving.
Group Quotas Screens
Clicking Group Quotas from the Dataset Actions menu shows the Edit Group Quotas screen.
The Edit Group Quotas screen displays the names and quota data of any groups cached on or connected to the system.
Setting
Description
Filter Group Quotas
Enter a string to show saved quotas that match the string.
Columns
Displays options to customize the table view to add or remove information. Options are Select All, ID, Data Quota, DQ Used, DQ % Used, Object Quota, Objects Used, OQ % Used, and Reset to Defaults. After selecting Select All the option toggles to Unselect All.
Actions
Shows additional options to manage or add entries to this screen.
Actions
Setting
Description
Toggle Display
Changes the view between filter and list views. By default, only group accounts with a quota are shown (filter view). Switching to the list view shows all available groups, even if the group has no quota assigned.
Set Quotas (Bulk)
Opens the Set Group Quotas screen to add quotas.
Group Expanded View
Click the expand_more icon to display a detailed individual group quota view.
Click the editEdit button to display the Edit Group window.
Edit Group Configuration Window
The Edit Group window allows you to modify the group data quota and group object quota values for an individual group.
Settings
Description
Group
Displays the name of the selected group(s).
Group Data Quota (Examples: 500KiB, 500M, 2 TB)
Enter the amount of disk space the selected group can use. Entering 0 allows the group to use all disk space. You can enter human-readable values such as 50 GiB, 500M, 2 TB, etc.). If units are not specified, the value defaults to bytes.
Group Object Quota
Enter the number of objects the selected group can own or use. Entering 0 allows unlimited objects.
Click Set Quota to save changes or Cancel to close the window without saving.
Set Group Quotas Screen
Click **Actions > Set Quotas (Bulk) ** to see the Set Group Quotas screen.
Set Quotas Settings
Settings
Description
Group Data Quota (Examples: 500KiB, 500M, 2 TB)
Enter the amount of disk space the selected group can use. Entering 0 allows the group to use all disk space. You can enter human-readable values such as 50 GiB, 500M, 2 TB, etc.). If units are not specified, the value defaults to bytes.
Group Object Quota
Enter the number of objects the selected group can own or use. Entering 0 allows unlimited objects.
Apply Quotas to Selected Groups Settings
Settings
Description
Select Groups Cached by this System
Select the users from the dropdown list of options.
Search for Connected Groups
Click in the field to see the list of groups on the system or type a group name and press Enter. A clickable list displays of found matches as you type. Click on the group to add the name. A warning dialog displays if there are no matches found.
Click Submit to set the quotas or Cancel to exit without saving.
3.7.1.3 - Zvols Screen
Describes the fields in the Storage Pools Add Zvol screen in TrueNAS CORE.
Use the Storage > Pools Add Zvol screen to add a zvol to a pool.
Basic Options
Setting
Description
Zvol name
Enter a short name for the zvol. Using a zvol name longer than 63-characters can prevent accessing zvols as devices. For example, a zvol with a 70-character filename or path cannot be used as an iSCSI extent. This setting is required.
Comments
Enter any notes about this zvol.
Size for this zvol
Specify size and value. Units like t, TiB, and G can be used. The size of the zvol can be increased later, but cannot be reduced. If the size is more than 80% of the available capacity, the creation fails with an out of space error unless Force size is also selected.
Force size
Select to force the system to create a zvol that brings a pool to over 80% capacity (not recommended). By default, the system does not create a zvol if that operation brings the pool to over 80% capacity.
Sync
Select an option from the dropdown list that sets the data write synchronization. Inherit sets zvol to get sync settings from the parent dataset, Standard uses the sync settings requested by the client software, Always that waits for data writes to complete,or Disabled that never waits for writes to complete.
Compression level
Select a compression option from the dropdown list. Select Off to not compress data to save space. Refer to Compression for a description of the available algorithms.
ZFS Deduplication
Do not change this setting unless instructed to do so by your iXsystems support engineer.
Sparse
Select to provide thin provisioning. Use with caution as writes fail when the pool is low on space.
Read-only
Select an option from the dropdown list to set whether the zvol can be modified. Options are Inherit to get and use the parent pool or root dataset settings, On to prevent modifying the zvol, or Off to allow the zvol to be modified.
Inherit (Encryption Options)
Select to enable the zvol to use the encryption properties of the root dataset.
Selecting ADVANCED OPTIONS adds one additional setting.
Setting
Description
Block size
select the default Inherit or select from the other dropdown list options 4KiB, 8KiB, 16KiB, 32KiB, 64KiB or 128KiB. See Creating a Zvol for more information on these options and block sizes.
SUBMIT activates after all required fields are populated. Use to save settings.
Use CANCEL to exit without saving settings and display the Pools screen.
3.7.2 - Snapshots Screens
Describes the Snapshots screens on TrueNAS CORE.
Use the Storage > Snapshots screens to create and manage snapshots on your TrueNAS.
Use the to display the Show Extra Columns dialog, and after clickng SHOW, the Snapshot screen changes to dipslay the blue COLUMNS button with options to modify the table information.
It also changes the individual snapshots listed to show the individual snapshot action options from the more_vert rather than the navigate_next expand symbol that, after clicking on it, expands the selected snapshot to show details with the action options on the bottom of the expanded view of the snapshot.
To return to the previous display click the to display the Hide Extra Columns dialog, and after clickng HIDE, the blue COLUMNS button no longer displays and the list of snapshots displays the navigate_next expand symbol.
Use ADD to display the Snapshot > Add screen.
Snapshot Add Screen
Name
Description
Dataset
Select a dataset or zvol from the dropdown list to use as the storage location for snapshots.
Name
Enter a unique name. This cannot be used with the value in Naming Schema
Naming Schema
Used to generate a name for the snapshot from a previously created periodic snapshot task. This allows replication of the snapshot. Value cannot be used with a value specified in Name.
Recursive
Select to include child datasets of the selected dataset.
Use SUBMIT to save settings.
Use CANCEL to exit without saving and display the Snapshots screen.
Snapshot Details Screen
The expanded snapshot view includes date created, space used, and the amount of data accessible by this dataset.
Name
Icon
Description
Delete
delete
Displays a delete confirmation dialog. Select Confirm to activate the DELETE button.
Clone to New Dataset
Displays the Clone to New Dataset screen.
Rollback
restore
Displays the Dataset Rollback From Snapshot dialog.
Dataset Rollback from Snapshot Dialog
WARNING: Rolling the dataset back destroys data on the dataset and can destroy additional snapshots that are related to the dataset.
This can result in permanent data loss!
Do not roll back until all desired data and snapshots are backed up.
Name
Description
Stop Roolback if Snapshot Exists
Select the safety level for the rollback action. Select the radio button that best fits. Rollback is cancelled when the safety check finds additional snapshots that are directly related to the dataset being rolled back.
Newer intermeidate, Child, and clone
Select to stop rollback when the safety check finds any related intermediate, child dataset, or clone snapshots that are newer than the rollback snapshots.
Newer Clone
Select to stop rollbck when the safety check finds any related clone snapshots that are newer than the rollback snapshot.
No Safety Check (CAUTION)
Select to stop rollback if snapshot exists. The rollback destroys any related intermediate, child dataset, and cloned snapshots that are newer than the rollback snapshot.
Confirm
Select to confirm the selection and activate the ROLLBACK button.
See Creating Snapshots for more information on creating and managing snapshots.
3.7.3 - VMware-Snapshots Screen
Describes the fields in the VMware Snapshot screen on TrueNAS CORE.
Use Storage > VMware-Snapshots to add a VMWare snapshot that coordinates ZFS snapshots when using TrueNAS as a VMware datastore.
Name
Description
Hostname
Enter the IP address or host name of the VMware host. When clustering, use the IP address or host name of the vCenter server for the cluster.
Username
Enter a user account name created on the VMware host. The account must have permission to snapshot virtual machines.
Password
Enter the password associated with the value in Username.
ZFS Filesystem
Select a file system to snapshot from the dropdown list. Values populate from the VMWare host response.
Datastore
Select an option from the dropdown list after entering the Hostname, Username, and Password, click FETCH DATASTORES to populate the menu. Select the datastore to synchronize. Selecting a datastore also select any previously mapped datasets.
Use FETCH DATASTORES to have TrueNAS connect to the VMware host.
3.7.4 - Disks Screens
Describes the fields in the Disk Screens in TrueNAS CORE.
Use the Storage > Disks screen to add or manage disks in your TrueNAS.
Use the blue Columns button to display a list of options to modify the information displayed in the list of disks.
Use the arrow_forward_ios expand symbol to the right of any disk on the list to expand that disk to show settings and actions for that disk.
Disk Information Screen
The Disks individual disk information screen includes details about the disk settings and status. It also provides access to disk actions the user can take.
Use EDIT to display the Edit Disk screen.
Use MANUAL TEST to display the Manual S.M.A.R.T. Tests dialog where you can specify the type of test as LONG, SHORT, CONVEYANCE or OFFLINE.
Use S.M.A.R.T. TEST RESULTS to display the results of any S.M.A.R.T. tests executed on the system.
Use WIPE to delete obsolete data off an unused disk. This option does not display unless your disk is unused. See Wiping a Disk for more information on how to use this function.
Edit Disk Screen
The settings on the Edit Disk are the same as those on the Add Disk screen.
Settings
Description
Name
Enter the FreeBSD disk device name. For example, ada0.
Serial
Enter the serial number for this disk.
Description
Enter notes or a description for this disk. For example, where it is located or what it is used for.
HDD Standby
Select the option from the dropdown list for the minutes of inactivity before the drive enters standby mode. Select from Always On or the minutes in a range from 5 to 330. See this forum post for information on identifying spun down drives. Temperature monitoring is disabled for standby disks.
Force HDD Standby
Select to allow the drive to enter standby, even when non-physical S.M.A.R.T. operations could prevent the drive from sleeping.
Advanced Power Management
Select an option from the dropdown list to select a power management profile from the menu. Options are Disabled, Level 1 - Minimum power usage with Standby (spindown), Level 64 - Intermediate power usage with Standby, Level 127 - Maximum power usage with Standby, Level 128 - Minimum with power usage without Standby (no spindown), Level 192 - Intermediate power usage without Standby, Level 254 - Maximum performance, maximum power usage.
Acoustic Level
Select the option from the dropdown list to modify disks that understand AAM Options are Disabled, Minimum, Medium or Maximum.
Enable S.M.A.R.T.
Select to enable allowing the system to conduct periodic S.M.A.R.T. tests.
Enter a numeric value to set the threshold temperature in Celsius. If the drive temperature is higher than this value, a LOG_CRIT level log entry is created and an email i s sent. 0 disables this check.
Difference
Enter a value where the the system reports if the drive temperature changed by this many degrees Celsius since the last report. 0 disables the report.
Informational
Enter a value where the system reports if the drive temperature is at or above this temperature in Celsius. 0 disables this report.
SED Password
Use to set or change the password of this SED. This password is used insead of the global SED password.
Clear SED Password
Select to chear the SED password for this disk.
Use SAVE to save settings and return the Disks screen or use CANCEL to exit without saving.
Import Disk Screen
Use the Import Disk screen to perform a one time disk import, only one disk at a time, on you TrueNAS system.
Settings
Description
Disk
Select the disk to import from the dropdown list. The import copies the data from the selected disk to an existing ZFS dataset. Only one disk can be imported at a time. This is a required field.
Filesystem type
Select one radio button option to specity the file system type that is on the disk to import. Options are UFS, NTFS, MSDOSFS or EXT2FS.
Destination Path
Browse to locate the dataset on the TrueNAS that is to hold the copied data.
The SAVE button activates after required fields are populated.
See Import Disks for more information on importing a disk into your TrueNAS.
3.8 - Directory Services
Reference documentation of the Directory Services screens.
Directory Services Contents
Active Directory Screen: Use the AD screen to configure Active Directory (AD) on TrueNAS CORE.
Idmap Screen: Use the Idmap screen to configure Identity Mapping (Idmap) on TrueNAS CORE.
LDAP Screen: Use the LDAP screen to configure Lightweight Directory Access Protocol (LDAP) server settings on TrueNAS CORE.
NIS Screen: Use the NIS screen to configure Network Information System (NIS) on TrueNAS CORE.
Kerberos Screens: Use the Kerberos screen to configure to configure Kerberos realms and keytabs on TrueNAS CORE.
3.8.1 - Active Directory Screen
Use the AD screen to configure Active Directory (AD) on TrueNAS CORE.
The Active Directory (AD) service shares resources in a Windows network environment. Go to Directory Services > Active Directory to set up AD on TrueNAS. The first Active Directory screen is a list of basic options.
Basic Options
Name
Description
Domain Name
Enter the Active Directory domain (example.com) or child domain (sales.example.com). Required field.
Domain Account Name
Enter the Active Directory administrator account name. Required field.
Domain Account Password
Enter the password for the Active Directory administrator account. Required when configuring a domain for the first time. After initial configuration, the password is not needed to edit, start or stop the service.
Enable (requires password or Kerberos principle)
Enable the Active Directory services. Must enter the Domain Account Password when selecting this option for the first time.
Click ADVANCED OPTIONS to access extra options shown below.
Click REBUILD DIRECTORY SERVICE CACHE to resync the cache if it becomes out of sync. Or if fewer users than expected are available or visible in the permissions editors.
Advanced Options
Name
Description
Verbose logging
Select to log attempts to join the domain to /var/log/messages.
Allow Trusted Domains
Selected if you do not want the username to include a domain name. Clear the checkbox to force the domain names to be prepended to usernames. One possible reason to not select this value is to prevent username collisions when this is selected and there are identical usernames across multiple domains.
Use Default Domain
Leave checkbox clear to prepend the domain name to the user name. When not selected prevents name collisions when Allow Trusted Domains is set and multiple domains use the same user name.
Allow DNS Updates
Select to enable Samba to do DNS updates when joining a domain.
Disable FreeNAS Cache
Select to disable caching AD users and groups. This can help when unable to bind to a domain with a large number of users or groups.
Restrict PAM
Select to restrict SSH access in certain circumstances. When selected only members of BUILTIN\Administrators have SSH access.
Site Name
Enter the relative distinguished name of the site object in the Active Directory.
Kerberos Realm
Select an existing realm added in Directory Services > Kerberos Realms.
Kerberos Principal
Select the location of the principal in the keytab. Keytab created in Directory Services > Kerberos Keytabs.
Computer Account OU
The organizational unit where new computer accounts get created. OU strings read from top to bottom without RDNs. Use slashes (/) as delimiters, like Computers/Servers/NAS. Use the backslash (\) to escape characters but not as a separator. Backslash interpretation takes place at many levels. Backslashes might need doubling or even quadrupling to take effect. When left blank, new computer accounts get created in the Active Directory default OU.
AD Timeout
Number of seconds before timeout. To view the AD connection status, open the interface Task Manager.
DNS Timeout
Number of seconds before a timeout. Increase this value if AD DNS queries time out.
Winbind NSS Info
Select the schema to use when querying AD for user/group info from the dropdown list. rfc2307 uses the schema support included in Windows 2003 R2. sfu is for Service For Unix 3.0 or 3.5. sfu20 is for Service For Unix 2.0.
Netbios Name
The Netbios name of this NAS is truenas. This name must differ from the Workgroup name and be no greater than 15 characters.
NetBIOS alias
Alternative names that SMB clients can use when connecting to this NAS. Can be no greater than 15 characters.
LEAVE DOMAIN
Disconnects the TrueNAS system from the Active Directory.
Click SAVE to save settings.
Click BASIC OPTIONS to return to the Active Directory display of basic options only.
Click EDIT IDMAP to navigate to the Directory Services > Idmap screen.
Click REBUILD DIRECTORY SERVICE CACHE to resync the cache if it becomes out of sync. Or if fewer users than expected are available in the permissions editors.
3.8.2 - Idmap Screen
Use the Idmap screen to configure Identity Mapping (Idmap) on TrueNAS CORE.
On a system running Unix or a Unix-like OS, Idmap acts as a translator. Windows Security Identifier (SID)s convert to a user ID (UID) and group ID (GID). Use the Identity Mapping (Idmap) screen to configure Idmap service on the TrueNAS.
Click Edit IDMAP on the Active Directory > Advanced Options screen. The Edit Idmap screen displays. It lists all domains configured on the TrueNAS.
You can customize the information displayed in the Idmap table. Click the blue COLUMNS button to display a dropdown list of options. A check mark next to the option name means the column is currently visible. Select from Unselect All, Backend, DNS Domain Name, Range Low, Range High, Certificate or Reset to Defaults.
Click ADD to open the Idmap Add screen. Enable Active Directory before attempting to add new domains.
Click the more_vert icon to display the options for each domain, Edit or Delete.
Idmap Settings
Name
Description
Idmap Backend
Select the plugin interface for Windbind to use from the dropdown list. Plugin interfaces for Windbind use varying backends. These backends store SID/uid/gid mapping tables. The correct setting depends on the NAS deployment environment.
Name
Enter the pre-Windows 2000 domain name or select from the dropdown list.
DNS Domain Name
Enter the DNS name of the domain.
Range Low
Determines the range of UID/GID numbers which this Idmap backend translates. External credentials like a Windows SID must map to a UID or GID number inside this range. Ignores external credentials outside this range.
Range High
Determines the range of UID/GID numbers which this Idmap backend translates. External credentials like a Windows SID must map to a UID or GID number inside this range. Ignores external credentials outside this range.
SSSD Compat
Select to generate Idmap low range based on same algorithm that SSSD uses by default.
Click SAVE to save settings and return to the Idmap screen.
Click CANCEL to exit without saving and return to the Idmap screen.
3.8.3 - LDAP Screen
Use the LDAP screen to configure Lightweight Directory Access Protocol (LDAP) server settings on TrueNAS CORE.
Lightweight Directory Access Protocol (LDAP) is an industry standard. Directory information services deployed over an Internet Protocol (IP) network can use LDAP. Configure LDAP server settings on your TrueNAS using the Directory Services > LDAP screen.
Click SAVE to save settings.
Click ADVANCED OPTIONS to display extra LDAP configuration options.
Click REBUILD DIRECTORY SERVICE CACHE to resync the cache if it becomes out of sync. Or if fewer users than expected are available in the permissions editors.
Basic Options
Name
Description
Hostname
Enter the LDAP server host names or IP addresses. Separate entries with an empty space. To create an LDAP failover priority list, enter more than one host name or IP address. If a host does not respond, the system tries the next host on the list. This continues until the new connection succeeds.
Base DN
Top level of the LDAP directory tree to use when searching for resources. For example, dc=test,dc=org.
Bind DN
Enter an administrative account name on the LDAP server. For example, cn=Manager,dc=test,dc=org.
Bind Password
Enter the password for the administrative account in Bind DN.
Enable
Select to activate the configuration. Leave checkbox clear to disable the configuration without deleting it.
Advanced Options
Name
Description
Allow Anonymous Binding
Select to disable authentication and allow read and write access to any client.
Kerberos Realm
Select an option configured on your system from the dropdown list.
Kerberos Principle
Select an option configured on your system from the dropdown list.
Encryption Mode
Select an encryption mode for the LDAP connection from the dropdown list. Select OFF to not encrypt the LDAP connection. Select ON to encrypt the LDAP connection with SSL on port 636. Select START_TLS to encrypt the LDAP connection with STARTTLS. This option uses the default LDAP port 389.
Certificate
A certificate is not required when using a username and password. A certificate is not required when using Kerberos authentication. Select a certificate added to your system from the dropdown list. The default option is freenas_default. Or add a new LDAP certificate-based authentication for the LDAP provider to sign. See Certificate Signing Requests for more information.
Validate Certificates
Select to validate the authenticity of the certificate.
Disable LDAP User/Group Cache
Select to disable caching LDAP users and groups in large LDAP environments. When disabled, LDAP users and groups do not display on dropdown lists. They are still accepted when typed into fields.
LDAP timeout
Default value is 10 seconds. Increase if Kerberos ticket queries are not responding within the default time.
DNS timout
Default value is 10 seconds. Increase if DNS queries take too long to respond.
Samba Schema (DEPRECATED - see help text)
Samba 4.13.0 deprecated Samba Schema. Select if SMB shares need LDAP authentication and the LDAP server is already configured with Samba attributes. If selected, specify the type of schema from the Schema dropdown list.
Select the Samba schema from the dropdown list. Options are RFC2307 or RFC2307BIS.
Click SAVE to save settings and return to the LDAP screen.
Click BASIC OPTIONS to return to the LDAP display of basic options only.
Click EDIT IDMAP to navigate to the Directory Services > Idmap screen.
3.8.4 - NIS Screen
Use the NIS screen to configure Network Information System (NIS) on TrueNAS CORE.
NIS is a client–server directory service protocol. Usage scenarios include the distribution of user and host names between networked computers.
Use the Directory Services > NIS screen to configure Network Information Service on your TrueNAS.
NIS is limited in scalability and security.
For modern networks, LDAP has replaced NIS.
Name
Description
NIS Domain
Enter a name and list any NIS domain host names or IP addresses. Press Enter to separate server entries.
NIS Servers
Enter a name and list any NIS server host names or IP addresses. Press Enter to separate server entries.
Secure Mode
Select to have ypbind(8) refuse to bind to any NIS server not running as root on a TCP port over 1024.
Manycast
Select for ypbind to bind to the fastest responding server.
Enable
Select to enable the configuration. Leave checkbox clear to disable the configuration without deleting it.
Click SAVE to save configuration settings.
Click REBUILD DIRECTORY SERVICE CACHE to resync the cache if it becomes out of sync. Or if fewer users than expected are available in the permissions editors.
3.8.5 - Kerberos Screens
Use the Kerberos screen to configure to configure Kerberos realms and keytabs on TrueNAS CORE.
Kerberos is an authentication protocol. It allows nodes on a network to perform identity checks in a secure manner.
Kerberos uses realms and keytabs to authenticate clients and servers.
Go to Directory Services > Kerberos to configure Kerberos. These screens configure Kerberos realms and keytabs on your TrueNAS.
Both Kerberos Realms and Kerberos Keytabs display a table of what is currently on the system.
Click the blue Columns button to display a list of options. These options customize the table display. This button is available for both the realms and keytabs screens.
Click ADD to display the settings screens for either realms or keytabs.
Select Kerberos Settings to open the settings screen but no table.
Kerberos Realms
Your network must contain a Key Distribution Center (KDC) to add a realm.
A Kerberos realm is an authorized domain that a Kerberos server can use to authenticate a client.
By default, TrueNAS creates a Kerberos realm for the local system.
Click ADD to create a realm on the TrueNAS. Click SUBMIT to save changes.
Basic Options
Name
Description
Realm
Enter a name for the realm.
Advanced Options
Name
Description
KDC
Enter the name of the Key Distribution Center. If there is more than one value separate the values by pressing Enter.
Admin Server
Define the server that performs all changes to the database. If there is more than one value separate the values by pressing Enter.
Password Server
Define the server that performs all password changes. If there is more than one value separate the values by pressing Enter.
Kerberos Keytabs
A keytab (key table) is a file that stores encryption keys for various authentication scenarios.
Kerberos keytabs allow systems and clients to join an Active Directory or LDAP. Keytabs make it possible to join without entering a password.
After generating the keytab, use the Add Kerberos Keytab screen to add it to your TrueNAS.
Kerberos Keytab
Name
Description
Name
Enter a name for the keytab.
Choose File
Opens a file explorer window where you can locate and select the keytab file.
Click SUBMIT to save settings or CANCEL to exit without saving.
Kerberos Settings
Use the Directory Services > Kerberos Settings screen to enter any extra settings.
Reference documentation for all screens within the Sharing menu option.
File sharing is a core benefit of a NAS. TrueNAS helps foster collaboration between users through network shares. TrueNAS can use AFP, iSCSI shares, Unix NFS shares, Windows SMB shares, and WebDAV shares.
Sharing Contents
AFP Share Screen: Provides information about the AFP Share screen in TrueNAS CORE.
Block Shares (iSCSI): Provides information about iSCSI terminology and configuration for TrueNAS CORE.
iSCSI Shares: Describes how to configure iSCSI block share on TrueNAS CORE.
Fibre Channel: Provides information about using Fibre Channel with TrueNAS CORE.
NFS Share Screen: Use the NFS share screen to configure Network File System (NFS) shares on your TrueNAS.
WebDAV Screen: Use the Sharing WebDAV screen to configure Web Distributed Authoring and Versioning (WebDAV) on your TrueNAS.
SMB Share Screen: Desctibes the SMB sharing screen in TrueNAS CORE
3.9.1 - AFP Share Screen
Provides information about the AFP Share screen in TrueNAS CORE.
Apple Filing Protocol (AFP) facilitates workgroup and Internet file sharing. It does this in a mixed-platform environment. Go to Sharing > AFP to set up an AFP share. Click ADD to edit AFP share settings.
AFP share creation is deprecated in CORE 13.0. A Recommendation dialog displays when accessing this screen and suggests sharing data with a different protocol.
Click CREATE AN SMB SHARE to display the SMB BASIC OPTIONS configuration screen.
Click CONTINUE WITH AFP SETUP to continue to the AFP > ADDBASIC OPTIONS configuration screen.
Click ADVANCED OPTIONS to display extra configuration settings. These configuration settings allow modifying the share Permissions and adding a Description. You can also specify any Auxiliary Parameters.
General Options
These settings display on the BASIC OPTIONS screen.
Name
Description
Path
Browse to the pool or dataset to share. Netatalk does not fully support nesting additional pools, datasets, or symbolic links beneath this path.
Name
The pool name that appears in the connect to server dialog of the computer. This is a required field.
Time Machine
Select to advertise TrueNAS as a Time Machine disk so Macs can find it. Configuring multiple shares for Time Machine use is not recommended. When multiple Macs share the same pool, low disk space issues and failed backups can occur.
Use as Home Share
Select to allow the share to host user home directories. Only one share can be the home share.
Enabled
Select to enable this AFP share. Clear checkmark to disable this AFP share without deleting it.
Permissions
These settings display on the BASIC OPTIONS screen and after clicking ADVANCED OPTIONS.
Name
Description
Default Umask
Umask used for newly created files. Default is 000. This means anyone can read, write, and execute.
File Permissions
Only works with Unix ACLs. New files created on the share are set with the selected permissions.
Directory Permissions
Only works with Unix ACLs. New directories created on the share are set with the selected permissions.
AFP3 Unix Privs
Select to enable Unix privileges supported by OSX 10.5 and higher. Do not enable this if the network contains Mac OSX 10.4 clients or lower as they do not support this feature. Only works with Unix ACLs.
Allow
Comma-delimited list of allowed users and/or groups where groupname begins with a @. Note that adding an entry denies any user or group that is not specified.
Read Only
Comma-delimited list of allowed users and/or groups where groupname begins with a @. Note that adding an entry denies any user or group that is not specified.
Allow Hosts
Allow host names or IP addresses to connect to the share. Click ADD to add multiple entries. If neither Allow Hosts or Deny Hosts contains an entry, then allow AFP share access for any host. If there is an entry in Allow Hosts list but none in Deny Hosts list, then only allow hosts on the Allow Hosts list. If there is a entry in Deny Hosts list but none in Allow Hosts list, then allow all hosts that are not on the Deny Hosts list. If there are entries in both Allow Hosts and Deny Hosts list, then allow all hosts that are on the Allow Hosts list. If there is a host not on the Allow Hosts and not on the Deny Hosts list, then allow it.
Deny
Comma-delimited list of allowed users and/or groups where groupname begins with a @. Note that adding an entry allows any user or group that is not specified.
Read/Write
Comma-delimited list of allowed users and/or groups where groupname begins with a @. Note that adding an entry allows any user or group that is not specified.
Deny Hosts
Deny host names or IP addresses access to the share. Click ADD to add multiple entries. If neither Allow Hosts or Deny Hosts contains an entry, then allow AFP share access for any host. If there is an entry in Allow Hosts list but none in Deny Hosts list, then only allow hosts on the Allow Hosts list. If there is an entry in Deny Hosts list but none in Allow Hosts list, then allow all hosts that are not on the Deny Hosts list. If there are entries in both Allow Hosts and Deny Hosts list, then allow all hosts that are on the Allow Hosts list. If there is a host not on the Allow Hosts and not on the Deny Hosts list, then allow it.
Other Options
These settings display after clicking ADVANCED OPTIONS.
Name
Description
Descriptions
Optional description.
Zero Device Number
Select to enable when the device number is inconstant across a reboot.
No Stat
Select to allow AFP to not stat the pool path when enumerating the pools list. This is useful for automounting or pools created by a preexec script.
Auxiliary Parameters
Additional afp.conf parameters not covered by other option fields.
Click SUBMIT to save settings and create the share.
Click CANCEL to exit the Add screen without saving and return to the AFP screen.
To edit an existing AFP share, go to Sharing > Apple Shares (AFP) and click .
3.9.2 - Block Shares (iSCSI)
Provides information about iSCSI terminology and configuration for TrueNAS CORE.
Internet Small Computer Systems Interface (iSCSI) represents standards for using Internet-based protocols for linking binary data storage device aggregations.
IBM and Cisco submitted the draft standards in March 2000. Since then, iSCSI has seen widespread adoption into enterprise IT environments.
iSCSI functions through encapsulation. The Open Systems Interconnection Model (OSI) encapsulates SCSI commands and storage data within the session stack. The OSI further encapsulates the session stack within the transport stack, the transport stack within the network stack, and the network stack within the data stack.
Transmitting data this way permits block-level access to storage devices over LANs, WANs, and even the Internet itself (although performance may suffer if your data traffic is traversing the Internet).
The table below shows where iSCSI sits in the OSI network stack:
OSI Layer Number
OSI Layer Name
Activity as it relates to iSCSI
7
Application
An application tells the CPU that it needs to write data to non-volatile storage.
6
Presentation
OSI creates a SCSI command, SCSI response, or SCSI data payload to hold the application data and communicate it to non-volatile storage.
5
Session
Communication between the source and the destination devices begins. This communication establishes when the conversation starts, what it talks about, and when the conversion ends. This entire dialogue represents the session. OSI encapsulates the SCSI command, SCSI response, or SCSI data payload containing the application data within an iSCSI Protocol Data Unit (PDU).
4
Transport
OSI encapsulates the iSCSI PDU within a TCP segment.
3
Network
OSI encapsulates the TCP segment within an IP packet.
2
Data
OSI encapsulates the IP packet within the Ethernet frame.
1
Physical
The Ethernet frame transmits as bits (zeros and ones).
Unlike other sharing protocols on TrueNAS, an iSCSI share allows block sharing and file sharing.
Block sharing provides the benefit of block-level access to data on the TrueNAS.
iSCSI exports disk devices (zvols on TrueNAS) over a network that other iSCSI clients (initiators) can attach and mount.
iSCSI Terminology
Challenge-Handshake Authentication Protocol (CHAP): an authentication method that uses a shared secret and three-way authentication to determine if a system is authorized to access the storage device. It also periodically confirms that the session has not been hijacked by another system. In iSCSI, the client (initiator) performs the CHAP authentication.
Mutual CHAP: a CHAP type in which both ends of the communication authenticate to each other.
Internet Storage Name Service (iSNS): protocol for the automated discovery of iSCSI devices on a TCP/IP network.
Extent: the storage unit to be shared. It can either be a file or a device.
Portal: indicates which IP addresses and ports to listen on for connection requests.
Initiators and Targets: iSCSI introduces the concept of initiators and targets which act as sources and destinations respectively. iSCSI initiators and targets follow a client/server model. Below is a diagram of a typical iSCSI network. The TrueNAS storage array acts as the iSCSI target and can be accessed by many of the different iSCSI initiator types, including software and hardware-accelerated initiators.
The iSCSI protocol standards require that iSCSI initiators and targets is represented as iSCSI nodes. It also requires that each node is given a unique iSCSI name. To represent these unique nodes via their names, iSCSI requires the use of one of two naming conventions and formats, IQN or EUI. iSCSI also allows the use of iSCSI aliases which are not required to be unique and can help manage nodes.
Logical Unit Number (LUN): LUN represents a logical SCSI device. An initiator negotiates with a target to establish connectivity to a LUN. The result is an iSCSI connection that emulates a connection to a SCSI hard disk. Initiators treat iSCSI LUNs as if they were a raw SCSI or SATA hard drive. Rather than mounting remote directories, initiators format and directly manage filesystems on iSCSI LUNs. When configuring multiple iSCSI LUNs, create a new target for each LUN. Since iSCSI multiplexes a target with multiple LUNs over the same TCP connection, there can be TCP contention when more than one target accesses the same LUN. TrueNAS supports up to 1024 LUNs.
Jumbo Frames: Jumbo frames are the name given to Ethernet frames that exceed the default 1500 byte size. This parameter is typically referenced by the nomenclature as a maximum transmission unit (MTU). A MTU that exceeds the default 1500 bytes necessitates that all devices transmitting Ethernet frames between the source and destination support the specific jumbo frame MTU setting, which means that NICs, dependent hardware iSCSI, independent hardware iSCSI cards, ingress and egress Ethernet switch ports, and the NICs of the storage array must all support the same jumbo frame MTU value. So, how does one decide if they should use jumbo frames?
Administrative time is consumed configuring jumbo frames and troubleshooting if/when things go sideways. Some network switches might also have ASICs optimized for processing MTU 1500 frames while others might be optimized for larger frames. Systems administrators should also account for the impact on host CPU utilization. Although jumbo frames are designed to increase data throughput, it may measurably increase latency (as is the case with some un-optimized switch ASICs); latency is typically more important than throughput in a VMware environment. Some iSCSI applications might see a net benefit running jumbo frames despite possible increased latency. Systems administrators should test jumbo frames on their workload with lab infrastructure as much as possible before updating the MTU on their production network.
TrueNAS Enterprise
Asymmetric Logical Unit Access (ALUA): ALUA allows a client computer to discover the best path to the storage on a TrueNAS system.
HA storage clusters can provide multiple paths to the same storage.
For example, the disks are directly connected to the primary computer and provide high speed and bandwidth when accessed through that primary computer.
The same disks are also available through the secondary computer, but speed and bandwidth are restricted.
With ALUA, clients automatically ask for and use the best path to the storage.
If one of the TrueNAS HA computers becomes inaccessible, the clients automatically switch to the next best alternate path to the storage.
When a better path becomes available, as when the primary host becomes available again, the clients automatically switch back to that better path to the storage.
Do not enable ALUA on TrueNAS unless it is also supported by and enabled on the client computers. ALUA only works when enabled on both the client and server.
iSCSI Configuration Methods
There are a few different approaches for configuring and managing iSCSI-shared data:
TrueNAS Enterprise
TrueNAS Enterprise customers that use vCenter to manage their systems can use the TrueNAS vCenter Plugin to connect their TrueNAS systems to vCenter and create and share iSCSI datastores.
This is all managed through the vCenter web interface.
TrueNAS CORE web interface: the TrueNAS web interface is fully capable of configuring iSCSI shares. This requires creating and populating zvol block devices with data, then setting up the iSCSI Share. TrueNAS Enterprise licensed customers also have additional options to configure the share with Fibre Channel.
TrueNAS SCALE web interface: TrueNAS SCALE offers a similar experience to TrueNAS CORE for managing data with iSCSI; create and populate the block storage, then configure the iSCSI share.
Block Share (iSCSI) Contents
For more information on iSCSI shares also see:
iSCSI Shares: Describes how to configure iSCSI block share on TrueNAS CORE.
Fibre Channel: Provides information about using Fibre Channel with TrueNAS CORE.
3.9.2.1 - iSCSI Shares
Describes how to configure iSCSI block share on TrueNAS CORE.
Users can configure an iSCSI block share using either the wizard or the individual configuration screens. The wizard steps users through the configuration process in an ordered sequence. Using the seven tabs on the iSCSI screen allows users to configure settings in any order they choose (a manual process).
iSCSI Wizard Configuration Screens
The iSCSI Wizard configuration forms guide users through the process of setting up an iSCSI block share. Click WIZARD to display the first configuration screen.
Wizard Navigation
Use Next to advance to the next wizard configuration form.
Use Back to return to a previous wizard configuration form.
Use Cancel to exit the configuration wizard.
Wizard Configuration Screens and Settings
Create or Choose Block Device Screen Settings
Create or Choose Block Device
Setting
Description
Name
Type a lower case alphanumeric character string that can include a dot (.), dash (-), or colon (:). Keep the string short and do not exceed 63 characters.
Extent Type
Choose either Device or File. If selecting Device use a zvol created for the share. If selecting File also select the path to the extent and include the file size.
Device
Required field. Create New or select from devices listed
Sharing Platform
Select from the options provided: VMware: extent block size 512b, TCP enabled, no Xen compat mode, SSD speed Xen: Extent block size 512b, TCP enabled, Xen compat mode enabled, SSD speed Legacy OS: Extent block size 512b, TCP enabled, no Xen compat mode, SSD speed Modern OS: Extent block size 4k, TCP enabled, no Xen compat mode, SSD speed Use Moderon OS for updated operating systems like Linux OS.
Portal Screen Settings
Portal
The Wizard Portal configuration form includes only the Portal field unless you select Create New on the dropdown list.
Setting
Description
Portal
Select either Create New or an existing portal from the dropdown list. Selecting Create New displays the Discovery Authentication Method, Discovery Authentication Group, IP Address and Port fields.
Discovery Authentication Method
Required if creating a new portal. Select either NONE, CHAP or Mutual CHAP from the dropdown list. If NONE you can leave Discovery Authentication Group set to NONE as well.
Discovery Authentication Group
Required if the discovery authentication method is set to CHAP or MUTUAL CHAP. Select either NONE or Create New on the dropdown list. If Discovery Authentication Method is set to NONE you can select NONE here but if Discovery Authentication Method is set to CHAP or MUTUAL CHAP select CREATE NEW. This displays the Group ID, User, Secret and Secret (Confirm) configuration fields.
Group ID
Displays after selecting Create New in the Discovery Authentication Group field. Group IDs allow you to configure different groups with different authentication profiles. For example, all users with a group ID of 1 inherits the authentication profile associated with group 1. Type a number for the group ID.
User
Displays after selecting Create New in for the discovery authentication group. Type the name of the user account to create for the CHAP authentication with the user on the remote system. For example, you could use the initiator name as the user name.
Secret
Displays after selecting Create New as the discovery authentication group. Type a user password of at least 12 but no more than 16 characters.
Secret (Confirm)
Displays after selecting Create New as the discovery authentication group. Retype the user password entered into the Secret field. Click the icon to display the characters you typed to verify you typed the desired password string. Click to hide the password string.
IP Address
Select the IP address from the dropdown list. This is the IP address to list on the portal. Click ADD to add more IP addresses if desired or necessary. Click DELETE to remove any IP addresses and ports you added after clicking ADD. Use 0.0.0.0 to listen on all IPv4 addresses or use :: to listen on all IPv6 IP addresses.
Port
Type the TCP port used to access the iSCSI target. The default port is 3260.
ADD
Saves the selected IP address and allows the user to add another IP address. New IP address and port entry fields includes the DELETE button allows you to remove the new entry if necessary.
DELETE
Displays after clicking ADD. Removes the new IP address and port line created after clicking ADD.
Initiator Screen Settings
Initiator
Setting
Description
Initiators
Leave blank to allow all host names or to enter a list of initiator host names. Use the keyboard Enter after entering each host name to save.
Authorized Networks
Network addresses allowed to use this initiator. Leave blank to allow all networks or list all network addresses with a CIDR mask. Separate each entry with the keyboard Enter.
Confirm Options Screen Settings
Confirm Options Form
Use Back to return to a previous configuration form to make any changes on that form.
Use SUBMIT to save the settings and the new iSCSI share.
Manual Setup Screens
The manual configuration screens allow you to add or edit an iSCSI block share.
There are seven configuration screens accessed from tabs at the top of the iSCSI screen.
Unlike the wizard configuration option, you can move from one screen to another in any sequence.
Manual Configuration Screens and Settings
Target Global Configuration Tab
The Target Global Configuration screen allows user to add or edit global configuration settings that apply to all iSCSI shares.
Setting
Description
Base Name
Lowercase alphanumeric characters plus dot (.), dash (-), and colon (:) are allowed. See the “Constructing iSCSI names using the iqn.format” section of RFC3721.
ISNS Servers
Host names or IP addresses of the ISNS servers to register with the iSCSI targets and portals of the system. Use keyboard Enter. to separate entries.
Pool Available Space Threshold (%)
Generates an alert when the pool has this percent space remaining. It is typical to configure this at the pool level when using zvols or at the extent level for both file and device-based extents.
Click SAVE before leaving the global configuration settings screen.
Portals Tab
The Portals screen displays a list of configured portals. It lets users create new portals or edit the existing ones in the list.
Use the blue Columns dropdown list to display a list of available options to add or remove columns in the Portals table. Select from Unselect All, Listen, Description, Discovery Auth Method, Discover Auth Group or Reset to Defaults to reverse any changes you made to the table.
Use ADD to display the Portals Add configuration form.
Click the more_vert icon for the portal and select Edit to display the Portal Edit configuration form.
Both the Add and Edit forms have the same settings fields.
Basic Info
Setting
Description
Description
Optional description. Portals are automatically assigned a numeric group.
Authentication Method and Group
Setting
Description
Discovery Authentication Method
iSCSI supports multiple authentication methods that the target uses to discover valid devices. None allows anonymous discovery while CHAP and Mutual CHAP require authentication.
Discovery Authentication Group
Group ID created in Authorized Access. Required when the discovery authentication method is CHAP or Mutual CHAP.
IP Address
Setting
Description
IP Address
Select the IP addresses the portal uses to listened on. Click ADD to add IP addresses with a different network port. 0.0.0.0 listens on all IPv4 addresses and :: listens on all IPv6 addresses.
Port
TCP port used to access the iSCSI target. Default is 3260.
ADD
Adds another IP address row.
Initiators Groups Tab
The Initiators Groups screen displays a lis of configured initiators. It lets users create new authorized access client groups or edit existing ones on the list.
Use the blue Columns dropdown list to display a list of available options to add or remove columns in the Initiator Groups table. Select from Unselect All, Initiators, Authorized Networks, Description or Reset to Defaults to reverse any changes you made to the table.
Use ADD to display the Initiators Add configuration screen.
Click the more_vert icon for the initiator and select Edit to display the Initiators Edit configuration form.
Both the Add and Edit forms have the same settings fields.
Setting
Description
Connected Initiators
Initiators currently connected to the system, displayed in the IQN format with an IP address. Set initiators and click an to add the initiators to either the Allowed Initiators or Authorized Networks lists. Click Refresh to update the list of connected initiators.
Allow All Initiators
Allows all initiators when selected. If not selected, configure your own allowed initiators and authorized networks.
Allowed Initiators (IQN)
Initiators allowed access to this system. Enter an iSCSI Qualified Name (IQN) and click the to add it to the list. Example: iqn.1994-09.org.freebsd:freenas.local.
Authorized Networks
Network addresses allowed use this initiator. Each address can include an optional CIDR netmask. Click to add the network address to the list. Example: 192.168.2.0/24.
Description
Enter any notes about initiators.
REFRESH
Refreshes the list displayed in Connected Initiators.
SAVE
Saves changes made on the Add or Edit initiator screens.
CANCEL
Discards changes made on and closes the Add or Edit initiator screens.
Authorized Access Tab
The Authorized Access screen displays a list of authorized access networks. It lets users create new authorized access networks or edit existing ones in the list.
Use the blue Columns dropdown list to display a list of available options to add or remove columns in the Initiator Groups table. Select from Unselect All, User, Peer User or Reset to Defaults to reverse any changes you made to the table.
Use ADD to display the Authorized Access Add configuration screen.
Click the more_vert icon for the authorized access and select Edit to display the Authorized Access Edit configuration form.
Both the Add and Edit forms have the same settings fields.
Group
Setting
Description
Group ID
Allow you to configure different groups with different authentication profiles. For example, all users with a group ID of 1 inherit the authentication profile associated with Group 1.
User
Setting
Description
User
User account to create for CHAP authentication with the user on the remote system. Many initiators use the initiator name as the user name.
Secret
User password of at least 12 but no more than 16 characters. Click the icon to display the characters you typed to verify you typed the desired password string. Click to hide the password string.
Secret (Confirm)
Confirm the user password.
Peer User
Setting
Description
Peer User
Only entered when configuring mutual CHAP. Usually the same value as User.
Peer Secret
Mutual secret password. Required when Peer User is set up. Must be different than the password used in Secret. Click the icon to display the characters you typed to verify you typed the desired password string. Click to hide the password string.
Peer Secret (Confirm)
Confirm the mutual secret password.
Targets Tab
The Targets screen displays a list of storage resources configured in the system. It lets users create new TrueNAS storage resources or edit existing ones in the list.
Use the blue Columns dropdown list to display a list of available options to add or remove columns in the Targets table. Select from Unselect All, Target Alias or Reset to Defaults to reverse any changes you made to the table.
Use ADD to display the Targets Add configuration screen.
Click the more_vert icon for the target and select Edit to display the Targets Edit configuration form.
Both the Add and Edit forms have the same settings fields.
Basic Info
Setting
Description
Target Name
The base name for the target. It is automatically prepended if the target name does not start with iqn. Allowed characters are lowercase alphanumeric characters plus dot (.), dash (-), and colon (:). See the “Constructing iSCSI names using the iqn.format” section of RFC3721.
Target Alias
Optional user-friendly name for the Target Name.
iSCSI Group
Setting
Description
Portal Group ID
Leave empty or select an existing portal to use. If you click the dropdown arrow, you must select a portal group ID from the list.
Initiator Group ID
Select the existing initiator group that has access to the target. Leave empty if Portal Group ID is empty.
Authentication Method
Select None, CHAP, or Mutual CHAP.
Authentication Group Number
Select None or an integer. This value represents the number of existing authorized accesses.
Extents Tab
The Extents screen displays a list of available shared storage units configured on the system. It lets users create new shared storage units or edit existing ones in the list.
Use the blue Columns dropdown list to display a list of available options to add or remove columns in the Extents table. Select from Unselect All, Description, Serial, NAA, Enabled or Reset to Defaults to reverse any changes you made to the table.
Use ADD to display the Extents Add configuration screen.
Click the more_vert icon for the shared storage unit and select Edit to display the Extents Edit configuration form.
Both the Add and Edit forms have the same settings fields.
Basic Info
Setting
Description
Name
Name of the extent. An extent with a size of zero can be an existing file within the pool or dataset. An extent with a size other than zero cannot be an existing file within the pool or dataset.
Description
Type any notes about this extent.
Enabled
Select to enable the iSCSI extent.
Type
Setting
Description
Extent Type
Specify the storage unit type. Select Device or File from the dropdown list. Device provides virtual storage access to zvols, zvol snapshots, or physical devices. File provides virtual storage access to a single file.
Device
Only displays only if Device is the selected in Extent Type. Select the unformatted disk, controller, or zvol snapshot.
Path to the Extent
Only displays if the Extent Type is set to File. Browse to an existing file. Create a new file by browsing to a dataset and appending /{filename.ext} to the path. Users cannot create extents inside a jail root directory.
Filesize
Only displays if the Extent Type is set to File. Enter 0 to use the actual file size and it requires that the file already exists. Otherwise, specify the file size for the new file.
Logical Block Size
Leave at the default of 512 unless the initiator requires a different block size. Select from 512, 1024, 2048 or 4096 on the dropdown list.
Disable Physical Block Size Reporting
Select if the initiator does not support physical block size values over 4K (MS SQL).
Compatibility
Setting
Description
Enable TPC
Select to allow an initiator to bypass normal access control and access any scannable target. This allows xcopy operations that are otherwise blocked by access control.
Xen initiator compat mode
Select when using Xen as the iSCSI initiator.
LUN RPM
Do not change this setting when using Windows as the initiator! Only change the default SSD setting if in a large environment where you need a number of systems using a specific RPM for accurate reporting statistics. Options are SSD, 5400, 7200, 10000 or 15000.
Read-only
Select to prevent the initiator from initializing this LUN.
Associated Targets Tab
The Associated Targets screen displays a list of associated TrueNAS storage resources configured on the system. It lets users create new associated TrueNAS storage resources or edit existing ones in the list.
Use the blue Columns dropdown list to display a list of available options to add or remove columns in the Associated Targets table. Select from Unselect All, LUN ID, Extent or Reset to Defaults to reverse any changes you made to the table.
Use ADD to display the Associated Targets Add configuration screen.
Click the more_vert icon for the associated TrueNAS storage resource and select Edit to display the Associated Targets Edit configuration form.
Both the Add and Edit forms have the same settings fields.
Setting
Description
Target
Select an existing target. This is a required field.
LUN ID
Select the value or enter a value between 0 and 1023. Some initiators expect a value below 256. Leave this field blank to automatically assign the next available ID.
Extent
Select an existing extent. This is a required field.
3.9.2.2 - Fibre Channel
Provides information about using Fibre Channel with TrueNAS CORE.
TrueNAS Enterprise
Fibre Channel is an Enterprise feature in TrueNAS CORE.
Only TrueNAS systems licensed for Fibre Channel have the Fibre Channel Ports tab on the Sharing > Block Shares (iSCSI) screen.
Fibre Channel is a high-speed data transfer protocol providing in-order, lossless delivery of raw block data.
Fibre Channel is primarily used to connect computer data storage to servers in storage area networks in commercial data centers.
The Fibre Channel protocol is fast, cost effective, and reliable over a wide variety of storage workloads.
Initiators and Authorized Access screens only apply to iSCSI block shares and can be ignored when configuring Fibre Channel ports.
Fibre Channel Ports
The Fibre Channel Ports screen displays a table of ports configured on the TrueNAS.
Use the blue Columns button to display options to can change the Fibre Channel table display. Options are Unselect All, WWPN, State or Reset to Defaults.
Click chevron_right to expand the Fibre Channel Ports options.
Fibre Channel Mode Settings
The Mode radio buttons display additional information on the screen based on the selection made.
Name
Description
Initiator
Sets the port as an initiator. Displays Connected Initiators on the right side of the screen for the selected target.
Target
Sets the port as a target. Dipslays the Targets dropdown list field on the right side of the screen. Select the port from the list. Connected Initiators for the selected target display below the dropdown field.
Disabled
Disables the selected Fibre Channel port.
SAVE after making any setting change.
Targets Settings for Fibre Channels
The Targets > Add screen Target Mode dropdown list includes options to select iSCSI, Fibre Channel, or Both.
Associated Target Settings for Fibre Channels
The Targets > Add screen Target Mode dropdown list includes options to select iSCSI, Fibre Channel, or Both.
3.9.3 - NFS Share Screen
Use the NFS share screen to configure Network File System (NFS) shares on your TrueNAS.
Unix and Unix-like operating systems often use the Network File System (NFS) protocol. NFS shares data across a network as part of a distributed file system. Go to Sharing > Unix Shares (NFS) to access the NFS screen to create a Network File System (NFS) share on TrueNAS.
Click COLUMNS to change the NSF table view. Options include Unselect All, Description, Enabled or Reset to Defaults.
Click ADD to open the BASIC OPTIONS configuration screen.
NFS Share Basic Option Settings
Name
Description
Path
Type or browse to the full path to the pool or dataset to share. Click ADD to add another Path setting field. Repeat to configure multiple paths.
Description
Enter any notes or reminders about the share.
All dirs
Select checkbox to allow the client to mount any subdirectory within the Path. Clear to only allow clients to mount the Path endpoint.
Quiet
Select to suppress some syslog diagnostics to avoid error messages. See exports(5) for examples. Clear checkbox to allow all syslog diagnostics. This can lead to additional cosmetic error messages.
Enabled
Select checkbox to enable this NFS share. Clear checkbox to disable this NFS share without deleting the configuration.
Click ADVANCED OPTIONS to display extra settings. These settings allow tuning the share access permissions and defining authorized networks.
NFS Share Advanced Option Settings
Access Settings
Name
Description
Read Only
Select checkbox to prohibit writing to the share. Clear checkbox to allow writing to the share.
Maproot User
Enter a new string or select a user to apply that user permissions to the root user. Dropdown list displays a list of all users on the system.
Maproot Group
Enter a new string or select a group to apply that group permissions to the root user. Dropdown list displays a list of all groups on the system.
Mapall User
Enter a new string or select a user to apply permissions for the chosen user to all clients.
Mapall Group
Enter a new string or select a group to apply permissions for the chosen group to all clients.
Authorized Networks
Enter an allowed network in network/mask CIDR notation. Click ADD to define another authorized network. Defining an authorized network restricts access to all other networks. Leave empty to allow all networks.
Authorized Hosts and IP addresses
Enter a host name or IP address to allow that system access to the NFS share. Click ADD to define another allowed system. Defining authorized systems restricts access to all other systems. Leave field empty to allow all systems access to the share.
Click SUBMIT to save NFS share settings.
Click CANCEL to exit without saving and return to the NFS Shares screen.
To edit an existing NFS share click the more_vert for the share and select Edit.
The options available are identical to the ADD share setting options.
3.9.4 - WebDAV Screen
Use the Sharing WebDAV screen to configure Web Distributed Authoring and Versioning (WebDAV) on your TrueNAS.
Web Distributed Authoring and Versioning (WebDAV) is an extension of HTTP. It is a protocol designed to help with web content authoring and management. Use the Sharing WebDAV screen to configure WebDAV on your TrueNAS.
Click COLUMNS to change the columns displayed in the table. Options are Select All, Description, Path, Enabled, Read Only, Change User and Group Owners or Reset to Defaults.
Click ADD to open the WebDAV configuration screen.
Name
Description
Name
Enter a name for the share.
Description
Optional.
Path
Browse to the pool or dataset to share.
Read Only
Select to prohibit users from writing to this share.
Change User & Group Ownership
Change existing ownership of all files in the share to user webdav and group webdav. Clearing the check mark means you must manually set ownership of the files accessed through WebDAV to the webdav or www user/group.
Enabled
Select to enable this WebDAV share. Leave checkbox clear to disable this WebDAV share without deleting it.
3.9.5 - SMB Share Screen
Desctibes the SMB sharing screen in TrueNAS CORE
Server Message Block (SMB) is a file sharing protocol. Windows and other operating systems use SMB.
Go to Sharing > Windows Shares (SMB) to display the SMB screen and setup SMB shares on your TrueNAS.
Click Columns to change the information displayed in the table. Options are Unselect All, Path, Description, Enabled and Reset to Defaults.
Click Add to display the BASIC Options settings screen.
Basic Options
Name
Description
Path
Use the file browser or click the /mnt to select the pool, dataset or directory to share.
Name
Enter a name for the SMB share.
Purpose
Select a preset purpose configuration. This locks in predetermined values for the share. This includes Advanced Options, as well as the Path Suffix. Select from the dropdown list. Options are: No presets Default share parameters Multi-user time machine Multi-protocol (AFP/SMB) shares Multi-protocol (NFSv3/SMB) shares Private SMB Datasets and Shares SMB WORM. Files become readonly via SMB after 5 minutes. Note: The SMB WORM preset only impacts writes over the SMB protocol. Prior to deploying this option in a production environment the user needs to determine whether the feature meets his / her requirements. See “What do all the presets do?” for more information on presets.
Description
Optional. Explains the purpose of the share.
Enabled
Select to enable this SMB share. Clear checkbox to disable the share without deleting the configuration.
What do all the presets do?
The following table shows the preset options for the different Purposes and if those options are locked.
An [x] indicates the option is enabled, [ ] means the option is disabled, and [text] indicates a specific value:
Default share parameters
Multi-user time machine
Multi-protocol (AFP/SMB) shares
Multi-protocol (NFSv3/SMB) shares
Private SMB Datasets and Shares
Files become readonly of SMB after 5 minutes
[x] Enable ACL (locked)
[x] Enable ACL (unlocked)
[x] Enable ACL (locked)
[ ] Enable ACL (locked)
[ ] Enable ACL (unlocked)
[ ] Enable ACL (unlocked)
[ ] Export Read Only (locked)
[ ] Export Read Only (unlocked)
[ ] Export Read Only (unlocked)
[ ] Export Read Only (unlocked)
[ ] Export Read Only (unlocked)
[ ] Export Read Only (unlocked)
[x] Browsable to Network Clients (locked)
[x] Browsable to Network Clients (unlocked)
[x] Browsable to Network Clients (unlocked)
[x] Browsable to Network Clients (unlocked)
[x] Browsable to Network Clients (unlocked)
[x] Browsable to Network Clients (unlocked)
[ ] Allow Guest Access (unlocked)
[ ] Allow Guest Access (unlocked)
[ ] Allow Guest Access (unlocked)
[ ] Allow Guest Access (unlocked)
[ ] Allow Guest Access (unlocked)
[ ] Allow Guest Access (unlocked)
[ ] Access Based Share Enumeration (locked)
[ ] Access Based Share Enumeration (unlocked)
[ ] Access Based Share Enumeration (unlocked)
[ ] Access Based Share Enumeration (unlocked)
[ ] Access Based Share Enumeration (unlocked)
[ ] Access Based Share Enumeration (unlocked)
[ ] Hosts Allow (locked)
[ ] Hosts Allow (unlocked)
[ ] Hosts Allow (unlocked)
[ ] Hosts Allow (unlocked)
[ ] Hosts Allow (unlocked)
[ ] Hosts Allow (unlocked)
[ ] Hosts Deny (locked)
[ ] Hosts Deny (unlocked)
[ ] Hosts Deny (unlocked)
[ ] Hosts Deny (unlocked)
[ ] Hosts Deny (unlocked)
[ ] Hosts Deny (unlocked)
[ ] Use as Home Share (locked)
[ ] Use as Home Share (unlocked)
[ ] Use as Home Share (unlocked)
[ ] Use as Home Share (unlocked)
[ ] Use as Home Share (unlocked)
[ ] Use as Home Share (unlocked)
[ ] Time Machine (locked)
[ ] Time Machine (unlocked)
[ ] Time Machine (unlocked)
[ ] Time Machine (unlocked)
[ ] Time Machine (unlocked)
[ ] Time Machine (unlocked)
[x] Enable Shadow Copies (locked)
[x] Enable Shadow Copies (unlocked)
[x] Enable Shadow Copies (unlocked)
[x] Enable Shadow Copies (unlocked)
[x] Enable Shadow Copies (unlocked)
[x] Enable Shadow Copies (unlocked)
[ ] Export Recycle Bin (locked)
[ ] Export Recycle Bin (unlocked)
[ ] Export Recycle Bin (unlocked)
[ ] Export Recycle Bin (unlocked)
[ ] Export Recycle Bin (unlocked)
[ ] Export Recycle Bin (unlocked)
[ ] Use Apple-style Character Encoding (locked)
[ ] Use Apple-style Character Encoding (unlocked)
[x] Use Apple-style Character Encoding (locked)
[x] Use Apple-style Character Encoding (unlocked)
[x] Use Apple-style Character Encoding (unlocked)
[x] Use Apple-style Character Encoding (unlocked)
[x] Enable Alternate Data Streams (locked)
[x] Enable Alternate Data Streams (unlocked)
[x] Enable Alternate Data Streams (locked)
[ ] Enable Alternate Data Streams (locked)
[ ] Enable Alternate Data Streams (unlocked)
[ ] Enable Alternate Data Streams (unlocked)
[x] Enable SMB2/3 Durable Handles (locked)
[x] Enable SMB2/3 Durable Handles (unlocked)
[ ] Enable SMB2/3 Durable Handles (locked)
[ ] Enable SMB2/3 Durable Handles (locked)
[ ] Enable SMB2/3 Durable Handles (unlocked)
[ ] Enable SMB2/3 Durable Handles (unlocked)
[ ] Enable FSRVP (locked)
[ ] Enable FSRVP (unlocked)
[ ] Enable FSRVP (locked)
[ ] Enable FSRVP (unlocked)
[ ] Enable FSRVP (unlocked)
[ ] Enable FSRVP (unlocked)
[ ] Path Suffix (locked)
[%U] Path Suffix (locked)
[%U] Path Suffix (unlocked)
[%U] Path Suffix (unlocked)
[%U] Path Suffix (locked)
[ ] Path Suffix (locked)
[ ] Auxiliary Parameters (unlocked)
[ ] Auxiliary Parameters (unlocked)
[ ] Auxiliary Parameters (unlocked)
[ ] Auxiliary Parameters (unlocked)
[ ] Auxiliary Parameters (unlocked)
[ ] Auxiliary Parameters (unlocked)
Advanced Options
Access and Other Options are the two options groups.
Access settings allow systems or users to access or change the shared data.
Name
Description
Enable ACL
Select to add Access Control List (ACL) support to the share. Leave checkbox clear to disable ACL support and delete any existing ACL for the share.
Export Read Only
Select to prohibit writes to the share. Leave checkbox clear to allow writes to the share.
Browsable to Network Clients
Select to include this share name when browsing shares. Home shares are only visible to the owner regardless of this setting.
Allow Guest Access
Select to make privileges the same as the guest account. Windows 10 version 1709 and Windows Server version 1903 have disabled guest access. Guest access for these clients requires extra client-side configuration.
MacOS clients: Trying to connect as a user that does not exist in TrueNAS does not default to the guest account. The Connect As: Guest option must be specifically chosen in MacOS to log in as the guest account. See the Apple documentation for more details.
Access Based Share Enumeration
Select to restrict share visibility to users with read or write access to the share. See the smb.conf manual page.
Hosts Allow
Enter a list of allowed host names or IP addresses. Separate entries by pressing Enter. A more detailed description with examples see here.
Hosts Deny
Enter a list of denied host names or IP addresses. Separate entries by pressing Enter.
Host Allow and Hosts Deny Fields
The Hosts Allow and Hosts Deny fields set up different access scenarios:
If neither Hosts Allow or Hosts Deny contain an entry, then allow SMB share access for any host.
If there is an entry in Hosts Allow list but none in Hosts Deny list, then only allow hosts on the Hosts Allow list.
If there is an entry in Hosts Deny list but none in Hosts Allow list, then allow all hosts that are not on the Hosts Deny list.
If there are both an entry in Hosts Allow and Hosts Deny list, then allow all hosts that are on the Hosts Allow list. If there is a host not on the Hosts Allow and not on the Hosts Deny list, then allow it.
The Other Options have settings for improving Apple software compatibility. There are also ZFS snapshot features, and other advanced features.
Name
Description
Use as Home Share
Select to allow the share to host user home directories. Gives each user a personal home directory when connecting to the share. This personal home directory is not accessible by other users. This allows for a personal, dynamic share. It is only possible to use one share as the home share. See the configuring Home Share article for detailed instructions.
Select to allow export ZFS snapshots as Shadow Copies for Microsoft Volume Shadow Copy Service (VSS) clients.
Export Recycle Bin
When selected, moves files deleted from the same dataset to a recycle bin located in that dataset. These files do not take any extra space.
Use Apple-style Character Encoding
Select to convert NTFS illegal characters in the same manner as MacOS SMB clients. By default, Samba uses a hashing algorithm for NTFS illegal characters.
Enable Alternate Data Streams
Select to allow multiple NTFS data streams. Disabling this option causes MacOS to write streams to files on the file system.
Enable SMB2/3 Durable Handles
Select to allow using open file handles that can withstand short disconnections. Support for POSIX byte-range locks in Samba is also disabled. This option is not recommended when configuring multi-protocol or local access to files.
Enable FSRVP
Select to enable support for the File Server Remote VSS Protocol (FSVRP). This protocol allows Remote Procedure Call (RPC) clients to manage snapshots for a specific SMB share. The share path must be a dataset mountpoint. Snapshots have the prefix fss- followed by a snapshot creation timestamp. A snapshot must have this prefix for an RPC user to delete it.
Path Suffix
Appends a suffix to the share connection path. This provides unique shares on a per-user, per-computer, or per-IP address basis. Suffixes can contain a macro. See the smb.conf manual page for a list of supported macros. The connectpath must be preset before a client connects.
Click Submit to save setings. This creates the share and adds it to the Sharing > Windows Shares (SMB) list.
Click CANCEL to exit without saving and return to the main SMB screen.
3.10 - Services
Provides information on the Services screen and lists other services UI reference articles.
The Services screen lists all services available on the TrueNAS.
Activate or configure a service on the Services page.
Use the right slider to scroll down to the bottom of the list of services or click on page 2, or the or arrows.
To locate a service, type in the Filter Search field to narrow down the list of services.
Select Start Automatically for configured services that need to start after the system boots.
Click the toggle to start or stop the service, depending on the current state. Hover the mouse over the toggle to see the current state of that service. The toggle turns blue when it is running.
Click the edit icon to display the settings screen for a service.
Sharing provides documentation for services related to data sharing. Tasks provides documentation for services related to automated tasks.
Services Contents
AFP Screen: Describes the AFP screen in TrueNAS CORE.
Use the Services AFP screen to configure Apple Filing Protocol (AFP) service on your TrueNAS.
Click SAVE to save settings.
Click CANCEL to exit without saving and return to the Services screen.
General Option
Name
Description
Database Path
The database information stored in the path. If the pool has read-only status, the path must still be writable.
Access
Name
Description
Guest Account
Select an account to use for guest access. This account must have permissions to the shared pool or dataset. Any client connecting to the guest service has the privileges of the guest account user. This user must exist in the password file, but does not need a valid login. Root user cannot be the guest account.
Guest Access
Select to disable the password prompt that displays before clients access AFP shares.
Max Connections
Maximum number of simultaneous connections permitted via AFP. The default limit is 50.
Chmod Request
Indicates how to handle access control lists. Select Ignore to disregard requests. Selecting Ignore also gives the parent directory ACL inheritance full control over new items. Select Preserve to preserve ZFS ACEs for named users and groups or the POSIX ACL group mask. Select Simple to configure chmod() as requested without any extra steps.
Map ACLs
Maps permissions for authenticated users. Select Rights (default, Unix-style permissions), None, or Mode (ACLs).
Other Options
Name
Description
Log Level
Record AFP service messages up to the specified log level in the system log. The system logs severe and warning level messages by default.
Bind Interfaces
Specify the IP addresses to listen for AFP connections. Leave blank to bind to all available IPs. If no IP addresses specified, advertise the first IP address of the system. If no IP addresses specified, listen for any incoming request.
ISPs often change the IP address of the system. With Dynamic Domain Name Service (DDNS) the current IP address continues to point to a domain name. This provides uninterrupted access to TrueNAS.
General Options
Name
Description
Provider
Select the provider from the dropdown list of supported providers. If a specific provider is not listed, select Custom Provider. Enter the information in the Custom Server and Custom Path fields.
Custom Server
Displays after selecting Custom Provider in the Provider field. Enter the DDNS server name. For example, members.dyndns.org denotes a server like dyndns.org.
Custom Path
Displays after selecting Custom Provider in the Provider field. Enter the DDNS server path. Path syntax can vary by provider. Obtain path syntax from that provider. For example, /update?hostname= is a simple path for the update.twodns.de custom sever. The host name is automatically appended by default. For more examples see In-A-Dyn documentation.
CheckIP-Server SSL
Use HTTPS for the connection to the CheckIP Server.
CheckIP Server
Name and port of the server that reports the external IP address. For example, entering checkip.dyndns.org:80 uses Dyn IP detection to discover the remote socket IP address.
CheckIP Path
Path to the CheckIP server. For example, no-ip.com uses a CheckIP Server of dynamic.zoneedit.com and CheckIP Path of /checkip.html.
SSL
Use HTTPS for the connection to the server that updates the DNS record.
Domain Name
Fully qualified domain name of the host with the dynamic IP address. Separate multiple domains with a space, comma (,), or semicolon (;). For example, myname.dyndns.org; myothername.dyndns.org.
Update Period
How often the IP is checked in seconds.
Credentials
Name
Description
Username
User name for logging in to the provider and updating the record.
Password
Password for logging in to the provider and updating the record.
The SAVE button activates after you enter your domain name in Domain Name. Click to save all settings.
After configuring your DDNS service, turn the service on using the Services screen.
3.10.3 - FTP Screen
Describes the FTP screen in TrueNAS CORE.
File Transfer Protocol (FTP) is a communication protocol. It transfers data across a computer network. Configure FTP service settings on TrueNAS using the FTP services screen.
After making changes to settings click SAVE to confirm and save your changes.
Click ADVANCED OPTIONS to display advanced settings options. Click BASIC OPTIONS to return to the basic settings options.
Click CANCEL to exit without saving.
General Options Settings
Name
Description
Port
Enter the port the FTP service listens on.
Clients
Enter the maximum number of simultaneous clients.
Connections
Enter the maximum number of connections per IP address. 0 is unlimited.
Login Attempts
Enter the greatest number of attempts client permitted before disconnect. Increase if users are prone to misspellings or typos.
Timeout
Enter the maximum client idle time in seconds before disconnect. Default value is 600 seconds.
Certificate
Select from the dropdown list the SSL certificate to use for TLS FTP connections. Currently listed as freenas_default. To create a certificate, go to System > Certificates.
Advanced Option Settings
Click Advanced Options if you need to customize your FTP service. Advanced Options are more detailed than the Basic Options settings.
Access and TLS Settings
Access Settings
Name
Description
Always Chroot
Select to only allow users access their home directory if they are in the wheel group. This option increases security risk.
Allow Root Login
Select to allow root logins. Selecting this option increases security risk. Not recommended.
Allow Anonymous Login
Select to allow anonymous FTP logins with access to the directory specified in Path.
Allow Local User Login
By default, only members of the ftp group can to log in. Select this checkbox to allow any local user to log in.
Require IDENT Authentication
Select to require IDENT authentication. Selecting this option results in timeouts when ident (or in shell identd) is not running on the client.
File Permissions
Select to define default permissions for newly created files.
Directory Permissions
Select to define default permissions for newly created directories.
TLS Settings
Unless necessary, do not allow anonymous or root access.
For better security, enable TLS when possible.
This is effectively FTPS.
When FTP is exposed to a WAN, enable TLS.
Name
Description
Enable TLS
Select to allow encrypted connections. Requires a certificate. To create or import a certificate go to System > Certificates.
TLS Policy
Select the policy from the dropdown list of options. Options are On, Off, Data, !Data, Auth, Ctrl, Ctrl + Data, Ctrl +!Data, Auth + Data or Auth +!Data. Defines whether the control channel, data channel, both channels, or neither channel of an FTP session must occur over SSL/TLS. The policies are described here.
TLS Allow Client Renegotiations
Select to allow client renegotiation. This option is not recommended. Selecting this option breaks several security measures. See mod_tls for details.
TLS Allow Dot Login
If selected, TrueNAS checks the user home directory for a .tlslogin file. This file must contain one or more PEM-encoded certificates. System prompts user for password authentication if file not found.
TLS Allow Per User
If selected, allows sending a user password unencrypted.
TLS Common Name Required
Select to require the common name in the certificate match the FQDN of the host.
TLS Enable Diagnostics
Select to make logs more verbose. Useful in troubleshooting a connection.
TLS Export Certificate Data
Select to export the certificate environment variables.
TLS No Certificate Request
Select if the client cannot connect due to a problem with the certificate request. Example: the client server is unable to handle the server certificate request.
TLS No Empty Fragments
Not recommended. This option bypasses a security mechanism.
TLS No Session Reuse Required
This option reduces connection security. Only select if the client does not understand reused SSL sessions.
TLS Export Standard Vars
Select to put in place several environment variables.
TLS DNS Name Required
Select to require the client DNS name resolve to its IP address, and the cert contain the same DNS name.
TLS IP Address Required
Select to require the client certificate IP address match the client IP address.
Bandwidth and Other Settings
Bandwitdth Settings
Name
Description
Local User Upload Bandwidth: (Examples: 500 KiB, 500M, 2 TB)
Enter a value. If measurement is not specified it defaults to KiB. This field accepts human-readable input in KiBs or greater (M, GiB, TB, etc.). The unlimited default is 0 KiB.
Local User Download Bandwidth
Enter a value. If measurement is not specified it defaults to KiB. This field accepts human-readable input in KiBs or greater (M, GiB, TB, etc.). The unlimited default is 0 KiB.
Anonymous User Upload Bandwidth
Enter a value. If measurement is not specified it defaults to KiB. This field accepts human-readable input in KiBs or greater (M, GiB, TB, etc.). The unlimited default is 0 KiB.
Anonymous User Download Bandwidth
Enter a value. If measurement is not specified it defaults to KiB. This field accepts human-readable input in KiBs or greater (M, GiB, TB, etc.). The unlimited default is 0 KiB.
Other Options Settings
Name
Description
Minimum Passive Port
Used by clients in PASV mode. A default of 0 means any port above 1023.
Maximum Passive Port
Used by clients in PASV mode. A default of 0 means any port above 1023.
Enable FXP
Select to enable the File eXchange Protocol (FXP). Not recommended as this leaves the server vulnerable to FTP bounce attacks.
Allow Transfer Resumption
Select to allow FTP clients to resume interrupted transfers.
Perform Reverse DNS Lookups
Select to allow performing reverse DNS lookups on client IPs. Causes long delays if reverse DNS isn’t configured.
Masquerade Address
Public IP address or host name. Select if FTP clients cannot connect through a NAT device.
Display Login
Specify the message displayed to local login users after authentication. This is not displayed to anonymous login users.
Network devices often use Link Layer Discovery Protocol (LLDP) to communicate information. This information includes their identities, abilities and peers on a LAN. The LAN is typically wired Ethernet. The TrueNAS LLDP services screen configures LLDP on the system.
General Options
Name
Description
Interface Description
Select to enable receive mode. Interface description stores any peer information received.
County Code
Select the two-letter ISO 3166-1 alpha-2 code used to enable LLDP location support. The dropdown list is a comprehensive list of two-character country codes.
Location
Enter the physical location of the host.
3.10.5 - NFS Screen
Describes the NFS screen in TrueNAS CORE.
Network File System (NFS) is an open IETF standard remote file access protocol. Use the Services NFS screen to enable NFS services on your TrueNAS.
Click SAVE to save settings and return to the Services screen.
Click CANCEL to exit without saving and return to the Services screen.
Name
Description
Number of servers
Enter a number to specify how many servers to create. Increase if NFS client responses are slow. Keep this less than or equal to the number of CPUs reported by sysctl -n kern.smp.cpus to limit CPU context switching.
Bind IP Addresses
Select IP addresses from dropdown list to listen to for NFS requests. Leave empty for NFS to listen to all available addresses.
Enable NFSv4
Select checkbox to switch from NFSv3 to NFSv4.
NFSv3 ownership model for NFSv4
Select checkbox to provide specific NFSv4 ACL support. This does not require the client and the server to sync users and groups.
Require Kerberos for NFSv4
Select checkbox to force NFS shares to fail if the Kerberos ticket is unavailable.
Serve UDP NFS clients
Select checkbox if NFS clients need to use the User Datagram Protocol (UDP).
Allow non-root mount
Select checkbox only if required by the NFS client. Select to allow serving non-root mount requests.
Support >16 groups
Select checkbox when a user is a member of more than 16 groups. Requires correct configuration of group membership on the NFS server.
Enter a number to bind rpc.statd only to that port.
rpc.lockd(8) bind port
Enter a number to bind rpc.lockd only to that port.
The recommendation is to use the default settings for the NFS service. Make changes if there is a need for a specific setting.
3.10.6 - OpenVPN Screen
Describes the OpenVPN screen in TrueNAS CORE.
OpenVPN is an open source connection protocol. OpenVPN creates a secure connection between 2 points in a network. VPN services use OpenVPN to safeguard data integrity and provide anonymity. There two OpenVPN services on TrueNAS, the OpenVPN Client and OpenVPN Server.
OpenVPN Client
Use OpenVPN Client to configure the client settings.
General Options
Name
Description
Client Certificate
Select a valid client certificate from the dropdown list. The option is freenas_default. A certificate must exist on this system that is current and not revoked. Find more about generating certificates and CAs for OpenVPN here.
Root CA
Select the root Certificate Authority used to sign the Client and Server certificates. Find more about generating certificates and CAs for OpenVPN here.
Remote
Enter a valid IP address or domain name to which OpenVPN connects.
Port
Enter a port number to use for the connection.
Authentication Algorithm
Select an algorithm to authenticate packets. The dropdown list provides a list of algorithms to choose from. This is used to confirm packets sent over the network connection. Your network environment might need a specific algorithm. If not, select SHA1 HMAC which is a good standard algorithm to use.
Cipher
Select a cipher algorithm to encrypt data channel packets sent through the connection. While not required, using a cipher increases connection security. Verify if your networking environment requires a particular cipher. If not, AES-256-GCM is a good default choice. The dropdown list provides a list of encryption ciphers to choose from.
Compression
Select a compression algorithm from the dropdown list. Dropdown list options are LZ0 or LZ4. Leave the field empty to send data uncompressed. LZ0 is the standard compression algorithm. It is backwards compatible with previous (pre-2.4) versions of OpenVPN. LZ4 is a newer option that is typically faster with less system resources required.
Protocol
Select the protocol to use when connecting with the remote system. Select from the dropdown list options UDP, UDP4, UDP6, TCP, TCP4 or TCP6. Select UDP or TCP. UDP sends packets in a continuous stream. It is generally faster and less strict about dropped packets than TCP. TCP sends packets sequentially. To force the connection to be IPv4 or IPv6 choose the UDP or TCP version with the 4 or 6 respectively.
Device Type
Select a virtual network interface from the dropdown list. Options are TUN or TAP. The client and server Device Type must be the same. For information see here.
Nobind
Select to enable and to prevent binding to local address and port. Required if running OpenVPN client and server at the same time.
TLS Crypt Auth Enabled
Select to enable or clear checkbox to disable TLS Web Client Authentication.
Additional Parameters
Enter any extra parameters for the client. This manually configures any of the core OpenVPN config file options. Refer to the OpenVPN Reference Manual for descriptions of each option.
TLS Crypt Auth
Encrypts all TLS handshake messages to add another layer of security. OpenVPN server and clients share a required static key. Enter the static key for authentication/encryption of all control channel packets. Must enable tls_crypt_auth_enabled.
OpenVPN Server
Use OpenVPN Server to configure the server settings.
Configure and save your OpenVPN server settings. Click DOWNLOAD CLIENT CONFIG to generate the certificate file you need from the client system.
Click Client Certificate to generate the configuration file you need from the client system already imported on the system.
General Options
Name
Description
Server Certificate
Select a valid server certificate from the dropdown list. The option is freenas_default. A certificate must exist on this system that is current and not revoked. Find more about generating certificates and CAs for OpenVPN here.
Root CA
Select the root Certificate Authority used to sign the Client and Server certificates. Find more about generating certificates and CAs for OpenVPN here.
Server
Enter the IP address and netmask of the server.
Port
Enter a port number to use for the connection.
Authentication Algorithm
Select an algorithm to authenticate packets. The dropdown list provides a list of algorithms to choose from. Your network environment might require a specific algorithm. If not, select SHA1 HMAC which is a good standard algorithm to use.
Cipher
Select a cipher algorithm to encrypt data channel packets sent through the connection. While not required, using a cipher increases connection security. Verify if your networking environment requires a particular cipher. If not, AES-256-GCM is a good default choice. The dropdown list provides a list of encryption ciphers to choose from.
Compression
Select a compression algorithm from the dropdown list. Dropdown list options are LZ0 or LZ4. Leave the field empty to send data uncompressed. LZ0 is the standard compression algorithm. It is backwards compatible with previous (pre-2.4) versions of OpenVPN. LZ4 is a newer option that is typically faster with less system resources required.
Protocol
Select the protocol to use when connecting with the remote system. Select from the dropdown list options UDP, UDP4, UDP6, TCP, TCP4 or TCP6. Select UDP or TCP. UDP sends packets in a continuous stream. It is generally faster and less strict about dropped packets than TCP. TCP sends packets sequentially. To force the connection to be IPv4 or IPv6 choose the UDP or TCP version with the 4 or 6 respectively.
Device Type
Select a virtual network interface from the dropdown list. Options are TUN or TAP. The client and server Device Type must be the same. For more information see here.
Topology
Select to configure virtual addressing topology when running in TUN mode. Dropdown list options are NET30, P2P or SUBNET. TAP mode always uses a SUBNET topology.
TLS Crypt Auth Enabled
Select to enable or clear checkbox to disable TLS Web Client Authentication.
Additional Parameters
Enter any extra parameters.
TLS Crypt Auth
Encrypting TLS handshake messages adds another layer of security. OpenVPN server and clients share a required static key. Enabling tls_crypt_auth_enabled generates a static key if tls_crypt_auth is not provided. The generated static key is for use with OpenVPN client. Enter that key here.
3.10.7 - S.M.A.R.T. Screen
Describes the S.M.A.R.T. screen in TrueNAS CORE.
Self-Monitoring, Analysis and Reporting Technology (S.M.A.R.T.) is an industry standard. S.M.A.R.T. performs disk monitoring and testing. It checks drive reliability and predicts hardware failures.
S.M.A.R.T. tests run on disks.
Running tests can reduce drive performance. We recommend scheduling tests when the system is in a low-usage state.
Avoid scheduling disk-intensive tests at the same time!
For example, do not schedule S.M.A.R.T. tests on the same day as a disk scrub or resilver.
Name
Description
Check Interval
Enter the time in minutes for smartd to wake up and check if any tests are configured to run.
Power Mode
Select the power mode from the dropdown list. Options are Never, Sleep, Standby or Idle. S.M.A.R.T. only tests when the Power Mode is Never.
Difference
Enter a number of degrees in Celsius. S.M.A.R.T. reports if a drive temperature changes by N degrees Celsius since the last report.
Informational
Enter a threshold temperature in Celsius. S.M.A.R.T. sends a message with a LOG_INFO log level if the temperature is above the threshold.
Critical
Enter a threshold temperature in Celsius. S.M.A.R.T. sends a message with a LOG_CRIT log level and send an email if the temperature is above the threshold.
3.10.8 - S3 Screen
Describes the S3 screen in TrueNAS CORE.
Due to security vulnerabilities and maintainability issues, the S3 service is deprecated in TrueNAS CORE 13.0 and removed in CORE 13.3.
Beginning in CORE 13.0-U6, the CORE web interface generates an alert when the deprecated service is either actively running or is enabled to start on boot.
TrueNAS Enterprise
Beginning in CORE 13.0-U6, Enterprise customers with the S3 service running or enabled are prevented from upgrading to the next major version.
Users should plan to migrate to a separately maintained MinIO plugin or otherwise move any production data away from the S3 service storage location.
Migrating from the built-in S3 service to the plugin could result in an extended data migration window and potential disruption to S3 data access.
See the CORE 13.0 MinIO Plugin tutorial for detailed migration instructions.
S3 manages data using object storage architecture.
Having large numbers of files (>100K for instance) in a single bucket with no sub-directories is not recommended. It can harm performance and cause stability issues.
Use the S3 screen to configure S3 on your TrueNAS.
The SAVE button activates after entering the required settings.
CANCEL closes the S3 screen without saving changes and displays the Services screen.
S3 Configuration Options
Name
Description
IP Address
Select an IP address from the dropdown list options 0.0.0.0, ::, or enter the IP address that runs the S3 service. Select 0.0.0.0 to tell the server to listen on all addresses. Select the TrueNAS IP address to constrain it to a specific network.
Port
Enter a static port for the MinIO web console. Default is 9001.
Console Port
Enter the TCP port that provides the S3 service.
Access Key
Enter the S3 access ID. See Access keys for more information.
Secret Key
Enter the S3 secret access key. See Access keys for more information.
Disk
Browse to a directory to define the S3 file system path.
Enable Browser
Enables the S3 service web UI. Access the MinIO web UI by entering the IP address and port number separated by a colon in the browser address bar. Example: 192.168.1.0:9000.
Certificate
Select an SSL (CORE) certificate or (SCALE) certificate created or imported in (CORE) System > Certificates > Add or (SCALE) Credentials > Certificates for secure S3 connections.
TLS Server Hostname / TLS Server URI
Displays if using an SSL certificate. Enter the MinIO server proxy-able address.
MinIO deprecated Access key and Secret key. MINIO_ROOT USER arguments and their values replace Access key. MINIO_ROOT_PASSWORD arguments and their values replace Secret key. For the ROOT_USER value, use a name up to 20 characters. For the ROOT_PASSWORD, use a string of 8 to 40 randomized characters. MinIO recommends using a long password string of unique random characters.
3.10.9 - SMB Service Screen
Describes the SMB screen in TrueNAS CORE.
Use the Services SMB screen to configure SMB service settings.
Unless a specific setting is needed or configuring for a specific network environment, it is recommended to use the default settings for the SMB service.
Basic Options
Name
Description
NetBIOS Name
Populates with the original host name of the system truenas. Limited to 15 characters and cannot be the same name in Workgroup.
NetBIOS Alias
Enter any aliases, separated by spaces. Each alias can be up to 15 characters long.
Workgroup
Value must match Windows workgroup name. If unconfigured, TrueNAS uses Active Directory or LDAP to detect and select the correct workgroup. Active Directory or LDAP must be active for TrueNAS to do this.
Description
Optional. Enter a server description.
Enable SMB1 support
Select to allow legacy SMB clients to connect to the server. Note that SMB1 is being deprecated. The recommendation is to upgrade the client OS. The OS upgrade should support modern versions of the SMB protocol.
NTLMv1 Auth
Select to allow smbd(8) attempts to authenticate users with NTLMv1 encryption. NTLMv1 is not secure and is a vulnerability. NTLMv1 authentication is off by default. This setting allows backward compatibility with older versions of Windows. It is not recommended. Do not use on untrusted networks.
Advanced Options
Name
Description
Unix Charset
Select an option from the dropdown list. Default is UTF-8 which supports all characters in all languages.
Log Level
Select an option from the dropdown list. Options are None, Minimum, Normal, Full or Debug. Records SMB service messages up to the specified log level. Logs error and warning level messages by default.
Use Syslog Only
Select to log authentication failures in /var/log/messages instead of the default /var/log/samba4/log.smbd.
Local Master
Select to determine if the system participates in a browser election. Leave checkbox clear when the network contains an AD or LDAP server. Leave checkbox clear when Vista or Windows 7 machines are present.
Enable Apple SMB2/3 Protocol Extensions
Select to allow macOS to use these protocol extensions. Improves the performance and behavioral characteristics of SMB shares. Required for Apple Time Machine support.
Administrators Group
Select an option from the dropdown list. Members of this group are local admins. Local admins have privileges to take ownership of any file in the SMB share. They can reset permissions. Local admins can administer the SMB server through the Computer Management MMC snap-in.
Guest Account
Select an account to use for guest access from the dropdown list. Default is nobody. The selected account must have permissions to the shared pool or dataset. To adjust permissions, edit the dataset Access Control List (ACL). Add a new entry for the selected guest account, and configure the permissions in that entry. Deleting the selected user in Guest Account resets the field to nobody.
File Mask
Overrides default file creation mask of 0666. File creation mask 0666 creates files with read and write access for everybody.
Directory Mask
Overrides default directory creation mask of 0777. Directory creation mask 0777 grants directory read, write and execute access for everybody.
Bind IP Addresses
Select from the dropdown list. These are the static IP addresses which SMB listens on for connections. If not selected, defaults to listen on all active interfaces.
Auxiliary Parameters
Enter additional smb.conf options. See the Samba Guide for more information on these settings. To log more details when a client attempts to authenticate to the share, add log level = 1, auth_audit:5.
3.10.10 - SNMP Screen
Describes the SNMP screen in TrueNAS CORE.
Simple Network Management Protocol (SNMP) is an Internet Standard protocol. SNMP gathers and sorts data about managed devices on IP networks, such as LANs and WANs. Use the SNMP screen to configure SNMP service on your TrueNAS.
After selecting SNMP v3 Support more configuration fields display.
After filling in all required fields with appropriate values, the SAVE button activates. Click SAVE to save settings.
Click CANCEL to exit without saving and display the Services screen.
Field Descriptions
General Options
Name
Description
Location
Enter the location of the system.
Contact
Enter the email address to receive SNMP service messages.
Community
Enter a community other than the default public to increase system security. Value can only contain alphanumeric characters, underscores (_), dashes (-), periods (.), and spaces. Not required and can leave this empty for SNMPv3 networks.
Select an authentication method: — for none, SHA, or MD5 from the dropdown list.
Password
Enter a password of at least eight characters.
Privacy Protocol
Select a privacy protocol: — for none, AES, or DES from the dropdown list.
Privacy Passphrase
Enter a separate privacy passphrase. Password is used when this is left empty.
Other Options
Name
Description
Auxiliary Parameters
Enter any additional snmpd.conf options. Add one option for each line.
Expose zilstat via SNMP
Select to enable. If enabled this option might have performance implications on your pools.
Log Level
Select how many log entries to create. Dropdown list options are Emergency, Alert, Critical, Error, Warning, Notice, Info and Debug.
3.10.11 - SSH Screen
Describes the SSH screen in TrueNAS CORE.
Secure Socket Shell (SSH) is a network communication protocol. It provides encryption to secure data. Use the SSH services screen to configure SSH File Transfer Protocol (SFTP). SFTP is available by enabling SSH remote access to the TrueNAS system.
Allowing external connections to TrueNAS is a security vulnerability!
Enable SSH only when there is a need for external connections.
See Security Recommendations for more security considerations when using SSH.
General Options
Name
Description
TCP Port
Open a port for SSH connection requests. Enter the port number.
Log in as Root with Password
Select to allow root logins. It is not recommended to allow root logins! A password must be set for the root user account.
Allow Password Authentication
Select to allow password authentication. Enabling allows SSH login authentication using a password. Warning: Determine if directory services are enabled. If so, this setting grants access to all users imported by directory service. When disabled, authentication requires keys for all users. Involves extra SSH client and server setup.
Allow Kerberos Authentication
Select to allow Kerberos authentication. Before enabling this option, valid entries must exist in: Directory Services > Kerberos Realms Directory Services > Kerberos Keytabs The system must be able to communicate with the Kerberos domain controller.
Allow TCP Port Forwarding
Select to allow users to bypass firewall restrictions using SSH port forwarding. For best security, leave disabled and deny shell access to users.
ADVANCED OPTIONS displays additional configuration fields to set up SSH for specific uses cases.
Advanced Options
Name
Description
Bind Interfaces
Select interfaces on your system from the dropdown list for SSH to listen on. Leave all options unselected for SSH to listen on all interfaces.
Compress Connections
Select to attempt to reduce latency over slow networks.
SFTP Log Level
Select the syslog(3) facility of the SFTP server option from the dropdown list. Options are Quiet, Fatal, Error, Info, Verbose, Debug, Debug2 or Debug3.
SFTP Log Facility
Select the syslog(3) facility of the SFTP server option from the dropdown list. Options are Daemon, User, Auth and Local 0 through Local7.
Weak Ciphers
Select a cipher from the dropdown list. Options are None or AES128-CBC. To allow more ciphers for sshd(8) in addition to the defaults in sshd_config(5). Use None to allow unencrypted SSH connections. Use AES128-CBC to allow the 128-bit Advanced Encryption Standard. WARNING: these ciphers are security vulnerabilities. Only allow them in a secure network environment.
Auxiliary Parameters
Add any more sshd_config(5) options not covered in this screen. Enter one option per line. Options added are case-sensitive. Misspellings can prevent the SSH service from starting.
3.10.12 - TFTP Screen
Describes the TFTP screen in TrueNAS CORE.
Trivial File Transfer Protocol (TFTP) is a basic protocol designed for simple file transfer. It provides no user authentication or the ability to browse a directory hierarchy. Use the TFTP service screen to configure TFTP service on the TrueNAS.
TFTP Service Screen Settings
Path
Name
Description
Directory
Browse to an existing directory to use for storage. Some devices can require a specific directory name. Consult the documentation for that device to see if there are any restrictions. Click the > to the left of /mnt to open a list of directories.
Connection
Name
Description
Host
The default host to use for TFTP transfers. Enter an IP address. For example, 192.0.2.1 or in Shell192.0.2.1
Port
The UDP port number that listens for TFTP requests. For example, 8050 or in Shell8050.
Username
Select the account to use for TFTP requests from the dropdown list. Options include but are not limited to root, daemon, operator, nobody and all other user names on the system. This account must have permission to what is specified in Directory.
Access
Name
Description
File Permissions
Adjust the User and Group file permissions. Use the Read, Write and Execute checkboxes. Select all that apply.
Allow New Files
Select when network devices need to send files to the system.
Other Options
Name
Description
Auxiliary Parameters
Add more options from tftpd. Add one option on each line.
3.10.13 - UPS Screen
Describes the UPS screen in TrueNAS CORE.
An uninterruptible power supply is a hardware device that provides a backup source of power in the event of a power outage. Use the UPS services screen to configure a UPS for your TrueNAS.
TrueNAS Enterprise
TrueNAS High Availability (HA) systems are not compatible with uninterruptible power supplies (UPS).
SAVE activates after all required fields are populated.
CANCEL exits without saving and returns you to the Services screen.
Type a description for the UPS device. You can use alphanumeric, period (.), comma (,), hyphen (-), and underscore (_) characters. This is a required field.
UPS Mode
Select mode from the dropdown list. Master is an option if the UPS plugs directly into the system serial port. Select Slave to have this system shut down before the master system. The UPS remains the last item to shut down. See the Network UPS Tools Overview.
Driver
Select the device driver from the dropdown list. See the Network UPS Tools compatibility list for a list of supported UPS devices. This is a required field.
Port or Hostname
Select the serial or USB port connected to the UPS from the dropdown list. Options include a list of ports on your system and auto. Select auto to automatically detect and manage the USB port settings. Enter the IP address or host name of the SNMP UPS device when selecting an SNMP driver. If the UPS Mode field is set as Master, this is a required field. If set to Slave this field is not required.
Monitor
Name
Description
Monitor User
Enter a user to associate with this service. Keeping the default is recommended.
Monitor Password
Change the default password to improve system security. The new password cannot include a space or #.
Extra Users
Enter accounts that have administrative access. See upsd.users(5) for examples.
Remote Monitor
Select to have the default configuration listen on all interfaces using the known values of user: upsmon and password: fixmepass.
Select the battery option to use when the UPS initiates shutdown. Dropdown list options are UPS reaches low battery or UPS goes on battery.
Shutdown Timer
Enter a value in seconds for the UPS to wait before initiating shutdown. Shutdown does not occur if power is restored while the timer is counting down. This value only applies when Shutdown Mode is set to UPS goes on battery.
Shutdown Command
Enter a command to shut down the system when either battery power is low or the shutdown timer ends.
Power off UPS
Select for the UPS to power off after shutting down the system.
Email
Name
Description
Send Email Status Updates
Select to enable sending messages to the address defined in the Email field.
Email
Enter any email addresses to receive status updates. Separate entries by pressing Enter.
Email Subject
Enter the subject for status emails.
Other Options
Name
Description
No Communication Warning Time
Enter the number of seconds to wait before alerting that the service cannot reach any UPS. Warnings continue until situation resolved.
Host Sync
Length of time in seconds for upsmon to wait while in master mode for the slaves to disconnect. This applies during a shutdown situation.
The WebDAV protocol contains extensions to HTTP. These extensions expand the capabilities of a webserver. It can act as a collaborative authoring and management tool for web content. Use the Services WebDAV screen to enable WebDAV services on your TrueNAS.
Click ADD to open the WebDAV settings screen.
General Options
Name
Description
Protocol
Select the protocol from the dropdown list. HTTP keeps the connection unencrypted. HTTPS encrypts the connection. HTTP+HTTPS allows both types of connections.
HTTP Port
Specify a port for unencrypted connections. The default port 8080 is recommended. Do not reuse a port.
HTTP Authentication
Select the HTTP authentication type from the dropdown list. Basic Authentication is unencrypted. Digest Authentication is encrypted. Select No Authentication when you don’t want to use authentication.
Webdav Password
Change the default of davtest as davtest is a known value.
3.11 - Jails, Plugins and Virtual Machines
Reference documentation for the Jails, Plugins, and Virtual Machines screens.
As of TrueNAS CORE 13.3, this feature is untested and provided without support to the TrueNAS Community.
Users with a critical need to use containers or virtualization solutions in production should migrate to the tested and supported virtualization features available in TrueNAS SCALE.
TrueNAS Enterprise customers can contact iXsystems to schedule a TrueNAS SCALE deployment.
See CORE to SCALE Migrations for more information.
This section describes the various screens and options available for deploying resource-minimal FreeBSD jails or fully virtualized operating systems.
Jails, Plugins, and Virtual Machine Contents
Jails Screens: Describes the fields in the Jails screen in TrueNAS CORE.
Virtual Machines: Describes the fields in the Virtual Machines screen in TrueNAS CORE.
Plugins Screens: Describes how to install and maintain 3rd party applications on TrueNAS CORE.
3.11.1 - Jails Screens
Describes the fields in the Jails screen in TrueNAS CORE.
As of TrueNAS CORE 13.3, this feature is untested and provided without support to the TrueNAS Community.
Users with a critical need to use containers or virtualization solutions in production should migrate to the tested and supported virtualization features available in TrueNAS SCALE.
TrueNAS Enterprise customers can contact iXsystems to schedule a TrueNAS SCALE deployment.
See CORE to SCALE Migrations for more information.
The Jails screen displays a list of jails installed on your system. Use to add, edit or delete jails.
Use the blue Columns dropdown list to display options to change the information displayed in the list of tables. Options are Select All, JID, Boot, State, Release, IPv4, IPv6, Type, Template, Basejail or Reset to Defaults.
Use the settings icon to set the pool to use for jail storage.
Use ADD to display the first configuration Wizard screen and to access the ADVANCED JAIL CREATION button to display advanced jail configuration screens.
Individual Jail Screen
Click the chevron_right icon to display the individual jail screen, the primary settings and additional action options for that jail.
Click the expand_more icon to collapse the individual jail screen.
Name
Description
EDIT
Used to modify the settings described in Advanced Jail Creation below. You cannot edit a jail while it is running. You can only view read only settings until you stop the jail operation.
MOUNT POINTS
Select an existing mount point to edit. Either click EDIT or ACTIONS > Add Mount Point to create a mount point for the jail. A mount point gives a jail access to storage located elsewhere on the system. You must stop a jail before adding, editing, or deleting a mount point.
RESTART
Stops and immediately starts a jail that is running or up.
START
Starts a jail that has a current STATE of down.
STOP
Stops a jail in the current STATE of up.
UPDATE
Runs freebsd-update to update the jail to the latest patch level of the installed FreeBSD release.
SHELL
Displays the Shell screen with access to a root command prompt where you can interact with a jail directly from the command line. Type exit to leave the command prompt or click Jails on the breadcrumb at the top of the screen to return to the Jails screen.
DELETE
Deletes the selected jail. Caution: deleting the jail also deletes all of the jail contents and all associated snapshots. Back up the jail data, configuration, and programs first. There is no way to recover the contents of a jail after deleting it!
Action options change based on the jail state. For example, a stopped jail does not have a STOP or SHELL option.
Jail Creation Options
TrueNAS has two options to create a jail, the Wizard or the Advanced Jail Creation option at the bottom of the Wizard screen.
The Jail Wizard makes it easy to create a jail.
ADVANCED JAIL CREATION opens the advanced configuration screen with all possible jail configuration settings.
We recommend that only advanced users with specific requirements for a jail use this form.
Jail Wizard
Use the jail-creation Wizard to add a new jail by following and completing required fields in a pre-determined order.
The wizard is the simplest process to create and configure a new jail.
Click ADD to display the first of three Wizard configuration screens.
Name Jail and Choose FreeBSD Release Screen
This screen includes the jail name, type, and release settings.
Name Jail and Choose FreeBSD Release Settings
Setting
Description
Name
Required. Enter a name using letters, numbers, or the period (.), dash (-), or underscore (_) special characters. You can rename a jail after creating and saving it.
Jail Type
Select an option from the dropdown list. Options are Default (Clone Jail) or Basejail. Use Default (Clone Jail) to clone jails that are clones of the value specified in Release. These are linked to that release, even if they are upgraded. Use Basejails to mount the specified release directories as nullfs mounts over the jail directories. Basejails are not linked to the original release when upgraded. Versions of FreeBSD are downloaded the first time they are used in a jail. Additional jails created with the same version of FreeBSD are created faster because the download is already complete.
Release
Select the FreeBSD release to use as the jail operating system option from the dropdown list. Options are 12.4-RELEASE or 13.2-RELEASE. Jails can run FreeBSD versions up to the same version as the host system. Newer releases are not shown.
Advanced Jail Creation
Opens the Advanced Jail Creation screens. This form is only recommended for advanced users with very specific requirements for a jail.
Configure Networking Screen
This screen includes DHCP, NAT or VNET, IPV4 IP or IPv6 interface, address, and netmask, and default router, and the IPv6 prefix.
Configure Networking Settings
Name
Description
DHCP Autoconfigure IPv4
Select to auto-configure jail networking with the Dynamic Host Configuration Protocol (DHCP). Select VNET and Berkeley Packet Filter with this option.
NAT
Network Address Translation (NAT) to transform local network IP addresses into a single IP address. Select when the jail shares a single connection to the Internet with other systems on the network.
VNET
Select to use VNET(9) to emulate network devices for the jail. A fully virtualized per-jail network stack is installed.
vnet_default_interface
Select the default VNET interface from options on the dropdown list. Options are none, auto, or specific interfaces on your system. Only takes effect when VNET is selected. Choose a specific interface or set to auto to use the interface that has the default route. Choose none to not set a default VNET interface.
IPv4 Interface
Select the IPv4 interface for the jail from the dropdown list.
IPv4 Address
Enter the IPv4 address for VNET(9) and shared IP jails.
IPv4 Netmask
Select the IPv4 netmask for the jail from the dropdown list.
IPv4 Default Router
Enter a valid IPv4 address to use as the default route. Enter none to configure the jail with no IPv4 default route. A jail without a default route is not be able to access any networks.
AutoConfigure IPv6
Select to use Stateless Address Auto Configuration (SLAAC) to auto-configure IPv6 in the jail.
IPv6 Interface
Select the IPv6 interface for the jail from the dropdown list.
IPv6 Address
Enter the IPv6 address for VNET(9) and shared IP jails.
IPv6 Prefix
Select the IPv6 prefix for the jail from the dropdown list.
IPv6 Default Router
Enter a valid IPv6 address to use as the default route. Enter none to configure the jail without an IPv6 default route. A jail without a default route is not able to access any networks.
Confirm Options Screen
This screen shows a summary of the jail settings entered or selected on the Wizard screens.
Wizard Navigation
Next advances to the next screen.
Back returns to the previous screen.
SUBMIT saves all settings and creates the Jail.
Cancel closes the current screen and exits the configuration process without saving.
Advanced Jail Creation
The Advanced Jail Creation screen has four expandable configuration areas:
Click the expand_more icon to collapse any area of configuration settings.
Use Next to advance to the next configuration settings section, or click the expand_less icon to expand a configuration settings area.
Basic Properties
The Basic Properties area includes the jail name, type, FreeBSD release, and network settings.
Jail Basic Properties Settings
Name
Description
Name
Required field. Enter a name that can include letters, numbers, periods (.), dashes (-), and underscores (_).
Jail Type
Select an option from the dropdown-list. Options are Default (Clone Jail) or Basejail. Use Default (Clone Jail) to clone jails that are clones of the specified value in Release. They are linked to that release, even if they are upgraded. Use Basejails to mount the specified release directories as nullfs mounts over the jail directories. Basejails are not linked to the original release when upgraded.
Release
Select an option from the dropdown list. Options are 12.2-RELEASE or 13.0-RELEASE. This is the FreeBSD release to use as the jail operating system. Jails can run FreeBSD versions up to the same version as the host system. Newer releases are not shown.
DHCP Autoconfigure IPv4
Select to auto-configure jail networking with the Dynamic Host Configuration Protocol (DHCP). Also select VNET and Berkeley Packet Filter with this selected option.
NAT
Network Address Translation (NAT) to transform local network IP addresses into a single IP address. Select when the jail shares a single connection to the Internet with other systems on the network.
VNET
Select to use VNET(9) to emulate network devices for the jail. A fully virtualized per-jail network stack is installed.
Select the default VNET interface from options on the dropdown list. Options are none, auto, or specific interfaces on your system. Only takes effect when VNET is selected. Choose a specific interface or set to auto to use the interface that has the default route. Choose none to not set a default VNET interface.
IPv4 Interface
Select the IPv4 interface for the jail from the dropdown list.
IPv4 Address
Enter the IPv4 address for VNET(9) and shared IP jails.
IPv4 Netmask
Select the IPv4 netmask for the jail from the dropdown list.
IPv4 Default Router
Enter a valid IPv4 address to use as the default route. Enter none to configure the jail with no IPv4 default route. A jail without a default route is not be able to access any networks.
AutoConfigure IPv6
Select to use Stateless Address Auto Configuration (SLAAC) to autoconfigure IPv6 in the jail.
IPv6 Interface
Select the IPv6 interface for the jail from the dropdown list.
IPv6 Address
Enter the IPv6 address for VNET(9) and shared IP jails.
IPv6 Netmask
Select the IPv6 prefix for the jail from the dropdown list.
IPv6 Default Router
Enter a valid IPv6 address to use as the default route. Enter none to configure the jail without an IPv6 default route. A jail without a default route is not be able to access any networks.
Auto Start
Select to auto-start the jail at system boot time. Jails are started and stopped based on iocage priority. Set in the Custom Properties priority field.
Jail Properties
The Jail Properties area includes the jail ruleset to follow, commands to run in the system or jail environment, jail user, allow or deny SYSV IPC message, shared memory primitives, or semaphore primitives, VNET interfaces, and other jail settings.
Jail Properties Settings
Name
Description
devfs_ruleset
The devfs(8) ruleset number to enforce when mounting devfs in the jail. The default 0 means no ruleset is enforced. Mounting devfs inside a jail is only possible when the allow_mount and allow_mount_devfs permissions are enabled and enforce_statfs is set to a value lower than 2.
exec_start
Commands to run in the jail environment after the jail is created. Example: sh /etc/rc. The pseudo-parameters section of JAIL(8) describes exec.start usage.
exec_stop
Commands to run in the jail environment before the jail is removed and after exec.prestop commands complete. Example: sh /etc/rc.shutdown.
exec_prestart
Commands to run in the system environment before a jail is started.
exec_poststart
Commands to run in the system environment after a jail is started and after any exec_start commands are finished.
exec_prestop
Commands to run in the system environment before a jail is stopped.
exec_poststop
Commands to run in the system environment after a jail is stopped.
exec_jail_user
Enter either root or another valid username. Inside the jail, this user runs the commands.
exec_system_user
Run commands in the jail as this user. By default, the current user runs these commands.
securelevel
The value of the jail securelevel sysctl. A jail never has a lower securelevel setting than the host system. Setting this parameter allows a higher securelevel setting. If the host system securelevel* setting is changed, the jail secure level is at least as secure.
sysvmsg
Allows or denies access to SYSV IPC message primitives. Use the dropdown list to select from Inherit, New or Disable. Select Inherit to make all IPC objects on the system visible to the jail. Select *New to make only objects the jail creates using the private key namespace visible. The system and parent jails have access to the jail objects but not private keys. Select Disable when the jail cannot perform any sysvmsg related system calls.
sysvsem
Allows or denies access to SYSV IPC semaphore primitives. Use dropdown list to select from Inherit, New or Disable. Use Inherit to make all IPC objects on the system visible to the jail. Select New to make only objects the jail creates using the private key namespace visible. The system and parent jails have access to the jail objects but not private keys. Select Disable when the jail cannot perform any sysvmem related system calls.
sysvshm
Allows or denies access to SYSV IPC shared memory primitives. Use dropdown list to select from Inherit, New or Disable. Select Inherit to make all IPC objects on the system visible to the jail. Select New to make only objects the jail creates using the private key namespace visible. The system and parent jails have access to the jail objects but not private keys. Select Disable when the jail cannot perform any sysvshm related system calls.
vnet_interfaces
A space-delimited list of network interfaces attached to a VNET enabled jail after it is created. Interfaces are released when the jail is removed.
Select to choose whether a process in the jail has access to System V IPC primitives. Equivalent to setting sysvmsg, sysvsem, and sysvshm to Inherit. Deprecated in FreeBSD 11.0 and newer! Use sysvmsg, sysvsem, and sysvshm instead.
allow_raw_sockets
Select to allow raw sockets. Utilities like ping(8) and traceroute(8) require raw sockets. When selected, source IP addresses are enforced to comply with the IP addresses bound to the jail, ignoring the IP_HDRINCL flag on the socket.
allow_chflags
Select to treat jail users as privileged and allow the manipulation of system file flags. Secure level constraints are still enforced.
allow_mlock
Enables running services that require mlock(2) in a jail.
allow_vmm
Allows the jail to access the bhyve virtual machine monitor (VMM). The jail must have FreeBSD 12.0 or newer installed with the vmm(4) kernel module loaded.
allow_quotas
Select to allow the jail root to administer quotas on jail file systems. This includes file systems the jail shares with other jails or with non-jailed parts of the system.
allow_socket_af
Select to allow access to other protocol stacks beyond IPv4, IPv6, local (UNIX), and route. Warning, jail functionality does not exist for all protocol stacks.
allow_mount
Select to allow privileged users inside the jail to mount and unmount file system types marked as jail-friendly. Also use dropdown list to select from list of options allow_mount_devfs, allow_mount_fusefs, allow_mount_nullfs, allow_mount_procfs, allow_mount_tmpfs or allow_mount_zfs.
Network Properties
The Network Properties area includes the assigned interface(s), host name, domain name, resolver, rounding table to use, and IP address type (v4 or v6), mac prefix, and NAT interface and port forwarding settings.
Network Properties Settings
Name
Description
Interfaces
Use to enter up to four interface configurations in the format interface:bridge, separated by a comma (,), where the left value is the virtual VNET interface name and the right value is the bridge name where to attach the virtual interface.
Use to set the jail host name. Defaults to the jail UUID.
resolver
Use to add lines to the jail resolv.conf. For example, nameserver IP;search domain.local. Delimit fields with a semicolon (;), this translates as new lines in resolv.conf. Enter none to inherit resolv.conf from the host.
exec_fib
Enter the routing table (FIB) to use when running commands inside the jail.
ip4.saddrsel
Select to disable IPv4 source address selection for the jail in favor of the primary IPv4 address of the jail. Only available when the jail is not configured to use VNET.
ip6.saddrsel
Select to disable IPv6 source address selection for the jail in favor of the primary IPv6 address of the jail. Only available when the jail is not configured to use VNET.
ip4
Controls the availability of IPv4 addresses. Use the dropdown list to select from options inherit, New or Disable. Select Inherit to allow unrestricted access to all system addresses. Select New to restrict addresses with ip4_addr. Select Disable to stop the jail from using IPv4 entirely.
ip6
Controls the availability of IPv6 addresses. Use the dropdown list to select from options inherit, New or Disable. Select Inherit to allow unrestricted access to all system addresses. Select New to restrict addresses with ip6_addr. Select Disable to stop the jail from using IPv6 entirely.
mac_prefix
Enter a valid MAC address vendor prefix. For example, E4F4C6.
vnet0_mac
Use to assign a fixed MAC address. Leave this field empty to generate random MAC addresses for the host and jail. To assign fixed MAC addresses, enter the MAC address to assign to the host, a space, then the MAC address to assign to the jail.
Custom Properties
The Custom Properties area includes the priority for the jail at boot time, jail host ID, setting this jail as a template, system host time to synchronize time between the jail and host, enabling ZFS jailing inside the jail, defining the dataset to be jailed and to be fully handed over to a jail, entering a mount point for the jail_zfs_dataset, tun settings, and other local host, IP host name, and IPV6 autoconfigure settings.
Custom Properties Settings
3.11.2 - Virtual Machines
Describes the fields in the Virtual Machines screen in TrueNAS CORE.
As of TrueNAS CORE 13.3, this feature is untested and provided without support to the TrueNAS Community.
Users with a critical need to use containers or virtualization solutions in production should migrate to the tested and supported virtualization features available in TrueNAS SCALE.
TrueNAS Enterprise customers can contact iXsystems to schedule a TrueNAS SCALE deployment.
See CORE to SCALE Migrations for more information.
The Virtual Machines screen displays a list of virtual machines (VM) configured on your system.
Use the blue COLUMNS button to display a list of options to customize the list view. Options are Select All, Autostart, Virtual CPUs, Cores, Threads, Memory Size, Boot Loader Type, System Clock, VNC Port, Com Port, Description, Shutdown Timeout or Reset to Defaults.
Use ADD to display the Virtual Machines configuration Wizard.
The State toggle indicates the current state of the VM. Hover over the toggle with your mouse to see the state as STOPPED or RUNNING. The toggle turns blue when it is running.
Select the Autostart checkbox to set the VM to start automatically after a system reboot, or clear the checkbox to require manually starting the VM after a system reboot.
Virtual Machine Wizard
The Wizard consists of six individual configuration screens.
Confirmation Options displays the summary of settings. You can use BACK to return to previous screens to make changes or use SUBMIT to save settings and create the virtual machine.
To make changes after saving the VM, select the VM on the list, expand it, and select EDIT.
VM Wizard Navigation
You cannot advance to the next screen if the current screen has required fields.
After entering all required information you can advance to the next screen.
Use Next to advance to the next wizard configuration form.
Use Back to return to a previous wizard configuration form.
Use Cancel to exit the configuration wizard.
The blue edit icons preceding each Wizard screen name, at the top of the screen, allow you to jump to the screen you selected but only if you have populated all required fields on the current screen and any screen that follows in the sequence of screens.
If you select a screen that follows a Wizard screen that has required fields and you have not provided the information those required fields wants, the screen you selected does not display.
You must enter all required fields before you can freely move around in the Wizard screens.
Operating System Settings
Name
Description
Guest Operating System
Required field. Select the VM operating system type from the dropdown list three operating systems listed Windows, Linux or FreeBSD.
Name
Enter an alphanumeric name for the virtual machine.
Description
(optional) Enter a description for the OS.
System Clock
Required field. Specifies the VM system time. Select from the dropdown list options Local or UTC. Default is Local.
Boot Method
Select from the dropdown list options UEFI, UEFI-CSM or Grub. Select UEFI for newer operating systems or UEFI-CSM (Compatibility Support Mode) for older operating systems that only support BIOS booting. Grub is not recommended but can be used when the other options do not work.
Shutdown Timeout
The time in seconds the system waits for the VM to cleanly shut down. During system shutdown, the system initiates power-off for the VM after the shutdown timeout expires.
Start on Boot
Select to start this VM when the system boots.
Enable VNC
Select to enable a VNC (Virtual Network Computing) remote connection. Requires UEFI booting.
Delay VM Boot Until VNC Connects
Select to wait to start VM until VNC client connects.
Bind
Required field. Select from the dropdown list options 0.0.0.0, ::, ::1 or the system IP addresses provided on the list. VNC network interface IP address. The primary interface IP address is the default. A different interface IP address can be chosen.
CPU and Memory Settings
Name
Description
Virtual CPUs
Number of virtual CPUs to allocate to the virtual machine. The maximum is 16, or fewer if the host CPU limits the maximum. The VM operating system might also have operational or licensing restrictions on the number of CPUs.
Cores
Specify the number of cores per virtual CPU socket. The product of vCPUs, cores, and threads must not exceed 16.
Threads
Specify the number of threads per core. The product of vCPUs, cores, and threads must not exceed 16.
Memory Size
Allocate RAM for the VM. Minimum value is 256 MiB. This field accepts human-readable input (Ex. 50 GiB, 500M, 2 TB). If units are not specified, the value defaults to bytes.
Disk Settings
Name
Description
Create new disk image
Select to create a new zvol on an existing dataset. This is used as a virtual hard drive for the VM. Select Use existing disk image to use an existing zvol or file for the VM.
Select Disk Type
Select desired disk type from the dropdown list options AHIC or VirtIO.
Zvol Location
Rerquired field. Select a dataset for the new zvol.
Size
Allocate space for the new zvol. (Examples: 500 KiB, 500M, 2 TB) MiB. Units smaller than MiB are not allowed.
Network Interface Settings
Name
Description
Adapter Type
Required field. Select an adapter from the dropdown list. Intel e82545 (e1000) emulates the same Intel Ethernet card. This provides compatibility with most operating systems. VirtIO provides better performance when the operating system installed in the VM supports VirtIO paravirtualized network drivers.
Mac Address
Enter the desired address into the field to override the randomized MAC address.
Attach NIC
Required field. Select the physical interface to associate with the VM from the dropdown list options.
Installation Media Settings
Name
Description
Choose Installation Media Image
Browse to the operating system installer image file.
Upload an Installer Image File
Set to display image upload options.
Individual Virtual Machine Screen
The individual virtual machine screens display the VM settings and provide optional operation buttons for that VM.
Click the icon to expand that virtual machine and access current settings and operation actions.
The following operations are available on each VM screen:
Operation
Icon
Description
RESTART
replay
Retarts the VM.
POWER OFF
power_settings_new
Powers off and halts the VM, similar to turning off a computer power switch.
STOP
stop
Stops a running VM. Because a virtual machine does not always respond well to STOP use the option to force the stop when prompted.
START
Starts a VM. The toggle turns blue when the VM switches to running.
EDIT
mode_edit
Displays the Virtual Machines > Edit screen. You cannot edit a VM while it is running. You must first stop the VM and then you can edit the properties and settings.
DELETE
delete
Deletes a VM. You cannot delete a virtual machine that is running. You must first stop the VM and then you can delete it.
DEVICES
device_hub
Displays the list of devices for this virtual machine.
CLONE
Makes an exact copy or clone of the VM that you can select and edit. A Name dialog displays where you can enter a name for the cloned VM. Naming the clone VM is optional. The cloned VM displays on the virtual machines list with the extension _clone0. If you clone the same VM again the extension for the second clone is clone1.
VNC
settings_ethernet
Opens a noVNC window that allows you to connect to a VNC client.
SERIAL
keyboard_arrow_right
Opens the shell.
The STOP button and the system State toggle both try to send an ACPI power-down command to the VM operating system. Sometimes the commands time out, so it is better to use the POWER OFF button instead.
3.11.3 - Plugins Screens
Describes how to install and maintain 3rd party applications on TrueNAS CORE.
As of TrueNAS CORE 13.3, this feature is untested and provided without support to the TrueNAS Community.
Users with a critical need to use containers or virtualization solutions in production should migrate to the tested and supported virtualization features available in TrueNAS SCALE.
TrueNAS Enterprise customers can contact iXsystems to schedule a TrueNAS SCALE deployment.
See CORE to SCALE Migrations for more information.
Use the Plugins screen to install and maintain 3rd party applications on your TrueNAS storage systems.
Use the blue Columns dropdown list to display options to change the information displayed in the lis to of tables. Options are Select All, Status, Admin Portals, IPv4 Address, IPv6 Address, Version, Plugin, Release, Boot, Collection or Reset to Defaults.
Use the settings icon to set the pool to use for Plugin and Jail Manager storage.
Use Browse a Collection to select 3rd party applications from either the iXsystems or Community libraries.
Use REFRESH INDEX to update the index of applications.
Use INSTALL to display the Plugins Add configuration screen and to access the ADVANCED PLUGIN INSTALLATION button to display advanced Plugin and jail configuration screens.
Individual Plugin Screen
Click the chevron_right icon to display the individual plugin screen with the IP address and name for the plugin, the release and version and Github location for the collection. It includes additional action options for that plugin.
Click the expand_more icon to collaspe the individual plugin screen.
Name
Description
Manage
Displays the System Overview screen for that application. For example, the netdatajail system overview with CPU and load graphics and options to view other information about this application.
MOUNT POINTS
Displays the Jails Mount Points of nameofpluginjail screen. Click ACTIONS and select either Add to create a mount point for the jail used by the plugin, or Go Back to Jails to open the Jails screen. A mount point gives a jail access to storage located elsewhere on the system. You must stop a jail before adding, editing, or deleting a mount point. See Additional Storage for more details.
RESTART
Starts a stopped plugin.
STOP
Stops a plugin and the associated jail.
UPDATE
Displays the Update plugin dialog where you can select the option to Update jail as well. Select Confirm to activate the UPDATE button.
Uninstall
Displays a verification dialog for the plugin and related jail. Type the name displayed in the dialog and select Confirm to activate the DELETE button.
Plugin Add Screen
Use the Add screen to install the plugin highlighted on the Plugins screen for a simple basic install of a third party application.
Use the ADVANCED PLUGIN INSTALLATION button to open the advanced configuration screens with all possible configuration settings for the plugin and related jail.
This form is recommended only for advanced users with very specific requirements for a jail.
Setting
Description
Plugin Name
Displays the name of the plugin highliged on the Plugin screen.
Jail Name
Required field. Enter a name that can include letters, numbers, periods (.), dashes (-), and underscores (_).
DHCP
Select to allow DHCP to configure networking for the jail.
NAT
Network Address Translation (NAT) to transform local network IP addresses into a single IP address. Select when the jail shares a single connection to the Internet with other systems on the network.
IPv4 Interface
Select the IPv4 interface for the jail from the dropdown list.
IPv4 Address
Enter the IPv4 address for VNET(9) and shared IP jails.
IPv4 Netmask
Select the IPv4 netmask for the jail from the dropdown list.
IPv6 Interface
Select the IPv6 interface for the jail from the dropdown list.
IPv6 Address
Enter the IPv6 address for VNET(9) and shared IP jails.
IPv6 Prefix
Select the IPv6 prefix for the jail from the dropdown list.
Advanced Plugin Installation
Opens the advanced configuration screens. This form is recommended only for advanced users with very specific requirements for a jail.
Advanced Plugin Installation
The Advanced Plugin Installation screens include four expandable configuration areas:
Basic Properties
Jail Properties
Network Properties
Custom Properties
Click the expand_more icon to collaspe any area of configuration settings.
Use Next to advance to the next configuration settings section, or click the expand_less icon to expand the configuration settings area.
Jail Basic Properties Screen
Name
Description
Plugins Name
Displays the name of the plugin highlighed on the Plugins screen. This field is not editable.
Name
Required field. Enter a name that can include letters, numbers, periods (.), dashes (-), and underscores (_).
DHCP Autoconfigure IPv4
Select to auto-configure jail networking with the Dynamic Host Configuration Protocol (DHCP). Also select VNET and Berkeley Packet Filter with this selected option.
NAT
Network Address Translation (NAT) to transform local network IP addresses into a single IP address. Select when the jail shares a single connection to the Internet with other systems on the network.
VNET
Select to use VNET(9) to emulate network devices for the jail. A fully virtualized per-jail network stack is installed.
Select the default VNET interface from options on the dropdown list. Options are none, auto, or specific interfaces on your system. Only takes effect when VNET is selected. Choose a specific interface or set to auto to use the interface that has the default route. Choose none to not set a default VNET interface.
IPv4 Interface
Select the IPv4 interface for the jail from the dropdown list.
IPv4 Address
Enter the IPv4 address for VNET(9) and shared IP jails.
IPv4 Netmask
Select the IPv4 netmask for the jail from the dropdown list.
IPv4 Default Router
Enter a valid IPv4 address to use as the default route. Enter none to configure the jail with no IPv4 default route. A jail without a default route is not be able to access any networks.
AutoConfigure IPv6
Select to use Stateless Address Auto Configuration (SLAAC) to autoconfigure IPv6 in the jail.
IPv6 Interface
Select the IPv6 interface for the jail from the dropdown list.
IPv6 Address
Enter the IPv6 address for VNET(9) and shared IP jails.
IPv6 Netmask
Select the IPv6 prefix for the jail from the dropdown list.
IPv6 Default Router
Enter a valid IPv6 address to use as the default route. Enter none to configure the jail without an IPv6 default route. A jail without a default route is not be able to access any networks.
Auto Start
Select to auto-start the jail at system boot time. Jails are started and stopped based on iocage priority. Set in the Custom Properties priority field.
Jail Properties Screen
Name
Description
devfs_ruleset
The devfs(8) ruleset number to enforce when mounting devfs in the jail. The default 0 means no ruleset is enforced. Mounting devfs inside a jail is only possible when the allow_mount and allow_mount_devfs permissions are enabled and enforce_statfs is set to a value lower than 2.
exec_start
Commands to run in the jail environment after the jail is created. Example: sh /etc/rc. The pseudo-parameters section of JAIL(8) describes exec.start usage.
exec_stop
Commands to run in the jail environment before the jail is removed and after exec.prestop commands complete. Example: sh /etc/rc.shutdown.
exec_prestart
Commands to run in the system environment before a jail is started.
exec_poststart
Commands to run in the system environment after a jail is started and after any exec_start commands are finished.
exec_prestop
Commands to run in the system environment before a jail is stopped.
exec_poststop
Commands to run in the system environment after a jail is stopped.
exec_jail_user
Enter either root or another valid username. Inside the jail, this user runs the commands.
exec_system_user
Run commands in the jail as this user. By default, the current user runs these commands.
securelevel
The value of the jail securelevel sysctl. A jail never has a lower securelevel setting than the host system. Setting this parameter allows a higher securelevel setting. If the host system securelevel* setting is changed, the jail secure level is at least as secure.
sysvmsg
Allows or denies access to SYSV IPC message primitives. Use the dropdown list to select from Inherit, New or Disable. Select Inherit to make all IPC objects on the system visible to the jail. Select *New to make only objects the jail creates using the private key namespace visible. The system and parent jails have access to the jail objects but not private keys. Select Disable when the jail cannot perform any sysvmsg related system calls.
sysvsem
Allows or denies access to SYSV IPC semaphore primitives. Use dropdown list to select from Inherit, New or Disable. Use Inherit to make all IPC objects on the system visible to the jail. Select New to make only objects the jail creates using the private key namespace visible. The system and parent jails have access to the jail objects but not private keys. Select Disable when the jail cannot perform any sysvmem related system calls.
sysvshm
Allows or denies access to SYSV IPC shared memory primitives. Use dropdown list to select from Inherit, New or Disable. Select Inherit to make all IPC objects on the system visible to the jail. Select New to make only objects the jail creates using the private key namespace visible. The system and parent jails have access to the jail objects but not private keys. Select Disable when the jail cannot perform any sysvshm related system calls.
vnet_interfaces
A space-delimited list of network interfaces attached to a VNET enabled jail after it is created. Interfaces are released when the jail is removed.
Select to choose whether a process in the jail has access to System V IPC primitives. Equivalent to setting sysvmsg, sysvsem, and sysvshm to Inherit. Deprecated in FreeBSD 11.0 and newer! Use sysvmsg, sysvsem, and sysvshm instead.
allow_raw_sockets
Select to allow raw sockets. Utilities like ping(8) and traceroute(8) require raw sockets. When selected, source IP addresses are enforced to comply with the IP addresses bound to the jail, ignoring the IP_HDRINCL flag on the socket.
allow_chflags
Select to treat jail users as privileged and allow the manipulation of system file flags. Secure level constraints are still enforced.
allow_mlock
Enables running services that require mlock(2) in a jail.
allow_vmm
Allows the jail to access the bhyve virtual machine monitor (VMM). The jail must have FreeBSD 12.0 or newer installed with the vmm(4) kernel module loaded.
allow_quotas
Select to allow the jail root to administer quotas on jail file systems. This includes file systems the jail shares with other jails or with non-jailed parts of the system.
allow_socket_af
Select to allow access to other protocol stacks beyond IPv4, IPv6, local (UNIX), and route. Warning, jail functionality does not exist for all protocol stacks.
allow_mount
Select to allow privileged users inside the jail to mount and unmount file system types marked as jail-friendly. Also use dropdown list to select from list of options allow_mount_devfs, allow_mount_fusefs, allow_mount_nullfs, allow_mount_procfs, allow_mount_tmpfs or allow_mount_zfs.
Network Properties Screen
Name
Description
Interfaces
Use to enter up to four interface configurations in the format interface:bridge, separated by a comma (,), where the left value is the virtual VNET interface name and the right value is the bridge name where to attach the virtual interface.
Use to set the jail host name. Defaults to the jail UUID.
resolver
Use to add lines to the jail resolv.conf. For example, nameserver IP;search domain.local. Delimit fields with a semicolon (;), this translates as new lines in resolv.conf. Enter none to inherit resolv.conf from the host.
exec_fib
Enter the routing table (FIB) to use when running commands inside the jail.
ip4.saddrsel
Select to disable IPv4 source address selection for the jail in favor of the primary IPv4 address of the jail. Only available when the jail is not configured to use VNET.
ip6.saddrsel
Select to disable IPv6 source address selection for the jail in favor of the primary IPv6 address of the jail. Only available when the jail is not configured to use VNET.
ip4
Controls the availability of IPv4 addresses. Use the dropdown list to select from options inherit, New or Disable. Select Inherit to allow unrestricted access to all system addresses. Select New to restrict addresses with ip4_addr. Select Disable to stop the jail from using IPv4 entirely.
ip6
Controls the availability of IPv6 addresses. Use the dropdown list to select from options inherit, New or Disable. Select Inherit to allow unrestricted access to all system addresses. Select New to restrict addresses with ip6_addr. Select Disable to stop the jail from using IPv6 entirely.
mac_prefix
Enter a valid MAC address vendor prefix. For example, E4F4C6.
vnet0_mac
Use to assign a fixed MAC address. Leave this field empty to generate random MAC addresses for the host and jail. To assign fixed MAC addresses, enter the MAC address to assign to the host, a space, then the MAC address to assign to the jail.
Custom Properties Screen
3.12 - Reporting
Contains information about the graphs displayed on the Reporting screen in TrueNAS CORE.
The Reporting screen displays graphs of system information for CPU, disk, memory, network, NFS, partition, target, UPS, ZFS and system functions.
What does TrueNAS use for reporting?
TrueNAS uses Graphite for metric gathering and visualizations.
TrueNAS uses collectd to provide reporting statistics.
Reporting data is saved to permit viewing and monitoring usage trends over time.
This data is preserved across system upgrades and restarts.
Data files are saved in /var/db/collectd/rrd/.
Because reporting data is frequently written it should not be stored on the boot pool or operating system device.
Reporting Screen Display Options
Setting
Description
CPU
Displays the CPU Temperature, CPU Usage, and System Load graphs.
Disk
Displays graphs for each disk in the system.
Memory
Displays both the Physical memory utilization and Swap utilization graphs.
Network
Displays an Interface Traffic graph for each interface in the system.
NFS
Displays the NFS Stats (Operations) and NFS Stats (Byptes) graphs.
Partition
Displays graphs showing disk space allocations.
System
Displays both the Processes and Uptime graphs.
Target
Displays graphs only for systems with iSCSI ports configured and shows the bandwidth statistics for iSCSI ports.
UPS
Displays the graphs only if the system is configured for and uses a UPS.
ZFS
Displays the ARC Size, ARC Hit Ratio, ARC Requests demand_data, ARC Requests demand_metadata, ARC Requests prefetch_data, and ARC Requests prefetch_metadata graphs with the Arc and L2 gigabytes and hits (%), and the hits, misses and total number of requests.
Interacting with Graphs
Click on and drag a certain range of the graph to expand the information displayed in that selected area in the Graph.
Click on the icon to zoom in on the graph.
Click on the icon to zoom out on the graph.
Click the to move the graph forward.
Click the to move the graph backward.
Graphs
CPU Graphs
CPU graphs shows the amount of time spent by the CPU in various states such as executing user code, executing system code, and being idle.
Graphs of short-, mid-, and long-term load are shown, along with CPU temperature graphs.
Disk Graphs
Diskgraphs shows read and write statistics on I/O, percent busy, latency, operations per second, pending I/O requests, and disk temperature.
Use the Devices dropdown list to select one or all system disks for which you want to display a graph. Use the Metrics dropdown list to select one or all disk measurements to display.
Disk Metrics Options
Setting
Description
Select All
Displays all available graphs for any or all disks selected on the Devices dropdown list.
Disk Temperature
Diplays the minimum, maximum and mean temperature reading for the disk selected.
Disk Busy
Displays the percent the selected disk is busy.
Disk Latency
Displays the disk latency in time (msec) for read, write and delete operations.
Disk Operations detailed
Displays the read, write and delete operations for the selected disk.
Pending I/O
Displays then length of pending I/O requests for the selected disk.
Disk I/O
Displays the disk read and write I/O stats in bytes/s.
Temperature monitoring for the disk is disabled if HDD Standby is enabled. Check the Storage > DisksEdit Disk* configuration form for any or all disks in the system if you do not see the temperature monitoring graph.
Memory Graphs
Memory graphs display memory usage and swap graphs display the amount of free and used swap space.
Network Graphs
Network graphs report received and transmitted traffic in megabytes per second for each configured interface.
NFS Graphs
NFS graphs show information about the number of procedure calls for each procedure and whether the system is a server or client.
Partition Graphs
Partition graphs displays free, used, and reserved space for each pool and dataset. However, the disk space used by an individual zvol is not displayed as it is a block device.
System Graphs
System graphs displays the number of processes. It is grouped by state.
Target Graphs
UPS Graphs
UPS graphs show statistics about an uninterruptible power supply (UPS) using Network UPS tools. Statistics include voltages, currents, power, frequencies, load, and temperatures.
ZFS Graphs
ZFS graphs shows compressed physical ARC size, hit ratio, demand data, demand metadata, and prefetch data.
4 - CORE API Reference
Describes how to access the API documentation in TrueNAS CORE.
TrueNAS CORE API documentation is available from the web interface by clicking settings > API Keys > DOCS.
Alternately, append /api/docs/ to your TrueNAS hostname or IP address in a browser to go directly to the API documentation.
For convenience, static builds of the current 2.0 API documentation stored on the Docs Hub:
Windows Explorer (File Explorer) does not need SMB1, or a separate protocol called NetBIOS (sometimes called “NetBIOS over TCP/IP”), to discover and list SMB shares from a TrueNAS server. All modern versions of Windows use a newer protocol called WS-Discovery, which is more reliable and faster. TrueNAS automatically enables WS-Discovery to allow discovery of SMB shares by client devices.
Do not enable SMB1 on FreeNAS or TrueNAS without understanding the security implications and taking measures to protect the network from those risks. Contact the vendor of older products for upgrades to support newer, more secure versions of SMB, or replace older products with ones that do not require the security risks of SMB1.
Do not enable SMB1 unless it is absolutely required for essential equipment that cannot be upgraded or replaced, the security implications are understood, and steps have been taken to protect the network from those security risks.


 icon next to the iXsystems logo shows


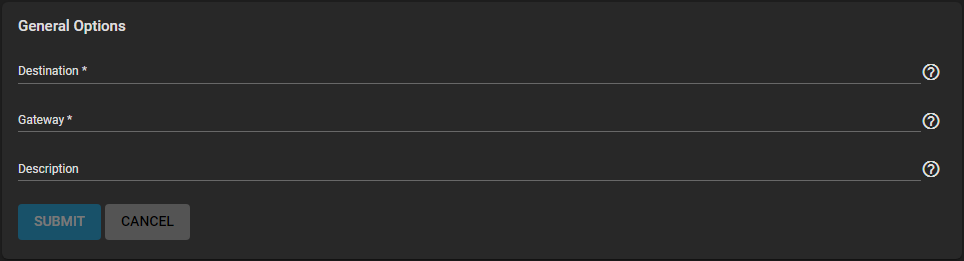


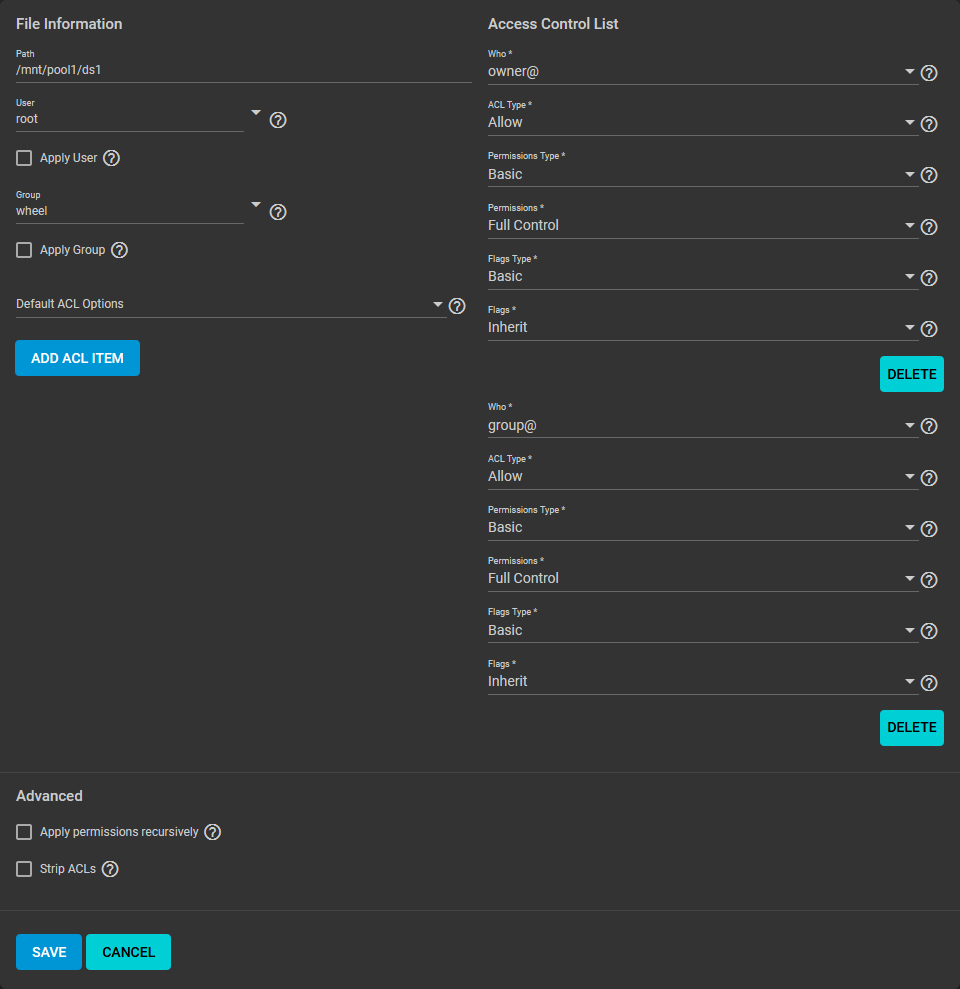


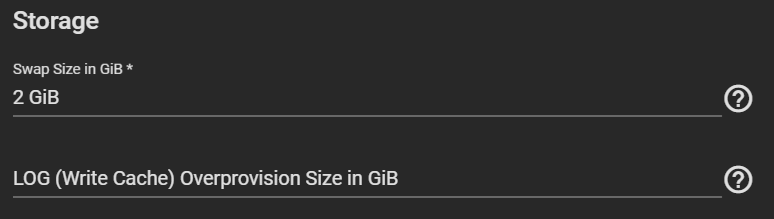


 >
>


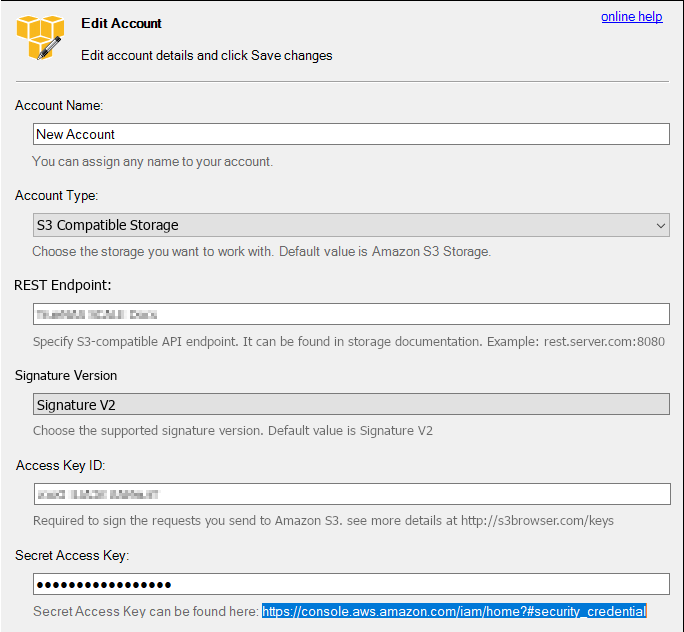


