




Issue Reporting in Jira
10 minute read.
We encourage all users to help us make TrueNAS the best NAS by reporting issues, requesting potentially helpful features, and relaying security vulnerabilities.
TrueNAS uses Jira to track bugs and develop features. You can view public issues without logging in, but you must create an Atlassian account and join the TrueNAS Jira instance to report bugs. See Joining the TrueNAS Jira Instance.
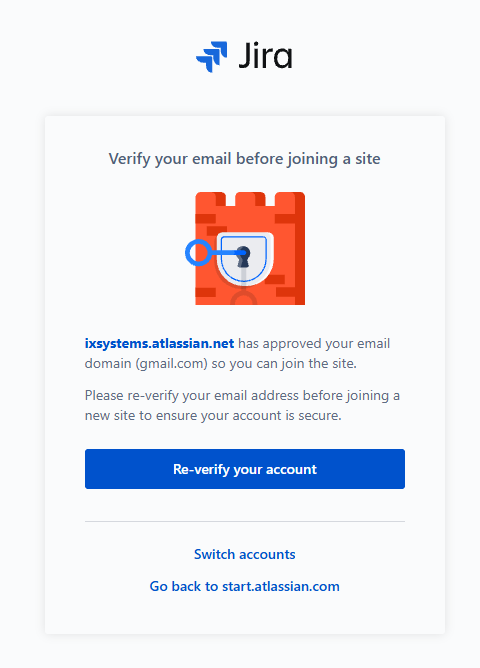
Signing in to your Atlassian account does not give you access to the TrueNAS Jira instance. Joining the instance is a separate step that includes an email verification.
Until you join the instance, Jira returns this error when you try to create a ticket:
You are not authorized to perform this operation. Please log in. Close this dialog and press refresh in your browser.
Refreshing the browser does not clear this error. Join the instance to resolve it.
To join the instance:
Go to https://ixsystems.atlassian.net and sign in to your Atlassian account. Create an account if you do not have one.
After you sign in, Jira displays the main page of the instance.
Click your profile icon in the upper-right corner of the page and select Log in. The Verify your email before joining a site screen displays.
Click Re-verify your account. Jira sends a verification email to the address on your Atlassian account.
Open the verification email and click the verification link. The link returns you to Jira.
Click your profile icon and select Log in again.
The second Log in completes joining the instance. You can now create tickets in the TrueNAS project.
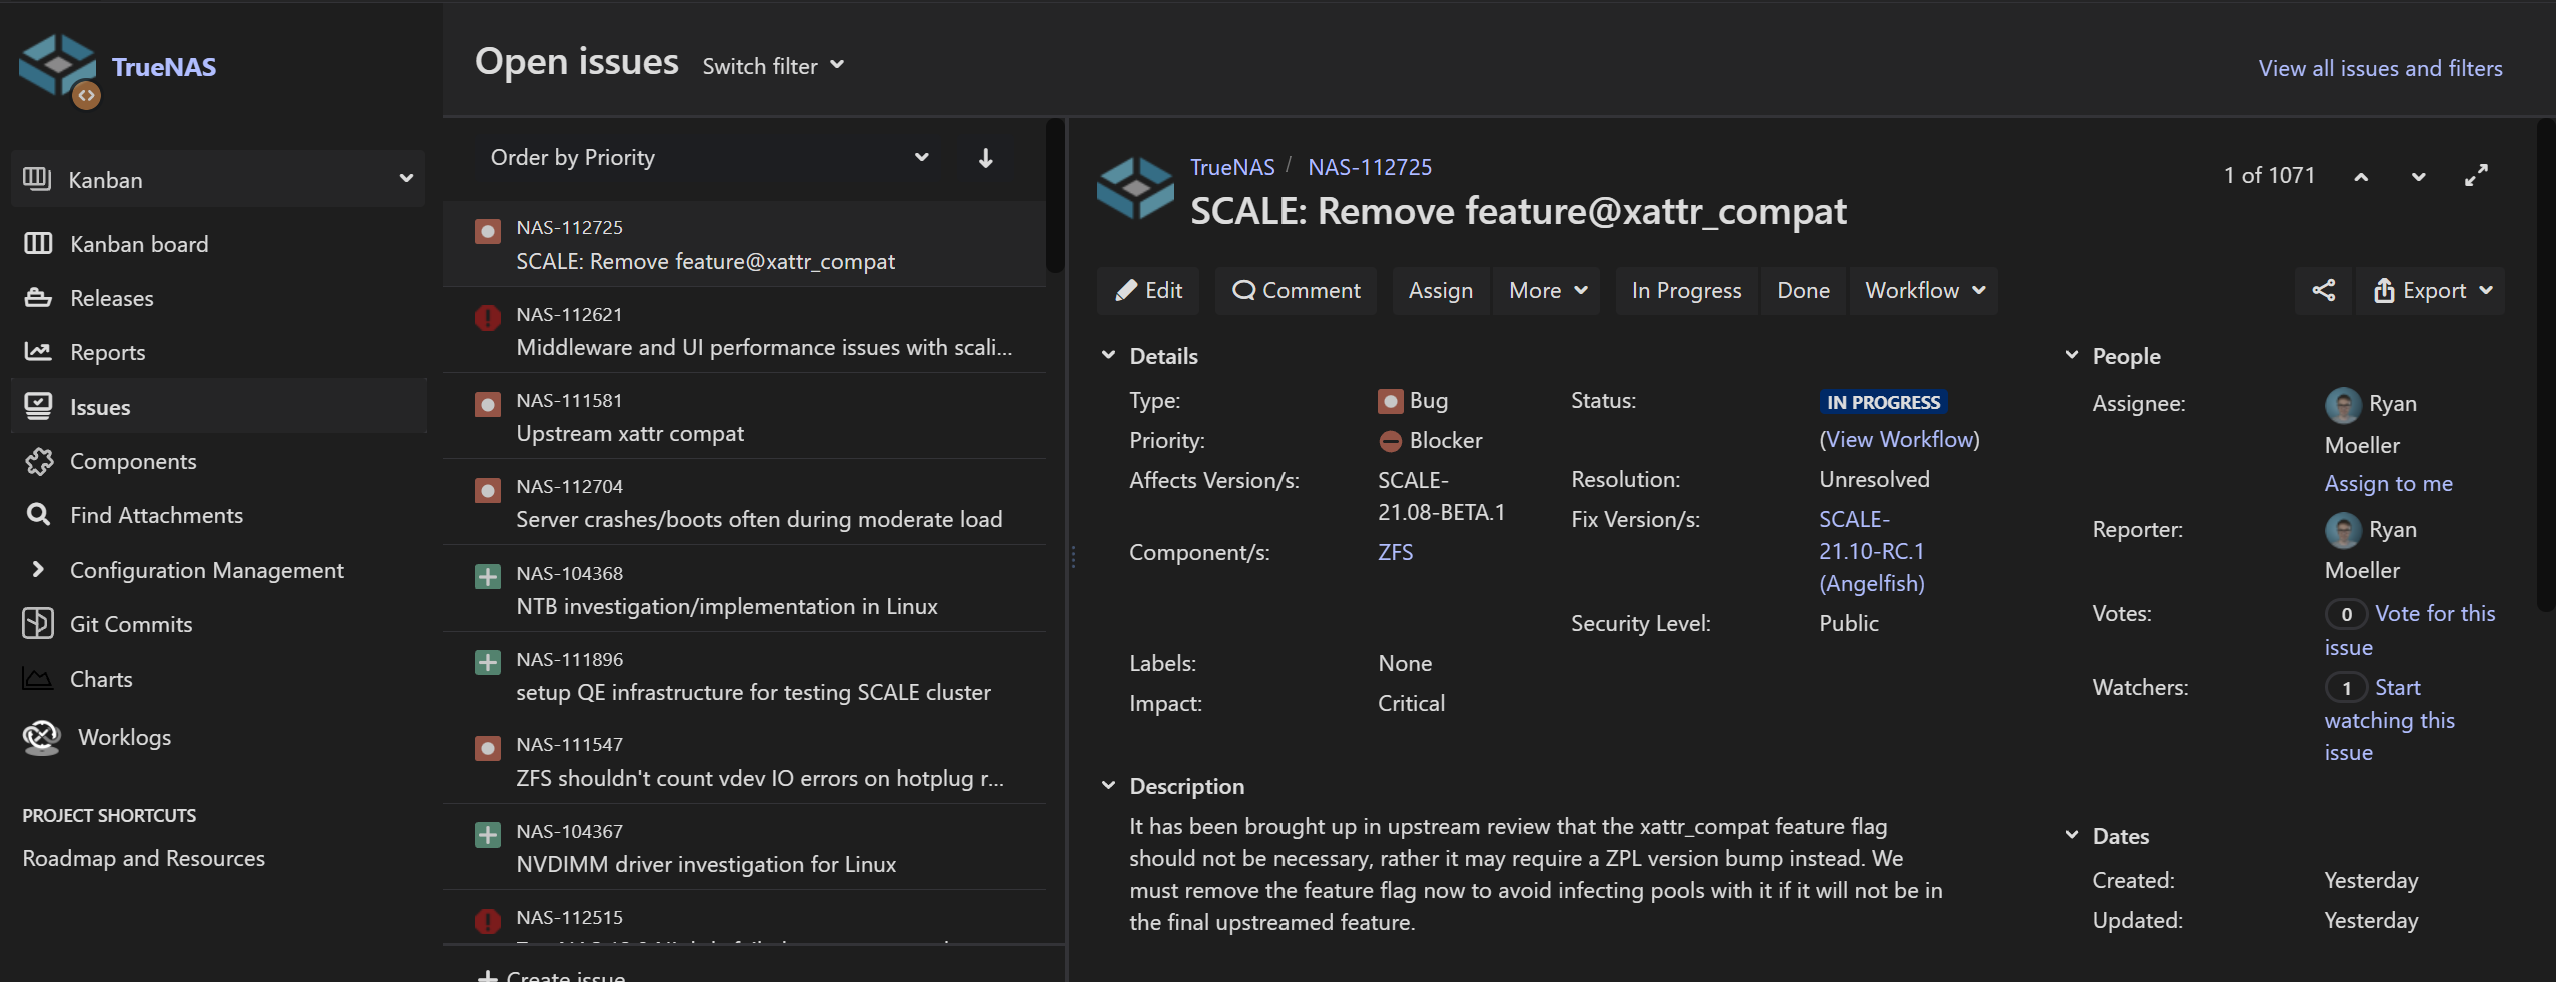
After you join the instance, you can go directly to the TrueNAS project to report bugs.
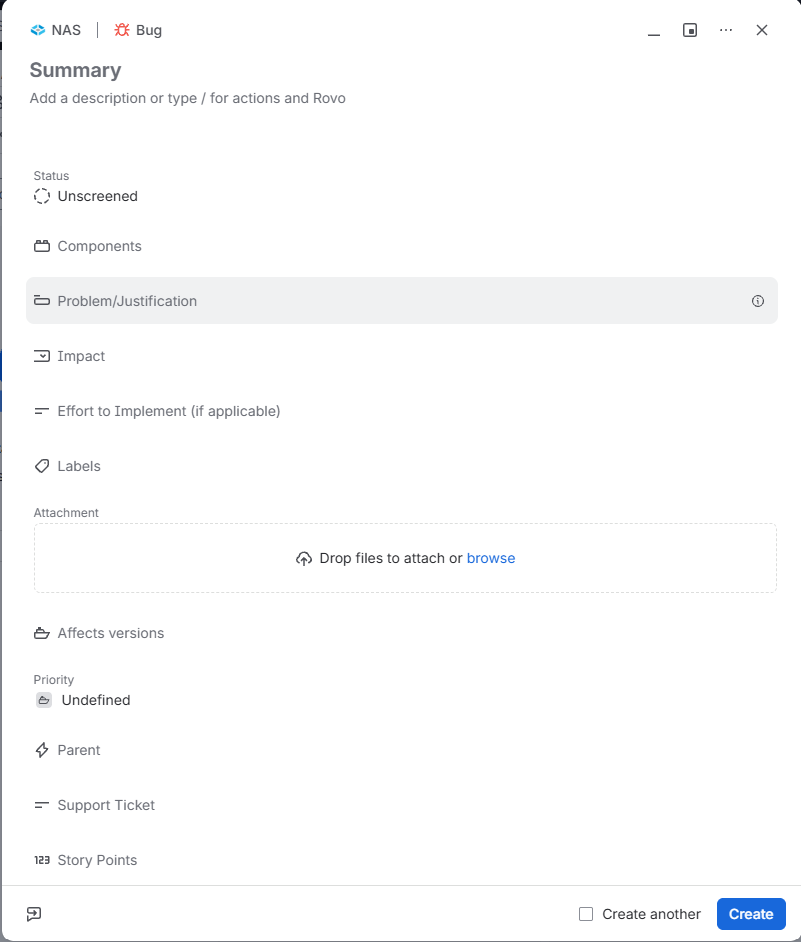
The selected work type determines which fields display on the Create form. The Bug work type opens the full form and includes the Components, Attachment, and Affects versions fields that a bug report needs. The other work types do not include these fields.
Select Bug from the work type dropdown list before you enter anything else on the form.
The TrueNAS project reserves the other work types, including Defect, for internal use. If the work type is set to anything other than Bug, the fields a bug report needs do not display on the form.
Changing the work type also reloads the form, which can clear values you already entered.
If Jira reports that you are not authorized when you click Create, you have not joined the TrueNAS Jira instance. See Joining the TrueNAS Jira Instance.
To request a new feature instead of reporting a bug, use the TrueNAS Community Forum Feature Requests category. Do not select the Suggestion, Improvement, or New Feature work types in Jira.
To submit a bug report:
Go to the TrueNAS project on Jira and click Create in the top bar. The Create window opens.
Select Bug from the work type dropdown list. The form reloads and displays the full set of bug report fields.
If a field does not display, click (More actions) > Show fields and select All fields.
Enter a short, descriptive title in the Summary field. A good title helps developers find the issue and understand the topic.
Click the description field below Summary and enter specific issue details.
Jira does not label this field. It shows the placeholder text Add a description or type / for actions and Rovo until you click it.
See What to Include in a Bug Report for the information developers need.
Select a TrueNAS release from the Affects versions dropdown list. If you cannot locate the version of software installed on the dropdown list, include it in the description field.
Drag and drop any public-facing files into the Attachment field.
Do not attach a debug file or any other file that contains private data here. See Adding a Debug File to a Jira Ticket.
Click Create.


Developers review the ticket and update it when they need additional information. The Jira account receives emails about the ticket status. Developers might request more details as they work to resolve the issue, so check the ticket periodically.
Developers use most of the fields on bug tickets, but the Summary field, the description field, and the Affects versions field provide the information needed for a usable report.
A good bug report includes these elements:
A brief, specific description detailing the problem you encountered.
The steps to reproduce the issue. A simple list of the steps you took to see the issue is fine.
An explanation of what should have happened while taking the steps listed above.
A description of what happened while taking the steps listed above.
The TrueNAS software version you are using, which is found on the main Dashboard.
The current service configuration if the bug is service-related to help developers replicate your system.
Any additional details you think can help the developer investigate.
In addition to the above information, also provide:
A TrueNAS debug file. This is required to help developers identify and troubleshoot issues on your system.
Include a console log if the error is a web interface issue. If unsure how to save these, see the Adding a Debug File to a Jira Ticket and Obtaining Web Console Logs sections in this article.
The core file if your system produces a core file error. Save the file and attach it to your ticket.
Screenshots if the bug is a web interface glitch or a formatting problem.
A video if screenshots do not adequately show the issue.
See https://security.truenas.com/ for security advisories and software bill of materials for specific TrueNAS releases.
Security issues do not appear on public issue trackers due to their sensitive nature. If you have discovered a suspected security vulnerability in the latest version of a software release, you can report this directly to the Security Team.
Downloading a debug file in TrueNAS differs from CORE releases.
On TrueNAS systems, go to System > General Settings, then click Save Debug and wait for the file to download to your local system. Generating the debug file might take a few minutes to complete. After that, it downloads to your system. If your browser download shows a dialog asking for confirmation, click Keep to continue the download process.
To generate a debug from the TrueNAS CLI, enter
PS C:\Users\tester> sftp admin@exampletruenas.net
Connected to exampletruenas.net.
sftp> cd /home/admin
sftp> get testdebug.tgz
Fetching /home/admin/testdebug.tgz to testdebug.tgz
/home/admin/testdebug.tgz						100% 7110KB	4.1MB/s	00.01
sftp> exit
The TrueNAS CORE web interface lets users save debugging information to a text file.
On TrueNAS 13 systems, go to System > Advanced and click SAVE DEBUG.
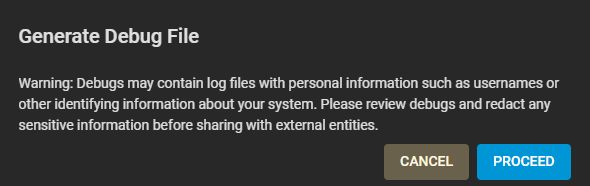
Click PROCEED to generate the debug file (might take a few minutes).
After generating the debug file, TrueNAS prompts you to download it to your local system and saves a copy in
The
freenas-debug
command-line utility collects debugging information.
Debug files contain log files which can include personal information such as usernames, networking configuration, device serial numbers, or other identifying information about your system. Files uploaded to an issue from the System > Support screen using Attach Debug or through the Jira Private File Upload service are only visible to the TrueNAS development team. The TrueNAS Privacy Policy contains a detailed statement of our commitment to data privacy.
Always store debug files in a secure location. Please review debugs and redact any sensitive information before sharing with external entities. Use a file archiver utility, such as 7-zip, to open compressed debug archives and review log contents.
Jira provides a public-facing area for files that do not require privacy. If you are not concerned about data privacy, attach the debug, core, log, or other files to the Jira ticket. Debug files attached directly to a Jira issue ticket are visible to other users searching and reading Jira issue tickets.
For users concerned about data privacy, TrueNAS provides a link to a secure file attachment ticket where you can upload files with sensitive information, like a system debug or screenshot of network connections.
After submitting a bug report, Jira sends a confirmation email with a link to your Jira issue ticket. The Jira issue ticket includes a link to the TrueNAS Private File Attachments area where you can upload the debug file and any other images or logs you kept private. Link the private file upload ticket to your Jira issue report before you save the private upload file ticket.
Only authorized individuals can access files attached to private file upload tickets!
Jira tickets with debugs directly attached are marked private, limiting access to only the ticket creator and authorized TrueNAS team members. Using the private file attachment tickets keeps issue tickets public so others can see the reports and track progress while still protecting private data.
Drag and drop public-facing files into the Attachment field on the Create form. The Attachment field displays when the work type is set to Bug. See Submitting Bug Reports in Jira for the full form.
To protect your privacy, use the link in the system-generated message in your Jira ticket to upload sensitive information to the TrueNAS Private File Attachments area. Link your private upload ticket to your Jira issue ticket so developers can locate the file. Files uploaded to this service are only visible to project developers.
For public-facing files, open the ticket in your browser and click Attach at the top of the ticket to open a local system file browser and select the files. You can also drag and drop the file onto the Attachments field and add any comments about it.
Upload private files to our secure private upload service located at https://ixsystems.atlassian.net/servicedesk/customer/portal/15/group/37/create/153. Files uploaded to this service are only visible to project developers.
Web console logs help diagnose problems with the user interface. You can add logs to TrueNAS issues for debugging.