TrueNAS CORE Nightly Development Documentation
This content follows experimental early release software. Use the Product and Version selectors above to view content specific to a stable software release.
Disks Screens
4 minute read.
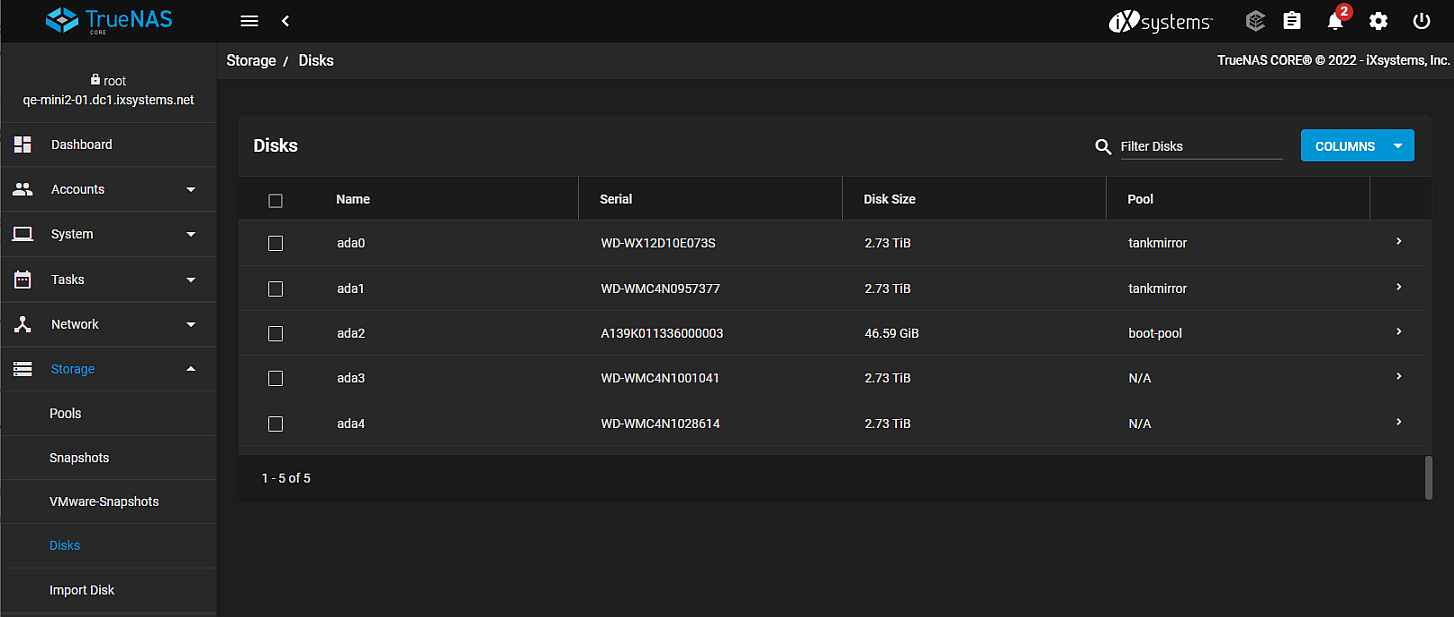
Last Modified 2023-11-30 10:15 ESTUse the Storage > Disks screen to add or manage disks in your TrueNAS.

Use the blue Columns button to display a list of options to modify the information displayed in the list of disks.
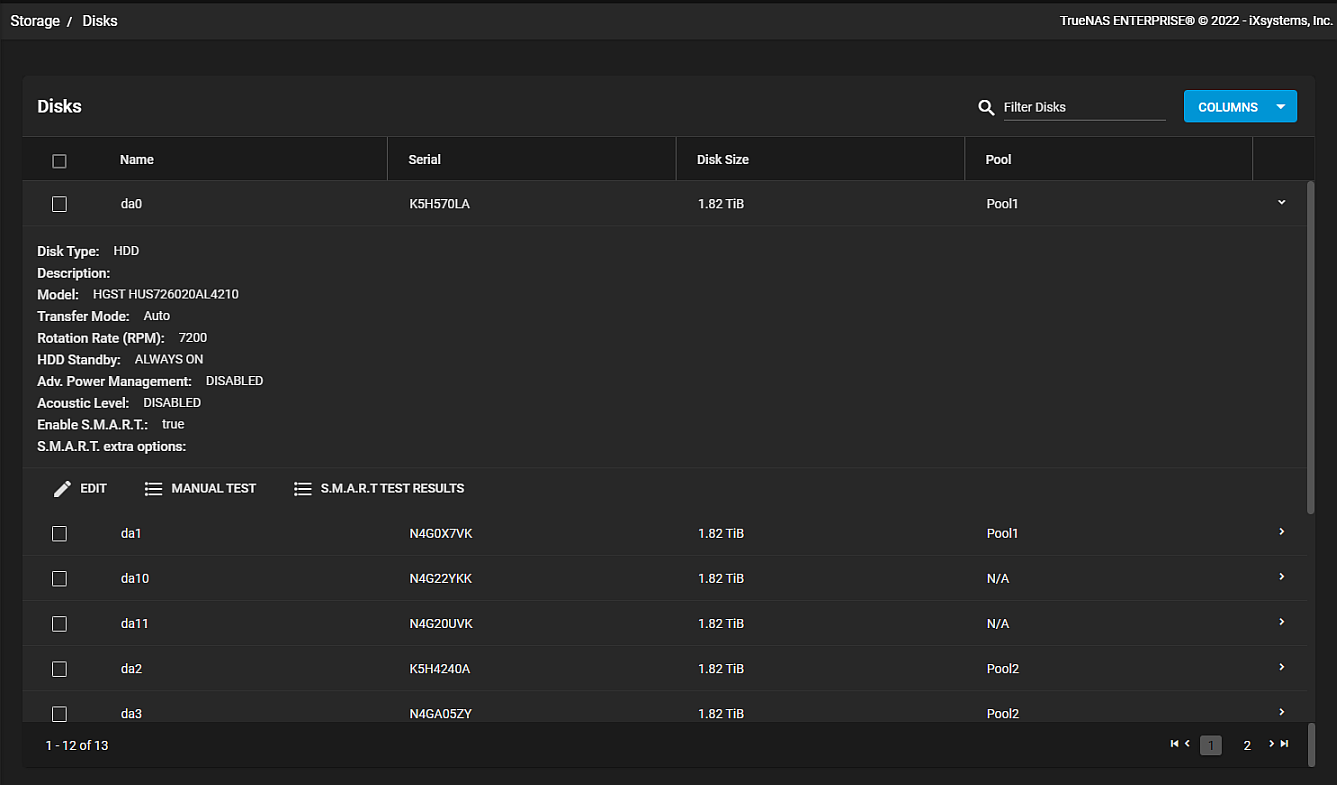
Use the expand symbol to the right of any disk on the list to expand that disk to show settings and actions for that disk.
The Disks individual disk information screen includes details about the disk settings and status. It also provides access to disk actions the user can take.

Use EDIT to display the Edit Disk screen.
Use MANUAL TEST to display the Manual S.M.A.R.T. Tests dialog where you can specify the type of test as LONG, SHORT, CONVEYANCE or OFFLINE.
Use S.M.A.R.T. TEST RESULTS to display the results of any S.M.A.R.T. tests executed on the system.
Use WIPE to delete obsolete data off an unused disk. This option does not display unless your disk is unused. See Wiping a Disk for more information on how to use this function.
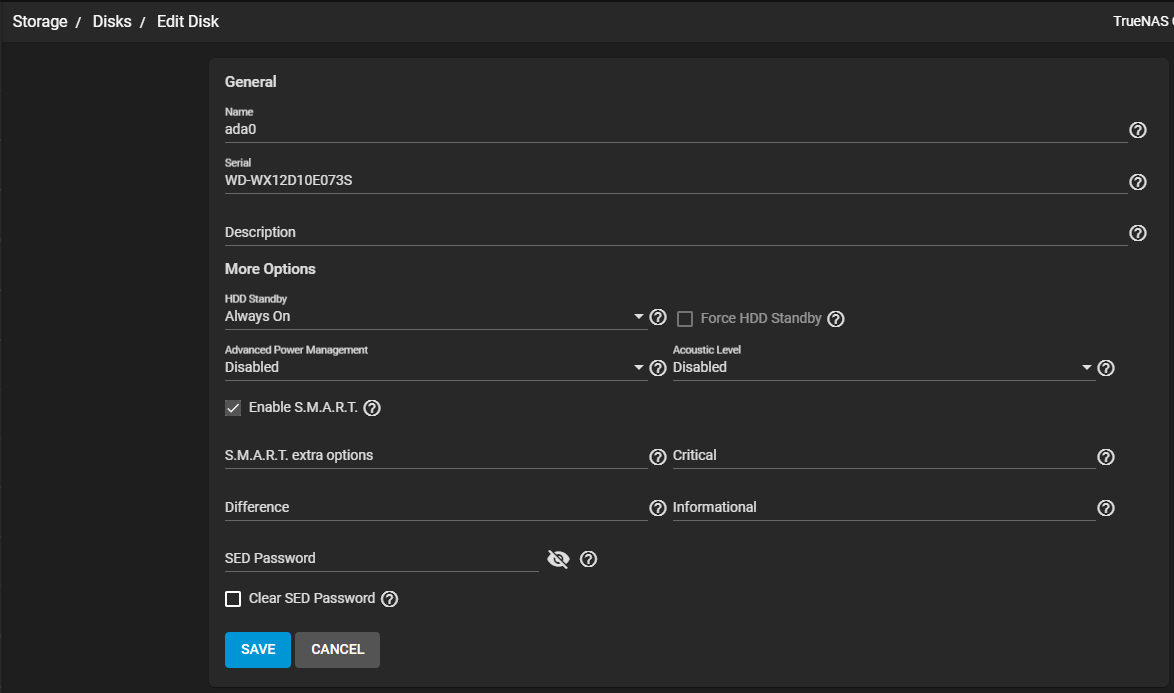
The settings on the Edit Disk are the same as those on the Add Disk screen.

| Settings | Description |
|---|---|
| Name | Enter the FreeBSD disk device name. For example, ada0. |
| Serial | Enter the serial number for this disk. |
| Description | Enter notes or a description for this disk. For example, where it is located or what it is used for. |
| HDD Standby | Select the option from the dropdown list for the minutes of inactivity before the drive enters standby mode. Select from Always On or the minutes in a range from 5 to 330. See this forum post for information on identifying spun down drives. Temperature monitoring is disabled for standby disks. |
| Force HDD Standby | Select to allow the drive to enter standby, even when non-physical S.M.A.R.T. operations could prevent the drive from sleeping. |
| Advanced Power Management | Select an option from the dropdown list to select a power management profile from the menu. Options are Disabled, Level 1 - Minimum power usage with Standby (spindown), Level 64 - Intermediate power usage with Standby, Level 127 - Maximum power usage with Standby, Level 128 - Minimum with power usage without Standby (no spindown), Level 192 - Intermediate power usage without Standby, Level 254 - Maximum performance, maximum power usage. |
| Acoustic Level | Select the option from the dropdown list to modify disks that understand AAM Options are Disabled, Minimum, Medium or Maximum. |
| Enable S.M.A.R.T. | Select to enable allowing the system to conduct periodic S.M.A.R.T. tests. |
| S.M.A.R.T. extra opitons | Enter additional smartctl(8) options. |
| Critical | Enter a numeric value to set the threshold temperature in Celsius. If the drive temperature is higher than this value, a LOG_CRIT level log entry is created and an email i s sent. 0 disables this check. |
| Difference | Enter a value where the the system reports if the drive temperature changed by this many degrees Celsius since the last report. 0 disables the report. |
| Informational | Enter a value where the system reports if the drive temperature is at or above this temperature in Celsius. 0 disables this report. |
| SED Password | Use to set or change the password of this SED. This password is used insead of the global SED password. |
| Clear SED Password | Select to chear the SED password for this disk. |
Use SAVE to save settings and return the Disks screen or use CANCEL to exit without saving.
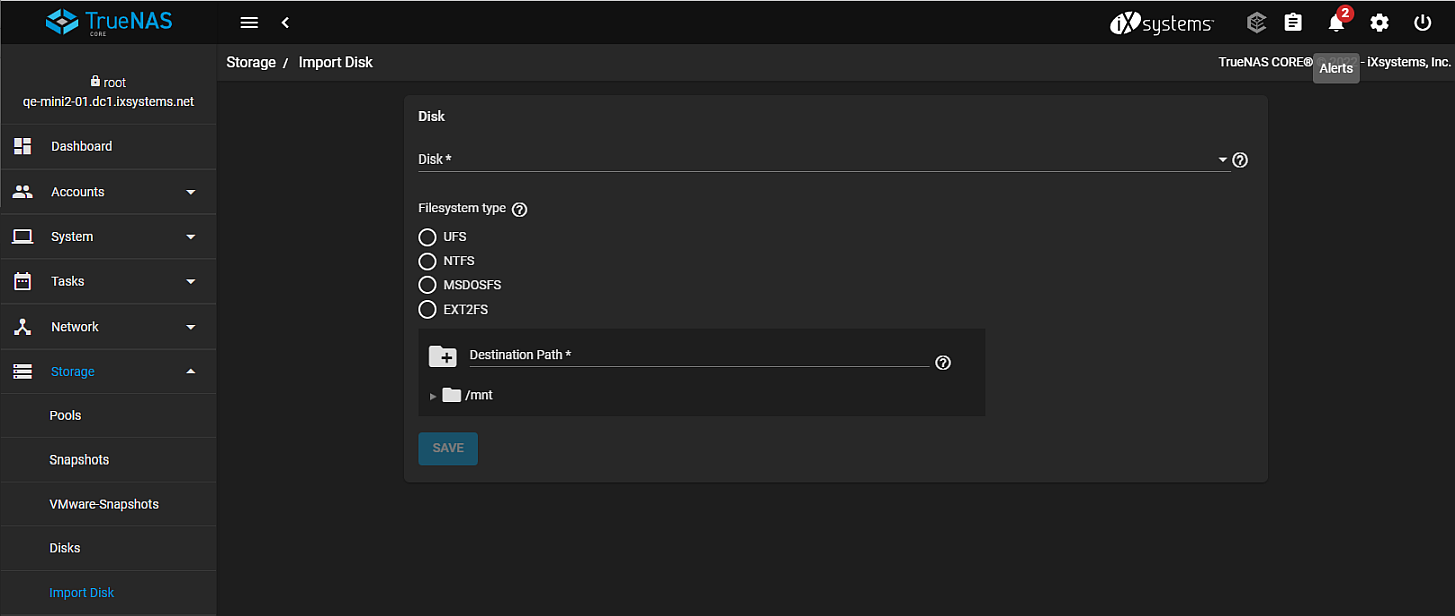
Use the Import Disk screen to perform a one time disk import, only one disk at a time, on you TrueNAS system.

| Settings | Description |
|---|---|
| Disk | Select the disk to import from the dropdown list. The import copies the data from the selected disk to an existing ZFS dataset. Only one disk can be imported at a time. This is a required field. |
| Filesystem type | Select one radio button option to specity the file system type that is on the disk to import. Options are UFS, NTFS, MSDOSFS or EXT2FS. |
| Destination Path | Browse to locate the dataset on the TrueNAS that is to hold the copied data. |
The SAVE button activates after required fields are populated.
See Import Disks for more information on importing a disk into your TrueNAS.

